Furry cape has stalled. I’ve been too distracted by Petit Main Sauvage’s Retro-Dress Draft-Along to finish off the cape.
Indecisions Indecisions Indecisions!
 So the usual then…I’ve always wanted to make some retro garbs. I’ve pined my way through Wade Laboissonniere’s Blueprints of Fashion: Home Sewing Patterns of the 1950s countless times. I even have a few issues of 1950’s Vogue and Bazaar. But when it comes to the crunch, I couldn’t decide.
As Petit Main Sauvage said, we don’t have 1950’s figures anymore. And I have one too many No-Breathing sewing projects as it is. So the classic fitted bodice and puffy skirt is out of the question.
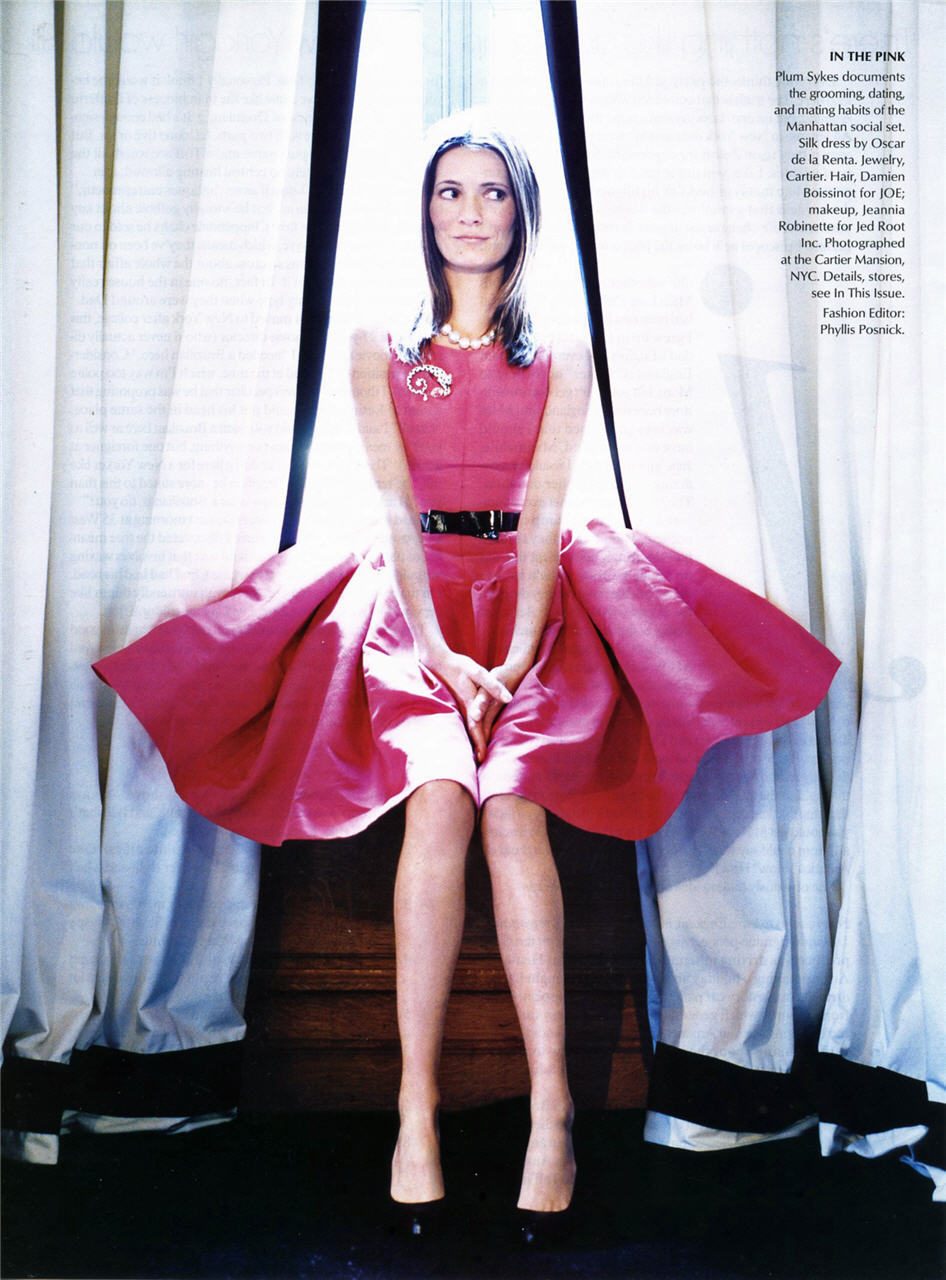 I was a bit tempted by this take modelled by Plum Skyes in an old issue of American Vogue.
The lowered waist works much better on modern figures I think. It’s easier to see the waist and it elongates the torso so that it’s not so squat & square.
But most puffy skirt dresses takes yards and yards of fabrics. And most in my stash are only 2-3 yards each.
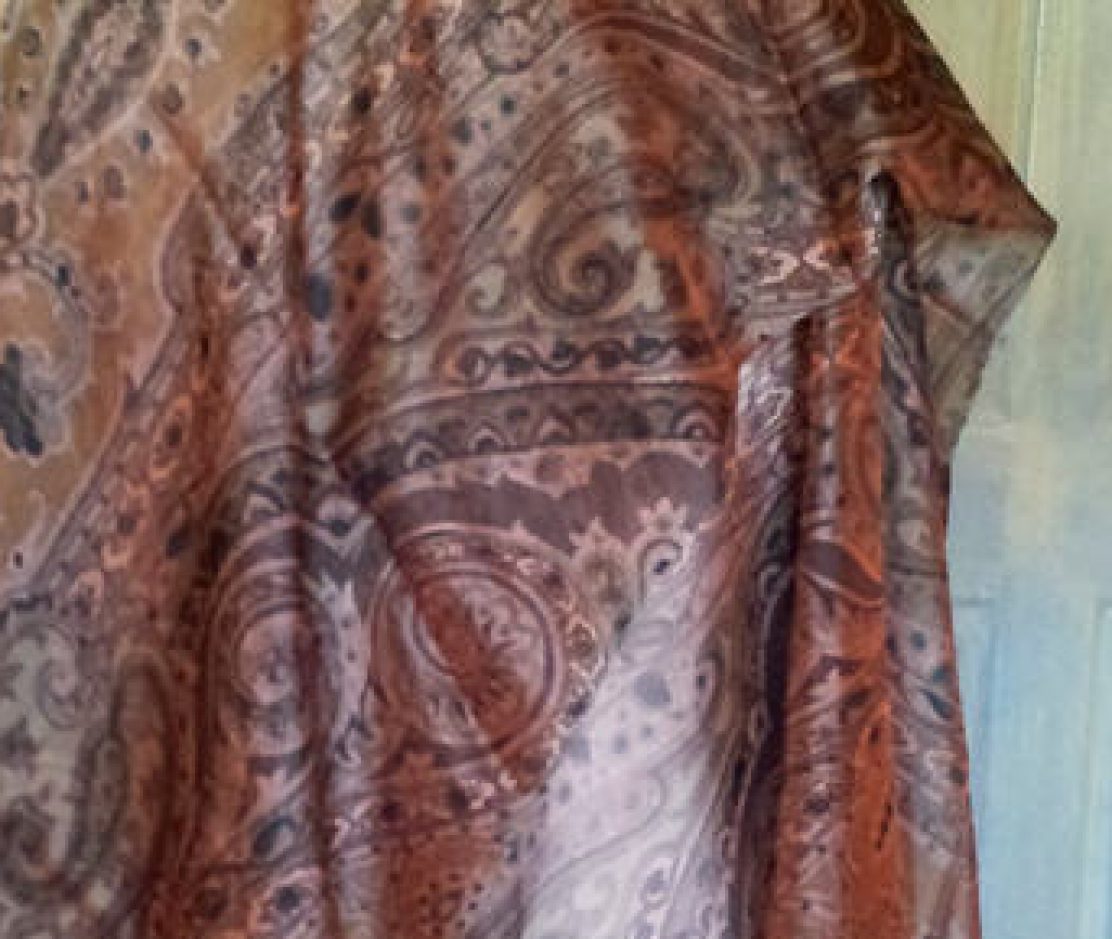
So I needed a different strategy than the others, who started by analyzing their figures and what silhouettes suit them. I started with a fabric, one that I have yards and yards of. I ended up with this:

I was going to make an A-line summer coat with CF bust darts like a coat I saw in a Notting Hill boutique ages ago. I’m still hoping there’ll be enough left over for this.
The other consideration was that I needed a simpler design. Simpler than ones I’d usually be attempting. Otherwise I’d fall behind the Draft-Along schedule. But a plain fabric with a plain design is just…Yawn. So an embellished fabric like this would be just the ticket. It’s too fussy for intricate details. It’s my way of tying my hands, or in this case my imagination, so I don’t go OTT.
OMG, a decision finally!
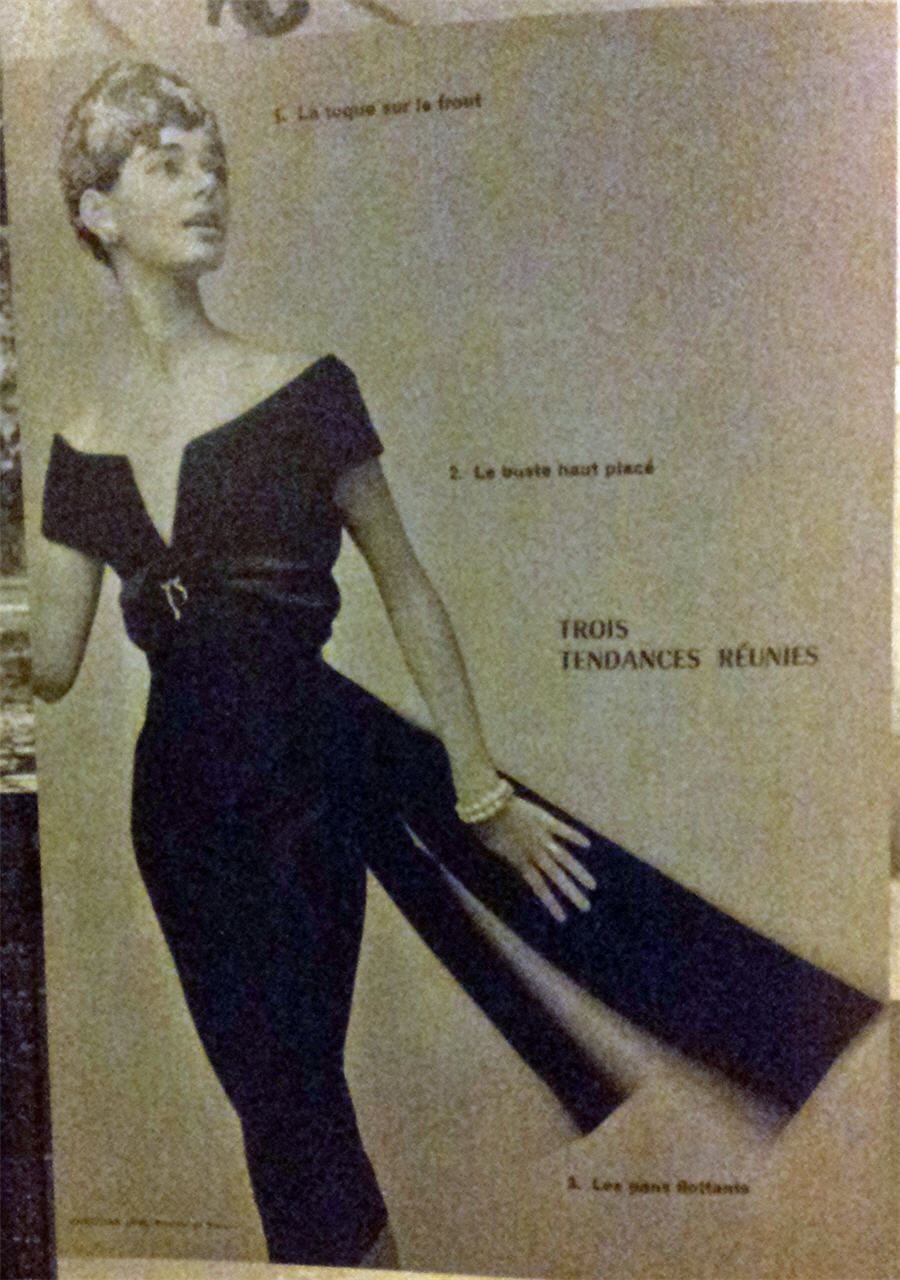 In the end, my inspiration was this Christian Dior dress from Winter 1955-56, published in L’Officiel No 81, 1000 Models: Dior 60 Years of Creation.
I like the slimline shape coupled with the extravagance of the back sashes, the slight off the shoulder v-neckline alluding to a womanly hour-glass shape. But it probably requires a fabric with a bit more drape than my embroidered silk. And the neckline is perhaps a bit too risqué for every day wear.
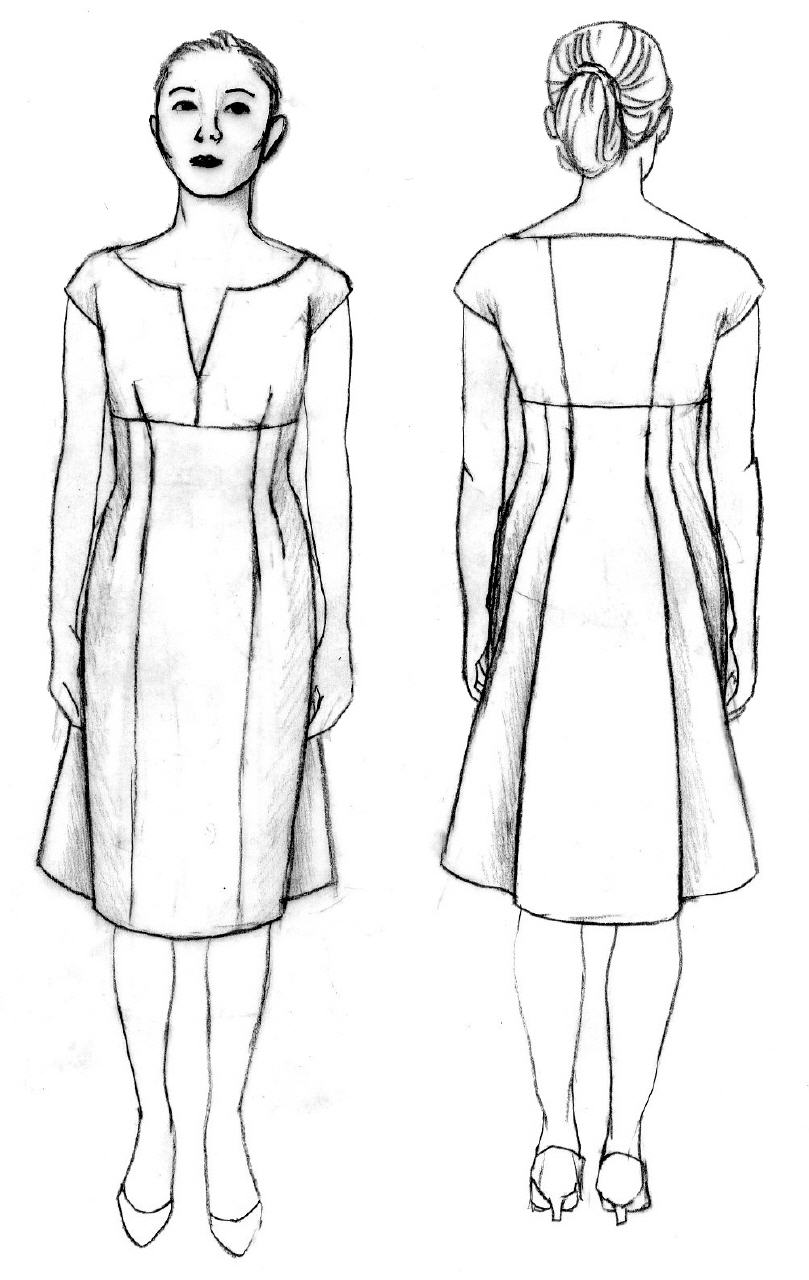 So here’s my adaptation:
Bodice with raised / below bust seam fitted through high hip. Cap sleeves of some sort. Pencil skirt in the front and pleated skirt in the center back to mimic a overskirt. (Nope, a leopard doesn’t change its spots. Commit to one style – are you kidding?)
I’m still not sure about the sleeves and top back. And the skirt design is a bit of a risk. But nothing ventured nothing gained, right? (She says nervously.) The drawing by the way, was done on a custom croquis.
Custom Croquis Instruction
Basically you take photos of yourself in close-fitting garment like swimwear, leotard, or underwear. Do front, side, & back. Use a tripod if necessary. Then print out & trace out the outlines to use as your croquis / design dummy. Or if you have Photoshop or Gimp, try this YouTube tutorial on turning photo into a drawing. Then you can play paper doll with yourself & your own designs! Simple.
I’ll leave you with this image of Big Bertha caught in the act:
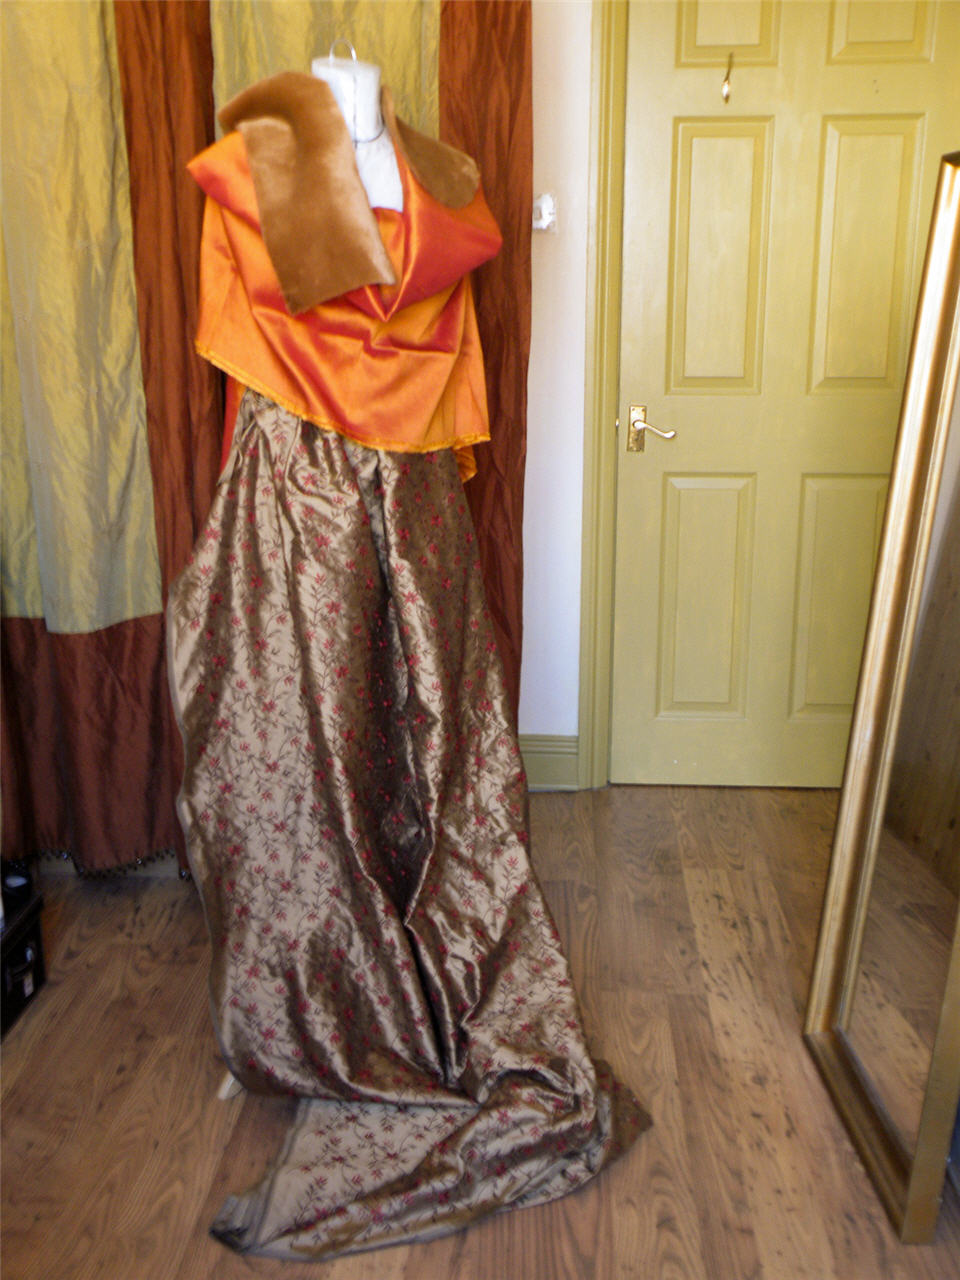
Big Bertha getting decadant & vain: Pilfering another piece of silk I was considering as an accent fabric, and my furry pillbox hat-to-be on her neck. It’s faux fur on one side and faux suede on the other. I’m too scared to sew into it as any mistake would be fatal – the faux suede once pierced is pierced forever. But winter is coming so one day soon I will take the plunge. Especially as faux fur stole seems to be all the rage in the shops right now.
Like this:
Like Loading...