Bridezilla Odyssey – part 4 – Choli Blouse

Now on to the me-made bit in the outfit – the Choli Blouse… This is actually quite a simple top. Many choli blouses are. The most labour-intensive bit is in the embellishment. So after finishing the custom embroidery, I kind of lost interest, which made the simple blouse construction excruciatingly slow.

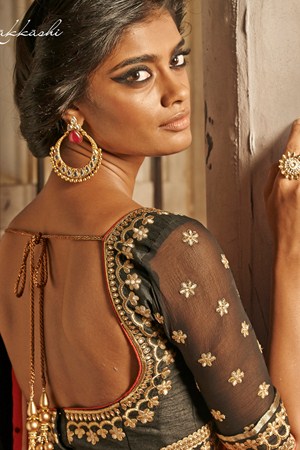
Style Shots & Mug Shots

4-style1-1

WORN WITH: 1-2 Altered Samyakk/Gajiwala Sarees lehenga skirt & RTW dupatta shawl; 3 Self-drafted chemise top, Miss Selfridge jeans; 4 Self-drafted chemise top, Self-drafted princess pencil skirt;

Inspirations & Design

To recap, the outfit I bought was a copy. So while the blouse fabrics & trim supplied do match the skirt, they don’t look like the original design I wanted. I decided to make a blouse from scratch so I can incorporate as much of the original embellishment design as possible.

  • I kept the front pretty simple & scale back the amount of embroidery because I wasn’t sure I can manage even just the hem & neckline borders.
  • 4021-2There wasn’t any photo of the back, so I took inspiration from other designs I liked & went for a basic U-neck that’s as open & deep as the bra I was going to wear would allow, with tasselled cord ties at upper back.
  • I debated whether to keep the sleeves see-through like in the original design or use the same opaque fabric as the bodice. I went with opaque because I thought I might want to wear the top as a vest over something like La Chemise, in keeping with the cooler London climate. It sort of half worked: On the plus side, it hid the messy underbelly of my embroidery. On the down side, my top turned out a bit on the tight side, so I’m not sure how practical – or visually pleasing – it would be to wear this as a vest over something else.

The Pattern

There are quite a few YouTube video tutorials on drafting Choli Blouse patterns from key measurements. But I thought I’d get better fitting patterns if I design from my own Blocks.

1-pat1

  • BLOCK: Top/Dress Block + Fitted Sleeve Block.
  • Pivoted front darts to create Front Armhole Princess Seams. (I really should sort out my Princess Seam Blocks.)
  • Picked a fight with gravity by moving the Bust Points up a bit & closer together for a fuller look.
  • Pivoted back darts to create smaller Back Waist Darts that won’t disrupt the embroidery design much.
  • Shortened bodice & sleeves for a cropped top with short sleeve.
  • Lowered neckline per design & pivoted out about 3/16″ per side (3/4″ total) from the neckline to pre-empt any gaps opening up on drastic lowering of the neckline.
  • Made the sleeve cap more shallow & wider at the top for better arm movement.
  • Added 3-sets of bra strap/band retainers – at the shoulder, further down the back straps, & near the CB opening.
  • Added placket beneath the butted CB opening which fasten with bra hooks & eyes.
  • Added detachable underarm sweat guard to help prevent sweat stains on the diva silk fashion fabric.

Well, it wasn’t a great success, despite a fitting muslin being made for a change.

1-muslin

  • The raised bust line didn’t fit very well. Gravity won this round. My bra was no match for it. It also didn’t help that I had to wash the fabric after I finished the embroidery (I had some hay fever sneezing fits while doing the embroidery). The washing or the pressing afterwards shrunk the embroidered neckline, which then pull the whole top up a bit further. Slight draglines above the bust was the result. Thankfully the blingy necklaces & shawl hid these draglines on The Day!
  • The whole thing is a bit tighter than planned. I always forget the extra ease needed to accommodate the innards – eg lining, interfacing, bumpy underbelly of couched embroidery. A fitting muslin is no help in this case – unless you include the extra layers in your muslin as well. The shrunken embroidery mentioned above no doubt made it worse. So I’m glad I didn’t aim for Bridezilla Second Skin Look in the first place!
  • And finally & most importantly, my draft failed the only test that matters when it comes to a Choli Blouse: I can’t bust out any ‘Screw In The Lightbulb’ Bollywood dance moves in this! The sleeves are still veering towards restrictive tailored fit. Me bad for not checking this in the fitting muslin – I only checked for standing still fit & lounging around comfort. Good thing no dance off was planned for the post-ceremony luncheon!

So the hunt for a TNT Choli Blouse pattern continues.

Fabric & Notions Used

There were a lot more bought than used. It was impossible to find supplies that come close to the inspiration photo & match the skirt. I never knew there were so many different shades of gold & types of metallic threads! So the Stash got a feast in the process…

And here’s the list of what I ended up using…
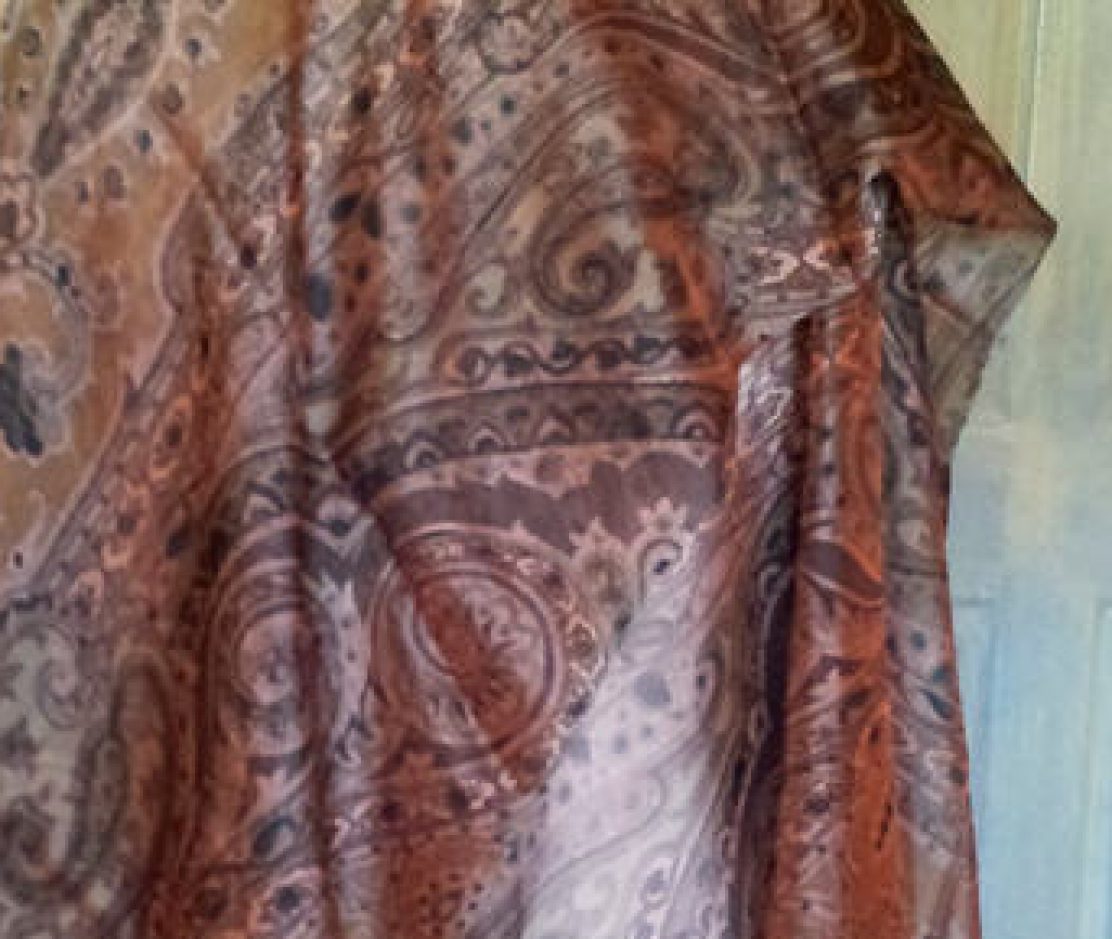
Construction Notes

The Embroidery Design

1-pat2

  1. Stabilise the neckline & hemline edges with fusible interfacing. This also supports the embroidery & minimise puckering.
  2. Traced the embroidery design from the Skirt scrap. As the material couldn’t be the same as the coordinating Skirt, I tried to at least match the embroidery design as much as possible.
  3. Worked out the embroidery design on a copy of the Blouse pattern, tracing from the Skirt embroidery design wherever possible. Because my left & right sides are not symmetrical, the differences are worked into the spacing between the flowers and vines to keep the design itself more symmetrical.
  4. The embroidery design is traced onto the right sides of the fabric with a pen & a white waxy dressmaking carbon paper. Using a different colour pen allowed me to easily see which bit of the design has already been traced. The pen is easier to control & the ball-point tip produced clear fine lines without shredding the pattern paper. My waxy carbon paper lines don’t wash out, but I think it’s acceptable as they will mostly be hidden by the embroidery. Plus the sheen of the Silk Dupion masks the white line in certain light. In fact it can be damn hard to see the design when I needed to! I had to experiment with the positioning of the lighting a fair bit.

Framing up:

2-emb-2-Frame

I chose the mix-n-match Siesta No-Sew Embroidery Roller Frames because of its flexibility & availability of sizes large enough to accommodate my sewing pattern pieces (they’re available in 6″-30″ widths & 7″-15″ lengths). Most frames are designed for dainty picture embroidery, so it can be hard to find ones big enough to keep the whole embroidery area flat. I didn’t want the embroidered areas to be crushed by the frame (as would happen with a hoop frame). Even rolling them up didn’t appeal. So I went for 30” roller bars (width) & 15” side bars (length) – just about large enough to keep the embroidery areas flat. I did still have to split the pattern pieces into 3 groups to make this work.

The other reason for choosing this frame was the Siesta No-Sew Table/Lap Stand Legs add-on that turn the frame into a table top / lap frame. This makes it possible to work comfortably at the table or on the sofa with the embroidery frame at the right height & with easy access to the front & back of the fabric. I did buy the optional cross-support bar, but ended up not using it.

Although the frame is designed to be “no-sew” – ie you can tape or staple your fabric to the soft wood roller bars – I prefer the sturdier looking sew-on method of traditional roller frames. So I stapled & taped strips of sturdy cotton ticking to the roller bars. (Twill tapes would have been the traditional choice, but I didn’t have any in the Stash.)

When it came to mounting the fabric onto the frame, I checked out this great YouTube tutorial…

…then did my variation of course! 🙂

  1. Reinforced the fabric on the sides with ticking strips.
  2. Baste the top & bottom to the roller bar ticking strips & rolled outward to keep the fabric taut lengthwise.
  3. To keep the fabric taut crosswise, sew the buttonhole twist threads through the reinforced sides & looped around the side bars. Keep top end of the thread in place by looping it around the top end of the side bar & sandwich between the bar & the wing nut. Pull the thread tighter around the side bar, working the slack loop by loop towards the bottom end of the side bar. Tighten the thread through multiple passes & alternate between the right & left side bars to keep the fabric centred. Once the loops are tight, keep the bottom end of the thread in place by looping around the bottom end of the side bar & sandwich between the side bar & the wing nut.

The Embroidery Sweat Shop

Flower centres & leaves at the neckline are satin stitches done in two passes: First with Krenik #8 Braid in 5005 Gold Coin, then with  Krenik Blending Filament in 202HL Aztec Gold for extra sparkle. The Blending Filament worked better when wetted & used in single strand. The white strengthening filaments did still fray a bit. When this happens I just remove them before using the Blending Filament.

Flower petals are Krenik #16 Braid in 202HL Aztec Gold couched with Guttermann Sulky in 7004 Gold. The flowers petals are double loops to match the flowers on the Skirt. To do this with a continuous Braid, I did the outer petal loops first, then flower centre outline, then inner petal loops.

Neckline vines & leaf outlines are Krenik #16 Braid in 002HL Gold Hi Lustre . The line borders are Metallic Mesh Ribbon outlined with Krenik #16 Braid in 202HL Aztec Gold Hi Lustre & 002HL Gold Hi Lustre. All of these were couched/sewn with Guttermann Sulky in 7004 Gold.

As the Braids are not cheap, I tried to keep it continuous to minimize amount wasted by knotting the ends. I pulled the Braid to the right side at the end point, then back to the wrong side at the starting point & knot this starting end. This way I can pull just the amount of Braid I need to the right side, & at the end any extra can be pulled back to the wrong side, knotted & cut with very little waste.

The two Back pieces were done while I was away visiting relatives. So I stitched the Metallic Mesh Ribbon border by machine first. The fabric & the frame were transported disassembled & the framing up done on location.

The Back Darts end in the neckline design area. To avoid bulk in the dart allowance, I stitched the dart points first before framing up.  It does make the fabric less tautly stretched, but it’s not too bad as I only stitch as much of the dart points as needed for the flowers that span across them.

I reckon the embroidery stitching process took me about 18 long days. I was at best managing 12 flowers a day & there were 111 of those, plus vines & leaves! I barely made it what with all the travelling. And it can be rather back-braking. I had to take regular breaks. So hats off to all the Embroidery Masters all over the world!

Sewing up

I didn’t do much research on how Choli Blouse are typically constructed beforehand. But I did notice a few blouses were sewn with wide side seams that are sewn last so that they can easily be let out when the Middle Age Spread hits! In other words, armscye seams & hems are done before the side seams, and if there’s any lining, they seem to be treated more like underlining – ie sewn as one with the fabric pieces.

Of course I went ahead & did this my bog standard Western way. For one thing, practical as they may be I still feel funny about those wide side seam allowance possibly peeking out at the hems.

  • Back darts, front princess seams, shoulder seams, armscye seams, side seams. Repeat with lining.
  • Join fabric & lining at neckline – sandwiching the back neck tasselled cords between the layers, understitch, then join fabric & lining at CB opening.
  • Hem fabric & lining. I did a jacket-style jump hem in case the two fabric shrink at different rate when cleaned. (I had a previous silk choli blouse develop an unsightly pull at the hem because the cotton lining shrank more. Not keen to repeat the mistake!)
  • Make the placket (fabric & lining), bra bits retainers (lining), sweat guards (lining) – all sewn right sides together with a gap for turning right side out.
  • Sew hooks to CB opening, then placket. Sew bra bits retainers to lining. Sew snaps to these retainers, sweat guards, & corresponding lining areas. Tack fabric & lining at shoulder-armscye points & underarm to help keep lining from peeking out.

2-final-Inside

The Verdict

I’m still feeling exhausted from my stint in the embroidery sweat shop. But I’m proud that I managed it. I don’t think I would have had the patience if it were for home decor projects like cushions or wall decorations. But once in a blue moon for a garment I can just about manage. There’s certainly a lot of leftover supplies for many more. And I’m impressed by how the simple embroidery design elements like these straight borders & nothing-special flowers can add up to something that looks fancier.

It’s a shame that the fit was off. Got to respect the Bod innit! And must, MUST remember to add extra allowance for each layer of innards added. I hope I’ll get a few more wear out of this top before I get too plump or it gets shrunken in the wash!

BTW all that effort with the bra bits retainers was a bit wasted. On the day I was too hot & flustered to do up all three sets, especially as the neckline was too snug to get one’s hand in. I only managed the bra band retainers near the CB. I ruled out attaching the bra first before putting the whole thing on because the too snug neckline wouldn’t have allowed me to cajole the girls into position. I kind of wished I had gone traditional bridal dress shopping so I can study how bridal wear designers manage to make so many women look so fabulous on their big day.

A couple of things for sure, I’m definitely up for making more of these embellished choli blouses, and the search for TNT choli blouse pattern continues. Now I just need some proper Summer days in London to make these worthwhile making!

Bridezilla Odyssey – part 3 – Lehenga Skirt

Moving swiftly along to the outfit itself…This spans the full spectrum from purely RTW (shawl) to partly pre-stitched (skirt) to purely me-made (top).

The skirt completion / alteration turned out to be more involved than I anticipated… Partly because I just couldn’t resist the opportunity to customise & do some unnecessarily tidying of the invisible innards!

Fit Alterations

2-skirtPanelLehenga skirts seem to be mostly panel / umbrella skirts. So originally I thought I just need to remove panels to reduce the circumference & shorten the length to fit, then sew up that last side seam & I’ll be done.

Well it turned out the top lace layer of this skirt is made from 34 panels which are each quite narrow from the top to the thigh, then spread out below that. Even if I remove some panels to fit my hip, this would still leave the top too wide for my waist (actually high hip, since many are worn lower down than the natural waist). Many lehenga designs simply use the tasselled cord to tighten the waistband to fit. But I didn’t like this haphazardly pleated waistline look, especially as the waistband can be quite stiff & bulky.

I ended up removing one panel, then pleated the extra width into 4 pleats at the front & back princess lines. This is then sewn to the smooth & more fitted waistband. The weight of the skirt actually pulls the pleats apart & along with the textured embroidery you can hardly see the pleating in the end. But I got the more fitted waistband I wanted. Well, almost.

The weight of the skirt still pulled the waistline down too much. To keep the skirt from sweeping the floor I had to tie the waist cord tighter, which brought back the dreaded bulky pleated waistband look. I tried to fix this by adding waistband elastic, which kind of spoils the neat waistline finish I took ages to make. Boo.

The inner layers were simpler to alter width-wise, though again I ended up doing this differently than planned. Because the hems of the inner layer weren’t as wide as my free spirit would like, I decided not remove any panel. Instead I resew each panel side seams & tapered more at the waist. Thankfully there are only 6 panels for each inner layer.

Length alteration was done at the top for a more A-line / circle skirt result. Considering that I basically resewn the hem border, I could have shortened from the hem. But I wanted more swish, so it made sense to cut off the more fitted length at the top rather than the flared length at the bottom.

Mug Shots vs Original Design vs Pre-altered Skirt

Customisation

2-skirtHem-nettingOut of the box the skirt weighs a ton & could stand on its own! In addition to the lace, the shiny underlay, and the lining, there was stiff netting attached to the hem of the lining. The lining itself also has wide hem that’s stiffened with the sort of heavy fusible interfacing that you might find in men’s formal shirt collars. It felt formal, ceremonial, claustrophobic, which I suppose is what a wedding ceremony calls for. Most of the other bridal lehenga outfit I saw also look really formal & restrictive.

lehenga_gold-red_1-3But it wasn’t what I attracted me to this outfit. The original design photos look bohemian. The model looked like she’s free to dance & twirl. I wanted a bit more of that romance. So off came the netting (fed to the Stash for some future petticoat of course!). The stiff lining hem interfacing had to go as well. The skirt still weighs just a touch under a ton, but at least I can twirl a bit better.

4-style1-2b

The more streamlined waistband, princess line pleats, & A-line silhouette I already mentioned above.

2-tasslesThe only other change I made was to replace the tasselled waist cord so that I can have a matching one for the Choli Blouse. I did like the original cord & tassels design, so tried to look for similar material. But it’s amazingly difficult to find the exact same type of material. Part of the problem is not knowing what the bits are called – eg the type of cord that was used. I did eventually find the same type of cord at jewellerymaker.com which they called “zari ropes”. No luck with the beads, so I ended up getting my beads from firemountaingems.com & also had to get some Montana Gold spray paint in Gold Chrome colour to ‘correct’ the brassy colours of the filigree beads. I followed the threading pattern of the original tassels, but replace some beads with red acrylic ones to tie in the red from the shawl. And paranoid about washability, I made the tassels detachable – hooked on to the cord with carabiner catches.

Unnecessary tidying

What can I say, I have sewing OCD }:-)

  • All 33 panel seams on the lace top layer had the seam allowances re-overlocked to an even & narrower width so that the shiny underlay show through more.
  • All 8+ yds of the hem border interfacing were replaced & tidied up (with Pro-Sheer Elegance Light Fusible Interfacing from Fashion Sewing Supply that I had in the Stash), and the border facing darted uniformly to match the 33 panel side seams. Before this fix there were some excess folds in the interfacing & the facing dart shaping were done more haphazardly. Although neither problem really affected the look, I. Just. Could. Not. Help. It!
  • Added plackets to the waist opening / waistband with hook & bar closures for extra security against gapnosis.
  • But there one thing that I didn’t bother to fix which perhaps I should have, and that is to replace the plastic bead trim at the hem with metallic beads. It’s all too easy to crush these beads when you’re a klutz like me. My sewing room / photo studio is now strewn with bead carcasses. I predict by the end of the wedding day I’ll have 5 beads left. So why didn’t my OCD extend to this fix? Because the skirt already weigh too much. And there’s 8+ yds of zig-zag beads. And they would all have to be replaced one by one as there is of course no ready-made trim that fits the bill. I think I’ve done my time with the blouse embroidery.

All this for much less than one day

WORN WITH: 1 & 3 Self-drafted top/jacket; 2 Self-drafted choli blouse;

Love the skirt, missing beads notwithstanding.

But my lifestyle just doesn’t support wearing this again. So I must swish as much as possible on the day. And afterwards, steel my heart & refashion this into something more wearable.

Am I buddhist enough to let go I wonder. How about you? Have you hung on to your wedding dress? Do you have any plans for it?

Bridezilla Odyssey – part 2 – Bra-Gate

Well Hello there! No, I’m quite a ‘Mrs’ yet. (What’s the feminist equivalent of a ‘Mrs’ to call the husband?) But the Bridezilla sewing is finally done. The final mile was excruciatingly slow even though it was simplest part of the Choli Blouse making. I must have left my Sewing Mojo with the relatives when I visited in July. Yes, I took my sewing on ‘holiday’ with me & promptly ignored all the relations who I meant to visit. The embroidery was finished at the eleventh hour just before we flew back to the UK. But making up the blouse took forever! Serves me right I guess for being rude to my hosts.

As for Blogging Mojo, that was lost long ago in the flurries of ideas & activities – too many & too fast to capture in words. So I will just outline the major incidents. Let’s start with Bra-Gate.

  1. I picked the outfit which was a copy. But while the skirt & shawl look exactly like the original, the blouse material doesn’t. I wanted a blouse more like the original. So I decided to make it from scratch.
  2. After searching all of London for supplies to little avail, & considering the amount of embroidery required, I had little faith I could manage this Plan A blouse in time. So I decided I need a Plan B.
  3. Plan B was to make up the pre-embroidered blouse fabric from one of the other two outfits. But there was a snag.
  4. This pre-embroidered blouse design has an very open back. I just could not find a bra that would stay hidden while still give me the gravity-defying lift I had hope to achieve. Let’s look at the typical open back bra options shall we?
    1. Built-in cups

      The standard choli solution. But with typical wearing ease built in, I don’t see how this will add any bust enhancement support. At best it just preserves modesty…Unless the top is made skin-tight from stretchy material. But mine is normal woven silk with no stretch.
    2. Stick-on bras

      Again, doesn’t seem like it’ll give enough bust enhancement support. Plus I’d be worried about it coming unstuck. One too many things to worry about on one’s big day!
    3. Low-back bra extenders

      This is the long add-on elastic that pulls down the back closure by extending your band so that it wraps around your front below the bust. Unfortunately these all seem to extend too far down (to the waist in the front at least) to work with cropped Choli Blouses.
    4. Totally backless bra (& Threads version)

      Backless bust support solution featured in "Build a Better Bust" from Threads Apr/May 2006

      Backless bust support solution featured in “Build a Better Bust” from Threads Apr/May 2006

      These seems perfect – if they stay on. I’d be worried that the straps would slip off easily & the cups won’t stay put. But I thought it has potential if tweaked:

      My open back Choli bra idea

      My open back Choli bra idea

      • Add below bust elastic band to help keep bra cups close to the body.
        Unlike hip young Asians, I’m never going to wear totally backless or stringy back-closure cholis. I just need a band & straps that accommodate a low & open back cropped top.
      • Add boned side panels to help keep bra straps from slipping off the shoulder.
        Not entirely sure this would actually work. But I think it looks more stable than having the elastic shoulder straps going around the arm joint & rejoining the cups at the side bottoms.
  5. I lost my mind & set about implementing my wholly untested custom open-back bra idea. Keep in mind that I have not even learn to make a bog-standard bra & I have only a few weeks left (to make Plan A blouse + Plan B blouse + this untested bra solution). I went as far as ordering bra material from Canadian Bra-maker Supply (and paid dearly for it – thank you UK customs & postal system).
    0-bust support-braSupply
  6. Luckily (!!!) Brexit threat devalued the pound sterling & delayed further investments such as Beverly Johnson’s hand-holding bra-making classes on Craftsy. This gave me just enough time to come to my senses & abandon Plan B along with my mad scientist open-back bra idea…for now anyway. As bra-making supply has already been bought no doubt I will return to my mad idea one day…Maybe when the pound sterling recover its value & I could afford to pay for the Craftsy classes? Any chance of that you think? 😉

Bridezilla Odyssey – part 1 – lehenga shop reviews

Getting back to Bridezilla sewing now…

These goodies arrived 2-3 weeks ago and I’ve been frantically planning my outfit and any sewing that needs to be done. First, some reviews of my shopping experience in case anyone else is interested in ordering from these online Indian shops. Some observations that apply to all shops…

These choli blouse + lehenga skirt + dupatta shawl designs frequently come as unstitched blouse fabric + partially stitched skirt (with one seam left to do so that it can be sewn up to your size) + fully stitched shawl. Some shops offer stitching services for the blouse and the skirt. But of course I prefer to do the sewing myself to ensure a good fit & stitching quality that I’d be happy with. Even for those who don’t sew, I’d recommend have them made up locally so the tailor can ensure a better fit. Us sewers know how the same measurements alone don’t guarantee a good fit as the body shape may be different – eg wide all around at the bust or a big bust on a small frame with narrower than expected back! Plus if you’re employing a local tailor you might be able to see example of their work before committing to their service, so you can be more confident the stitch quality is satisfactory.

The other reason to order unstitched version is that the items may arrive faster. If the shop have to stitch them up for you, not only do you have to factor in stitching time, at busy time of the year there may also be a queue. The seller will of course try to keep you sweet pre-sale, but after your order has been placed, you might have to chase them for status updates if your items is in the queue to be made up.

Having said that, not all designs lend themselves to this option. Sometimes the embellishment is very specific to the shape, size & fit of the garment. The pattern pieces need to be determined before the embellishment can be customised to fit. These probably will be the more expensive designs, like a few hundreds pounds to over £1000. All three that I ordered were just over £100 each.

As for fabric quality, it can be hard to be sure you’re getting real natural fiber like silk. Sometimes the shops will label something as “Art”, short for “artificial” or “faux”. But in general there doesn’t seem to be a clear distinction between type of fabric vs type of fibre used in the fabric. This applies not just to online shops. When I checked out a few brick-n-mortars in London, they also didn’t know there are “silk georgette” vs “polyester georgette”. The ones that make a point of sourcing natural fibre will probably shout about it & reflect that in their site menu categories. But in general, I think it’s best to assume man-made fibre. Then you may be pleasantly surprised if it turns out to be natural fibre if that is important to you! I haven’t done burn tests on the one I got. So I’m assuming man-made, especially with all the affordable bling!

Haya Creations
Indian/Asian outfit online shop

www.hayacreations.com

lehenga_nakkashi-haya-1I fell in love with these two Nakkashi designs and found Haya Creations which seems to sell the originals. Some shops show you photos of the original designs, but don’t mention the designers. So there’s no way to tell if they are selling the originals or copies, and more importantly, if copies whether they’ll look anything like the originals. Haya Creations does mention the brand name & the brand style number. Thankfully what I received also has the brand’s packaging.

Ordering process:

  • Haya Creations doesn’t seem to offer stitching service, which of course is fine by me.
  • I choose PayPal as payment option, but it isn’t entirely integrated into the checkout process. I received an email after placing the order with a link to PayPal to complete the payment. So don’t panic if this happen to you. Just wait for the email.
  • I ordered on a Friday (London time) & package was sent the following Tuesday. I would have received the package on the Thursday, but there was miscommunication about the delivery address. Haya called me long-distance (via WhatsAapp) the following Monday & gave me the tracking number & contact number for the courier (UK Mail). The package was delivered the following day. All in all it took just over a week from India to UK.
  • I was also expecting to have to pay import taxes, but I wasn’t charged any for my total purchase of just over £200.

Nakkashi Indian/Asian outfit designer & manufacturer

Now the Nakkashi designs themselves…I originally wanted to buy directly from Nakkashi’s online shop. But their PayPal payment option wasn’t set up properly. So I couldn’t complete the purchase on their eshop.

I think both lehengas may be relatively “mass-produced” rather than made to order or made as an one-off as some Indian/Asian outfits can be. Maybe that’s why both came with all three elements – blouse material, skirt, shawl – stitched / tacked together (see photos below). Perhaps this ensures each package has all the bits that its suppose to have. It is a bit of a hassle though to have to unpick these temporary seams before I can start sewing. I’d much rather the bits come as a loose kit – like bra kits do. But the designs are fabulous. For me to have to source all the bits & do the embellishment myself would be just as much hassle if not more.

In terms of quality, I’m assuming these are man-made fibers. Thankfully most of the fabrics don’t feel very plasticky. And while the skirt & shawl stitchings are not perfect, they don’t affect how the outfits look. So I’d say the marketing photos are fairly accurate. And given the affordable price I think they’re good value for money.

Nakkashi Royal Prestige 5033
unstitched choli blouse + part-stitched lehenga skirt + finished dupatta shawl

The colour for this one turned out darker than in the photos, a brownish flesh tone rather than antique gold. But it’s still nice. The only complaint I have is that the panel skirt doesn’t have an extra lining to protect the sequin stitching, so one might snag on the sequin threads. The skirt has a layer of soft netting on top of the sequined chiffon fabric. So I’m assuming the top is meant to have the same order of layering. The shaped trims for the front & back neckline is basted to the soft netting, and the straight trims for the hems also basted to the edges of the blouse fabric. The marketing photo doesn’t show the back, but the top has a deep U back that’s not too open. So this one should be OK to wear with normal bras. The shawl is shimmery chiffon. The floral trims on the skirt & shawl are velvet with metallic embroidery. The stitching on this one is OK.

Nakkashi Royal Prestige 5036
unstitched choli blouse + part-stitched lehenga skirt + finished dupatta shawl

The colour on this one is spot on. The panel skirt embellishment is on the top layer soft netting. So the threads in the back is protected by the orange lining / underlay. The shawl is chiffon with sewn on sequins. Both again have velvet trims with floral metallic embroidery. The stitching on this one is slightly twisted in places, but isn’t bad enough to show up in photos. So only perfectionist need to have these fixed! The blouse is dupion with sequin & metallic thread embroidery. Again, the marketing photos didn’t show the back. I scratched my head a bit when I first saw the shape of the embroidery, trying to figure out how it’s suppose to look. I think it’s meant to have a triangular cutout with neckline & below bust centre back closure. The cutout looks fairly large. So it’ll be hard to find a bra to wear with this if one needs proper bust support. Even the normal low-back bra extender won’t help as the top is cropped, so the extender looping at waist level will peep out.

Samyakk
Indian/Asian outfit shop

www.samyakk.com

lehenga_gajiwala-samyakk-1

I fell in love with a Gajiwara design and found Samyakk which sells something similar. Again, unlike other shops which show you designer photos then sell you a copy that may or may not look like the original, Samyakk shows you exactly what you’ll be getting. But you do have to look through all the photos on the product detail page, because sometimes the blouse fabric is not the same as the generic one shown on the mannequin. Where it’s different they do include a photo of the actual blouse fabric. But because the image menu only shows 3 thumbnails at a time, you have to use the arrow links to browse through all the product photos.

Ordering process:

  • Samyakk does offer blouse stitching service, but of course I didn’t opt for this, so can’t really comment on how this work or quality of this service.
  • I choose PayPal as payment option & this went through during check-out as expected.
  • I ordered on a Friday (London time) & package arrived the following Tuesday via DHL. All in all it took less than a week from India to UK. If you requested stitching service it’ll take longer. Presumably how long will depend on how busy it gets – there may be a queue in addition to time required for stitching. So plan ahead!
  • I was again expecting to have to pay import taxes, but I wasn’t charged any for my total purchase of just over £100.

Samyakk GC755
unstitched choli blouse + part-stitched lehenga skirt + finished dupatta shawl

This is similar to Gajiwara GS7384 lehenga choli (the first photo above), but with blouse fabric that’s the same as the skirt rather than a different but coordinating design. Also the Samyakk skirt is a panel skirt that’s fitted through the hip, whereas the Gajiwara skirt looks like it may be variations of the circle skirt, or at least panels that flares out higher up. I had wanted to get the Gajiwara version, but I couldn’t find a shop that can confirm they sell the original. And when I asked Gajiwara on Facebook, their response came too late – after I’ve already placed an order with Samyakk. Also they wanted me to call them long-distance & I felt uncomfortable with that, especially since I’m not sure if they would speak fluent English.

So the Samyakk version…This seems to be an one-off design. It’s no longer available on their eshop. The 3 elements are not stitched / tacked to each other. The stitching is better than the Nakkashi ones. But there are still stray threads, which is understandable on these easily snagged embroidered fabrics. Again I’m assuming man-made fibres. The blouse material is just a piece of metallic embroidered net + two-sided metallic fabric + metallic ribbon trim. The shawl is soft net with glued rhinestones with metallic ribbon & leave pattern trims. Now the skirt, this one is more elaborate than the Nakkashi skirts. At the hem it actually has 4 layers – metallic embroidered net + two-sided metallic fabric + stiff netting + lining. The netting is stitched to the lining which also has wide stiff fused interfacing. The whole thing is quite bulky & heavy! No wonder this outfit came in a big box and a clear zipper storage bag. The skirt also has the metallic ribbon & leave pattern trims. The hem on this & the shawl also have mini metallic ball edgings…which I’ve already stepped on & broke a few! I guess they must be gold painted plastic. Oops. The skirt comes with a waist tie in a lovely loosely knitted metallic cord with gold coloured (possibly plastic) latkan tassles.

The verdicts

I love all three garments / fabrics, despite the possibly man-made fibre content & less than perfect stitching. They’re lovely designs. I did try sourcing material from scratch. But it was so much effort, time, cost, & I couldn’t even find anything that looked similar never mind better quality fabric.

None of them when you break them down into their component fabrics & trims are too fancy to repurpose for less-than-special wear. So for a bit over £300, I’ll definitely get more value out of these than from a white poofy number. And they all feel more special than just a “nice dress” for such a special occasion!

In fact, I’m already tempted to buy more… 😈