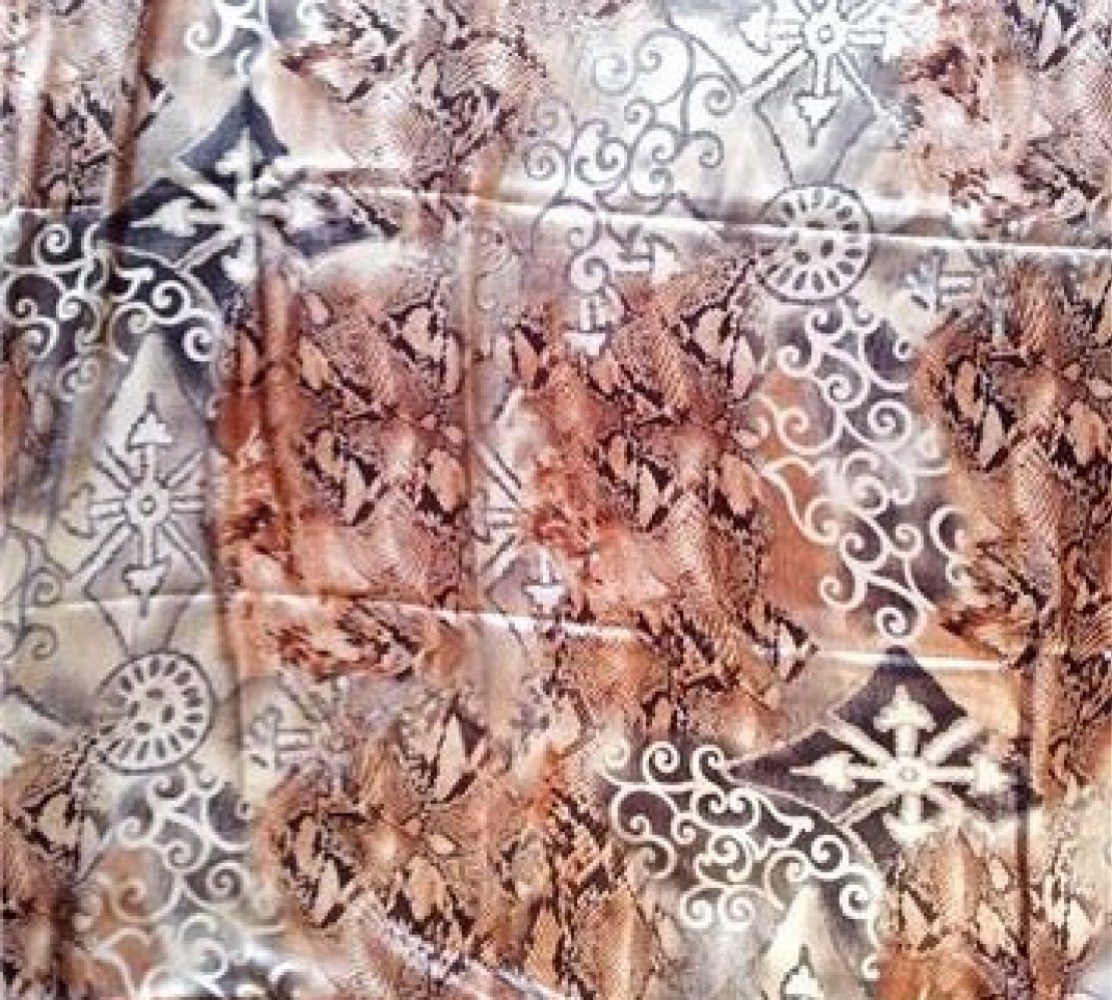
Watch out! Psychedelic Leopards on the loose!

This one is dedicated to the MC of Junglist Massive,
a Ms Anne of Pretty Grievances.

I’m not convinced the 3 Psychedelic Leopard cubs want to play nicely together, nor with other regular leopards either. But seeing as I’m terribly late for Jungle January, I thought the least I can do is to herd all of them into the same room for some OTT Jungle Fever photo ops. So here goes…

First off:
Vogue Donna Karan 1282 Cowl-Neck Top
& Burdastyle 2012-05-113 Skirt,
with well-worn Joan & David Circa lizard skin  pumps.

Next up:
Modified McCall 6078c Cowl Neck Top,
Skirt restyled from old H&M Dress,
Mini-Beret restyled from old scarf (never blogged),
with threadbare Anne Klein leopard print pumps.

No birds were killed during the making of these pictures. Well, not by me anyway. I blame the friend who gave me the feathers.

Improv Tote: Finished!

OMG! I finished something! And it’s made purely from stuff in my stash! What’s more is that although it’s not perfect, I’m OK with it! Miracle. So, picking up where we left off…

Tarting It Up for the Big Day

As you recall, this Vivienne Westwood tote bag was sort of what I was aiming for. And I briefly flirted with the idea of finding a similarly graphic print and image transfer using one of those printable transfer paper or image transfer medium.

But it seemed way too much hassle. Especially with the fabric being faux suede, I wasn’t sure that (a) the image would transfer well, and (b) the fabric could handle the heat required. So I resorted to my tried and tested Jacquard Lumiere 561 Metallic Gold Fabric PaintJacquard Lumiere Fabric Paint.

Next question is what design.

Derwentwater Golden Hearts Blackwork Embroidery KitI wanted something stylized, and thought this Derwentwater Blackwork Embroidery design would look great. Boy was I over ambitious or what. On the faux suede I just couldn’t get fine enough a line to attempt anything so complicated. (I do love these Elizabethan looking blackwork embroidery kits though – I have 6 of the 7 Derwentwater kits. One of these days I will find a way to incorporate them into my fashion sewing. Just you wait!)

WIP-17WIP-20

Ambition hampered, I went back to variations of the royal orbs. I ended up with this slightly wonky VW style orb.  I threw in a few more flourishes inspired by the real deals to compensate for the lack of fancy branding.

What do you think? Chav enough for you?

Coming Altogether Now

Next up, sewing the bag and lining bottoms together.

WIP-17Zipper foot came in handy for getting as close to the seam line as possible without being hampered by the bulk of the bag and lining.

I sewn three sides first, then inserted a piece of 7-count plastic canvas to stiffen the bag bottom. I got this tip from U Handbag’s great bag-making tutorial blog.

The last side is then sewn up, and the bag flipped right-side-out over the lining.

WIP-18

The top of the lining is then sewn to the underside of the zipper. (I slip-stitched it by hand for better control, then edge stitched again for reinforcement.)

WIP-19

I stitched across both ends of the zipper before covering the ends with faux leather tabs like Longchamp Le Pliage tote bags.

Now the tabs, what a pain they turned out to be!

WIP-21

With faux leather on both sides and a bit of bulk in-between, they were rather difficult to sew on the machine, even with tissue paper underneath to help the feed dog feed properly.

In the end I resorted to hand sewing. So thank God for my thimble and hand-sewing needle grabber.Hand sewing needle grabber

I would have had blood spilled on my lovely new bag otherwise trying to cajole the needle through the bulk – and the gunk from the double-sided tape!

WIP-22The resulting tabs aren’t brilliant. With my thin and somewhat stretchy faux leather you can see the zipper bulk striking through clearly. Longchamp Le Pliage tote bags tabs also shows a bit of bulk, but with proper leather and professional stitching they stick out much less like a sore thumb.

But you know what, who in real life is going to get close enough to notice this little blemish? So for once I’m declaring this project Plenty Good Enough!

So here you go, the finished result:

Done-01 Done-03 Done-04

What do you think? Good enough for a Gym & Grocery Bag? 🙂

Fortuny Delphos Wannabe Dress

Since there’ll be no sewing done this month, let’s play “Here’s one I made earlier.” First up, my Fortuny Delphos Wannabe Dress.

The Inspiration

Mario Fortuny is a Spanish artist from the turn of 20th century whose lighting designs, Grecian pleated dresses and Renaissance velvet robes I really, REALLY love. Actually, my Gigli Wannabe Coat can probably be traced back to his influence via Romeo Gigli, Paul Poiret, and Ballets Russes.

He developed a way of permanently micro pleating silk which to this day no one else has figured out how to do. The closest modern equivalent would be crystal pleats or mushroom pleats.

Supposedly 70s designer Mary McFadden revived the use of these type of pleated fabric, but in polyester because they couldn’t figure out how to permanently pleat silk. Threads Magazine have a couple of articles on how to work with these type of pleats (10-11/1990 and 6-7/1993 issues, available on Threads Magazine Archive DVD). Both showed designs more influenced by McFadden.

Not really my cup of tea. (70s and early 80s aren’t really my favorite decades fashion-wise.) I much prefer the romantic Grecian style of Fortuny. To me, it’s not a fashion garment: It’s a timeless classic. In fact, my favorite image of a Fortuny Delphos is this one of an obviously very old lady.

Doesn’t she look majestic! (Photos from Fortuny by Deschodi & Poli, and Fortuny: The Life & Work of Mariano Fortuny by Osma.)

I really wanted to make one just like Fortuny’s Delphos, with bateau neckline and all. But my fabric from the Cloth House on Berwick Street, London was a bit too stiff. I think it’s a rayon crystal pleat. It doesn’t burn like polyester, but it doesn’t have the sheen of silk either.

In the end, I found in my clippings this alternative inspiration:

I went for the one on the left, a simple sleeveless chemise dress with underbust and waist shaping. Slimming while still preserving the elegantly simple and classic spirit of a Fortuny Delphos.

The Making

The crystal pleat fabric was a bit difficult to work with. The micro pleats make the fabric spongy, stretchy, and unstable. But I couldn’t use fusible to stablize it since pressing would flatten the micro pleats. Plus fusible would make the fabric even stiffer. I wonder if a different base fabric might be more fluid. This one, though thin, was a bit like China Silk / Habotai – floaty rather than limp and drapy like Charmeuse, Georgette, or Chiffon.

I ended up draping and designing on Big Bertha, then hand-sewing the whole thing. Yes, hand-sewing . Actually I don’t mind hand-sewing . The part of sewing I hate the most is pressing. Hot and boring. Hand-sewing is actually kind of meditative. Not that I’d deliberately turn to hand-sewing like the couture-loving crowd – my hand stitches are a bit too crooked for me to love them. But compare to having to unpick machine stitching, I’d rather hand-sew for better control with fabrics like this. Besides, the micro pleats hide a multitude of sins! 🙂

The fabric is cut in half for the front and back, pinned at the sides and shoulder, put on Big Bertha. Then style tape is laid on top to determine the neckline, armholes, and underbust shaping. I basted the tape to the fabric while it was still on Big Bertha to temporarily preserve the shape, then hand back-stitched along the edge of the tapes before removing the tapes.


The neckline and armholes are cut to the stabilized edge with about 1/4” hem, then turned faced with bias tape made from off-cuts that were pressed flat. These edges were then overcast with decorative metallic knitting yarn for a more defined shape and rustic look like in the inspiration photo. The overcast along the front neck edge crisscross at CF and continue under the bust, then around the back. On the inside, the overcast couch the black elastic which I thought might help preserve a closer fitting shape while still provide enough stretch (like the pleated fabric) for comfortable breathing. But I’m not sure it works as intended. The shoulder and side seams are hand-sewn french seams, and the skirt hem hand-rolled lettuce hem.


While experimenting with the draping, I decided I quite like this open back look too. So for CB closure, instead of buttons on one side and loops on the other side of CB, I sewn buttons on both sides. Then I made separate double-loops to pull the two sides together for a more conservative look, or left the top double-loop off for a open back neckline.

Despite the hassle of hand-sewing the whole dress, I’m quite pleased with the dress. Especially when it packs like this…

fortuny-dress_2detail_10.jpg

Then unpack to this…

Style Shots & Mug Shots

Yeap, this dressed made it to Maldives too. It’s not the most practical dress – not what you’d call a wardrobe builder. And not particularly practical for chilly London. But feels just right in luxurious Maldives! I felt like one of those Grecian ladies from an Alma Tadema painting.  🙂


And for a slightly Medieval feel…with my beloved 1980s Comme des Garçons scarf – my first designer purchase back in High School and still in circulation decades later despite the moth holes. Plus the ceramic cross pendant my friend gave me – my Cow Bell I call it – dropped, broken, and glued back together again. I do get rather attached to some things. Not very Buddhist. Or with a slightly Indian flavor, worn as a skirt with another two old makes: a S/S 1989 Gigli inspired wrap top and a Indian choli (cropped fitted top).


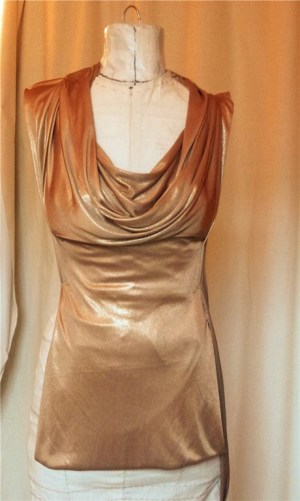
Golden Cowl Neck Tunic

OK, one last make for the holiday. This time it’s a restyle job. And it was an eleventh hour job. I was still up at 7am the day we flew out trying to finish it. So sewing quality is quite iffy. And fit can be improved a bit in the back, as usual. But I’m fairly happy with the design overall.

Without further ado, I present….

Before: Tarty

vs-gold-dress_1vs-gold-dress_2vs-gold-dress_3vs-gold-dress_4

This was a convertible dress from Victoria’s Secret. And as I’ve written recently, I’ve gone off convertibles because they’re quite fussy to wear with high risk of wardrobe malfunctioning.

This one I find especially tarty because of the ruching on the skirt CB. I don’t have curve down there and normally I’d appreciate a bit of shapely illusion. But this is way too much attention.

But I loved the fabric. It’s gold, but not a brash metallic. And it’s so soft and drapy. I especially loved how a cowl neck styling look in this fabric. I’ve tried to find more fabric like this and bought some duds on the way.

So I took this dress apart and tried to make something more classy out of it.

After: Classy & Glam (I hope)

Au natural…

gold-cowl-tunic_s1-1

gold-cowl-tunic_5mug2-1Fgold-cowl-tunic_5mug2-4SRgold-cowl-tunic_5mug2-3B

gold-cowl-tunic_s4-1…Or worn with hem turned up and held in place by elastic waistband threaded through the hem.

gold-cowl-tunic_s5-1

…Or a shallower cowl neck by ruching both shoulder with broaches.

It obviously can’t be worn as a dress by itself, what with the side slits. But I do still have the skirt portion of the original dress left. I might make that into a more modest pencil skirt to wear under this. Then it might look like a dress too.

As it is, I was thinking more of the Pakistani kameez, or Vietnamese ao dai as inspiration. I love how those combination of tunic and pants look in soft drapy fabric.

The Making

Originally I was going to use McCall 6078 sleeveless cowl neck T-shirt pattern again. But as my fabric pieces are reclaimed, they weren’t wide enough for the front pattern piece. So, necessity being the mother of invention, I played around with draping the fabric on Big Bertha. I was sure there was enough fabric. I just need to figure out how the fabric need to be positioned.

This is what I ended up with:

gold-cowl-tunic_0drape-1gold-cowl-tunic_0drape-2gold-cowl-tunic_0drape-3The front is one piece of fabric split into top cowl portion draped on the crosswise grain, and the bottom on the usual lengthwise grain. The back and side panels are from the second piece of fabric draped on the usual lengthwise grain.

gold-cowl-tunic_2measuregold-cowl-tunic_3patTo tidy up the pieces, I measured up the draped front bottom, side, and back roughly. Then I modified my tentative knit slopers to match the measurements.

The cowl piece is marked with pins at strategic places like underbust seam side and CF, shoulder seam, etc. while it’s still draped. I marked only one side and mirror image that on the other side to get the cowl a bit more symmetrical.

Here’s a diagram (not to scale) of roughly what the cowl neck piece is shaped like:

gold-cowl-tunic_4det_4The cowl neck extend to the CB to form a collar. To some extent you can control how low the cowl neck is by changing the angle of the collar CB seam.

To control the drape a bit, I also turn the outer edge of the back collar inside and slip stitch it to the back neck edge.

My cowl was a fair bit low cut. To preserve my modesty and also add more drape – can you ever have enough? – I added a separate rectangular piece inside the main cowl. The top two corners are tacked to the cowl neck edge about two inches below the shoulder seam (neck edge)…

gold-cowl-tunic_4det_2gold-cowl-tunic_4det_3gold-cowl-tunic_4det_5gold-cowl-tunic_4det_6

gold-cowl-tunic_4det_7

The bottom two edges are attached by thread chains to the underbust seam where it meets the side panels. I’m not sure if the same trick would work on other cowl neck (or even surplice / wrap) tops. But it certainly is worth experimenting with for those that threatens to expose your girls!

So there you have it, from tarty to classy (or Grecian-inspired anyway) in 24 hours. Or maybe 48.

And I would like to thank Big Bertha. I couldn’t have done this without her. Even though she’s getting a bit lumpy. (Me also, but in different places.)

V1159 Donna Karan twist front dress

This one was a tortoise. I made the first muslin like a year ago. Maldives was what it took to push through with a proper make. Or sort of proper. You see, part of the delay was due to my attempt to alter this no-alteration pattern. There was a fair bit of “I feel lucky” going on.

The Pattern

It’s a lovely feminine pattern. All of the makes on Pattern Review have been gorgeous, even if many complained about the low cut armhole and front gap-ahoy.

Style Shots & Mug Shots

v1159_4s2_2v1159_4s2_4v1159_3_0Fv1159_3_2SLv1159_4s2_6v1159_3_3B

Fabric & Notions Used

Size Used

My first muslin was a 10 based on high bust measurement. For this one I used am 8 with alterations.

First Muslin

For my first I followed the instruction closely. Or so I thought.

Like others, I noticed that front drape crisscrossed in the opposite direction to the pattern photo and tech drawing.

It wasn’t until I took apart the muslin and tried to trace my alteration guidelines that I noticed I didn’t pay enough attention to the cutting layout instruction: I had the wrong side facing up instead of the right side when I cut my fabric. It’s an easy mistake to make since most of the time you’re cutting folded fabric with wrong sides on the outside, facing up.

I thought it turned out alright though. The drape plus the stretchy fabric make it a rather forgiving pattern. It does have the minor flaws noted by others, though non-matching notches wasn’t a problem in size 10 and 8.

Heeding their warnings I had raised the armholes by about 1-1/2”, but they were still a bit low and gappy. The front was fine if I stand up straight, but immodest if I lean forward – like to get up from a chair. So I decided that I’d attempt alteration for my next make.

BTW, the profile looks horrible, especially the skirt, only because the fabric I chose wasn’t really appropriate. It felt more like sweatshirt material. So too stiff to drape gracefully. I learnt my lesson and chose a more drapy fabric for this make.

Changes Made

v1159_1Palt_3_fv1159_1Palt_3_b

  • Narrowed lower back.
  • Sway-back adjustment.
  • Full-bust adjustment and pivoted FBA dart to shoulder pleats and waist / skirt drapes. Interestingly, I think this might have made the shoulder more like the slight cap sleeve in the pattern photo.
  • Shorten front fold to get rid of gaps.
  • Lower left shoulder adjustment.
  • Raised armhole. I think I might have overdone this a bit. Together with the FBA, the armhole has become a bit too small / binding. The Vilene Bias Tape I use to stabilize the armhole probably doesn’t help either. When I get home I might unpick this, get rid of the bias tape, re-stitch with stretch stitch, and pray that the natural give of the fabric will remedy the over-zealous armhole reduction!
  • Changed skirt seam to CB seam (to make it easier to diagnose skirt fitting problems).
  • Omit skirt lining. Extended bottom edge of the “Upper Back” pattern to meet at CF. Added interfaced facing to make this extension sturdy enough to support the weight of the front draped skirt.
    v1159_2D_3v1159_2D_4

Verdict on the Instruction

It is convoluted. This is one pattern where I had to follow the instruction faithfully. At least for the first muslin. The illustrations helped tremendously because the verbal instruction is a jumble due to the poor pattern area naming. How are you suppose to make sense of “shoulder pleats in FRONT AND BACK (1)”??? In fact, when I mapped it out, all pattern pieces cover the front and the back, just different parts of them. This is because they all warp around your body.

To help others who want to make this dress, here’s my rough mapping of pattern areas and numbered matching seams in a somewhat Burda style. Who knows, maybe some of you may also be brave enough to attempt alteration! 🙂

And here are some details of my muslin, especially the inside, to help you figure out what’s going on with the pattern areas.

v1159_0m_0-F-Iv1159_0m_0-SL-Iv1159_0m_0-B-Iv1159_0m_0-SR-Iv1159_0m_1D-I1-av1159_0m_1D-I2-av1159_0m_1D-I3-a

For this make, I tried to stabilize edges that I thought might stretch out of shape:

  • Vilene Bias Tape on back neckline, armholes, and front drape crossing hems. I might omit it from the front armholes in future make or enlarge my altered armholes slightly.
    v1159_2D_2v1159_2D_1
  • Clear elastic on shoulder seams, waist seams, under-bust seams in the front.

v1159_2D_5I also tacked the folds of the top front drape in place. That’s the only way the folds will stay gracefully small and Grecian. Otherwise it’d morph into an unflatteringly wide Beauty Pageant Sash look.

Would I sew it again

Probably. Once I work out the kinks. I think it’s a wardrobe classic. I might even alter the armhole area to take sleeves. It’d be a lovely LBD with 3/4 sleeves!