Sloper delimma

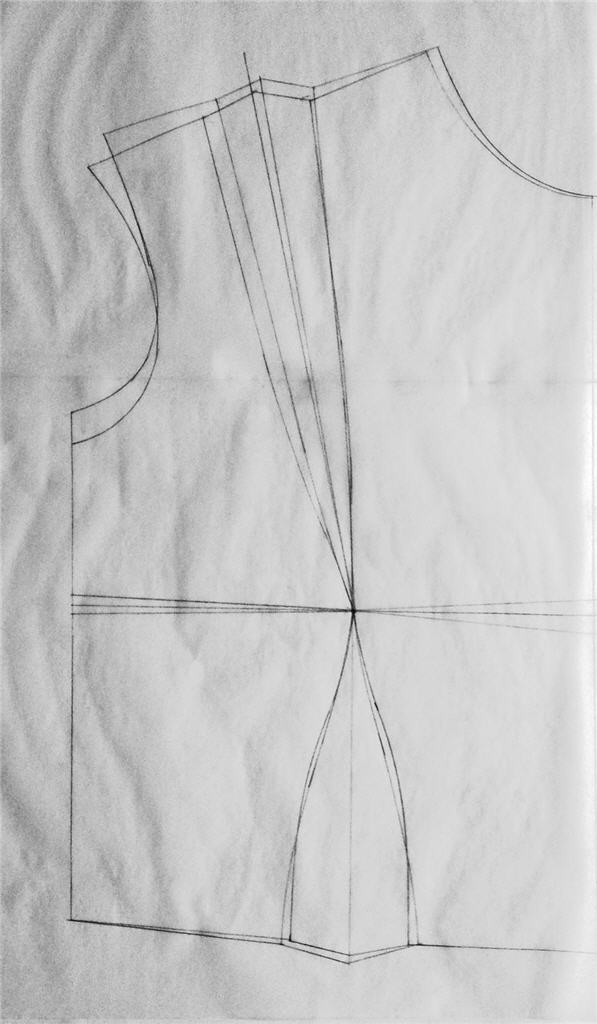
So, cape done & step 1 of the Draft Along pretty much settled. Next up: sorting out that damn sloper. (Pardon my French!)

May I present evidence F & B:

F as in Front    &    B as in Back


So what do you do with pattern adjustment for a lopsided body?

I’ve read somewhere that it may be better to keep the garment symmetrical and pad it out inside where your lumps are a bit anemic. Otherwise you might end up emphasizing your lopsidedness. That’s all very well if it’s sleeved and all you need is a shoulder pad. But my design has no sleeves for the pad to hide in.

On the other hand, if I tailor it for each side of my body, the embroidered pattern may give away the lopsidedness as well.

So what to do? Anyone got any tips?

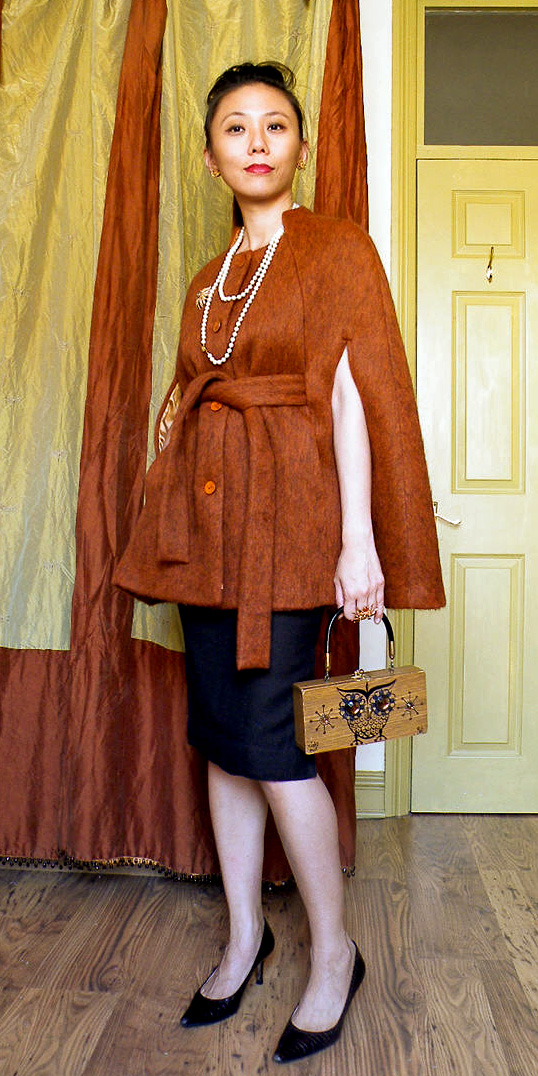
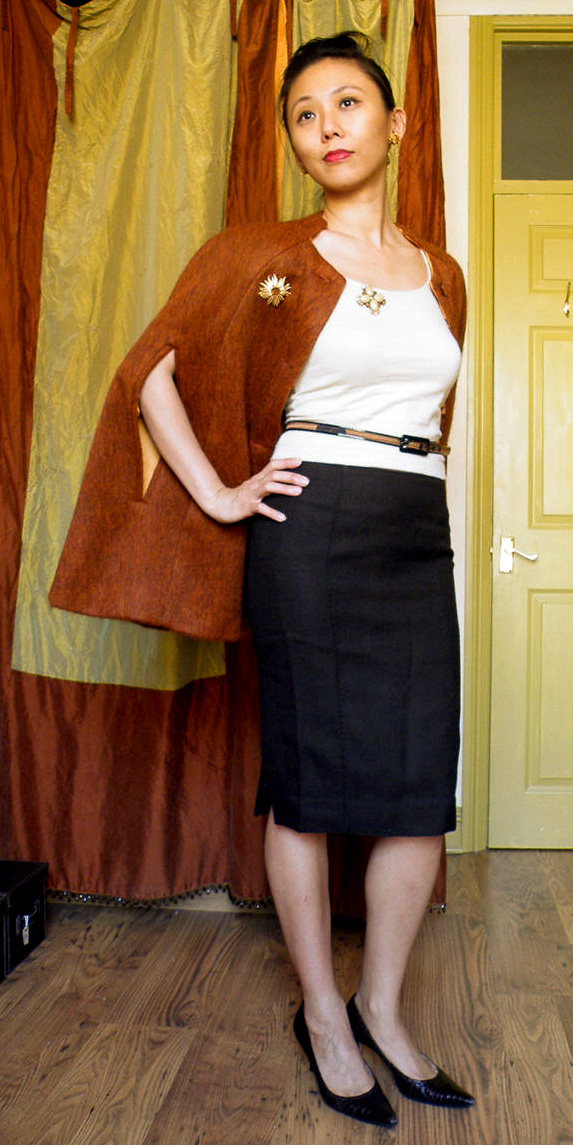
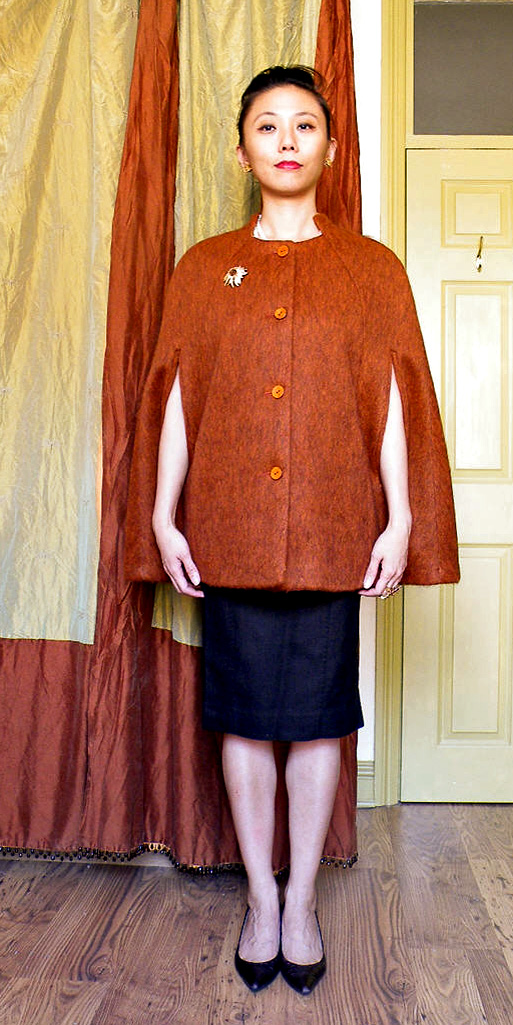
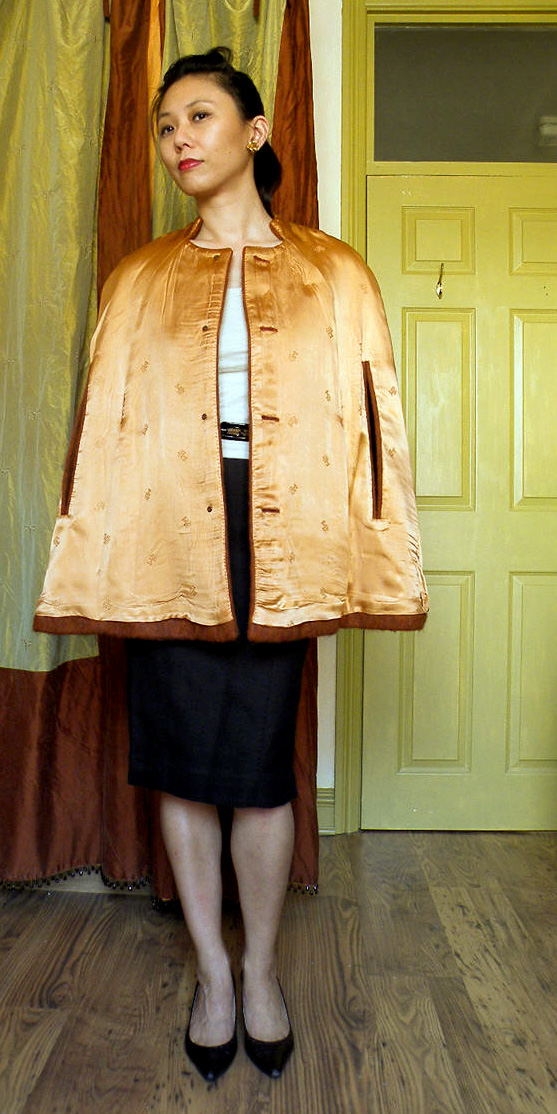
World, meet Crumb Catcher Cape

As promised, here comes the sun and the show-n-tell…

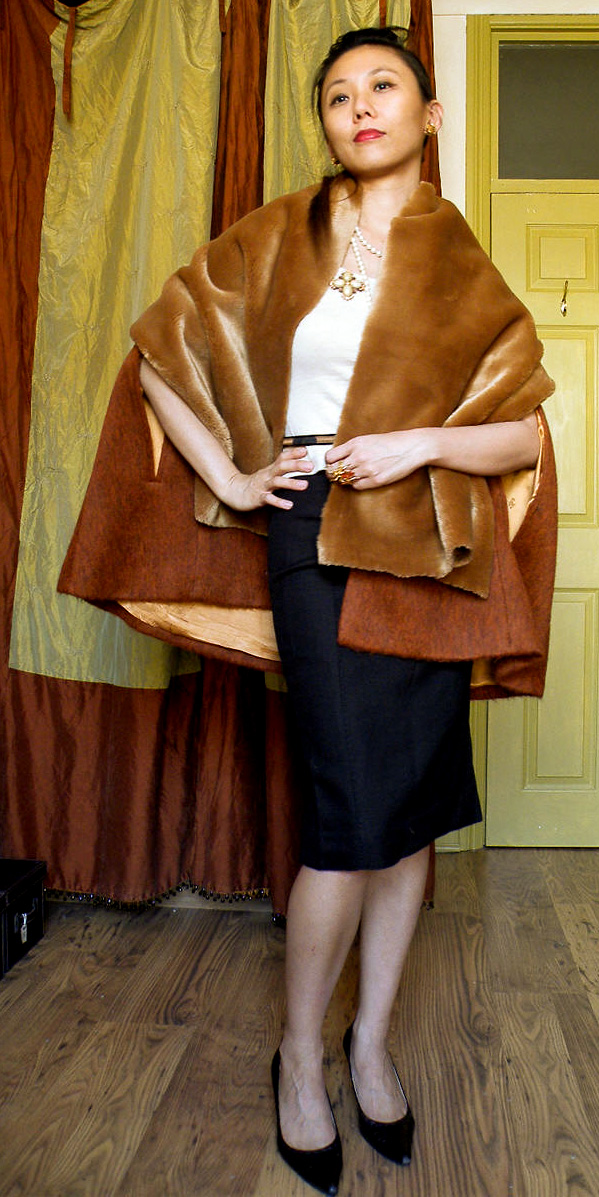
Styled with suitably retro box handbag & pearls…

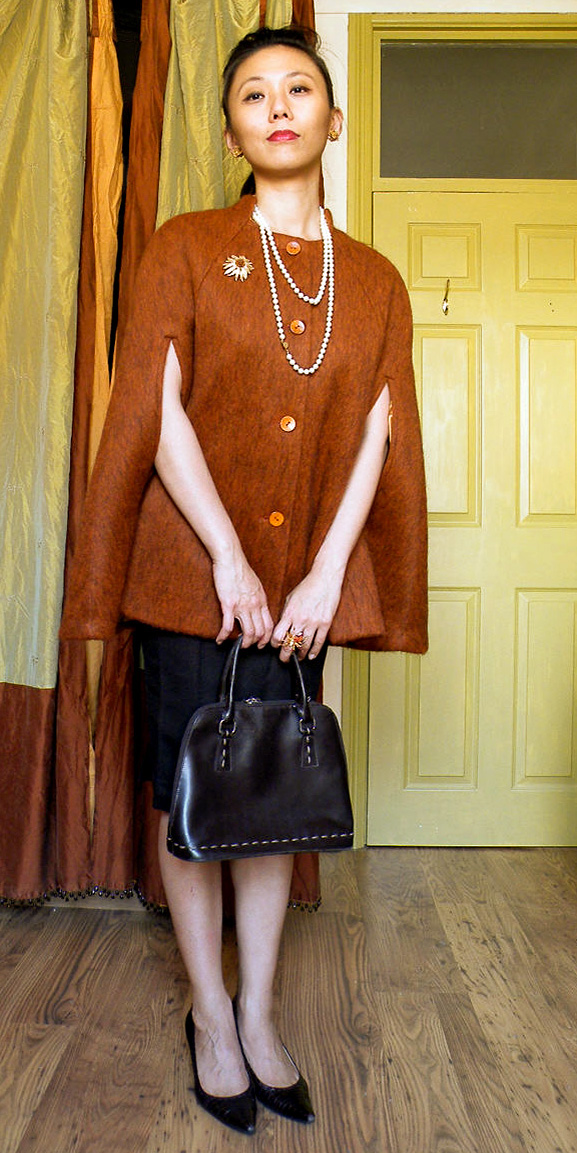
Or my beat up John Lewis handbag, held together now with safety pins. But fear not, for I’ve already planned to make a copy with scraps from the cape…some day!

With home-made close-fitting T-shirt (mentioned in previous WIP posts) and pencil skirt (part of a 2-piece dress. More another day.)

Simply posed, befitting a late 50s early 60s style cape.

Or decadently OTT with faux fur / suede WIP stole.

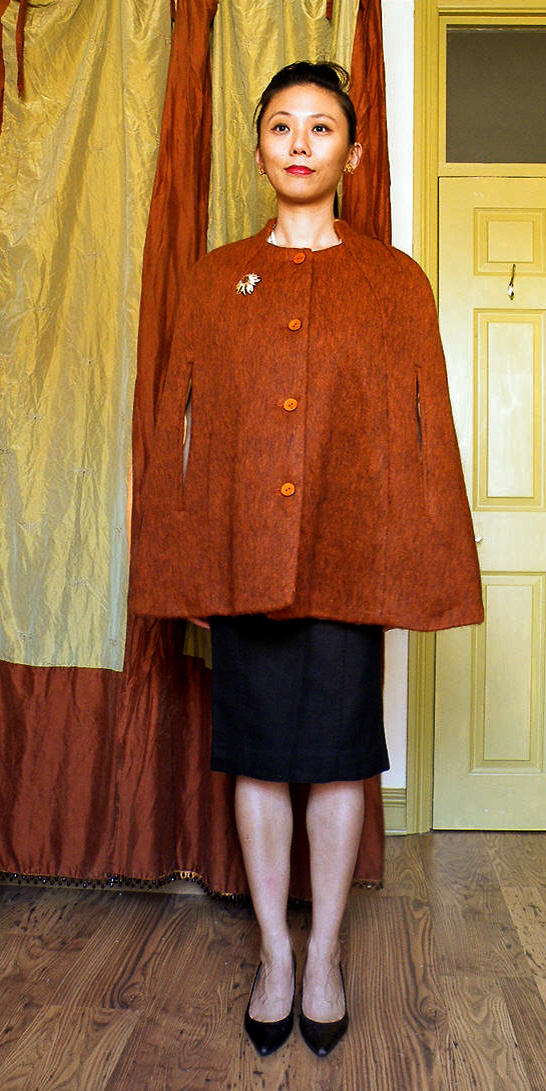
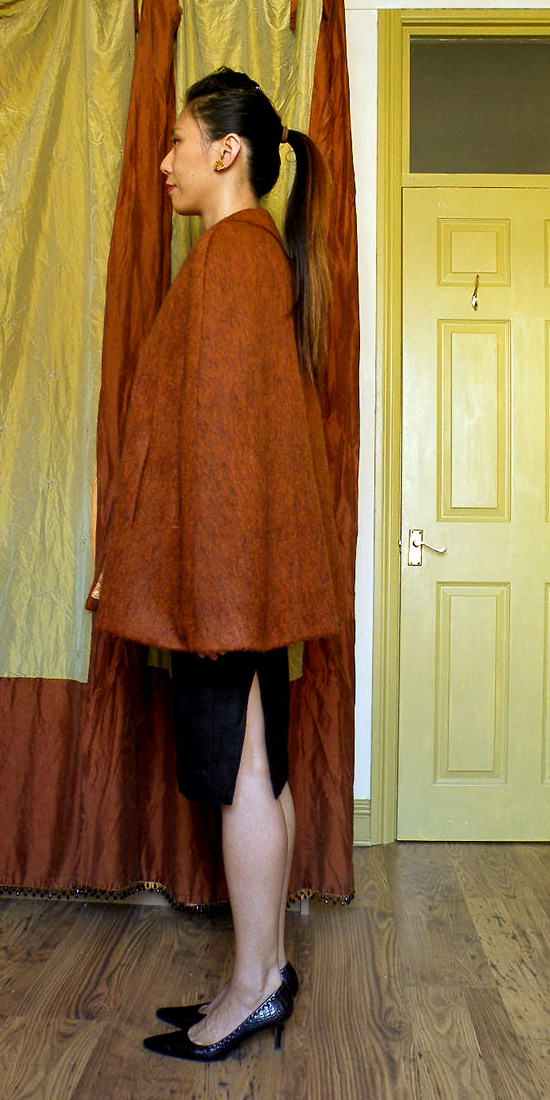
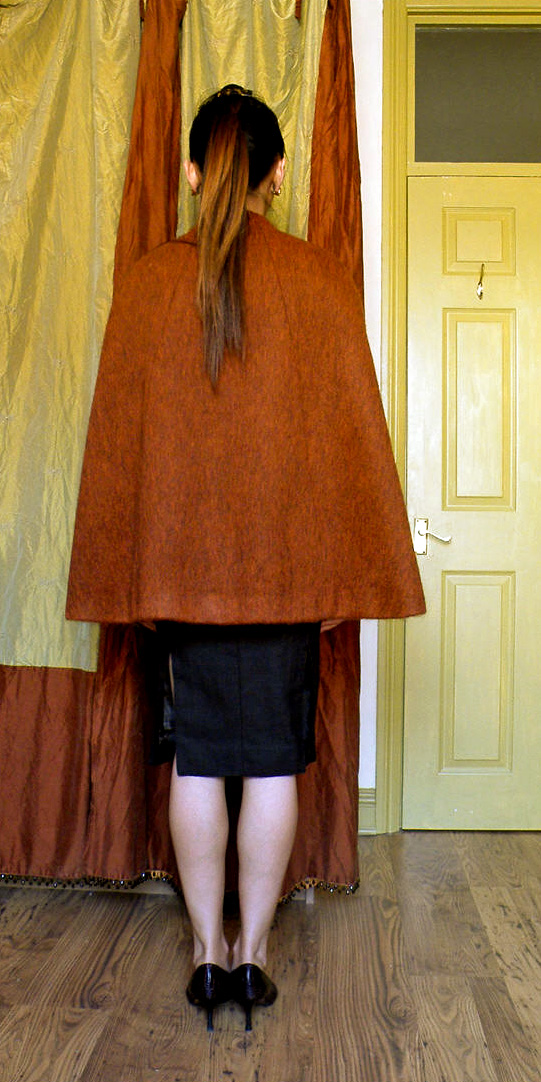
The obligatory mug shots

front side & back

The new double-welt arm slits sit properly at the sides.

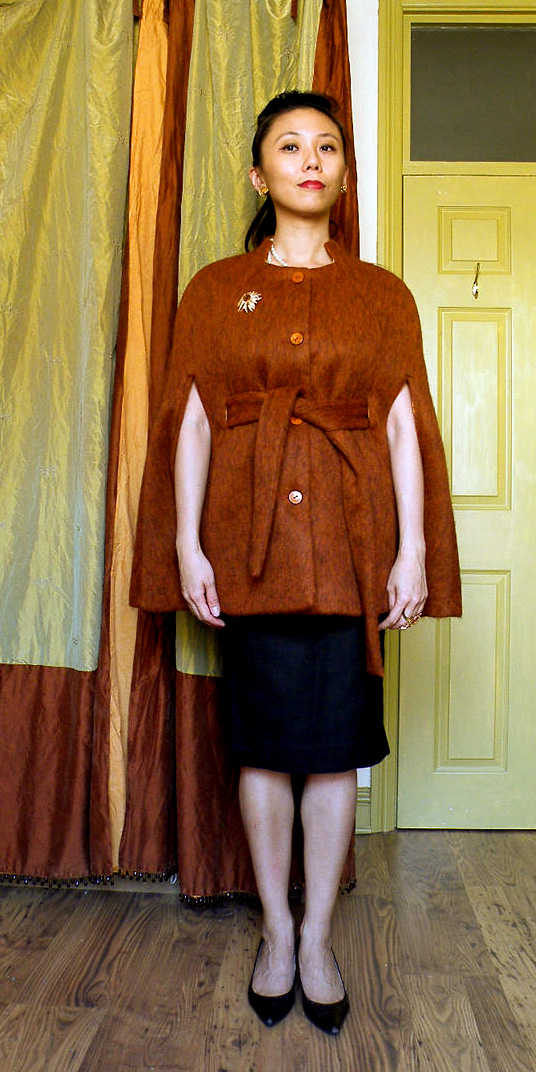
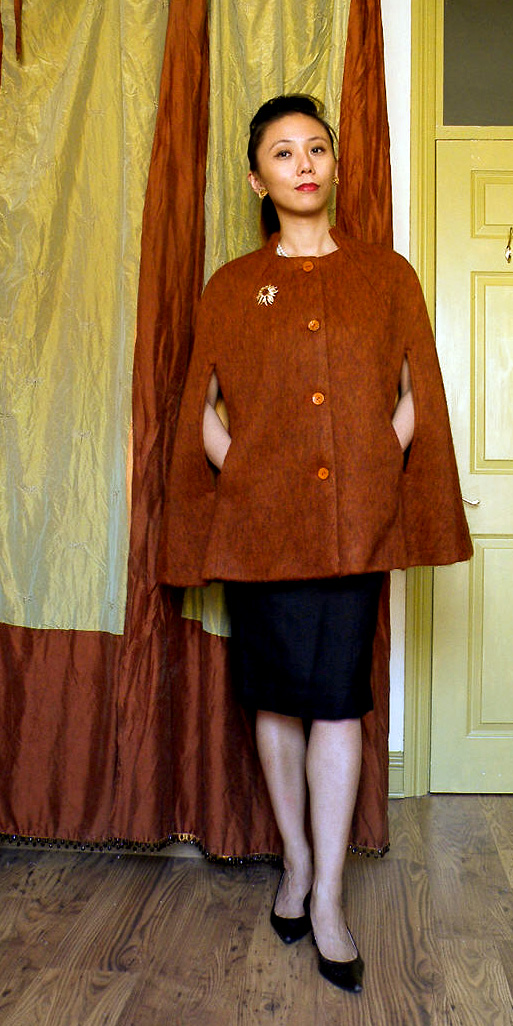
One way is not enough!

Optional tie belt comes out of small slits just above the pockets.

The old arm slits are now handy cozy pockets.

Almost edge-to-edge lining keep scratch wool at bay.

Erm, I guess the lining could do with a good ironing.

And the ongoing sewing commentary

Most of the alteration & sewing details have been mentioned in previous posts. Here’s the rest.

  • Attaching the lining was a bit of a pain. I tried to bag it, but had to hand-sew the various slits.
  • And I still haven’t  figured out a good way to sew edge-to-edge lining so it doesn’t peep  at the edges. Inter-corners too were a nightmare.
  • The button holes I attempted with on the Husqvarna Viking Sapphire 830 with one-step buttonhole stitch. I had 5 or 6 to choose from. Lucky me. But in the end I went over again with hand-worked blanket stitches. Because the white interlining was poking through the cut edges. And because I want some practice for future bespoke tailoring projects. Lucky for me I have a men’s tailoring booking (Classic Tailoring Techniques: A Construction Guide for Men’s Wear). Because Claire Shaeffer’s Fabric Sewing Guide doesn’t have very good instruction on hand-sewing button hole. Well, not enough clear pictures anyway.

Finally, the verdict…drum roll please

All in all I’m quite pleased with the results, despite the less than stellar sewing. Hence all the smug shots. Hey, it’s not everyday that I finish a sewing project.

Now if only Old Blighty’s weather would give me a few more days of mild weather to wear my spanking new cape…

Pies in the Sky

And while I’m waiting for the sun to get out of  bed, here’s the original Idea Doodles for the embroidered silk I’m now using for the Draft Along (the ones at the bottom, obviously):

I used to sketch better, having taken both art classes and fashion design classes. Nowadays though, my drawing skills are a bit rusty. But not as rusty as my self-taught almost non-existent pattern-drafting skills. Here are more Idea Doodles, almost all of which I haven’t managed to turn into reality yet.

But I’m getting better. If I can pull off the Draft Along I’ll be one step closer to rehabilitation. And maybe one day soon it’ll rain pies from the sky, and I’ll be able to show you me (or Big Bertha) wearing some of these designs!

Detour to a Retro Draft Along

Furry cape has stalled. I’ve been too distracted by Petit Main Sauvage’s Retro-Dress Draft-Along to finish off the cape.

Indecisions Indecisions Indecisions!

So the usual then…I’ve always wanted to make some retro garbs. I’ve pined my way through Wade Laboissonniere’s Blueprints of Fashion: Home Sewing Patterns of the 1950s countless times. I even have a few issues of 1950’s Vogue and Bazaar. But when it comes to the crunch, I couldn’t decide.

As Petit Main Sauvage said, we don’t have 1950’s figures anymore. And I have one too many No-Breathing sewing projects as it is. So the classic fitted bodice and puffy skirt is out of the question.
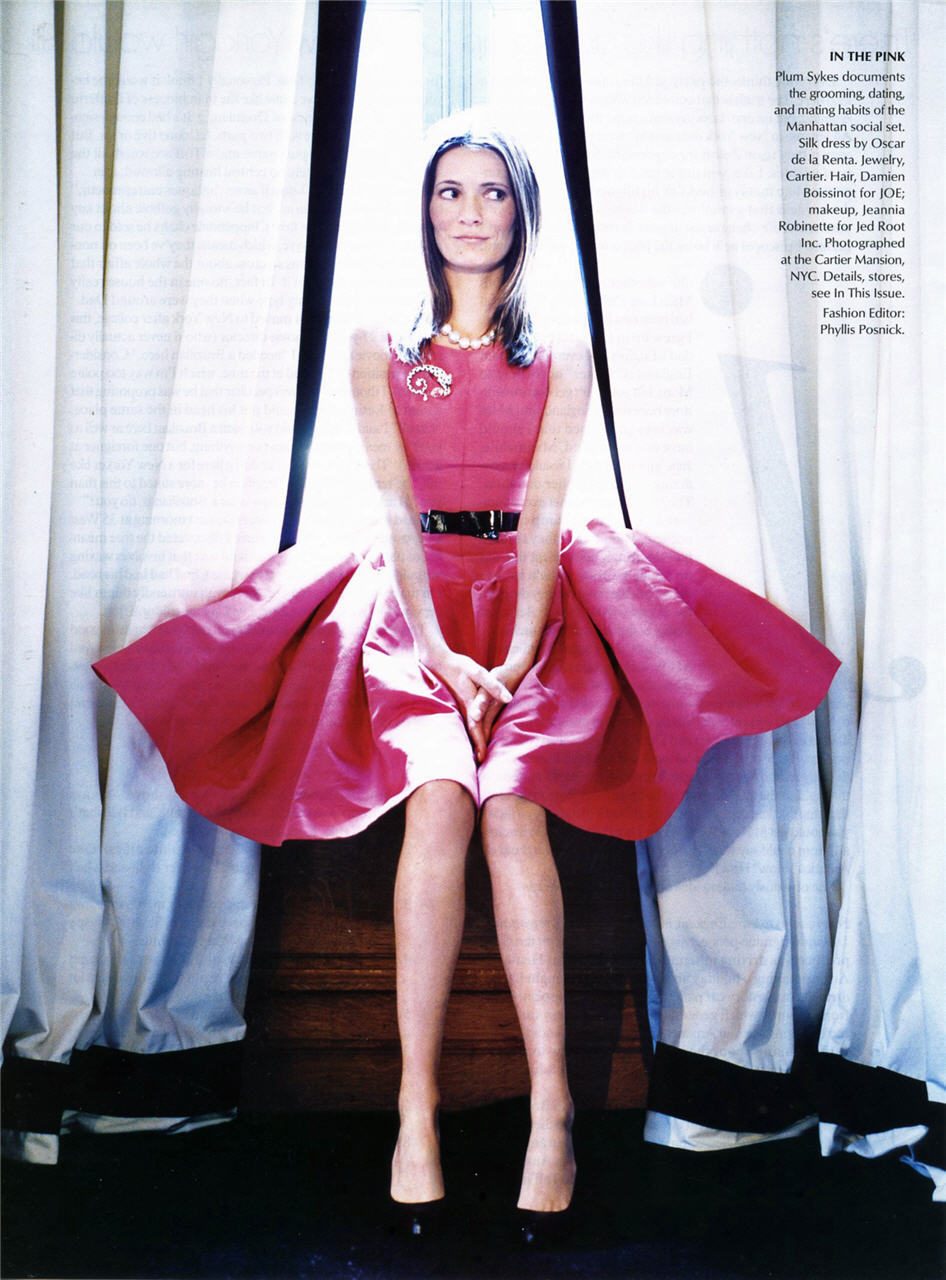
Plum Skyes in Pink DressI was a bit tempted by this take modelled by Plum Skyes in an old issue of American Vogue.

The lowered waist works much better on modern figures I think. It’s easier to see the waist and it elongates the torso so that it’s not so squat & square.

But most puffy skirt dresses takes yards and yards of fabrics. And most in my stash are only 2-3 yards each.

So I needed a different strategy than the others, who started by analyzing their figures and what silhouettes suit them. I started with a fabric, one that I have yards and yards of.  I ended up with this:
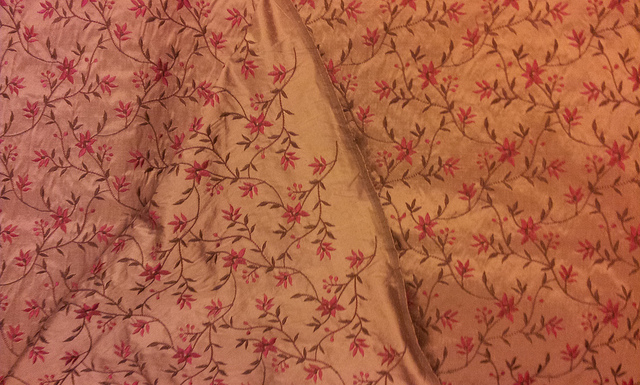
Prime candidate draft along

I was going to make an A-line summer coat with CF bust darts like a coat I saw in a Notting Hill boutique ages ago. I’m still hoping there’ll be enough left over for this.

The other consideration was that I needed a simpler design. Simpler than ones I’d usually be attempting. Otherwise I’d fall behind the Draft-Along schedule. But a plain fabric with a plain design is just…Yawn. So an embellished fabric like this would be just the ticket. It’s too fussy for intricate details. It’s my way of tying my hands, or in this case my imagination, so I don’t go OTT.

OMG, a decision finally!
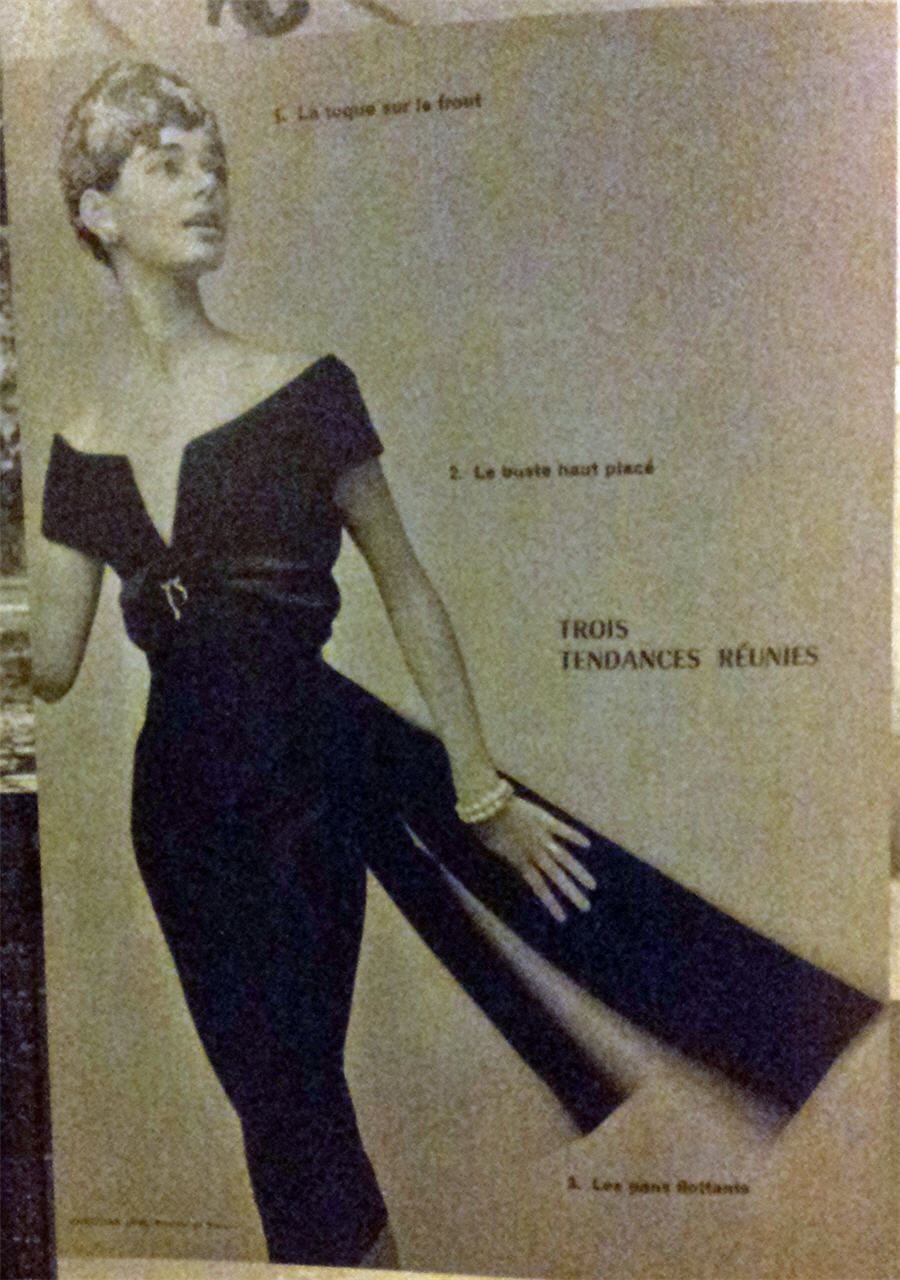
Christian Dior Winter 1955-56In the end, my inspiration was this Christian Dior dress from Winter 1955-56, published in L’Officiel No 81, 1000 Models: Dior 60 Years of Creation.

I like the slimline shape coupled with the extravagance of the back sashes, the slight off the shoulder v-neckline alluding to a womanly hour-glass shape. But it probably requires a fabric with a bit more drape than my embroidered silk. And the neckline is perhaps a bit too risqué for every day wear.
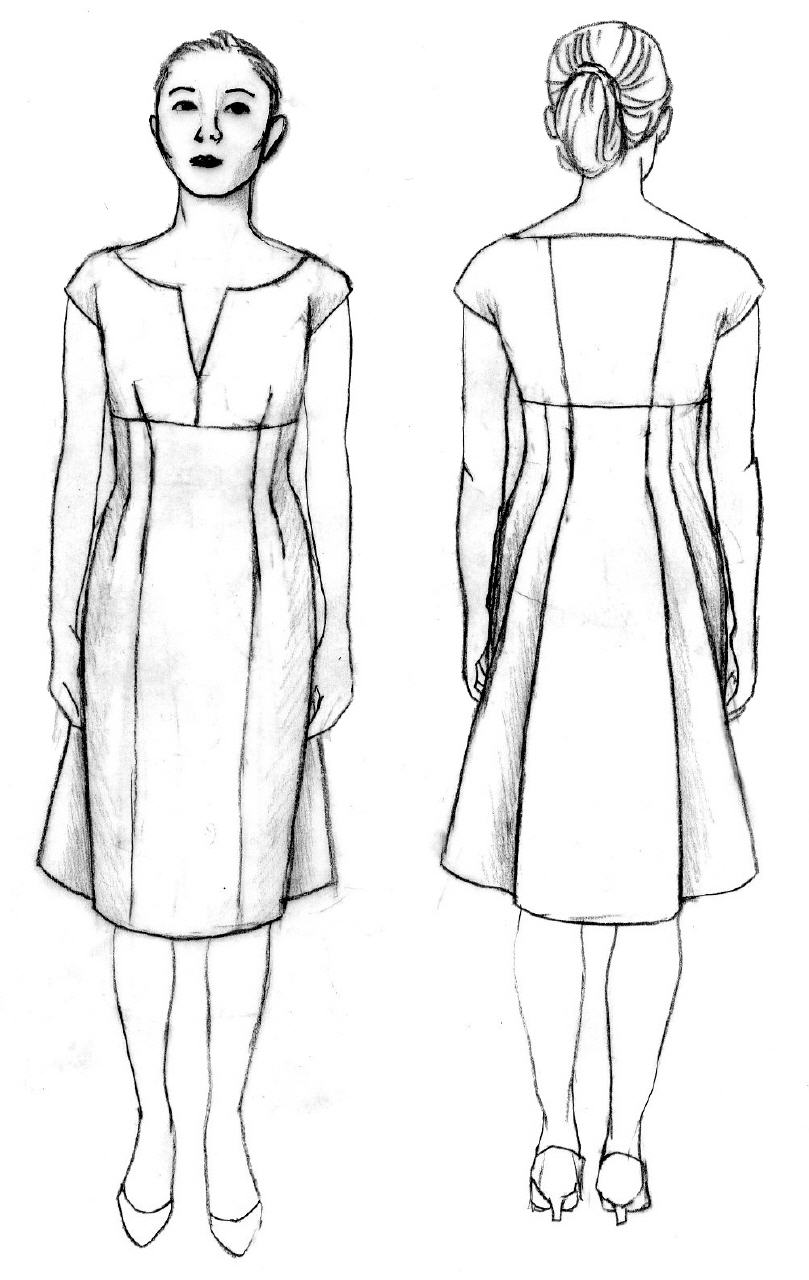
Retro Dress Draft-Along DesignSo here’s my adaptation:

Bodice with raised / below bust seam fitted through high hip. Cap sleeves of some sort. Pencil skirt in the front and pleated skirt in the center back to mimic a overskirt. (Nope, a leopard doesn’t change its spots. Commit to one style – are you kidding?)

I’m still not sure about the sleeves and top back. And the skirt design is a bit of a risk. But nothing ventured nothing gained, right? (She says nervously.) The drawing by the way, was done on a custom croquis.

Custom Croquis Instruction

Basically you take photos of yourself in close-fitting garment like swimwear, leotard, or underwear. Do front, side, & back. Use a tripod if necessary. Then print out & trace out the outlines to use as your croquis / design dummy. Or if you have Photoshop or Gimp, try this YouTube tutorial on turning photo into a drawing. Then you can play paper doll with yourself & your own designs! Simple.

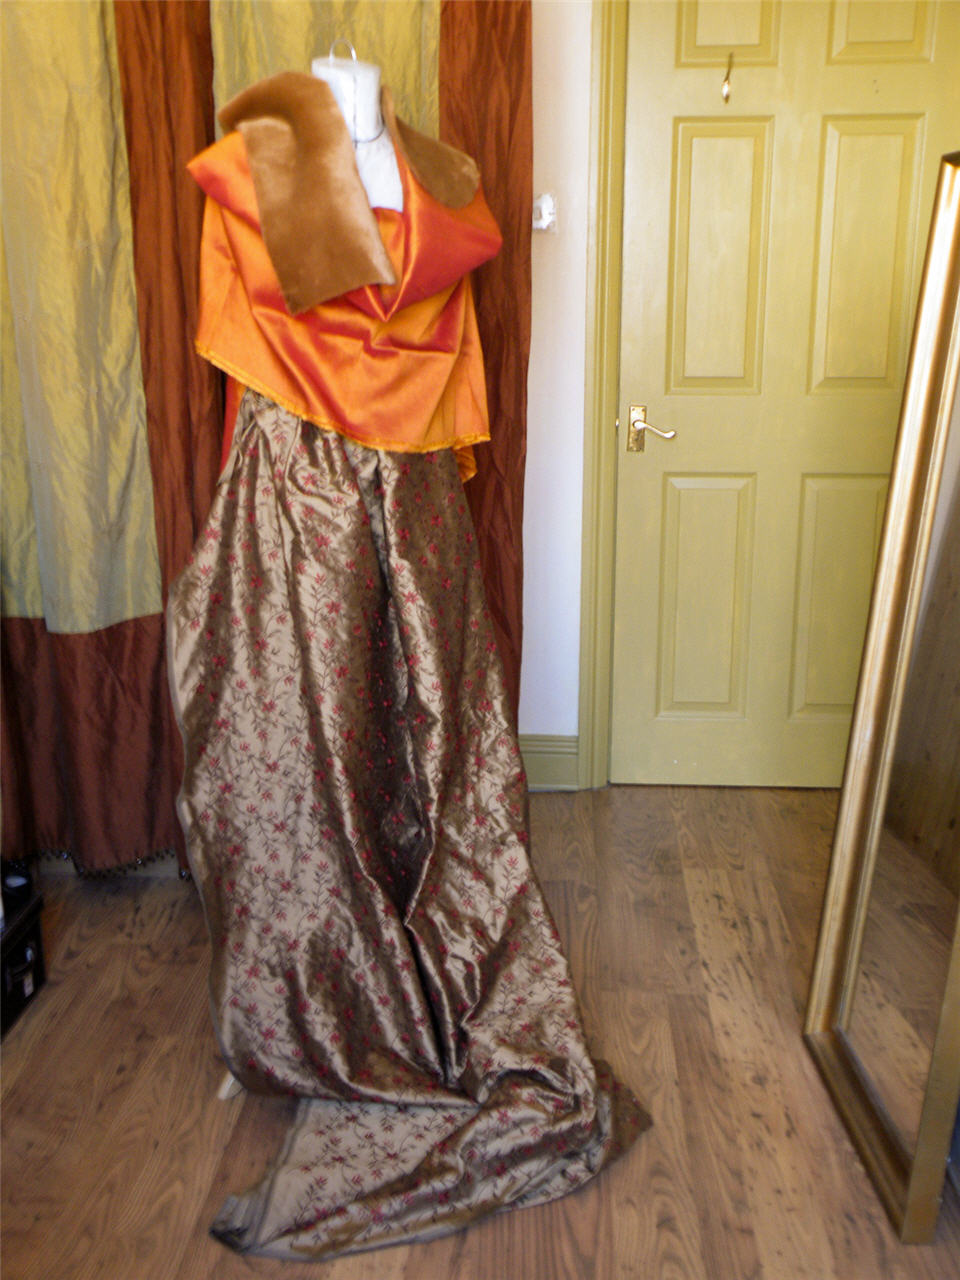
I’ll leave you with this image of Big Bertha caught in the act:
Retro Fabrics 2
Big Bertha getting decadant & vain: Pilfering another piece of silk I was considering as an accent fabric, and my furry pillbox hat-to-be on her neck. It’s faux fur on one side and faux suede on the other. I’m too scared to sew into it as any mistake would be fatal – the faux suede once pierced is pierced forever. But winter is coming so one day soon I will take the  plunge. Especially as faux fur stole seems to be all the rage in the shops right now.

Taking the scenic route with Gigli wannabe coat

Unlike the Selfish Seamstress and her recent finished-in-less-than-a-day dress, I take the scenic routes with my sewing projects.

V 1159 is simmering along nicely. It only took me like 2-3 weeks to research, trace out & adjust the pattern, order & prep the fabrics, and finally cutting out the pieces. Still need to transfer the markings. And sewing up, that’ll probably take another week or two at 2-3 seams per day. All relatively rabbit-fast to the tortoise that is my Romeo Gigli wannabe coat from ages ago.

Here’s the inspiration…

At $4000+ back in 1989, there was no way I could have bought it. So I vowed to make a copy. Fortunately I was able to examine one in a store (though how good I was in analysing and recreating is a totally different matter). Here’s my rough pattern sketches from back then.

Even more fortunate was a runway report from Paper magazine which had this close up of the embroidery. I was able to trace and enlarge the pattern on a copier. It saved me from having to recreate it freehand.

So the flurry of activity started in 1989. But it took me another 13 years to finish the coat, partly because I got bored of all the hand applique and embroidery, partly because I moved across the pond so the project had to go into hibernation like forever.

Here’s the end result.

Unfortunately, it turn out to be a massive oops.
(That unlucky 13!)

Oop no.1: As usual, I didn’t check the scale and silhouette first. The coat swamped my frame. I eventually gave it to a friend who is taller and fuller than me. Her vivacious personality and socially active lifestyle really brought the coat to life. In my hand, it just languished in the closet. She wore it out, even for grocery shopping, and got compliments after compliments. Once she was in Harvey Nicols (a very posh London department store) and a gentleman asked where she got it. He wanted to get one for his wife. The other time she was at the opera in NYC and another lady also complimented the coat. Made all that effort so worthwhile, even if it wasn’t me wearing it.

Oops no.2: Cotton velvet wasn’t the best choice of fabric. It wasn’t as drapy as rayon or silk velvet, so looked bulky and too big on me. And although the coat looked like it should be quite cozy, it was actually not very warm. Again probably the cotton to blame. (Didn’t help that I’m a girl of the Tropics either.)

Oops no.3: I didn’t think through the button-hole choices and went for hand sewn ones. Turned out a bit wonky. Luckily I had some stretch brown cords which I was able to fashion into fancy loops that pretty much covered up the wonky button holes.

Not an Oops: The embroidery I’m quite proud of. The applique was made with China Silk, outlined with green embroidery cords. The embroidered parts were backed by wadding to give the collar and cuffs a bit of body, maybe a tad too much. Here are some close-ups.

Here’s what it looks like inside.

A fittingly Tragic Romantic Ending…

Sadly the coat was too delicate to withstand the fast paced lifestyle of my friend. Buttoned up the bottom is rather narrow. So one day one of the buttons came off, not being able to cope with her grand strides. It tore the fabric where it was attached to. I tried to repair it clumsily with fusible. Of course that didn’t work with velvet. So now you see the outline of the fusible patch where the tear was. My friend decided not to take it back as she felt guilty about the tear.

So like a faded grand dame it has retired back into my closet. But I’m glad it had gotten a good leash on life. Better to have lived and be torn than to be pristine in a sterile ivory tower!