Golden Cowl Neck Tunic

OK, one last make for the holiday. This time it’s a restyle job. And it was an eleventh hour job. I was still up at 7am the day we flew out trying to finish it. So sewing quality is quite iffy. And fit can be improved a bit in the back, as usual. But I’m fairly happy with the design overall.

Without further ado, I present….

Before: Tarty

vs-gold-dress_1vs-gold-dress_2vs-gold-dress_3vs-gold-dress_4

This was a convertible dress from Victoria’s Secret. And as I’ve written recently, I’ve gone off convertibles because they’re quite fussy to wear with high risk of wardrobe malfunctioning.

This one I find especially tarty because of the ruching on the skirt CB. I don’t have curve down there and normally I’d appreciate a bit of shapely illusion. But this is way too much attention.

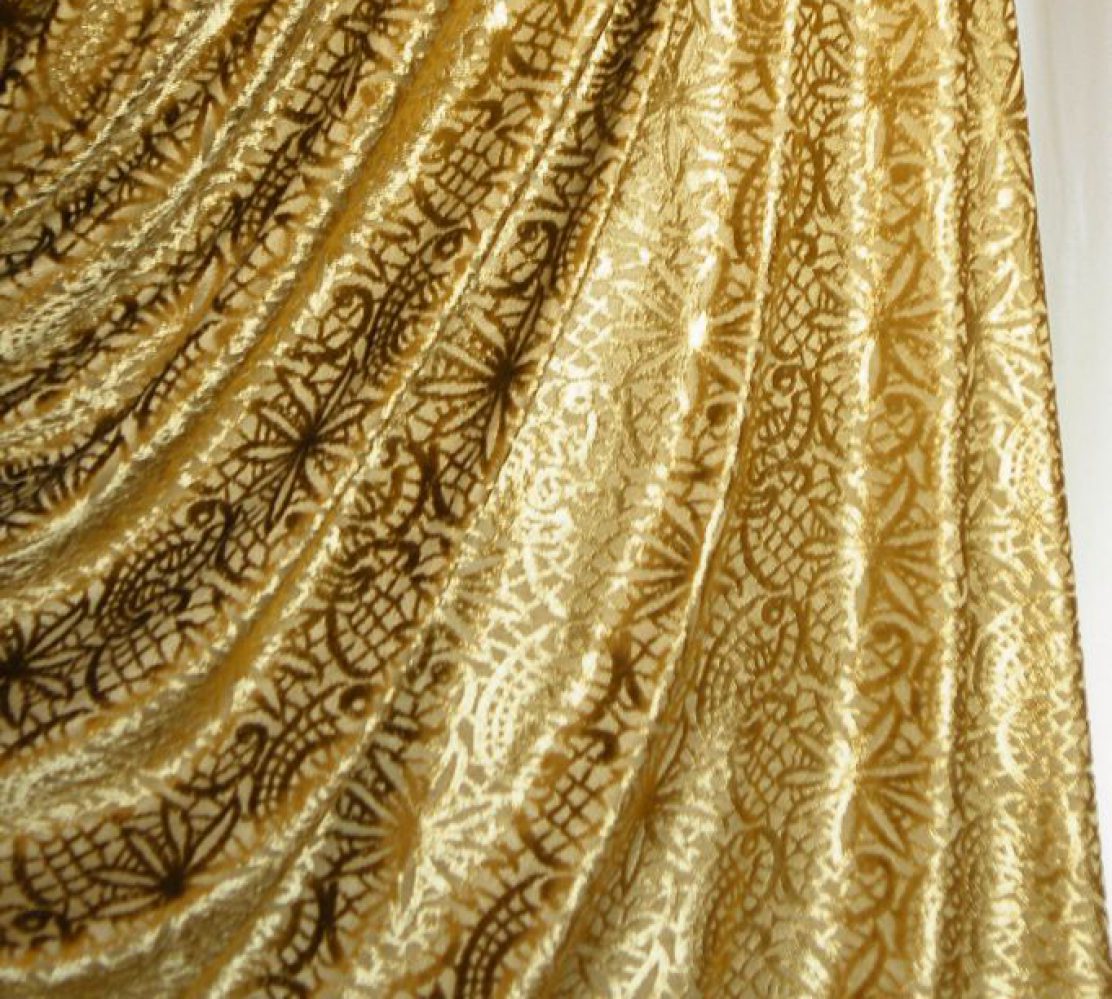
But I loved the fabric. It’s gold, but not a brash metallic. And it’s so soft and drapy. I especially loved how a cowl neck styling look in this fabric. I’ve tried to find more fabric like this and bought some duds on the way.

So I took this dress apart and tried to make something more classy out of it.

After: Classy & Glam (I hope)

Au natural…

gold-cowl-tunic_s1-1

gold-cowl-tunic_5mug2-1Fgold-cowl-tunic_5mug2-4SRgold-cowl-tunic_5mug2-3B

gold-cowl-tunic_s4-1…Or worn with hem turned up and held in place by elastic waistband threaded through the hem.

gold-cowl-tunic_s5-1

…Or a shallower cowl neck by ruching both shoulder with broaches.

It obviously can’t be worn as a dress by itself, what with the side slits. But I do still have the skirt portion of the original dress left. I might make that into a more modest pencil skirt to wear under this. Then it might look like a dress too.

As it is, I was thinking more of the Pakistani kameez, or Vietnamese ao dai as inspiration. I love how those combination of tunic and pants look in soft drapy fabric.

The Making

Originally I was going to use McCall 6078 sleeveless cowl neck T-shirt pattern again. But as my fabric pieces are reclaimed, they weren’t wide enough for the front pattern piece. So, necessity being the mother of invention, I played around with draping the fabric on Big Bertha. I was sure there was enough fabric. I just need to figure out how the fabric need to be positioned.

This is what I ended up with:

gold-cowl-tunic_0drape-1gold-cowl-tunic_0drape-2gold-cowl-tunic_0drape-3The front is one piece of fabric split into top cowl portion draped on the crosswise grain, and the bottom on the usual lengthwise grain. The back and side panels are from the second piece of fabric draped on the usual lengthwise grain.

gold-cowl-tunic_2measuregold-cowl-tunic_3patTo tidy up the pieces, I measured up the draped front bottom, side, and back roughly. Then I modified my tentative knit slopers to match the measurements.

The cowl piece is marked with pins at strategic places like underbust seam side and CF, shoulder seam, etc. while it’s still draped. I marked only one side and mirror image that on the other side to get the cowl a bit more symmetrical.

Here’s a diagram (not to scale) of roughly what the cowl neck piece is shaped like:

gold-cowl-tunic_4det_4The cowl neck extend to the CB to form a collar. To some extent you can control how low the cowl neck is by changing the angle of the collar CB seam.

To control the drape a bit, I also turn the outer edge of the back collar inside and slip stitch it to the back neck edge.

My cowl was a fair bit low cut. To preserve my modesty and also add more drape – can you ever have enough? – I added a separate rectangular piece inside the main cowl. The top two corners are tacked to the cowl neck edge about two inches below the shoulder seam (neck edge)…

gold-cowl-tunic_4det_2gold-cowl-tunic_4det_3gold-cowl-tunic_4det_5gold-cowl-tunic_4det_6

gold-cowl-tunic_4det_7

The bottom two edges are attached by thread chains to the underbust seam where it meets the side panels. I’m not sure if the same trick would work on other cowl neck (or even surplice / wrap) tops. But it certainly is worth experimenting with for those that threatens to expose your girls!

So there you have it, from tarty to classy (or Grecian-inspired anyway) in 24 hours. Or maybe 48.

And I would like to thank Big Bertha. I couldn’t have done this without her. Even though she’s getting a bit lumpy. (Me also, but in different places.)

Bandeau Tube Top: Carrie or Tarty?

So, as I only needed half of the fabric width for my Endless Dress waist band, I turned the other half into a matching Bandeau Top.

bandeau_s_3bandeau_0_1Fbandeau_0_2SLbandeau_0_3B

bandeau-satcI was thinking SATC Carrie (S2 E17). My other half’s verdict? “Tarty”. Men. Go figure.

In any case, it can still act as a Modesty Preserver for my Endless Dress, now that I’ve learnt that yards of skirt attached to a flimsy bodice = wardrobe malfunction.

Making of this bandeau top should have been dead easy. But it was actually like solving an Escher puzzle. Or a game of Twister.

FYI, this is how NOT to do it:

bandeau_oops_1bandeau_oops_2

While it looked neat and tidy, when I turned the thing right side out, it was all twisted the wrong way. (Sorry, forgot to take pictures for your and my education.) I had to unpick the bottom edge. Then from the right sides fold in the seam allowances, grab hold of the SA inside and pull it out for sewing. Sewing the full circle the correct way was a twisted and Escheresque experience. But turned right side out everything fell right into place.

I’m sure there must be a clear how-to in some sewing book or somewhere online. But I didn’t have the luxury of time to look for it. I got a whole travel wardrobe to sew!

As you can see, I’ve already thought to make the top less flimsy by adding the Power Mesh underlining. So that’s one point against tartiness. Plus the top and bottom edges are reinforced with clear elastics. That’s another point against tartiness. Having said that, wear it in weather inappropriate Britain, and I can definitely see tartiness creeping in. Guess it’s another garment that’s not going to get much wear }:-)

The ever festering dress

I’m on route to my brother’s graduation with nothing to do on the flight. So finally, some time to catch you up on the gazillion projects I always seem to be working on (if not finish).

First off, a lemon.

It started life as a RTW dress from Camden Market. As expected of the Camden aesthetic it’s a bit Lolita Goth. It’s an interesting combination of a thin stretchy knit that clings for the long sleeve top and a floaty soft muslin for the A-line gore skirt. Inside the skirt at each vertical seam there’s a twill tape that allows you to draw up the skirt to form irregular bubble hem.

camden-dress2-0-2camden-dress2-0-3camden-dress2-detail-1

I liked the dress well enough, but that knit top was never going to keep its shape with a full skirt dragging it down. So I decided to multiply my investment and turn each section into a separate garment.

First off, the skirt. I thought I’d keep to the Victorian Undergarment feel and keep it light and airy in thin China Silk and as a pull on with no zip, no closures. After much agonizing I settled on a spaghetti strap camisole top with empire waist in the front slopping to a natural waist in the back. I didn’t have the right shade of matching off-white, so I went for what seems like a complementary shade light mocha, along with a lovely organdy ribbon with gold scroll print for a border.

camden-dress2-dsgn camden-dress2-detail-3

For pattern, I base it on my most recent bodice sloper result. camden-dress2-patternThe bust darts have been pivoted into one single French dart, and bodice cropped at under-bust in the front. The back waist darts have been pivoted out, resulting in a continuous curved back piece. But I then had to pivot the dart back in to make the waist big enough to slip the dress on. OK, no big deal I thought and continued my merry way finishing the damn slippery top and attached it to the skirt.

Boy was I wrong. The result was less than stellar. The combination of the color and silhouette just does not work for me. Especially in the back where the unflattering puffy band of the back bodice cuts my body into unflattering proportions.

camden-dress2-1-F-3camden-dress2-1-SL-2camden-dress2-1-B

The angle of the straps also look a bit weird. But I had to shift them so close to the CB to prevent the straps from falling off my sloping shoulder / muscular neck.

I tried my best to style it to no avail. So it’s a case of “Sounds Good In Theory…”

camden-dress2-2-04camden-dress2-2-05camden-dress2-2-07camden-dress2-2-10

But fear not. The dress isn’t going to be binned. camden-dress2-detail-2

The doubled spaghetti straps with matching bows are too pretty to bin. I’m just going to dissect and multiply the dress again and turn this lemon into a lemon meringue. Stayed tuned to find out what becomes of 1 that became 2 that then became 3 dresses.


Burda Style, it’s complicated

Being formerly American, I’m fairly new to the world of Burda Style magazines. Most of my past pattern purchases have been Vogue Patterns. But since I started lurking on other sewists’ blogs a year ago, I started buying the odd issues. I did consider subscribing, but (A) it’s not any cheaper, and (B) our love affair has not been true and constant. Towards the end of last year there were a few months of love-ups. But recently it’s been mostly blah disappointments.

That’s until the current issue. I saw this picture in the July 2012 issue and I just had to get it:

“But it’s just a simple square top!” I hear you protest. Well yes. I didn’t exactly buy this issue for the patterns. I bought it for the image of this scarf fabric. Because it reminds me of another Restyled Ready-To-Wear in my closet…

Like my newly decorated sewing room, the colors and pattern make me happy.

It’s from Top Shop, a second-hand top I think. There was only one on the rack and it’s made from this 70ish plasticky polyester. I wish the fabric were smooth drapy silk, for the original design might have worked better. As it was, I had to restyled it to avoid looking puffy. Here’s the Before & After diagrams (click on the images to enlarge and see the details):

The alterations:

  1. To create a slimmer silhouette I cut apart the sleeves from the bodice along the original stitching lines. Sewed the front & back side seams I just created about 2/3 way up. Hemmed the remaining part of the slits to create Japanese style kimono sleeves. (See close-up photo below.)
  2. To further slim it down I replaced the elastic gathering at the waist with loops at the waist side seams that pull the extra fullness towards a couple of buttons on the back. (See enlarged After diagram above.)
  3. For a bit of Greco-Roman flair – and that all important extra wearing option – I opened up the shoulder / sleeve top seams part-way to create slits. (See top two photos below.)
  4. Lastly a decorative waist tie thrown in for good measure. A couple of venetian beads weigh these fabric tubes down.

Et Voilà…


I like it too with a couple of shawls for a remotely English Civil War inspired look. In my rather irreverent muddled head anyway.

And back to Burda Style 7/2012…

I’m hoping to track down scarfs like the one used in that series of patterns. Sadly Roeckl, which supplied the ones used in the magazine, doesn’t seem to have that exact pattern anymore.

Anyone has suggestions for where to look?

Older But Not Wiser

Decades ago, when I was a relative sewing novice, I was much more adventurous with my sewing.

Slapdash Pattern Happy!

I thought nothing of my poor techniques, and happily dabbled with making my own patterns. Like this dress…

Apology for the blurry photos. My Mom wasn’t exactly ace with the camera and this was in the days before digital cameras. So you had to wait for the films to be developed to find out that you got some dud photos!

Note the stiff exposed back zipper. The collar probably wasn’t properly interfaced either. But it was my own design, probably inspired by some magazine photos. And then there’s this one…

What was I thinking of? LOL. My head was in the cloud back then. I don’t even remember making this one. (You know I must love you to share such unflattering photos of myself with you! 😉

Designer Love Love Love!!

Many were the attempts at copying designer clothing I liked but couldn’t afford. There was the Romeo Gigli coat wannabe I wrote about a while back. But my main love back then was the Japanese design house COMME des GARÇONS.

Here’s an example, modeled after a skirt from COMME des GARÇONS Spring Summer 1988 collection…


With the twinkly sequins and sparkling tear drop crystals, the lace skirt was like the widowed Scarlett O’Hara on a crisp rainy day. Rain in its romantic glory of course, not London gloomy.

And another inspired by COMME des GARÇONS Autumn Winter 1988-89 collection…

A red flannel pleated skirt with crochet lace embellishment and self-fabric belt.

I love that folklore inspired collection! There were many more ideas that I didn’t get around to try out.

From the next collection – COMME des GARÇONS Spring Summer 1989 – there were at least two more…


A gathered skirt with one panel folded back up at the hem and hand drawn Renaissance style Pierrot characters.

The blouse pattern was rather interesting. The sleeves were cut as one with the bodice, not separate pieces. They were like bat-wings extending up beyond the shoulder seam. Halfway up the armholes they separate from the upper armhole of the bodice, then were gathered and reattached to the upper armhole. You know those Japanese designers, they like their origami! And yes, those are pom-pom faux buttons.

Sometimes I’d take the liberty to “improve” on the original. Like with this Marc Jacobs dress. I made my version reversible.

Bring On Them Tailoring Challenges!!!

I also wasn’t afraid to tackle tailoring. Here’s my first Vogue suits – Vogue Pattern 9199…

The result is a bit conservative for me at the time, so I didn’t wear it much and have no idea what happened to it.

But then under the lens of the right photographer – my university friend in this case – even a plain old suits can look fashionable!

That suits though didn’t make use of proper tailoring. But this Vogue Pattern 1224 one did… Apology about the lack of mug shots. I guess I used to take sewing for granted so didn’t think to document my projects. Anyway, this one had the pad stitching, the hair canvas, the roll line tape  and everything.

Jolly Old Midlife Crisis!?!?!

So what happened? Well this for example:

Note all the drag lines. Fitting has never been my forte. Nor was picking the right proportion and silhouette. The V1224 suit above for example had wide lapels and extended shoulder that doesn’t really flatter my short-waisted figure. I also didn’t think to lower the waist band slightly to create the illusion of a longer torso. I mean a waist goes where your waist naturally is or where the pattern designer intended it to go, right? So naive I was. I simply took instruction and the pattern at face value. I didn’t think to customize it to suit my own figure quarks.

The other thing that happened was aging. Although I wasn’t great at fitting, stuff I made before didn’t look too bad. The T-Shirt above is actually a recent make. Shock Horror – my figure has changed. And in exactly the ways described in Fit For Real People! The rounded upper back, forward shoulder, fuller bust front and narrower back, fuller tummy, sway back and droopy behinds. You name it, I got it. Makes fitting so much more difficult.

Hence my current obsession with making slopers instead of lovely clothing from the Big 4 patterns  and Burda magazines I’ve collected.

What about you? Have you grown wiser with age and sewing experience? Have you ever hit a sewing midlife crisis like me & got over it? Please, please tell me there’s light at the end of the tunnel! 😉