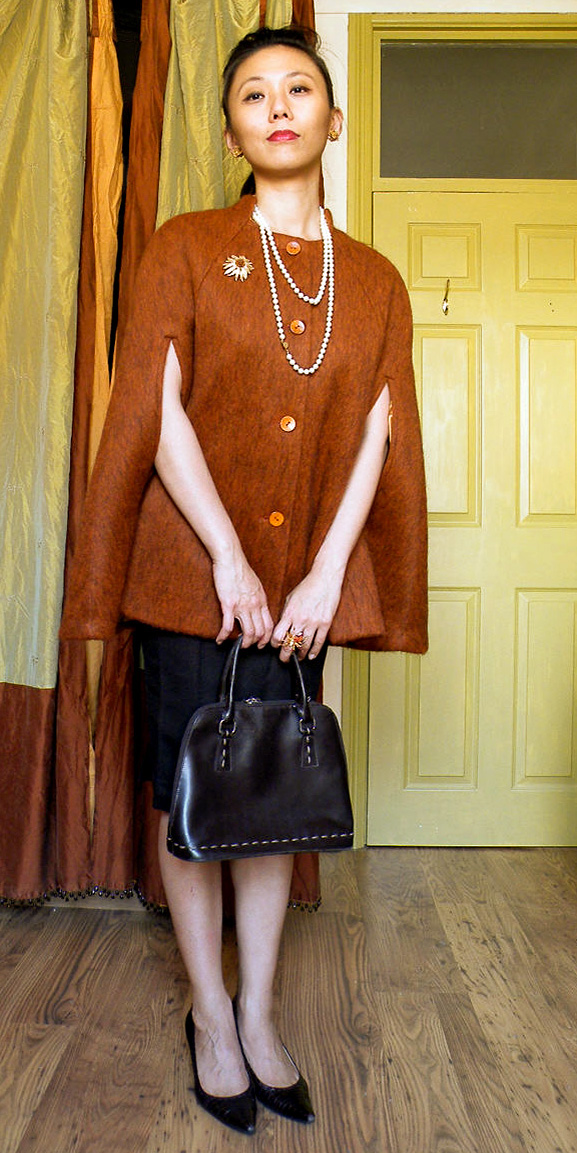
World, meet Crumb Catcher Cape

As promised, here comes the sun and the show-n-tell…

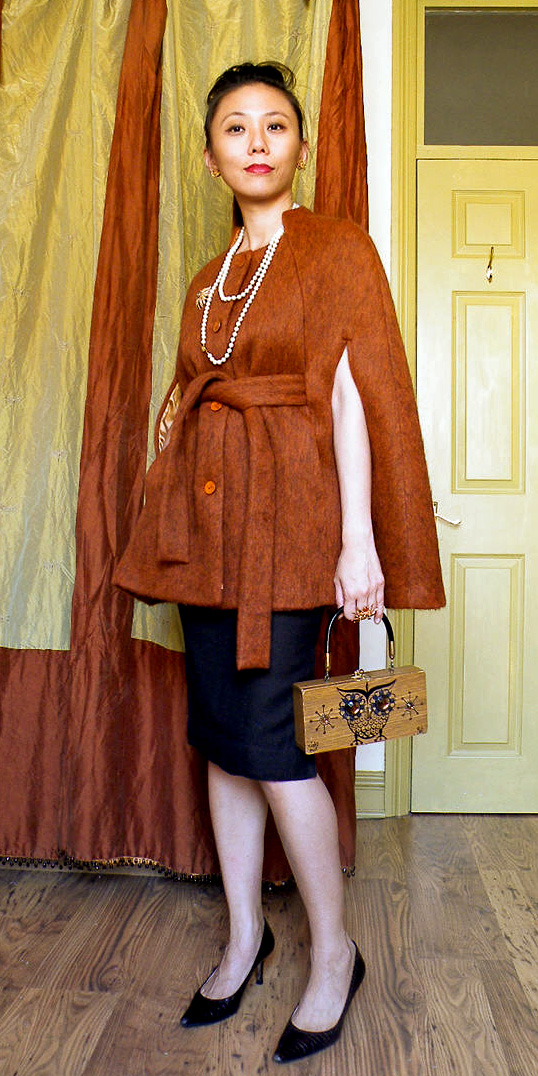
Styled with suitably retro box handbag & pearls…

Or my beat up John Lewis handbag, held together now with safety pins. But fear not, for I’ve already planned to make a copy with scraps from the cape…some day!

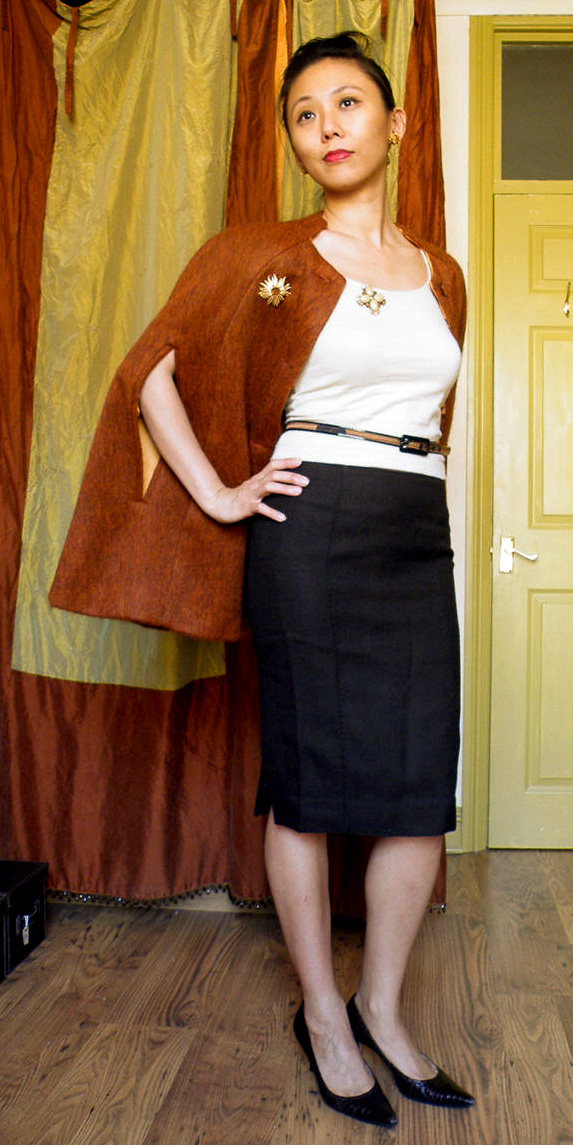
With home-made close-fitting T-shirt (mentioned in previous WIP posts) and pencil skirt (part of a 2-piece dress. More another day.)

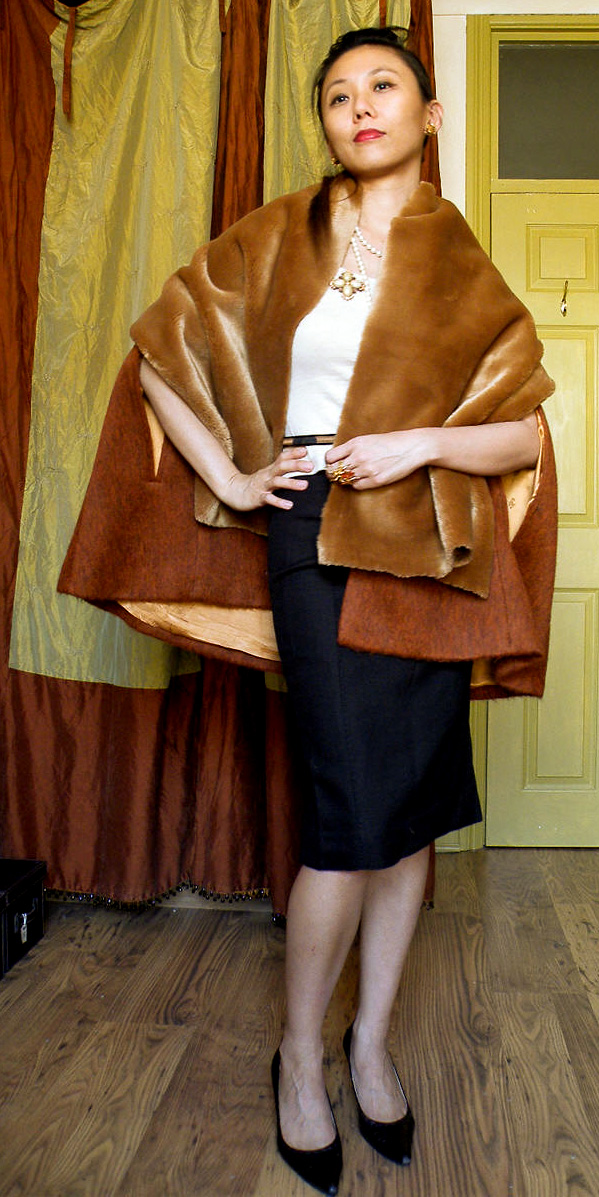
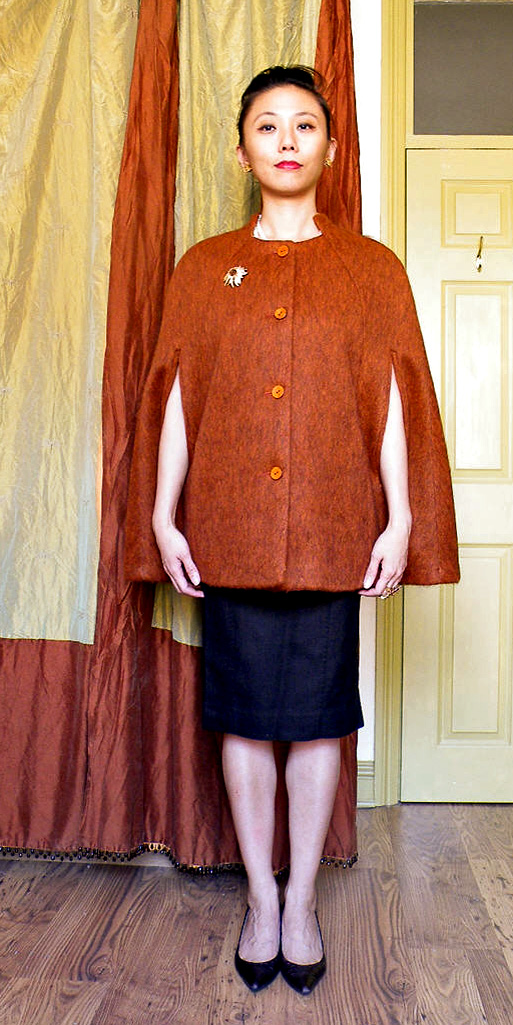
Simply posed, befitting a late 50s early 60s style cape.

Or decadently OTT with faux fur / suede WIP stole.

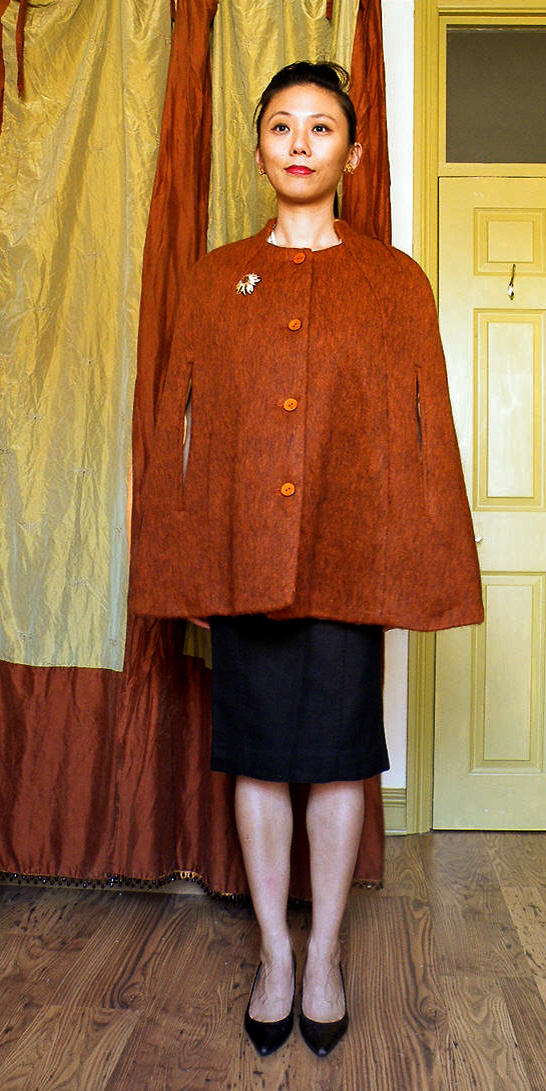
The obligatory mug shots

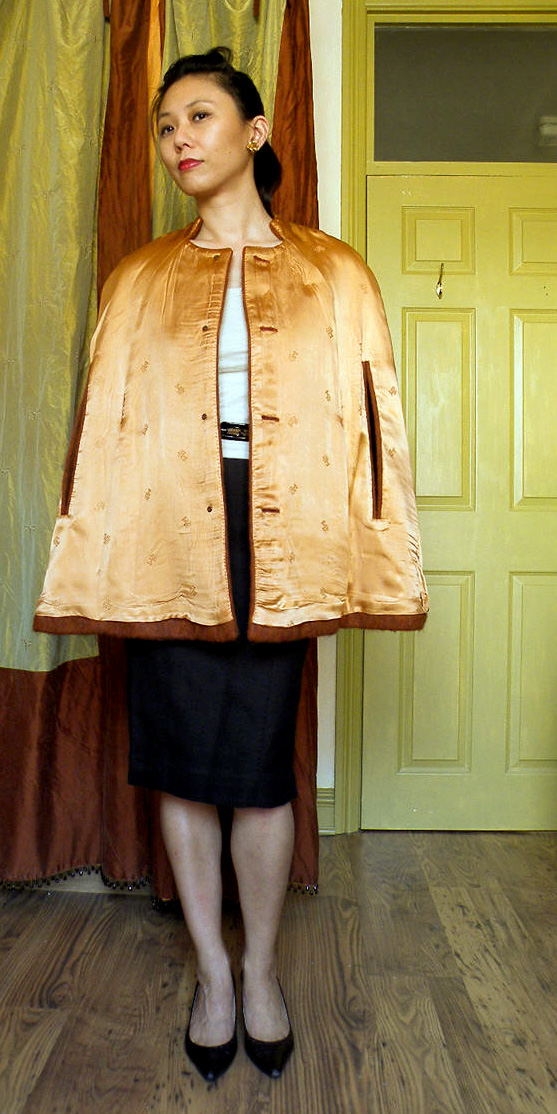
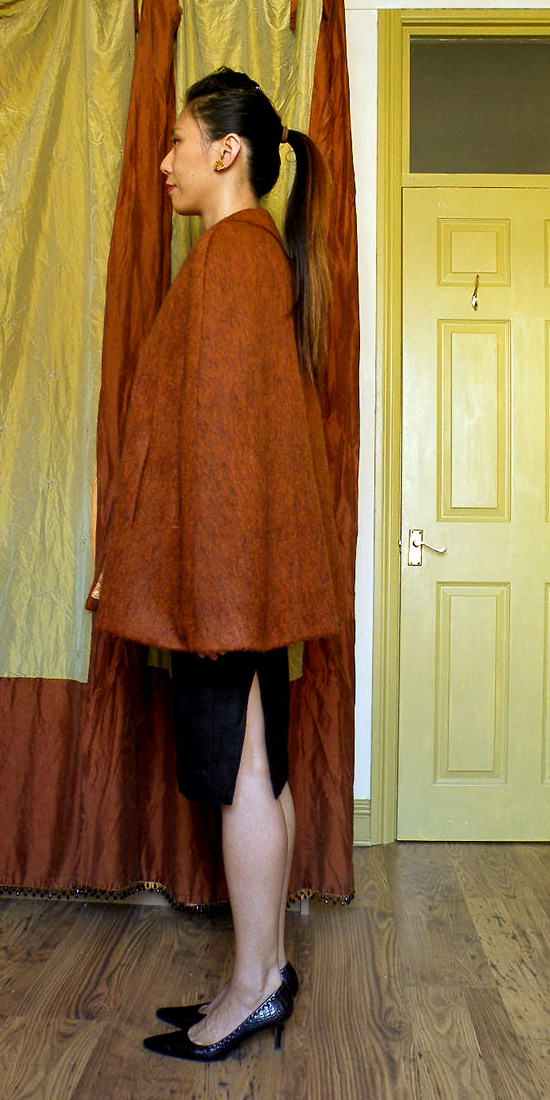
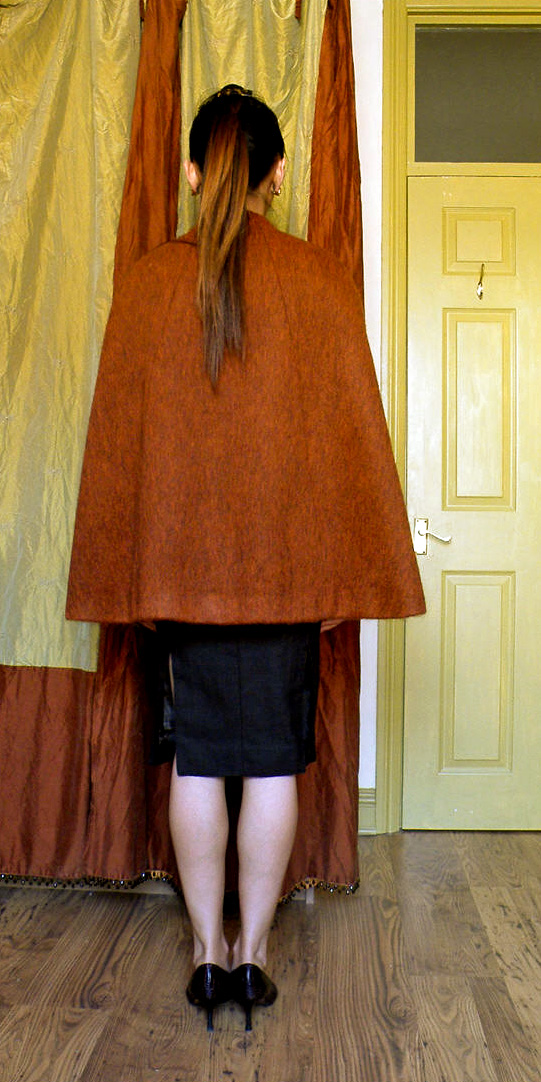
front side & back

The new double-welt arm slits sit properly at the sides.

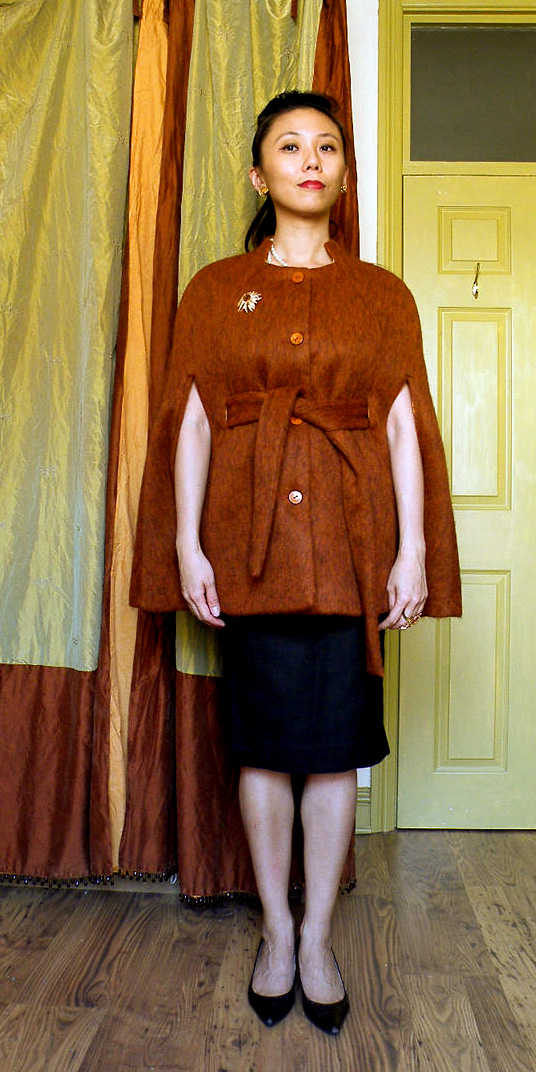
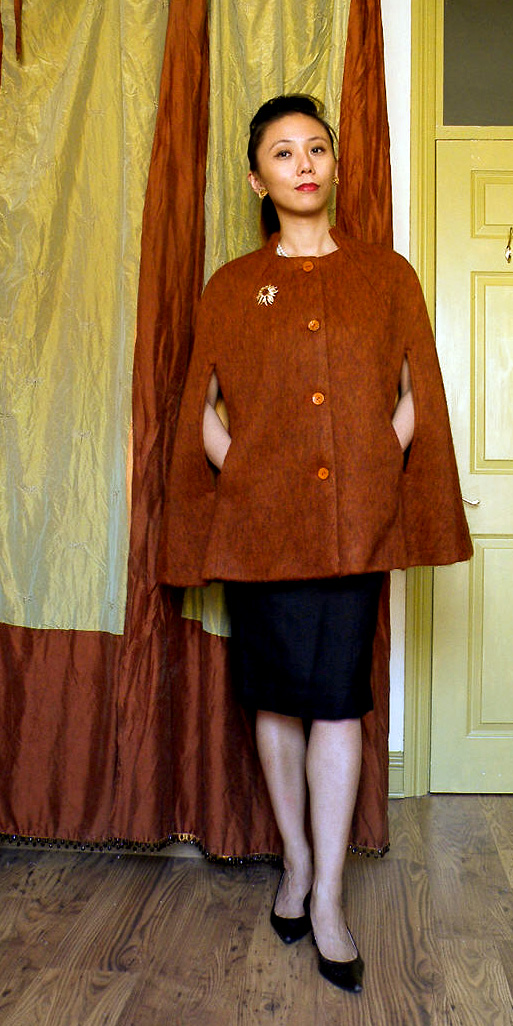
One way is not enough!

Optional tie belt comes out of small slits just above the pockets.

The old arm slits are now handy cozy pockets.

Almost edge-to-edge lining keep scratch wool at bay.

Erm, I guess the lining could do with a good ironing.

And the ongoing sewing commentary

Most of the alteration & sewing details have been mentioned in previous posts. Here’s the rest.

  • Attaching the lining was a bit of a pain. I tried to bag it, but had to hand-sew the various slits.
  • And I still haven’t  figured out a good way to sew edge-to-edge lining so it doesn’t peep  at the edges. Inter-corners too were a nightmare.
  • The button holes I attempted with on the Husqvarna Viking Sapphire 830 with one-step buttonhole stitch. I had 5 or 6 to choose from. Lucky me. But in the end I went over again with hand-worked blanket stitches. Because the white interlining was poking through the cut edges. And because I want some practice for future bespoke tailoring projects. Lucky for me I have a men’s tailoring booking (Classic Tailoring Techniques: A Construction Guide for Men’s Wear). Because Claire Shaeffer’s Fabric Sewing Guide doesn’t have very good instruction on hand-sewing button hole. Well, not enough clear pictures anyway.

Finally, the verdict…drum roll please

All in all I’m quite pleased with the results, despite the less than stellar sewing. Hence all the smug shots. Hey, it’s not everyday that I finish a sewing project.

Now if only Old Blighty’s weather would give me a few more days of mild weather to wear my spanking new cape…

Pies in the Sky

And while I’m waiting for the sun to get out of  bed, here’s the original Idea Doodles for the embroidered silk I’m now using for the Draft Along (the ones at the bottom, obviously):

I used to sketch better, having taken both art classes and fashion design classes. Nowadays though, my drawing skills are a bit rusty. But not as rusty as my self-taught almost non-existent pattern-drafting skills. Here are more Idea Doodles, almost all of which I haven’t managed to turn into reality yet.

But I’m getting better. If I can pull off the Draft Along I’ll be one step closer to rehabilitation. And maybe one day soon it’ll rain pies from the sky, and I’ll be able to show you me (or Big Bertha) wearing some of these designs!

Detour to a Retro Draft Along

Furry cape has stalled. I’ve been too distracted by Petit Main Sauvage’s Retro-Dress Draft-Along to finish off the cape.

Indecisions Indecisions Indecisions!

So the usual then…I’ve always wanted to make some retro garbs. I’ve pined my way through Wade Laboissonniere’s Blueprints of Fashion: Home Sewing Patterns of the 1950s countless times. I even have a few issues of 1950’s Vogue and Bazaar. But when it comes to the crunch, I couldn’t decide.

As Petit Main Sauvage said, we don’t have 1950’s figures anymore. And I have one too many No-Breathing sewing projects as it is. So the classic fitted bodice and puffy skirt is out of the question.

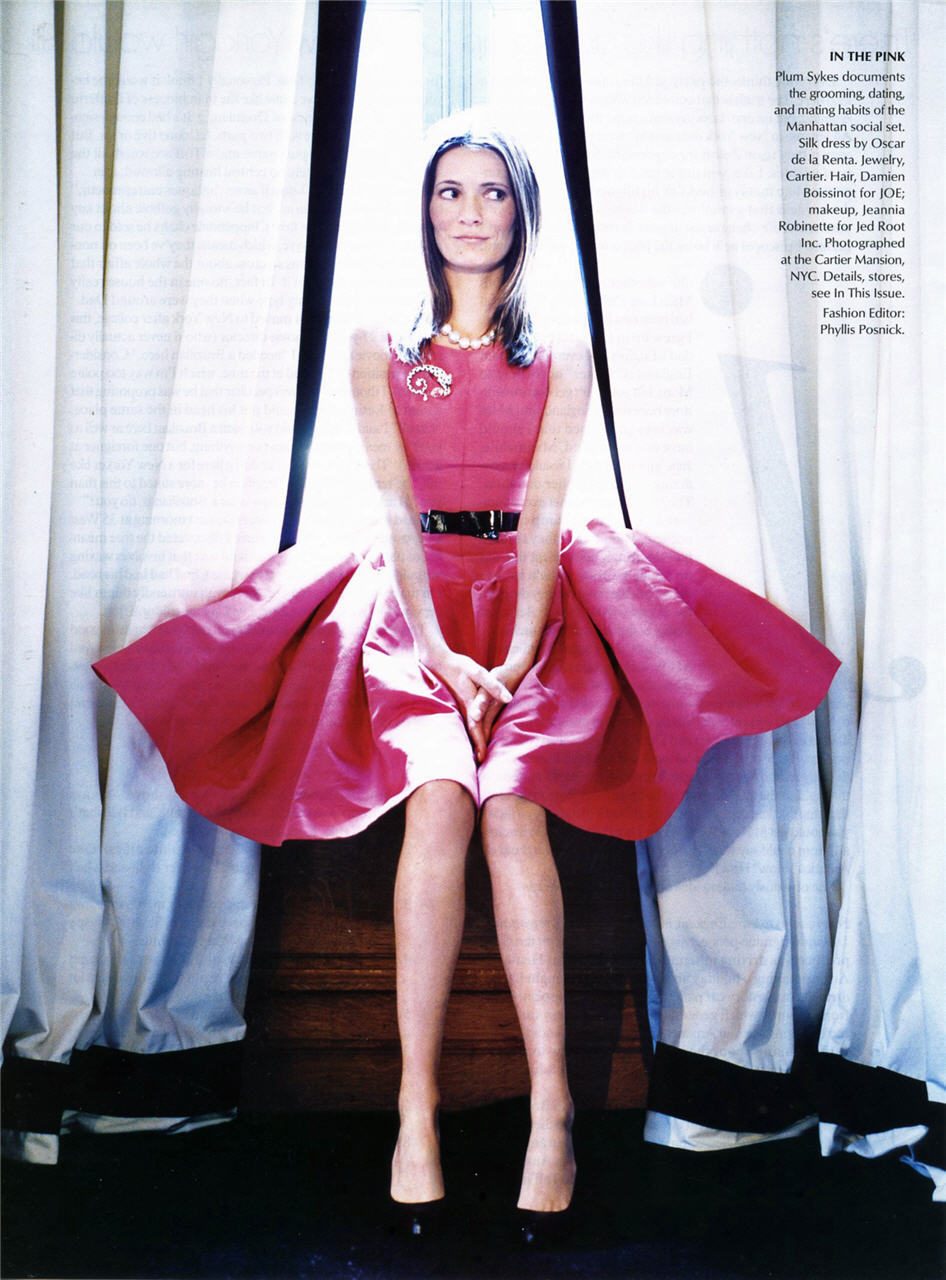
Plum Skyes in Pink DressI was a bit tempted by this take modelled by Plum Skyes in an old issue of American Vogue.

The lowered waist works much better on modern figures I think. It’s easier to see the waist and it elongates the torso so that it’s not so squat & square.

But most puffy skirt dresses takes yards and yards of fabrics. And most in my stash are only 2-3 yards each.

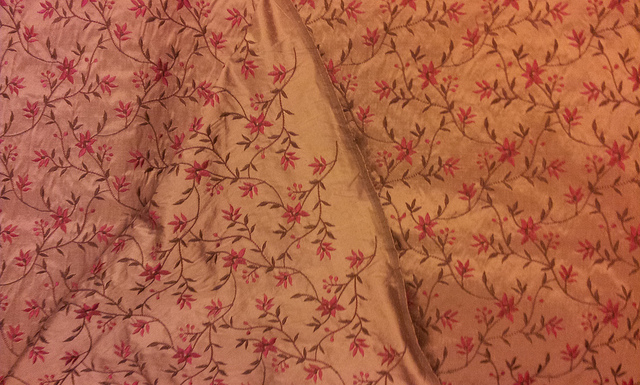
So I needed a different strategy than the others, who started by analyzing their figures and what silhouettes suit them. I started with a fabric, one that I have yards and yards of.  I ended up with this:

Prime candidate draft along

I was going to make an A-line summer coat with CF bust darts like a coat I saw in a Notting Hill boutique ages ago. I’m still hoping there’ll be enough left over for this.

The other consideration was that I needed a simpler design. Simpler than ones I’d usually be attempting. Otherwise I’d fall behind the Draft-Along schedule. But a plain fabric with a plain design is just…Yawn. So an embellished fabric like this would be just the ticket. It’s too fussy for intricate details. It’s my way of tying my hands, or in this case my imagination, so I don’t go OTT.

OMG, a decision finally!

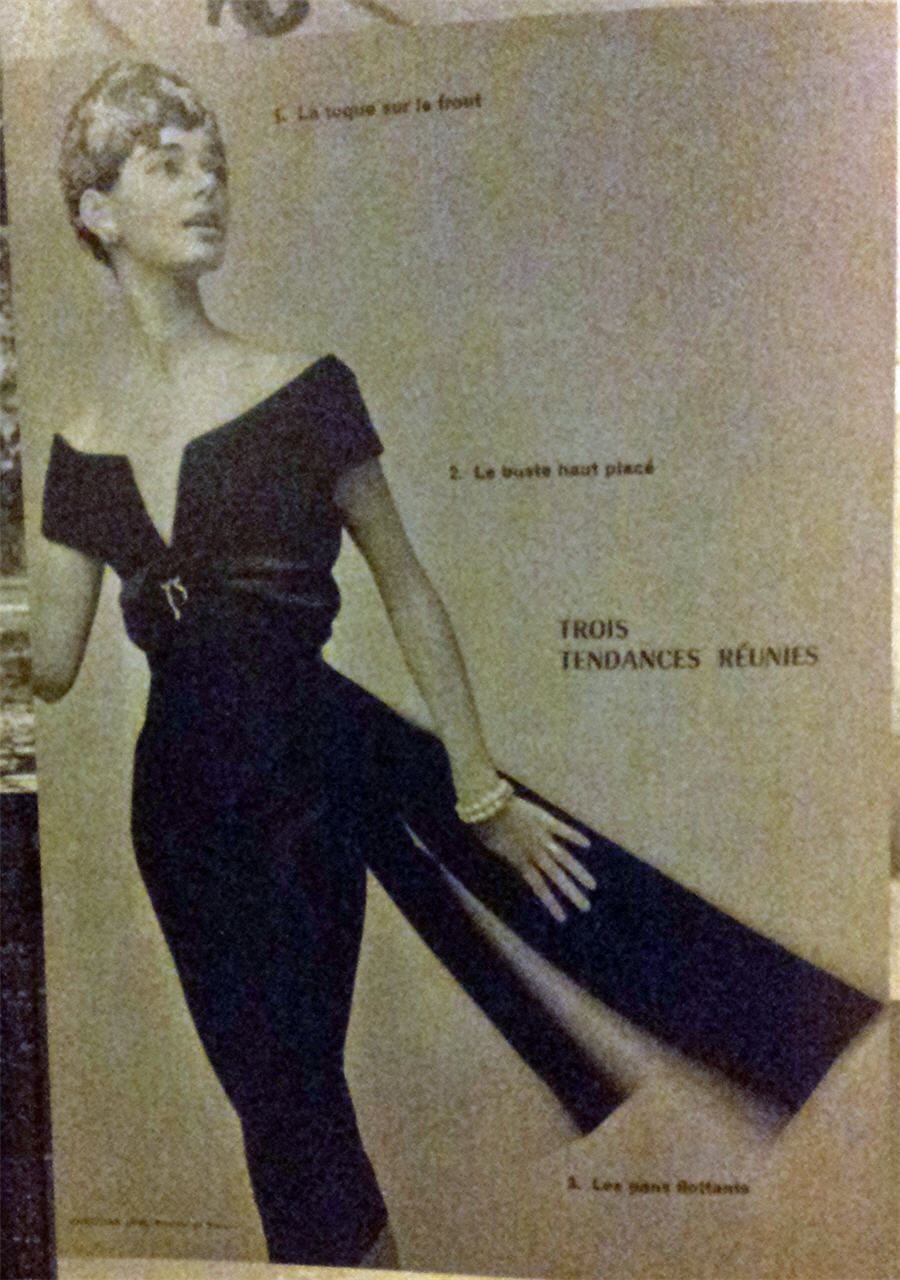
Christian Dior Winter 1955-56In the end, my inspiration was this Christian Dior dress from Winter 1955-56, published in L’Officiel No 81, 1000 Models: Dior 60 Years of Creation.

I like the slimline shape coupled with the extravagance of the back sashes, the slight off the shoulder v-neckline alluding to a womanly hour-glass shape. But it probably requires a fabric with a bit more drape than my embroidered silk. And the neckline is perhaps a bit too risqué for every day wear.

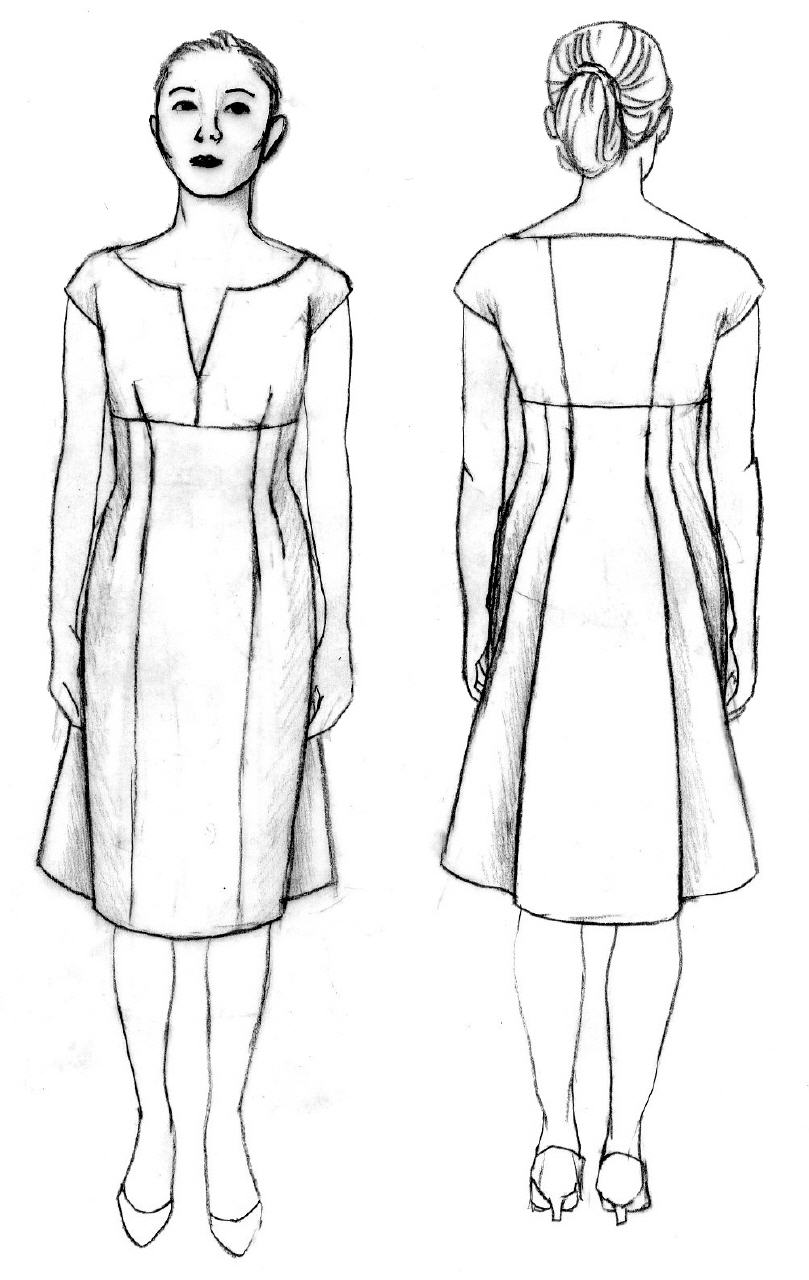
Retro Dress Draft-Along DesignSo here’s my adaptation:

Bodice with raised / below bust seam fitted through high hip. Cap sleeves of some sort. Pencil skirt in the front and pleated skirt in the center back to mimic a overskirt. (Nope, a leopard doesn’t change its spots. Commit to one style – are you kidding?)

I’m still not sure about the sleeves and top back. And the skirt design is a bit of a risk. But nothing ventured nothing gained, right? (She says nervously.) The drawing by the way, was done on a custom croquis.

Custom Croquis Instruction

Basically you take photos of yourself in close-fitting garment like swimwear, leotard, or underwear. Do front, side, & back. Use a tripod if necessary. Then print out & trace out the outlines to use as your croquis / design dummy. Or if you have Photoshop or Gimp, try this YouTube tutorial on turning photo into a drawing. Then you can play paper doll with yourself & your own designs! Simple.

I’ll leave you with this image of Big Bertha caught in the act:
Retro Fabrics 2
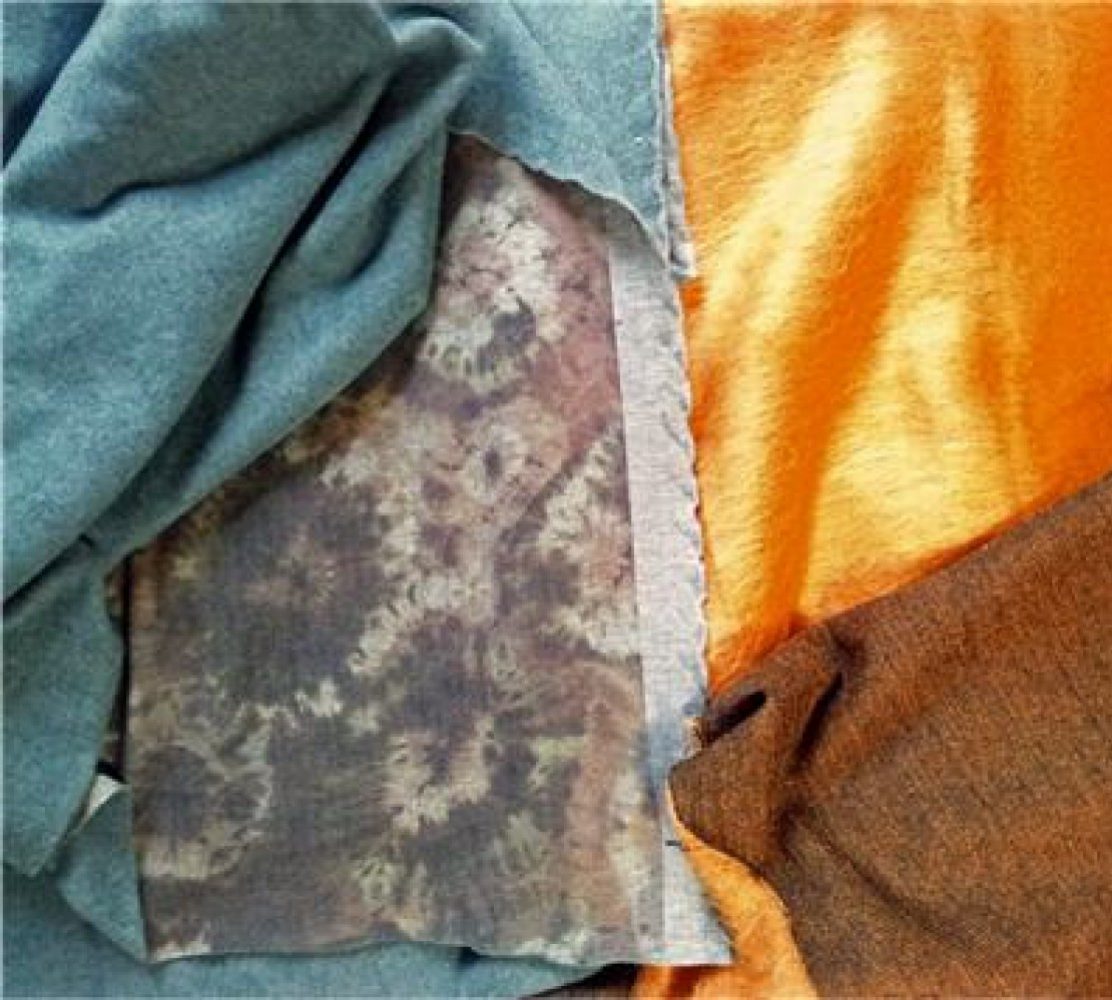
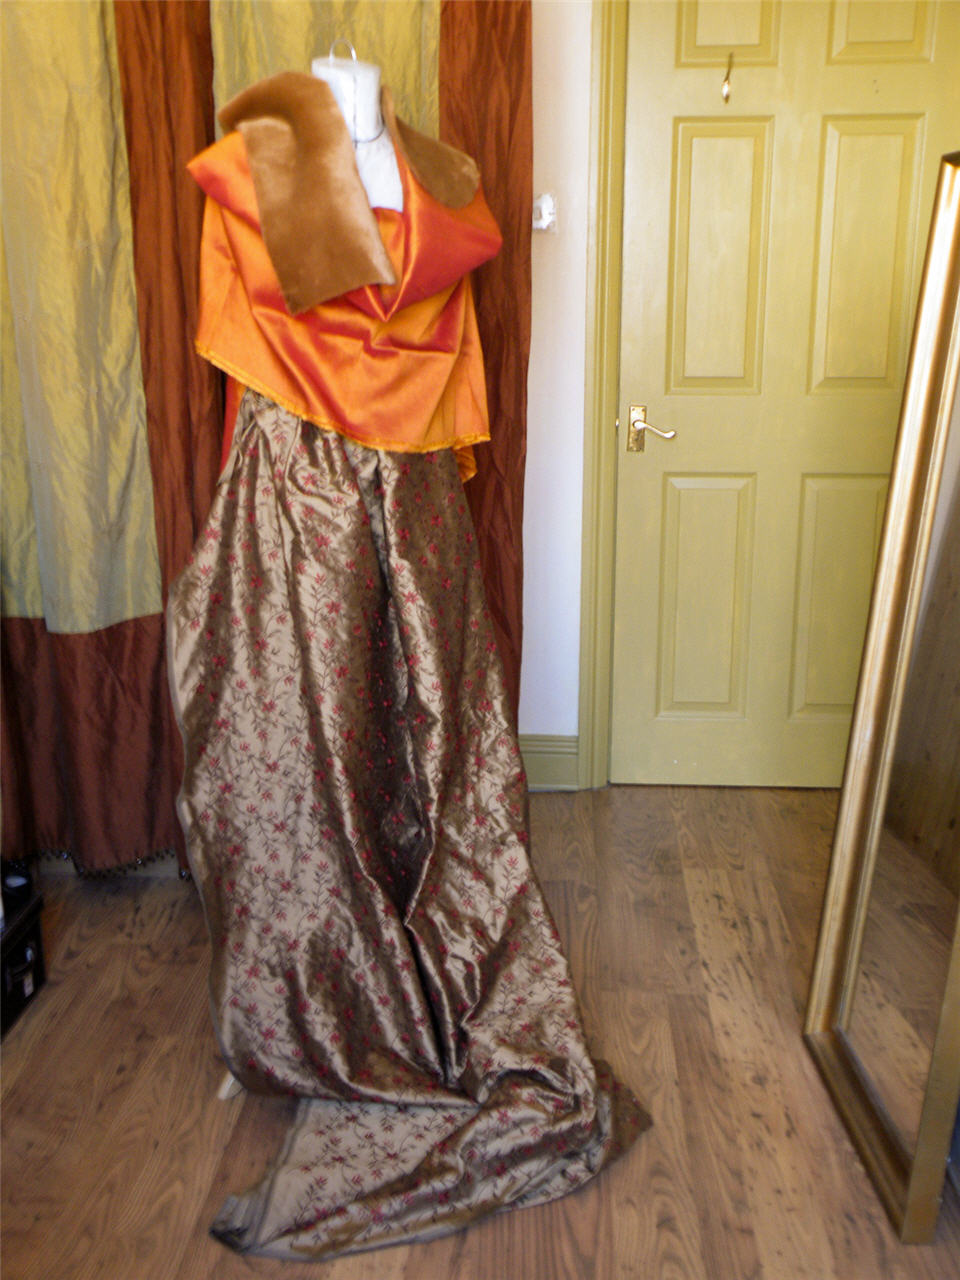
Big Bertha getting decadant & vain: Pilfering another piece of silk I was considering as an accent fabric, and my furry pillbox hat-to-be on her neck. It’s faux fur on one side and faux suede on the other. I’m too scared to sew into it as any mistake would be fatal – the faux suede once pierced is pierced forever. But winter is coming so one day soon I will take the  plunge. Especially as faux fur stole seems to be all the rage in the shops right now.

Cape WIP

No, I haven’t been playing truant. Work’s been rather stressful, so progress is slow with the cape. I’m almost there. Just need to attach the lining, finish the hem, the button holes and buttons. In the meanwhile, here are some WIP pictures. Non-sewers be warned – plenty of boring sewing details to follow!

The fitting tweaks…

So, after my disappointing muslim of Burda Style 2011-08-112, I enlisted the help of Big Bertha, my duct-tape twin (more about her some other day). She made me realise a few truths.

  1. My shoulders are lopsided.
  2. All those massage therapists weren’t lying, I do have shoulders of concrete.
  3. My neck sticks forward like a chicken, which is why all those RTW shirts gape at the back of the neck and choke me in the front.
  4. And finally, all those fitting experts weren’t lying either, if it doesn’t fit at the shoulders it won’t fit right elsewhere.

Here’s the muslim on Big Bertha…Back shoulder seam has been let out at the neck base to accommodate my concrete back shoulder muscle.  Similar amount has been removed from the front shoulder at the neck base…

All of a sudden the whole things hangs much better. Even the weird lumps at the upper arms seem less noticeable and the arm holes less restrictive.

But I decided to smooth out the lumps anyway and move the  arm holes as planned so I can gain some useful pockets.

I also let out a bit at center front for my chicken neck to roam freely.

Here’s the final patterns…

On the left are side-front & front, on the right are back & side-back. The new lines drawn on the old Burda patterns for comparison…

So the shoulder points have been moved inward & upward. I also increased the hem width of the sides by pivoting from the shoulder points to make the cape feel less constrictive.

The double-welt arm-hole and the pockets are my additions too. The arm-holes now align with my arms naturally at my sides. The top of the arm holes are about 2″ above my elbows to accommodate bent arms without bunching up above, and they extend just far enough  so I can comfortably stick my hands in my spanking new in-seam pockets! See…

And of course I can’t possibly commit to just one way of wearing it. So belt holes have been added in the front side seams just above the pockets.

Here they are, tried on with my Topshop trench belt for size & positioning.

So, with the patterns happily settled, the sewing commenced.

All cut out and…Oops!

Here are the fabrics all cut out, and reinforcement interface ironed on. Now for the oops…What is a sewing project without an Oops right?

In the dim light after work I stupidly forgot to check the direction of the nap. This fabric has texture a bit like pony skin with furry nap running downward. I cut the fabric upside down, so the nap runs upward. Great for catching crumbs! At least all of the pieces are in the same direction. Anyway, too late to cry over spilt milk & all that. So soldiering on…

Double-welted arm-hole slits

face

back

  • The arm hole slits being on the bias I thought I better interface it to cut down stretching.
  • Bulk was a bit of a worry. I allowed a bit extra width for the welt than I would on thinner fabrics. So 2 welts added up to 5/8″ width. I cut separate fabrics for each welt and staggered the seam allowances so that when finished, they’ll be graded for a gentler slope rather than one hefty 3 layer 1/4″ cliff.
  • Machine basting some guidelines followed by hand-basting kept the seam-rippers at bay. And voilà, here’s the finished welted slits.

face

back

And now for some Pocket Magic!

  • The original in-seam slits have been converted into in-seam pockets. They sit just below the waistline and I made sure they’re big enough for my hand. And my Oyster card. And my smart phone. What after my expensive disaster with Lilliputian Topshop trench pockets I was taking no chances.
  • They actually sit just inside the seam. I had cut 3/4″ seam allowance to accommodate the thick fabric. The pockets are sewn to the bodice with 1/4″ seam allowance, leaving about 1/2″ of coat fabric acting as facing. This prevents the lining fabric pockets from poking out, but without the bulk factor of a separate facing.
  • The pockets are actually backed by fitting muslims. I was paranoid that keys & co. will poke holes in my pockets no sooner than I finish the cape. So preventative reinforcement was patched on. OTT I know. Here are some lovely views of the innards….

What do you think? Should I just wear it out like that – yes, inside out? 😉

The state of the affair…

Look rather dashing don’t you agree? 😉

Just wait till you see what I have planned for the leftover! Yes, I’ve managed to squeeze enough for a handbag from the scarp. But plan for how to put that together is fuzzy as fuzzy can be.

One thing at a time. First get off this blog and get that old Viking Sapphire cranking!

Cape of Hope

I’m deflated. I thought for once I’ll be able to whip out a bought pattern design quickly then move on to fight my war with the moths. No such luck.

I traced the cape pattern 112 from Burda Style 2011-08. I then decided to make a muslin fitting first just in case. I reckon I can reuse the muslin as underlining for the cape itself, wool being generally too scratchy for my sensitive skin and an extra layer between the fabric and lining helps greatly.

So yesterday, I got the muslin basted together, tried it on. Shock horror, I look like a…

…fully padded out American footballer.

And here’s me & my cape…

See what I mean?

Worst yet, with all that extra room in the shoulder area, I still couldn’t move my arms freely if the cape is buttoned up. The holes for the arms are too close to center front for comfort. I want to rest my arms by my sides. I don’t want to walk around with my elbows glued to my waist and hands folded!

I don’t know if it’s meant to be that way – I’ve never wore a cape before. Anyway, it’s not comfortable. And I know I won’t wear it if it’s not comfortable.

I’m so glad I haven’t cut into the fabric yet. But what to do now?

I was feeling so flat last night I thought I’d ditch the cape idea and find another pattern for this fabric.

But then I found these cute capes on Asos this afternoon, and they gave me some ideas…


I’ll convert the original arm slits into in-seam pockets and make a slash on both side front panels for new arm slits where it’ll be closer to my sides and more comfortable. I might even raise the slit top a bit like the bottom two pictures, or maybe add welt to the slits like the top picture. That should fix the comfort problem and give me two useful pockets to boot! (It’ll definitely be lined, unlike the Burda original.)

That footballer shoulders will still need to be fixed somehow.

And I’m hoping I’ll have enough fabric left to make a handbag.

Like this Queen of Heart Bowling Bag from Hot Patterns:
(…which supposedly is inspired by a Vivienne Westwood handbag)

Or the Hepburn Handbag from Aspinal:

(I don’t know why it’s so difficult to find patterns for classic structured handbags. All the patterns I’ve seen tend to be oversized, or too casual. Crafty quilty country totes just aren’t my cup of tea.) Orange wool with the hand of cowhide + brown faux leather trims. What do you think?

Anyway, here’s to hoping that I’ll be back on track this weekend!