Golden Cowl Neck Tunic

OK, one last make for the holiday. This time it’s a restyle job. And it was an eleventh hour job. I was still up at 7am the day we flew out trying to finish it. So sewing quality is quite iffy. And fit can be improved a bit in the back, as usual. But I’m fairly happy with the design overall.

Without further ado, I present….

Before: Tarty

vs-gold-dress_1vs-gold-dress_2vs-gold-dress_3vs-gold-dress_4

This was a convertible dress from Victoria’s Secret. And as I’ve written recently, I’ve gone off convertibles because they’re quite fussy to wear with high risk of wardrobe malfunctioning.

This one I find especially tarty because of the ruching on the skirt CB. I don’t have curve down there and normally I’d appreciate a bit of shapely illusion. But this is way too much attention.

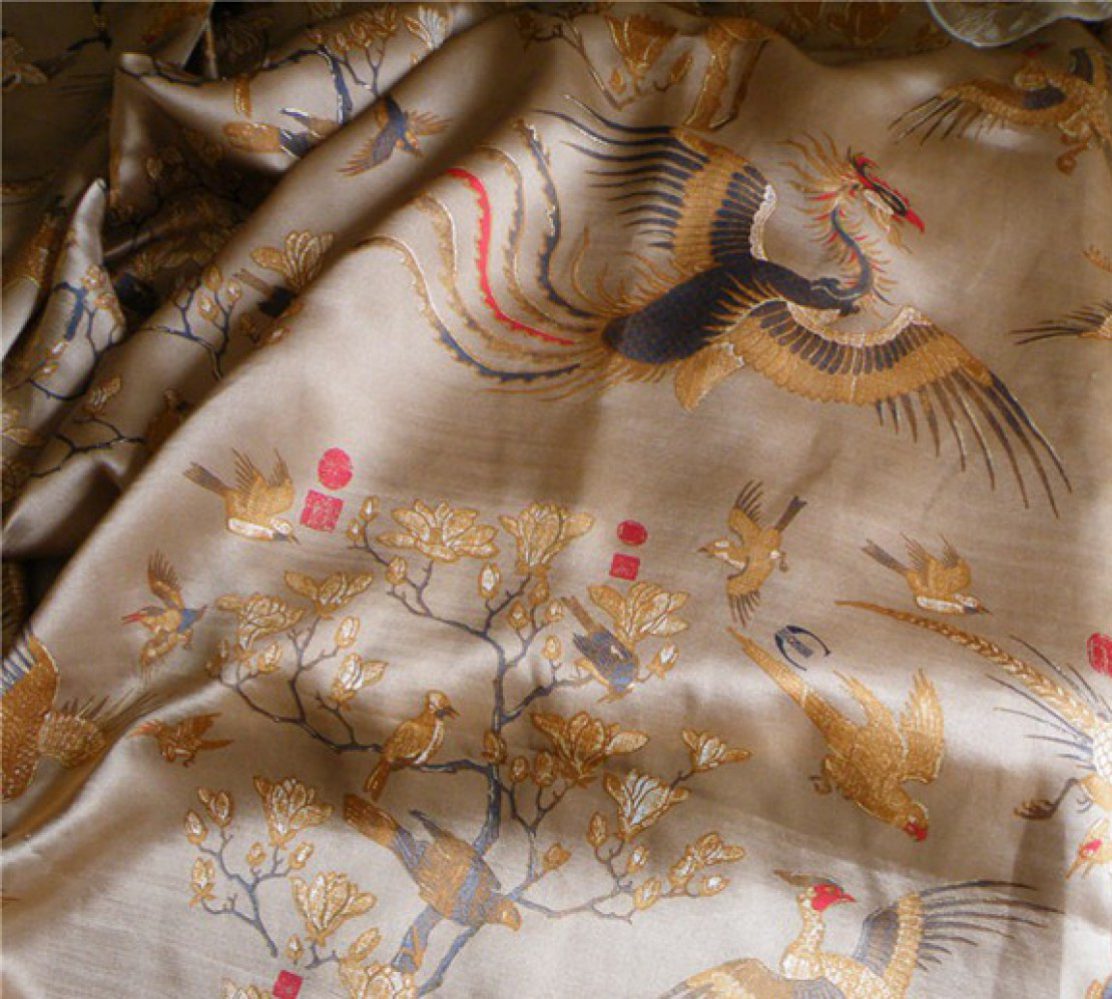
But I loved the fabric. It’s gold, but not a brash metallic. And it’s so soft and drapy. I especially loved how a cowl neck styling look in this fabric. I’ve tried to find more fabric like this and bought some duds on the way.

So I took this dress apart and tried to make something more classy out of it.

After: Classy & Glam (I hope)

Au natural…

gold-cowl-tunic_s1-1

gold-cowl-tunic_5mug2-1Fgold-cowl-tunic_5mug2-4SRgold-cowl-tunic_5mug2-3B

gold-cowl-tunic_s4-1…Or worn with hem turned up and held in place by elastic waistband threaded through the hem.

gold-cowl-tunic_s5-1

…Or a shallower cowl neck by ruching both shoulder with broaches.

It obviously can’t be worn as a dress by itself, what with the side slits. But I do still have the skirt portion of the original dress left. I might make that into a more modest pencil skirt to wear under this. Then it might look like a dress too.

As it is, I was thinking more of the Pakistani kameez, or Vietnamese ao dai as inspiration. I love how those combination of tunic and pants look in soft drapy fabric.

The Making

Originally I was going to use McCall 6078 sleeveless cowl neck T-shirt pattern again. But as my fabric pieces are reclaimed, they weren’t wide enough for the front pattern piece. So, necessity being the mother of invention, I played around with draping the fabric on Big Bertha. I was sure there was enough fabric. I just need to figure out how the fabric need to be positioned.

This is what I ended up with:
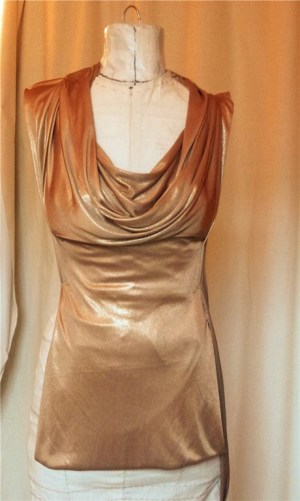
gold-cowl-tunic_0drape-1gold-cowl-tunic_0drape-2gold-cowl-tunic_0drape-3The front is one piece of fabric split into top cowl portion draped on the crosswise grain, and the bottom on the usual lengthwise grain. The back and side panels are from the second piece of fabric draped on the usual lengthwise grain.

gold-cowl-tunic_2measuregold-cowl-tunic_3patTo tidy up the pieces, I measured up the draped front bottom, side, and back roughly. Then I modified my tentative knit slopers to match the measurements.

The cowl piece is marked with pins at strategic places like underbust seam side and CF, shoulder seam, etc. while it’s still draped. I marked only one side and mirror image that on the other side to get the cowl a bit more symmetrical.

Here’s a diagram (not to scale) of roughly what the cowl neck piece is shaped like:

gold-cowl-tunic_4det_4The cowl neck extend to the CB to form a collar. To some extent you can control how low the cowl neck is by changing the angle of the collar CB seam.

To control the drape a bit, I also turn the outer edge of the back collar inside and slip stitch it to the back neck edge.

My cowl was a fair bit low cut. To preserve my modesty and also add more drape – can you ever have enough? – I added a separate rectangular piece inside the main cowl. The top two corners are tacked to the cowl neck edge about two inches below the shoulder seam (neck edge)…

gold-cowl-tunic_4det_2gold-cowl-tunic_4det_3gold-cowl-tunic_4det_5gold-cowl-tunic_4det_6

gold-cowl-tunic_4det_7

The bottom two edges are attached by thread chains to the underbust seam where it meets the side panels. I’m not sure if the same trick would work on other cowl neck (or even surplice / wrap) tops. But it certainly is worth experimenting with for those that threatens to expose your girls!

So there you have it, from tarty to classy (or Grecian-inspired anyway) in 24 hours. Or maybe 48.

And I would like to thank Big Bertha. I couldn’t have done this without her. Even though she’s getting a bit lumpy. (Me also, but in different places.)
M6078…A classic Cowl Neck Sleeveless T

Not one to waste scraps, I used the 21” x 58” leftover from my Endless Dress to make a cowl neck top.

During the last Vogue / McCall / Butterick sales I got a few basic but classic patterns. So there were two cowl neck patterns to choose from. I’m sure there are more in the few issues of Burda Style magazine I own. But I don’t like how Burda tends to drape the cowl to one side or use stiff fabrics that resulting in a single ungraceful large fold. For me cowl neck is all about Grecian style: Lots of fluid mini folds.

The Pattern

So the candidates were:

In the end I went with M6078 view B. M6563 is designed for woven fabrics, so had more ease than M6078. And more ease means more unnecessary alterations. Sometimes it’s best to go with the instruction and not make grief for yourself!

Style Shots & Mug Shots

m6078B-s-01m6078B-s-05
m6078B-0-1Fm6078B-0-2SLm6078B-0-3B

Fabric & Notions Used

Mustard color Viscose Cotton Lycra 4-way Stretch Fabric from Tia Knight / Tissu Fabrics. It’s soft and drapy – perfect for a cowl neck.

Gutermann polyester thread, and some woolly nylon I got in America long time ago. 3/8” clear elastic. Vilene Bias Tape

Size Used

XS (4 – 6).

Having read on Pattern Review that the sizing runs big, I was careful to go by the finished bust, waist, and hip measurements indicated on the patterns rather than by standard sizing chart. Sizing chart would have me using a M (12 – 14). But recently I’ve been experimenting with using my old sizing (8 / S) with a FBA or otherwise widening at the side seams rather than all around. However, as this pattern is for knit and I like a more fitted look, I went down one more size to XS.

Changes Made

I compared the pattern to my tentative moderate stretch sloper first before deciding what fitting changes to make.

  • Narrowed lower back 1/4” – 1/2”.
  • Sway-back adjustment – shortened CB by 3/4”. There’s still a bit of fold at back waist line, but I don’t mind it in this style of slightly drapy top.
  • Raised back neckline 3/8”.
  • Widen shoulder by 1/4”.
  • Prominent shoulder blade adjustments – added 1/4” ease to back shoulder.
  • Forward shoulder adjustment on front only – raised front shoulder at neck 1/4”.
  • Deepen front-facing to 6” at CF (insurance to prevent the facing from flipping out).
  • Cut on the lengthwise grain because I didn’t have enough fabric. This was fine on a 4-way (or 2-way) stretch fabric. If mine was a fabric with only 1-way (crosswise) stretch, then I wouldn’t deviate unless I go with a larger size with enough ease built into the pattern itself.

Verdict on the Instruction

Easy to follow and quick to make. I did deviate in places though.

I did a Burda style stabilized back back neckline and armholes using Vilene Bias Tape, then clear elastics to stabilize shoulder seams. All seams are done on sewing machine with lowered foot pressure, walking foot, and narrow zig-zag stretch stitch. Side and shoulder seams and the bottom hem are finished with 3-thread overlock on the serger. Neckline, armholes, and bottom hem are stitched with stretch stitch.

For a softer drape and because my fabric doesn’t fray, I left the facing edge unfinished.

Would I sew it again

Most definitely! It’s a great wardrobe builder. I could see this with long sleeves as well. It’s slightly loose in the waist, so if I were to use a less drapy fabric I might narrow through the waist a bit more.

Bandeau Tube Top: Carrie or Tarty?

So, as I only needed half of the fabric width for my Endless Dress waist band, I turned the other half into a matching Bandeau Top.

bandeau_s_3bandeau_0_1Fbandeau_0_2SLbandeau_0_3B

bandeau-satcI was thinking SATC Carrie (S2 E17). My other half’s verdict? “Tarty”. Men. Go figure.

In any case, it can still act as a Modesty Preserver for my Endless Dress, now that I’ve learnt that yards of skirt attached to a flimsy bodice = wardrobe malfunction.

Making of this bandeau top should have been dead easy. But it was actually like solving an Escher puzzle. Or a game of Twister.

FYI, this is how NOT to do it:

bandeau_oops_1bandeau_oops_2

While it looked neat and tidy, when I turned the thing right side out, it was all twisted the wrong way. (Sorry, forgot to take pictures for your and my education.) I had to unpick the bottom edge. Then from the right sides fold in the seam allowances, grab hold of the SA inside and pull it out for sewing. Sewing the full circle the correct way was a twisted and Escheresque experience. But turned right side out everything fell right into place.

I’m sure there must be a clear how-to in some sewing book or somewhere online. But I didn’t have the luxury of time to look for it. I got a whole travel wardrobe to sew!

As you can see, I’ve already thought to make the top less flimsy by adding the Power Mesh underlining. So that’s one point against tartiness. Plus the top and bottom edges are reinforced with clear elastics. That’s another point against tartiness. Having said that, wear it in weather inappropriate Britain, and I can definitely see tartiness creeping in. Guess it’s another garment that’s not going to get much wear }:-)

Vogue Patterns 2686, a fitting guinea pig

SVPD-frontSVPD-back

Having worked out my SVPD (Standard Vogue Patterns Deviations), I set to try out FFRP tissue fit and fit-as-you-sew approachon a proper fashion pattern.

I combed through my Vogue Patterns collection looking for one as similar to the bodice fitting pattern as possible, and preferably without bottom / skirt nor sleeves. Because I’m that timid. Baby steps dear, baby steps.

Unbelievably I had only one candidate. Almost all others were princess seams of one type or another, or complicated seaming, or too loose. So the top from out-of-print V2686 by Tom and Linda Platt it is then.

V2686V2686-b

I must confess I didn’t obey FFRP’s instruction to try on the tissue without alteration first. I went ahead and compare the patterns to my SVPD slopers and dived in for the kill. Which is just as well since the bust point on the pattern is weirdly low. Don’t know if it’s printing mistake or drafting mistake. In any case, my boobs may be maturing, but they haven’t head that far south just yet. To get into the Pattern Reviews habit, here’s my write up in roughly the standard PR format…

Size Used:

8, per my SVPD fitting trials and tribulation. I would have otherwise used a 10 if I go by FFRP / chest measurement, or even a 12 if I had went for the size that’s closest to my bust measurement.

Changes Made:

Fitting Alterations I initially made:

  • Forward Shoulder
  • Wide Shoulder
  • Narrow Back at Under Arm / Bust level
  • Repositioned Back Waist Darts towards CB
  • Sway-Back
  • Full Bust (B to C cup)

After reading reviews on Pattern Reviews site, I also made minor Style Alterations:

  • Added an extra row of neckline top-stitching at the neck edge so the neckline isn’t so wide that the shoulders won’t stay put.
  • Added another row of neckline top-stitching at the outer / shoulder edge and extended the shoulder seam so the outer rows of top-stitching aren’t cut off by the armhole. What’s the point of having this lovely details if it’s flimsily insubstantial I say!

v2686-top_0_pat-alt Final pattern: Black lines are tracing of the original pattern. Blue bits are additions. Red and Green lines are various iterations of my changes.

And here is the initial tissue fitting:

v2686-top_1_tis-Fv2686-top_1_tis-Sv2686-top_1_tis-B

To my untrained eyes it looks darn good to me. Apart from the slight gap in the back arm hole. I’m not surprised by that, but I’m not sure what to do to fix it. My SVPD back sloper shows that I needed a deeper shoulder dart. In fact, it’s twice the width of the fitting shell shoulder dart. FFRP call this Slightly Rounded Upper Back. In my other fitting book it’s closest to a Prominent Shoulder Blade. Regardless, I needed shaping for curvature there. But this fashion pattern doesn’t have dart there. Nor do many other. So what do you do?

I decide to go ahead with fashion fabric pin fitting and see how bad the gap is in fabric.

Here is my first fabric fitting:

v2686-top_2_pin-F-1v2686-top_2_pin-SL-1v2686-top_2_pin-B-1v2686-top_2_pin-SR-1

A bit baggy here and there I’d say. And the back armhole gap is definitely there. Even the front armhole gap a little. Here’s what I ended up doing:

  • Increase front side bust darts to get rid of front armhole gap.
  • Extend back darts upward closer to my blade points to get rid of mid back bagginess.
  • Made back shoulder slightly more sloped and extended it towards neck and armhole a little bit for dart-wannabe that will be converted into ease when sewing. Any further gap I’d stay-stitch and ease into a slightly shorter back armhole binding.

Here’s my second fabric fitting:

v2686-top_2_pin-F-2v2686-top_2_pin-SL-2v2686-top_2_pin-B-2v2686-top_2_pin-SR-2

And here’s the finished result:

v2686-top_3_fin-Fv2686-top_3_fin-SLv2686-top_3_fin-Bv2686-top_3_fin-SR

Hmm, where did all those back wrinkles come from?!?!?! Is this a fail? Or can I blame it on the fabric? Speaking of the devil…

Fabric & Notions Used

v2686-top_3_det-03The weird pale blue-cream two-tone silk dupioni that I got 11 yards of for some unfathomable reason ages ago. I figure I wouldn’t cry if it didn’t work out – I’d still have yards and yard of it, even if the fabric wasn’t cheap. It’s Twilight Como Silk from Wolf Home (formerly Silk Trading Co. in the basement of ABC Carpets) in NYC.

Contrasting Guterman topstitching thread in a lovely orange. I think recent sewing room makeover color scheme is really getting into my head. I can’t get away from orange-turquoise combinations!

Lovely plastic button with irregular clear and milky stripes in a pale green that matches the two-tone dupioni perfectly!

Cotton sew-in interfacing.

Verdict on the Instructions

I did read through it. But I also took advice from Pattern Review and sew the top-stitching after joining the shoulder seams. Because frankly my dear, my seam matching and parallel straight-stitching skills aren’t up to par. (Glad I’m not a Quilter.)

I also deviated from the instruction on how to finish the facing edges. I was concerned about bulkiness showing through my light weight dupioni. I did tests with the layers that the instruction would have landed me with, as well as 2-thread overlocked edges with both overlock thread and woolly nylon. All too heavy for my taste.

So I resorted to that hallmark of home sewing – pinking, reinforced with a straight-stitch 1/8” from the edge. This I used to finish all the seam edges as well.

v2686-top_3_det-07Whatever rock your boat I say. I mean it’s not like I’m going to take the top off to show you the pinked innards!

I wouldn’t dare telling professionals using specialised machinery to make things my way, but when it comes to my own sewing, my own machine’s quarks, my own skill shortfalls…Anything goes as long as it works – better than it would have if I had followed instructions to the T that is.

Would I sew it again

As a Basic Block, yes. I’ve invested in all that fitting effort after all. But probably only as a Block. Or if this one wears out.

v2686-top_3_style-01v2686-top_3_style-07v2686-top_3_style-04

Back buttoning isn’t exactly easy. I can just about reach the buttons right now. But you know what they say about age and flexibility. And oops, I missed one button in my photo shoot. Point proven.

Zipper would be easier.

v2686-top_3_det-back-zip-1v2686-top_3_det-back-zip-2I’ve done a couple of above hip length fitted tops before with back zipper that zip down instead of up so that I can get through the fitted waist. The zipper stops about shoulder blade level and I find that manageable to get into.

So that’s probably what’ll happen to this V2686 top in future incarnations. It’ll also avoid interrupting the top-stitching line with button and button hole. A happy win-win then.

Burda Style, it’s complicated

Being formerly American, I’m fairly new to the world of Burda Style magazines. Most of my past pattern purchases have been Vogue Patterns. But since I started lurking on other sewists’ blogs a year ago, I started buying the odd issues. I did consider subscribing, but (A) it’s not any cheaper, and (B) our love affair has not been true and constant. Towards the end of last year there were a few months of love-ups. But recently it’s been mostly blah disappointments.

That’s until the current issue. I saw this picture in the July 2012 issue and I just had to get it:

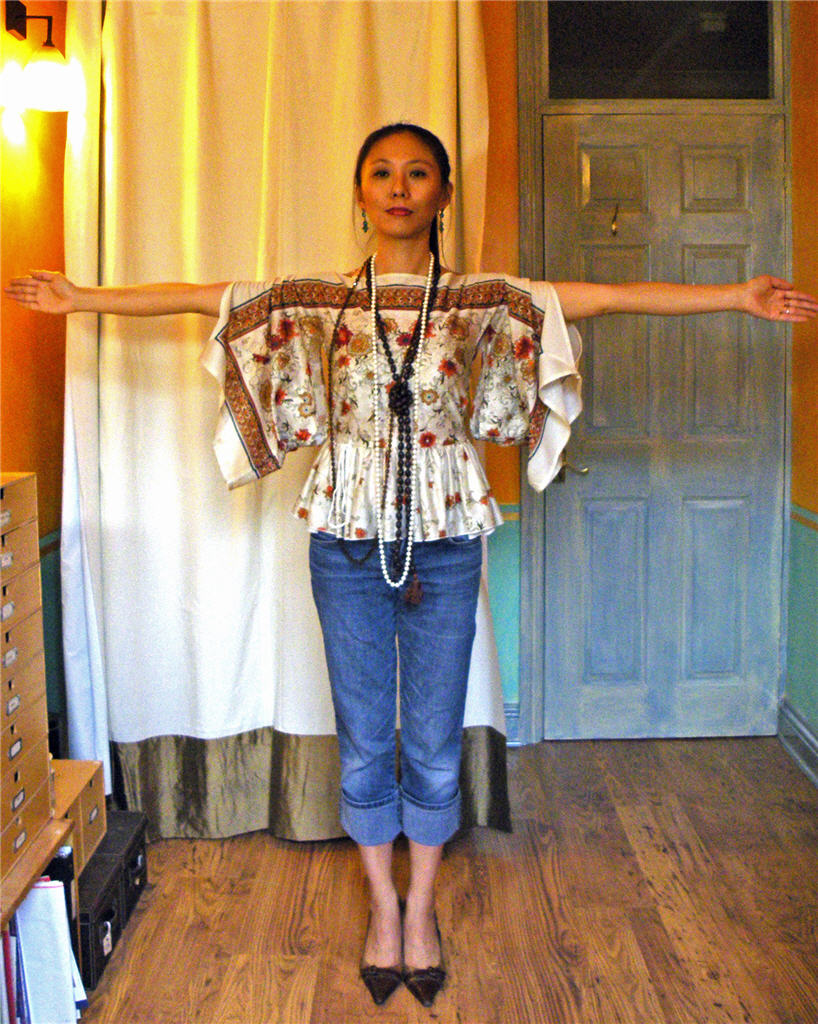
“But it’s just a simple square top!” I hear you protest. Well yes. I didn’t exactly buy this issue for the patterns. I bought it for the image of this scarf fabric. Because it reminds me of another Restyled Ready-To-Wear in my closet…

Like my newly decorated sewing room, the colors and pattern make me happy.

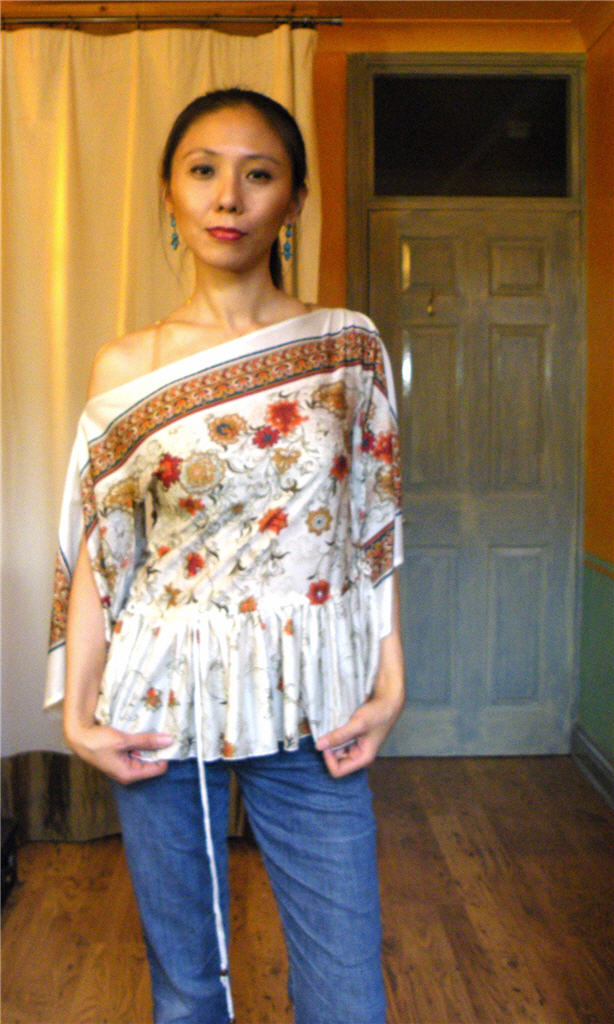
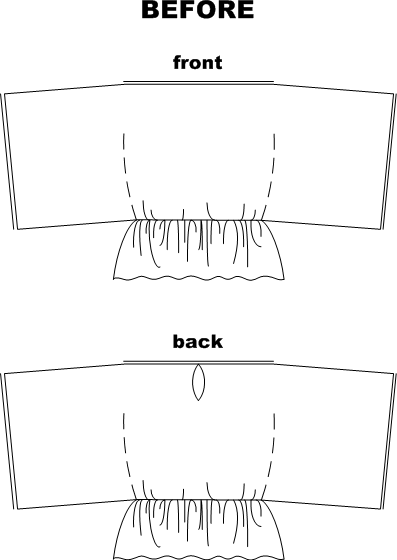
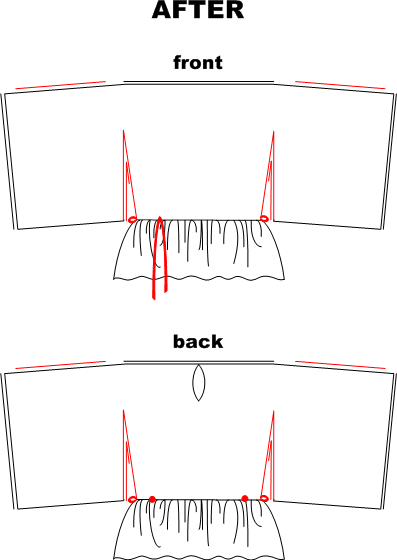
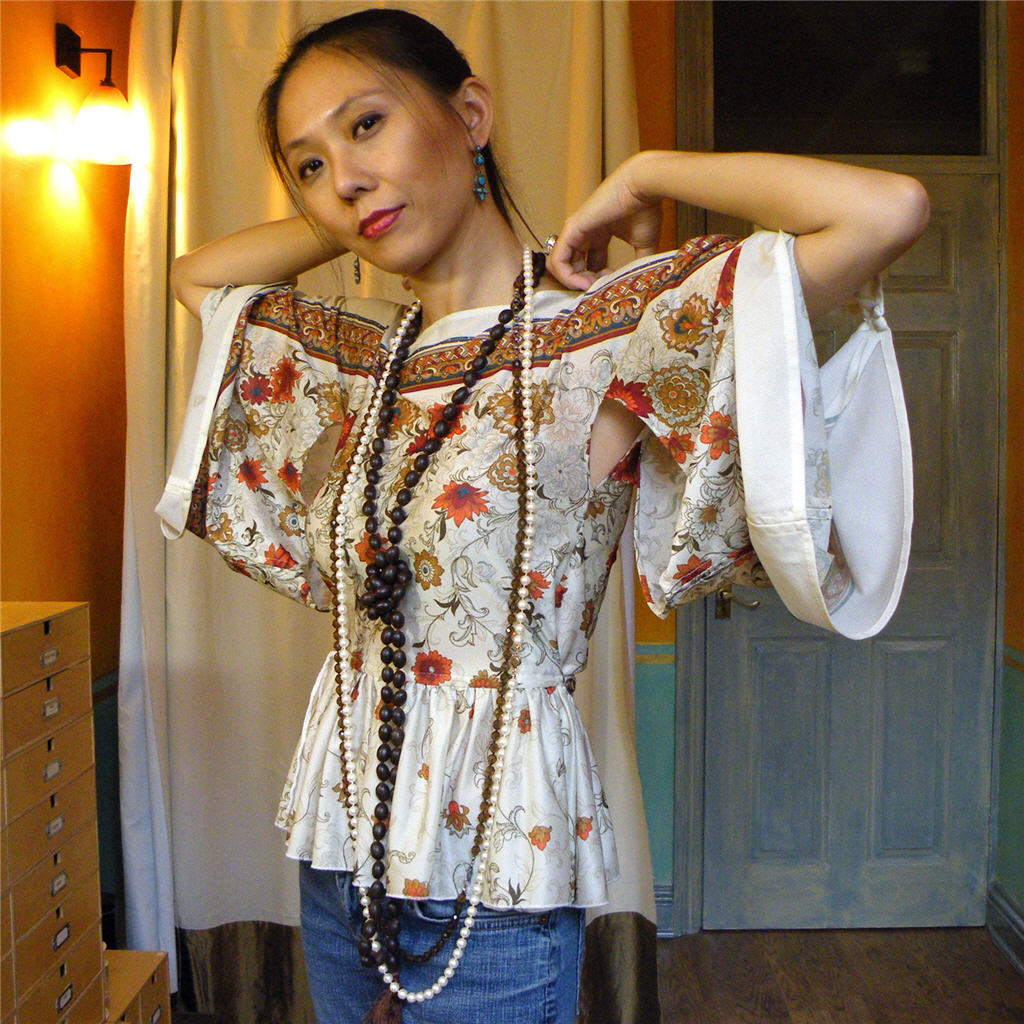
It’s from Top Shop, a second-hand top I think. There was only one on the rack and it’s made from this 70ish plasticky polyester. I wish the fabric were smooth drapy silk, for the original design might have worked better. As it was, I had to restyled it to avoid looking puffy. Here’s the Before & After diagrams (click on the images to enlarge and see the details):

The alterations:

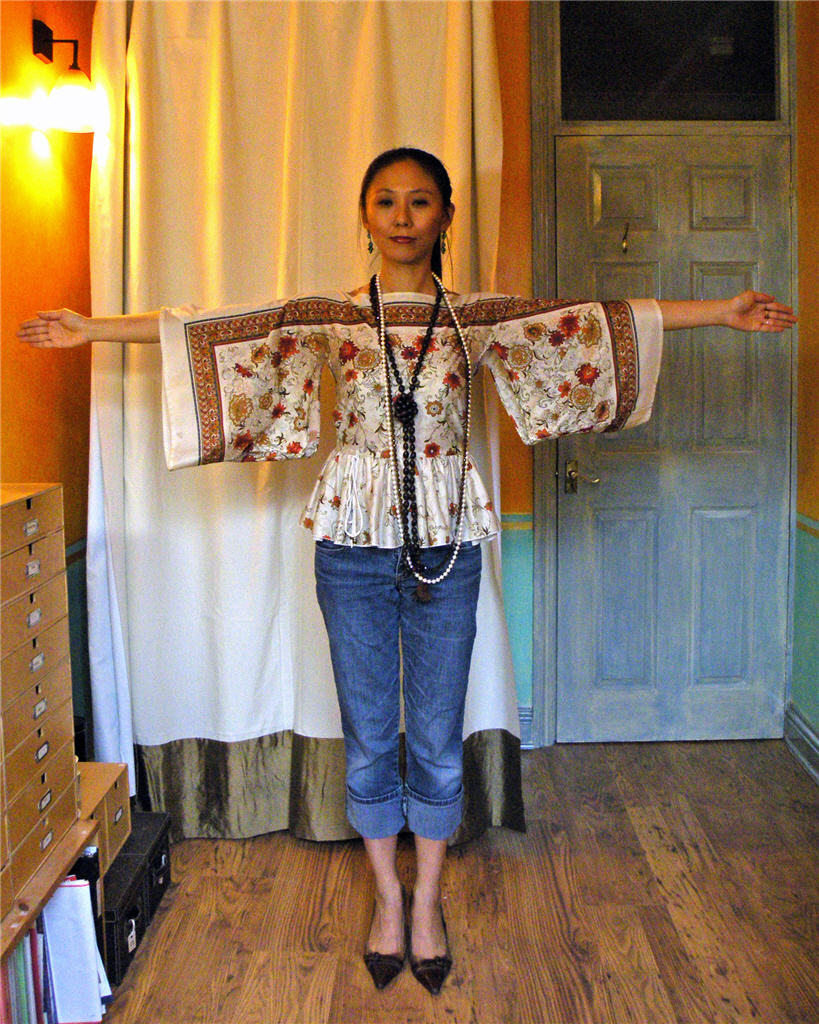
  1. To create a slimmer silhouette I cut apart the sleeves from the bodice along the original stitching lines. Sewed the front & back side seams I just created about 2/3 way up. Hemmed the remaining part of the slits to create Japanese style kimono sleeves. (See close-up photo below.)
  2. To further slim it down I replaced the elastic gathering at the waist with loops at the waist side seams that pull the extra fullness towards a couple of buttons on the back. (See enlarged After diagram above.)
  3. For a bit of Greco-Roman flair – and that all important extra wearing option – I opened up the shoulder / sleeve top seams part-way to create slits. (See top two photos below.)
  4. Lastly a decorative waist tie thrown in for good measure. A couple of venetian beads weigh these fabric tubes down.

Et Voilà…


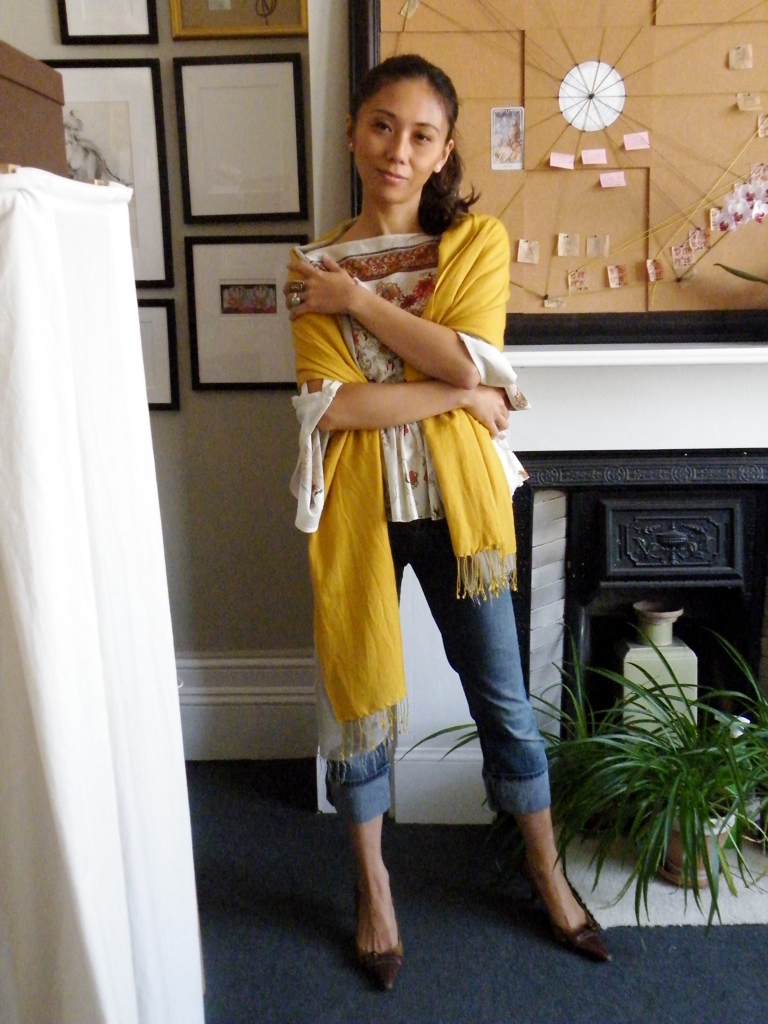
I like it too with a couple of shawls for a remotely English Civil War inspired look. In my rather irreverent muddled head anyway.

And back to Burda Style 7/2012…

I’m hoping to track down scarfs like the one used in that series of patterns. Sadly Roeckl, which supplied the ones used in the magazine, doesn’t seem to have that exact pattern anymore.

Anyone has suggestions for where to look?