Pencil Skirt sloper quest

If only it were the height of summer instead of chilly winter here…So even though my bodice slopers are done, I can’t really put them to good use. Boo. I haven’t got sleeve slopers to make them practical for winter. And sleeves sound like they’d be a royal pain to draft and fit.

So what do I do? Move on to a pencil skirt sloper of course. I mean, how difficult can they be to fit right? Well, maybe just a tiny bit if you’re fussy not only about the wrinkles, but also about any potential frump factor. I like my pencil skirts fashionlicious, not corporate teamaker ready.

Since I had fairly good success with Kenneth King’s bodice moulage, and saw the success Clio  had with her Kenneth King pencil skirt, I decided to start with Mr King’s Skirt draft instructions. Here are the results based on following the instruction strictly:

1-f1-sR1-b1-sL

Hmm…They may be the instruction taught by the Parisian couture pattern drafting system, but my result looks a tad frumpy to me. That’s the thing isn’t it, there are all sorts of experts and systems out there. But you just don’t know if their vision of loveliness is to your taste or not. And we also know that taste and trends change. So are the instructions from the various pattern-drafting camps up to date with current trends? Do all those couture dissecting books examine current couture and not just past examples?

Even if they are current, are they designing for the target market that you’re aspiring to?
Dennic Chunman Lo talks about a designer’s signature fit in his Patternmaking book, how clothing aimed at mass market may have a different cut to those at higher price designer end (and how nowadays jacket shoulders have a lot less ease / shoulder extension than before). Maybe some of the industry experts instruction are geared towards designs for a different audience than you.

Of course it could simply be that my figure isn’t suited to pencil skirts and no amount of tweaking is going to fix that. Maybe they only look fab on stick insect models or curvy goddesses. Also, have you notice a lot of these skirts are shown with legs crossed or slightly apart? Maybe at attention stance doesn’t show off these skirt well. (And I don’t know why some people call untapered skirts pencil skirts. To me they’re just straight skirts. I mean pencils have tapered points, right? You can’t write with them otherwise. Why call them pencil skirts if they’re not similarly tapered???)

Anyway, long story short, I tried tweaking the muslin to my taste. I want a more noticeable tapering at the hemline. And a bottom hugging back.

What can I say, I have booty envy. Mine are a bit flat. So I’m unable to fill out normal cuts like some of you can. I’m not sure how one would achieve this. Can you just taper more at the back side seams? Have anyone tried that? Does it cause weird twisting of the side seams or rippling in the stitching (due to difference in degrees of bias between the front side seam and the back side seam)?

I checked out a few high street shops and noticed some pencil skirts seem to taper on CB seam as well as the side seams. I’ve never seen this in commercial patterns and pattern-drafting book. Have you?

My last resort would be to add back princess lines and use them to add more tapering to the back. I’ve done this before with previous pencil skirts, some of which were perhaps a bit too tapered – making going to the bathroom a bit troublesome, especially in dresses with such over-tapered skirts!

That reminds me I need to be careful that I don’t over do the tapering so that it’s hard to walk / sit / climb the stairs in, or go to the loo! (Note to self: must test drive the final muslin like Clio does.) That’s another gripe I have with existing pattern-drafting / fitting instructions – they may tell you how to add ease, but not why that much or why add it there. Not knowing the principles makes it impossible to adjust the instruction to update or personalize the fit.


That’s why I’ve ordered the reprint of Theory of Garment-Pattern Making by W. H. Hulme from the 1950s. It supposedly covers things like the effect of anatomy, proportion, and movement on garment design and pattern drafting. I’m hoping it’ll answer my question about what ease is really necessary where. Here’s Fashion Incubator’s review of the book.

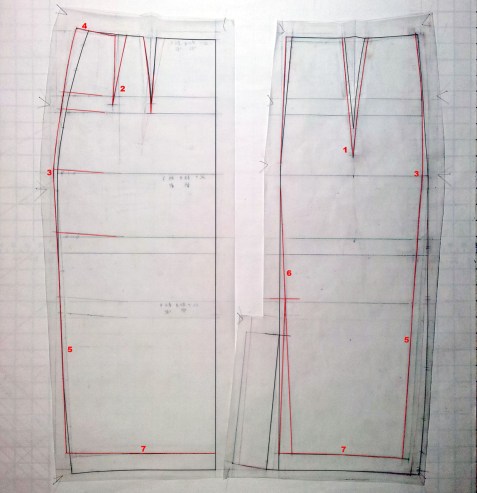
In the meanwhile I tried the following changes:

pencil-skirt-sloper-fit-pat-alt

  1. Increased the dart depths and made side curve above the hip shallower to match my bodice moulage.
  2. In the front I split the deeper dart depth into two darts per side. When I tried one deeper dart, it points right at the hollow between my tummy and my protruding thigh, so looked wrong. Splitting into two allows me to have one dart accommodate my tummy and the other my protruding hipbone.
  3. Moved almost all the hip ease to the front so that the back would hopefully hug my bottom better and the front accommodate my protruding thigh and forward limb movement (walking, sitting).
  4. 2-0alt-front-thigh Added the front ease for protruding thigh using the technique shown in Fitting and Pattern Alteration. The slight tilting up at the side seam seems like it might also push the ease forward rather than side-way and make the front view slimmer looking. I think the side-way expansion of the standard draft doesn’t skim my front-back body well, so makes the skirt look slightly too big and therefore frumpy.
  5. Straighten the side tapering (the original draft has slight curve) and made back side seam match the front side seam angle (for some reason, my original draft based on the calculation instruction came out with less tapering on the back vs the front).
  6. Tried tapering a little bit at CB below the hip as well. Above the hip I made the tapering less deep so it’d match my bodice moulage. Why? Oh, I don’t really know. Maybe “why mess with a moulage that seems to fit”?
  7. Shortened the skirt about 1″. I would never understand guidelines that recommend the same length for everyone.

Here’s the result:

2-f2-sR2-b2-sL

I hope I’m not deluding myself here. I think the changes does make the skirt look smarter, more like how pencil skirts look on all you gorgeous gals. Short of getting booty boosting Spanx I think this will be as close as I’m going to get to a practical yet flattering pencil skirt without the princess seams. I might still add princess seams occasionally for a even more tapered look on some skirts. But for dresses this will definitely be as tapered as I’m going to go unless the fabric has more stretch.

Now should I try this out in a bog standard corporate wool? Or should I go for variations in some funkier fabrics? I already have three fabrics lined up for this silhouette, if not exactly this bog standard boring darts+CB vent pattern.
231

Kiddy Tiered Skirt Yeehaw…Gathering Hell

Excuse #4: Verdict on the Instruction, continued

OMG, how could I have forgotten about this other very important key make-my-life-harder feature…

You may gather (haha) from my previous projects that I’m not much of a gatherer. But this project has miles of gathering to do.

tiered-skirt_1-3I do own one of those weird contraption called a ruffler foot. But given the type of garments I tend to sew I’ve never used it on a project before.

I thought I’d try it out. Unfortunately, it eats fabric for breakfast, lunch & dinner. I’m not sure if I got a defective unit or not – it was a cheap eBay model – but even at the least-gathering setting, 18″ of test fabric was promptly reduced to 5″ at best. What with the calculation hell I was already in with this project, I had to abandon this route. It does make some lovely gathers though…(see bottom sample in the photo below).

tiered-skirt_1-2

The other route I’ve read about is using overlocker’s differential feed to gather & sew at the same time. Way too advanced for me – the second part that is. I tried the first part on a sample. The result wasn’t spectacular (see top sample in the photo above). Maybe 2-thread overlock isn’t the right stitch to do overlocker gathering – the instruction did specify 4-thread overlock stitch. But I was worried about having too much thread built up as I was going to gather, attach, then overlock again.

In the end it was back to good old fashion route of pulled basting stitch. Which of course took ages. Urgh.

So here’s a question for all you Master Gatherers: What’s your secrets for expert gathering? Is this one for Patience or am I missing out on some Fast Track Insider Tips?

BTW, a couple more styling ideas for this skirt if I had one in my size… Biker Chic with a leather jacket … Or Senorita style like this clipping…

tiered-skirt_3-1

Lucky for my niece this skirt doesn’t fit me. Otherwise she might not be getting this in the post!

Kiddy Tiered Skirt Yeehaw

Next off the kiddy clothing production line is the pile in the middle.

For a simple tiered skirt this one took me embarrassingly long to complete.

Excuse #1: The Pattern

What pattern? Precisely.

Originally I was going to use the Burda 9547 view E skirt that I had already bought. But then I decided I’d prefer the tiers to be free-floating like the out of print McCall 5920 pattern.

So I ended up improvising as I go along. And being an indecisive type, this was not a pretty sight with many a redo and tweaks along the way…despite this being essentially 3 rectangular strips of fabrics!

Catalogue Shots

tiered-skirt_2-finished

Fabric & Notions Used

Excuse #2: Size Used

Obviously no standard sizing was involved in the making of this project.

My main criteria was the waistband / top piece has to be big enough for my niece’s hip (+ a bit for growth spurt) and once done small enough for her current waist but elastic enough for the aforesaid growth spurt (or one too many scoop of ice cream). The lower tiers are basically multiples of the fabric width.

Length is where a lot of dithering comes in. Was knee-length too uncool? But too short a skirt will definitely get a veto from the parents.  The skirt ended up a 17-1/2″, which I think is maybe 1-2″ above the knee. Fingers crossed.

Excuse #3: Changes Made

Now with no commercial pattern nothing counts as change right. But if I were to start with McCall 5920 A I would still have had to…

  • Convert the fitted top band with zipper to elasticated waistband.
  • Account for the sort-of-underlining (which was no walk in the park because of the free-floating tiers, especially as I didn’t want the top of the bottom tier to be so wide that any gust of wind would make her indecent) .

Excuse #4: Verdict on the Instruction

Yeah, the instruction – that would be mine – was pretty poor. Good thing I’m no indie pattern designer then! ;o) Too many back & forth between sewing machine & overlocker, brown threads & orange threads, brown on top & orange on bottom, and vice versa!

But let’s get to the key make-my-life-harder features of this skirt:tiered-skirt-1-construction

All 3 tiers are sort of underlined. “Sort of” because they’re not really basted to the shell & treated as one. I wanted the underlining to be free-floating as well, especially for the bottom tier. So underling & shell side seams were sewn separately. They were only treated as one when joining the tiers. Let me just say this (+ the aforementioned modesty preserver) complicate things t-r-e-m-e-n-d-o-u-s-l-y. Highly not recommended.

Because the cut lace is a bit scratchy, I decided to cut the elastic casing separately in lining fabric to make it more comfortable to wear. But I was a bit worried the thin lining might wear out too quickly. So I reinforced the casing lining with light-weight interfacing.

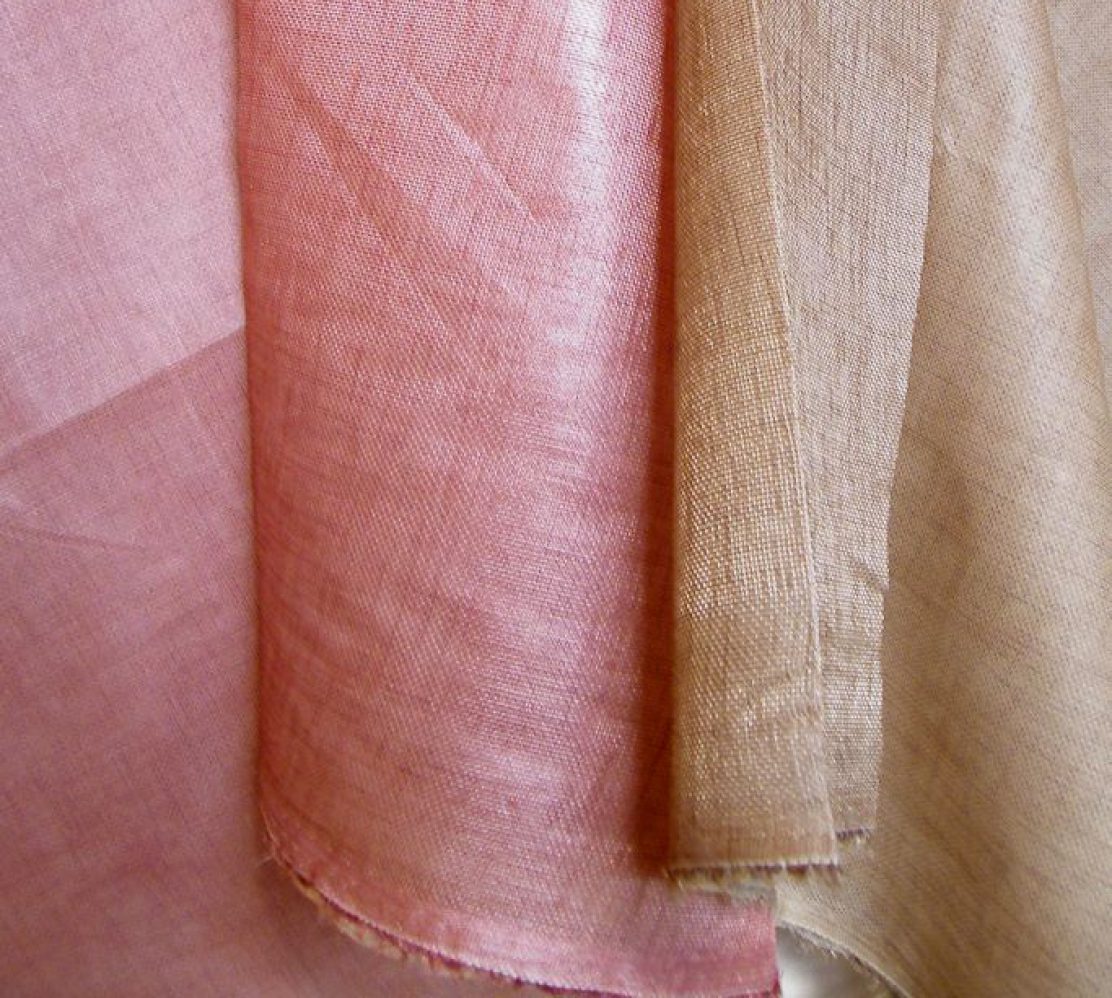
The fabric doesn’t come with scallop salvage. But I wanted scallops. The lacy pattern screams out for scallops. So scallops I will have. And of course the underlining being free-floating it must have its own scallops too. And of course the fancy scallop stitch that came with the sewing machine was not good enough: It was too narrow even if the length was adjustable to match the cut lace’s pattern repeat.

So a template was made. And fabric stiffened and double stiffened. And countless hours lost to rows and rows of manual satin-stitching. The result immediately after stitching doesn’t look half-bad. But once the stabilizers were washed out, the scallops were a bit underwhelming to be honest.

tiered-skirt_1-1tiered-skirt_2-finished-detail-2

I suppose it gives the skirt a bit of Vivienne Westwoodish 16th century cut lash look, all rough & delicate at the same time. (She says delusionally.) Of course any fashion reference would sadly be lost on a Tweeny Bopper. Poop.

Would I sew it again / Would I recommend it to others

Would I! Not for a growing kid I won’t! Maybe for myself, if I’m high on paint fume or something.

It is awfully labor intensive. But I already have a few styling ideas for one my size! Country-western… Aforementioned VW cut & slashy… Maybe even classy pearls, mohair, & pumps. (No wonder kids thinks home sewn fashion are so uncool – we sew for our own grownup taste after all! 😉

Me Made Holiday Report Card

In the suitcase…

suitcase-top

Tops

nyc-me-made-0-tops

  1. McCall 6078 Cowl Neck Sleeveless T-shirt
  2. Franken McCall 6078c Cowl Neck Leopard Print Sleeveless T-shirt
  3. Burda 2012-09-123 Painted (Byzantine) T-shirt

Bottoms

nyc-me-made-0-bottoms

  1. Burdastyle 2012-05-113 Draped Leopard Print Skirt
  2. Refashioned RTW Leopard Print Skirt
  3. This is the only non-Me-Made item in my suitcase. Or is it? I did shorten then turn up the hem to wear it as a capri. So can I be cheeky and count this as Me-Made as well? 😉
  4. Refashioned RTW Heidi Skirt. Not blogged. But it’s pretty much the same make as my Improv Embroidered Taffeta Pleated Skirt

Dresses

nyc-me-made-0-dresses

  1. OK, another borderline cased. RTW Victoria Secret Dress altered to fit me better. Does it still count?
  2. Improv Tent Dress. Not blogged yet. This has got to be the Happiest Oops & my favorite make. Ever. It has gone on almost every holiday with me since I made it – I think that was back in 2003.
  3. V1159 Donna Karan Twist Front Dress

Keeping Warm…

nyc-me-made-0-cardies

  1. Wrap Cardigan based on Burda 2011-06-139 Bluemarine Wrap Dress, planned a while back, but only finished during this trip. So not blogged yet. I was actually finishing the hemming just before checking my luggage in for the flight to Ohio! But boy was I glad I finished it. I wore it so many times during this trip.
  2. Franken Burda 013-02-121 Sweater
  3. Improv Faux Shearling Stole

Accessories

nyc-me-made-0-jewelrynyc-me-made-0-shoes

suitcase-bottom

Actually worn….

I got to hand it to you Me-Made-May girls. I don’t know how you manage a whopping 31 days. Even with just 14 days I couldn’t keep up with the photo-documentation.

No, worse, Mother Nature intervened (too hot AND too cold). So despite packing enough for 15 outfits ((3 tops x 4 bottoms) + 3 dresses) I keep sorting to the same few comfortable outfits. Here are the few photos I did manage to take…

What I’ve learnt…

I need to stop making tight fitting summer clothing! Skin. Wants. To. Breathe…And. Feel. The. Breeze.

And watch out for grainline, stretch, & gravity! The two sleeveless cowl neck tops were based on the same pattern. But the yellow one was cut on the crossgrain while the turquoise leopard one was cut on the regular lengthwise grain.  As stretch is greatest in the crossgrain on most knits, the yellow one’s armholes have obviously stretched thanks to gravity and feels comfortably loose. The turquoise one didn’t. So was a bit too binding for hot NY summers.

The Final Score

I think that will have to be a B at best.

I did force myself to wear everything at least once. But some days I just had to change midway through the day. There is only so much I’m willing to suffer for fashion!

Psychedelic Leopard 2: Burdastyle 2012-05-113 draped skirt

It was love at first sight for this pattern, though I didn’t have the leopard print fabric in mind.  In fact, the print might not be the best choice as it obscures the lovely drapes a bit. But when I was planning a wrap top for the fabric, I thought this skirt worn with the wrap top might give me a faux wrap dress look I originally wanted. Never mind that the wrap top never materialized due to fabric shortage. The skirt pattern stuck. Especially after I saw Merche of Aventuras de Costuras showing off her version worn with the very same V1282 top I also made from this fabric.

The Pattern

One piece pattern, très chic result. How brilliant is that? Photo here is actually for the longer view C in a thicker knit. I went for the mid-length view B.

Style Shots & Mug Shots

bs201205113-mug1_Fbs201205113-mug2_SLbs201205113-mug3_Bbs201205113-mug4_SR
bs201205113-style1_1

Fabric & Notions Used

Size Used

For bottoms I’m between size 34 & 36. I chose 34 because I assumed a knit pattern would be more forgiving and I wanted a snug fit. I did check the pattern measurements against my fabric’s stretchability to ensure the negative ease won’t be too much for the fabric to handle.

Changes Made

bs201205113-1

  • Narrowed hip 3/16″ on both side seams (3/4″ total) to get 0 ease at hip level.
  • Short Waist Adjustment – lowered the raised waist by 1″ (from 3″ to 2″) so the top edge isn’t right at my underbust.
  • Ignored the hem length and measured on the unpleated side seam the length I need for a skirt length that’s just below my knee.
  • Added zipper and hook to the pleated side seam. I wanted a snug fit at the waist and didn’t want my fabric to stretch out of shape with wear. So zipper was the only way to go. Noting the problem Merche of Aventuras de Costuras had with wavy zipper on the unpleated side I went for the pleated side, thinking that the pleats might hide any waviness.

Verdict on the Instruction

It’s typical Burda instruction: terse, unillustrated. So put on your thinking hat, I usually do anyway. In this case, it didn’t help me with step 1: I was totally confused about which direction to press the pleats.

bs201205113-3In the end I pressed it in a way to minimize the bulk noted by several Pattern Reviewers: Bottom 3 pleats downward, top 2 pleats upward, and the remaining pleat half-up-half-down. Even so, the pleat still puffed up like a blow fish. And my fabric isn’t that thick. Even with the underlining I’d say it’s mid-weight at best. Imagine this in a thicker ponte knit! I feel your pain, fellow Pattern Reviewers.

bs201205113-4See how the zipper is buried in the Valley of the Pleats!

bs201205113-5~
Distributed pleats. And tightly trimmed seam allowance. Imagine the thickness of those pleats multiplied by two if I didn’t. It looks rather precarious though, doesn’t it? As insurance against fabric fraying and pleats falling apart I then fused 3/4″ wide So Sheer tricot interfacing to the seam allowance, overlapping stitching and the inner pleats. Sorry I forgot to take photo showing this.

bs201205113-6Zipper catch-stitched to the underlining to further tame the bulk.

The resulting pleated side is bulky, but not uncomfortable. And I think the bulk enhances the draped design. So no complaints from me.

bs201205113-2Heeding the warning of  Melissa of Fehr Trade about potentially saggy waist and facing flipping out, I went down the separate facing route (views A & B) and as extra insurance (a) interfaced the double-layer facing with So Sheer tricot interfacing  which has stretch in one direction; (b) added clear elastic to the skirt-facing seam; and (c) catch-stitched the bottom edge of the facing to the underlining rather than just tacking it down at the two side seams.

Dawn of Two on Two off  wondered on Pattern Review about why views A & B have separate facings and view C has cut-on facing. My theory is that the “Ponte Jersey” recommended for view C is stable enough not to need the double-layer facing or the extra seam for added stability. The “Fine Stretch Jersey” recommended for views A & B would be too flimsy without stabilization. So I’d recommend choosing the appropriate facing option depending on the fabric you choose, regardless of the length you go for.

Other than these two finer points, it’s a fairly easy and quick skirt to sew up. So don’t let my long-winded review put you off!

Would I sew it again / Would I recommend it to others

You betcha! One in a heavier-weight knit like the view C photo. And maybe even a woven! I would have to go up a size or two width-wise of course.