Me Made Maldives – Almost Didn’t Make It edition

Last of my holiday sewing was this “cut-off” jeans shorts that almost didn’t make it to the Maldives. I think I had 1.5 days left when I started this. And because I’m a slow sewer I thought I’d go shopping for a backup to relieve the time pressure. Bad idea. Got stuck in traffic & paucity of choices (because wrong season). What I ended up buying fitted poorly through the crotch, so I had to take in across the inseam + shorten it. At this point I’ve lost half a day. So it was an all nighter on this me-made. I had to drop the coin pocket – never use that anyway – and started but left off the belt loops until I got back from holiday.

Closet Case Ginger Jeans Shorts – Mid Rise

Size made: 4 with fitting & mid-rise design changes

Fabrics: 98/2 Cotton/Lycra 8oz Elvis Denim from Sherwoods Fabrics UK, muslin from the Stash, brass zipper from Wawak, donut button from Citron Jeans, ring rivets from Thread Theory, Pro-Sheer Elegance Medium Fusible interfacing from Fashion Sewing Supply

Changes:

  • Shorten to bum length
  • Left out the coin pocket
  • Belt loop wasn’t added until I came back from holiday

Construction notes:

  • During interfacing fusing I also made the mistake of fusing to the wrong side. I had initially wanted to use the lighter wrong side of this denim on the outside because the right side looks too similar to my flesh colour, making me look like I have no pants on! Tight deadline meant I had no choice but to use the right side as the outside.
  • I was a bit worried about the donut button being a bit too small, but it worked out OK, & was very easy to install using the tool kit from the same Japanese vendor. It feels very secure – unlike some of the buttons I used on previous Gingers. Highly recommend these.
  • For the rivet I again used the hand press kit I got in Asia. I did still have to trim the tacks down to avoid them poking through the centre of the ring rivets because of the thin fabric. But without this tool I wouldn’t have been able to attach them in time…for it was early morning by the time I got to the rivets. And you know, neighbours.
  • My topstitching is still a bit rubbish. I get loops forming on the wrong side in places though not continuously. So good thing these jeans are just for me. I would be too embarrassed to make one for someone else with my poor stitching.

The Verdict: It’s quite satisfying to be able to make my own jeans. RTW options can be so unreliable. You’re at the mercy of the retail seasons & designer whims. And you may still end up having hack it apart & alter to fit. Hopefully my next pair of Gingers will be even faster. And maybe I should branch out to other silhouetter … like bootleg?

Me Made Maldives – East Meet West edition

Next up are items made from a couple of my Indian outfit kits. I was half thinking of taking one of my sari outfits, but in the end thought I’d be too uncomfortable to relax. Beautiful as they are, they’re not my heritage & I don’t feel I can pull them off so nonchalantly. Instead, I went fusion. For these outfits I canabalised the Dupatta scarves, bits of the main Anarkali tunic, & the fabrics for the Churidar trousers from my Jinaam Floral Tulip outfit kits.

Jinaam Floral Tulip 7363

For the marroon outfit, my inspiration was a Spring/Summer 2015 Dries Van Noten outfit featured in a travel magazine.

Self-drafted Bandeau Tunic Top

Fabrics: sleeve fabric from Jinaam Floral Tulip 7363 Anarkali tunic for the bodice & Dupatta scarf for the skirt part, nylon/lycra stretch Bodystocking & Silhouette fabrics from Funki Fabrics for bodice underlining & lining.
Pattern & construction: The skirt part is just a rectangle pleated at the princess lines. The strapless bodice was based on my last bodice cling film wrap. To minimise risk of wardrobe malfunction I made a muslin. Good thing I did because I forgot that because it takes a while to do a cling film wrap, you inevitably wrap in breathing ease. So without taking away this ease, any strapless top based on this will flash strangers. For this one though, because the shell fabric is woven, I decided to keep the ease, but used negative ease stretch fabric for the underlining & lining + elastic at top & bottom of the bodice for extra insurance. Because the top has minimum ease, I had to add hook & eye opening at one side seam to get in & out. I added rigilene boning to the bodice side seam & side opening to minimise the bodice collapsing / wardrobe malfunction. Unfortunately the boning ends poked through while I was on holiday. I melted the ends like previous times, so I’m not sure what I did wrong this time. Maybe it’s the nature of the fabrics I used this time. I may have to retroactively pad the ends with something sturdier … if I get a chance to wear this more often.


Self-drafted Slim Elasticated Trousers

Fabrics: Jinaam Floral Tulip 7363 rayon Churidar trousers fabric, border from the Anarkali tunic’s skirt
Pattern & construction: Although I went for a Western elasticated + draw-string pajama pants look, the pattern is based on traditional Indian churidar trousers pattern instruction. These are usually drafted directly on the fabric using hip & leg measurements. They’re cut with only seams on the inseam & crotch, and side seam on the bias fold. Normally they’d cut the wasitband separately, but mine is just cut-on. I also wanted pockets, so I added small waist dart at the side seam to attach side-seam pockets. Unfortunately this approach didn’t work out for me. I thought the bias grain would provide moving ease while creating a slender look. But it was rather uncomfortable to wear despite not being skin-tight – the front thigh feels tight at the same time the front crotch looke unsightly baggy. I ended up having to take a wedge from front crotch through the thigh area and add that back to the back crotch as gussets. Not an elegant solution & still a bit uncomfortable. Maybe I have strange legs, maybe it’s an acquired taste. Anyway, now I know to stick to my legs cling film wrap Trousers Block.


Jinaam Floral Tulip 7365

Inspiration for the beige outfit was a hodgepodge of things…

Franken V1390 Gigli Wannabe Wrap Top

Fabrics: Jinaam Floral Tulip 7365 Dupatta scarf
Pattern & construction: The wrap top was inspired by Romeo Gigli 1989 Spring/Summer collection. I had already attempted to recreate one before by adapting 90s Vogue Genny Designer Pattern 1390. But because I had limited amount of fabric to work with this time, I couldn’t reuse that pattern as is. Instead, I used the slide & pivot method to tweak that pattern for a more economical layout. I also changed the neckline border trim from shaped to straight for a stand-up collar look that’s more like Japanese kimono collar. The CB seam wasn’t necessary design-wise, but because I wanted to squeeze a skirt out of the scarf as well, this was the only way I could fit both garments into the yardage I had. Because the fabric is translucent, I went with french seams & manual blind hem.


Self-drafted Cover-up Panel Skirt

Fabrics: Jinaam Floral Tulip 7365 Dupatta scarf
Pattern & construction: The panel skirt was inspired by one I saw in a K-pop video. The back panel is just a rectangle with elasticated waist. The front panel is shaped to fit the leftover fabric I had & to provide dart shaping without seaming or gathering. I had hoped the skirt would work well as a beach cover-up, but I don’t think the translucent fabric work well with this design. It’s not so bad worn as a floaty overskirt over an underskirt though.


Self-drafted Tulip Trousers

OK I lied. This one didn’t actually make it to Maldives. I wanted to take it, but I ran out of time to birth it. So it wasn’t made until I got back.

Fabrics: Jinaam Floral Tulip 7365 rayon Churidar trousers fabric
Pattern & construction: Since the traditional Indian churidar trousers pattern instruction didn’t work well for me, I went back to my Slim Trousers Block for this take on Indian tulip / samosa pants. I’m still a bit timid with volume – especially with fabric that isn’t limp as fish. So I chose a slimmer modern version as my inspiration. Mine is basically slim pants without side seam & with the front double-layered at the waist. It looks like there is some drapes on the inseam side in that inspiration photo, but for the life of me I couldn’t work out how they’re formed. So I experimented with waist pleats on the inner front layer. I couldn’t be bothered to work out complicated closure, so I just elasticated the back waist up to the Block’s front side seam. Back waistband is just a rectanglar casing for the elastic. Front waistband is contoured & interfaced, with a fake closure at the left princess line – which was a pain to construct because I didn’t think the order through. The end result is certainly more comfortable to wear than the slim churidar trousers above, but the legs flare a bit rather than wrap snugly like in the inspiration photo. I tried salvaging this by tacking the hems closer at the ankle and added buttons to disguise this pattern-drafting mishap. Doesn’t look too bad. But the front top layer pulls a bit at the waist forming those unsightly diagnol draglines. Ah well, nothing ventured nothing gained. I can always wear it under a longer top to hide the draglines. Or just own these battle scars proudly.

Nakkashi Euphoria 11042 anarkali & co

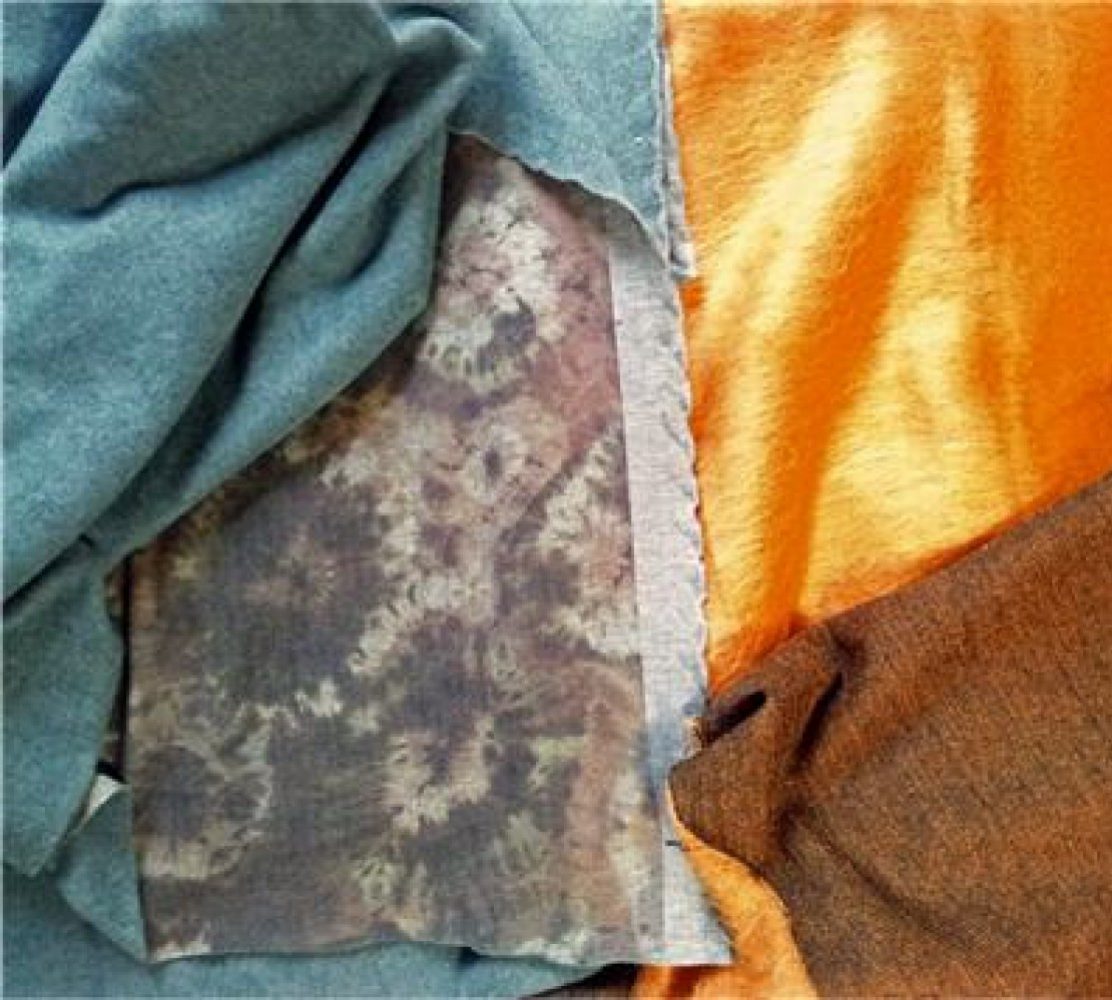
And now for a change of pace, let’s finally catch up with a project finished last year, but was waiting for the matching slim trousers which I just finished… This is the Indian anarkali tunic outfit kit I bought last year:

Nakkashi Euphoria 11042

fabric for Churidar trousers + part-stitched Anarkali tunic + RTW Dupatta shawl

1. Anarkali Tunic ⇒ Shirt Dress / Light Flared Coat ✔

Style Shots & Mug Shots

WORN WITH: 1 Self-drafted slim pants + Nakkashi dupatta shawl 2 Self-drafted tent dress;

Fabrics:

  • Loose weave Khadi shell fabric – this looks really similar to the raw silk gauze I used for Burda 2014-02-117 top (another one waiting to be blogged)
  • Poplin / Batiste lining

Design:

Originally I was going to leave this quite loose & robey as it vaguely reminds me of dreamy Pre-Rarobes. But Ms Practicality vetoed that idea. And I went back to something more like the original intended design. Ms Practicality also insisted that I make this tunic open front to maximise wearing opportunities. (Though in retrospect, the flared shape doesn’t really lend itself to being worn with front opened.)

Fitting:

  • Examining the marketing photo I saw that armhole bust darts were added to give the tunic a fitted silhouette. I followed suit & modified my Fitted Top Block to shift some of the bust shaping into a new armhole bust dart.
  • The bodice did not quite fit into the panels neatly. To minimize the number of vertical seams, I ended up removed the equivalent of one panel – front outer panel – at the side seam & kept the corresponding back outer panel for the underarm area – ie no proper side seams… kind of like in some tailored jackets.
  • Additional dart shaping (bust, waist, shoulder blade) were done at the existing panel seams with varied seam allowance widths.
  • For sleeves I used my more mobile Tunic Sleeve Block.
  • Hem were shorten for my less than modelesque stature (yielding scraps to squeeze out #2 Peplum Top below).

Construction:

Ms OCD demanded that I redo the collar, chest appliqué, hem border, and lining “properly” the Western way. So…

  • Collar & front opening were properly interfaced.
  • Chest appliqué reapplied incorporating bust shaping.
  • Hem border reapplied after everything else was done (saving me a chunk to squeeze out #3 Bustier Top below).
  • Lining flipped to hide the seam allowance the Western way. (So far I find that the Asian garments seems to favour exposed seam allowances even when the garment is lined. Someone told me it’s to facilitate alteration in case one gains weight. It’s less pretty in side, but certainly quicker to let out or take in. I guess I better not grow sideway any further now that I’ve hidden all the seams!)
  • Hooks & thread bars were used for front closure to minimize visual disruption to the design whether worn open or closed.

Now can I just moan about hooks a bit? I thought all hooks are equal. Apparently not. I bought a bunch of Hemline hook & eye fasteners that you’d find in all the sewing shops here in the UK. Trusted brand right? Nope. Total fail. They won’t stay closed, because the bump at the base of the hook is too shallow to properly do its job of stopping the thread bar or eye from slipping off. Maybe if the garment has negative ease – eg in a bra band or bustier – then this won’t be a problem as the busting tension would stop the hook & bar/eye from moving about. But given the positive ease in my tunic, it’s wardrobe malfunction waiting to happen. Actually the hooks I recycled from old Victoria Secrets bras for my choli blouses also have the same problem of wanting to come undone. I only properly understood the problem when I examined a couple of custom made choli blouses I ordered from India: These have hooks with prominent bumps & are properly secure once done up. Annoyingly online shops don’t show profile photos of hooks they sell, so it’s impossible to tell which brand has the secure hook design with a proper gate-keeper bump.

1a. Anarkali Tunic scraps ⇒ Peplum Top

I wish I had scraps bigged enough to make Burda 2014-03-118 Square Neck Peasant Top. I didn’t. So I tried draping the scraps on Q to see if there’s even enough to cover Q’s modesty. Thankfully I did. This peplum top design is the result. The front, peplum, & back for each (L/R) half is one continuous piece of the excess length panelled hem from the tunic. The bodice sides & straps are from the tunic’s two excess front outer panels (minus length used for the shirt dress front opening facing).

As the fabric is loose woven & seemingly delicate, I will need to line the top. The lining scraps are not big enough, so a batiste from the Stash will have to be pressed into service.

While the neck opening is big enough to slip over my head, I want the waist to remain trim, so some sort of opening must be incorporated to make it possible to put on/take off the top. Back overlap with buttons perhaps?

Now I just need to figure out the construction… one day some day!

1b. Anarkali Tunic scraps ⇒ Bustier Top

The scrap hem border from the tunic just barely goes around my torso. As the embellishment is so lovely, it seems a shame to throw it away. Taking inspiration from a Dolce & Gabbana editorial & a Alexander McQueen F/W 2008 designs, I think I will turn this into a bustier. To bridge the gap in girth I’m going for a contrasting deconstructed aesthetic of exposed zipper, braided elastic, or hook & eye tape. To maximize wearability, I may add sleeves & peplum – or maybe make this a separate top to be worn under the bustier. I have nothing as fancy as McQueen’s silk tulle, so instead I’m going to use a plentiful cheap gauze from the Stash (formerly window drapes). Haven’t quite work out the pattern yet let alone construction. So yet another project joining the long queue.

2. Churidar Trousers ⇒ Slim Pants

Since the fabric is a stiff Jacquard, the usual Asian instructions for a drapier Churidar Trousers won’t work. So as you already know I turned this into a Western style slim trousers, doubling as wearable muslin for my new Slim Pants / Trousers Block to statisfy Ms Two-Bird-One-Stone.

2a. Churidar Trousers scraps ⇒ TBD

There’s enough fabric for something else… Something I haven’t yet decided, but probably a dress or a-line skirt because this stiff fabrc with no give needs plenty of ventilation.

3. Dupatta Shawl ⇒ TBD

This was readymade. But the rose coloured fabric is rather scratchy. So I initially added a dual-tone chiffon lining. But then it doesn’t drape as well anymore. So off the lining comes.

I think I will have to make this into something I may wear more often. I have way too many dupatta shawls for my Western lifestyle!

Burda 2015-11-106C Sailor Trousers wannabe

Mixing up a little bit for the 2nd pair derived from my new Slim Pants Block… a flared version with higher waist and in a totally different type of fabric.

The Design Inspiration

This one was actually supposed to be a Burda alter-to-fit. But I gave up when it seemed like numerous non-standard adjustments would be needed. Plus the Burda version is designed for stretch woven and I’m using a bog standard woven suiting. And their sailor button front is an imposter bolstered by a side zip whereas I wanted to try out a functioning one. So my Block with Burda stylelines it is then.

Style Shots & Mug Shots

WORN WITH: 1 Self-drafted fitted T; 2 Zara blouse;

The Pattern

Block Used: Slim Pants/Trouser Block

Changes Made

  • Design: High-rise, F centred dart, B centred dart > princess seam, capri length, flared below knees, cuffed, sailor pants front flap (buttoned along princess seams – instead of Burda version’s faux front with side zip), no pocket, hem cuff.
  • Fitting: To accommodate lining bulk & my middle age spread, added ease by sewing a smaller SA instead of the 3/4″ SA added to the pattern for side seams & inseams (5/8″ inseams, 3/8″-5/8″ side seams).  This gave me approx 1-1/2″ extra ease at the waist tapering to 1/2″ extra ease at the bottom of the legs, almost 1/2″ extra crotch length.

Fabric & Notions Used

Construction Notes

  • Facings were cut from lining except for the top front overlap. Lining pieces were cut from the same pattern as the shell, so there’s actually double layer of lining at the waist (facing + top of lining).
  • Interfaced waist facing & front overlaps. Extra interfacing for buttons & buttonholes.
  • Although the wool suiting doesn’t fray as much as the jacquard of the last pair, I still overlocked the pieces as soon as they were cut, including the lining which does fray a bit.
  • Stretched bias edges – inseams, leg side seams, back crotch fork. Much easier with the wool suiting than the jacquard of the last pair.
  • Because of the angles of my crotch points, it’s easier to sew the inseams first, then crotch seam. This does mean it’s not possible to fit the inseam as I sew (like suggested by Pants for Real People), though adjusting the fit at the side seam is still possible.
  • Sewed side seams & inseams with a smaller seam allowance instead fo 3/4″ added to the pattern. Originally tried even 5/8″ (1/2″ extra ease), but maybe because of the higher waistline, it felt a bit too tight when I fit as I sew. So I ended up with 3/8″ (1-1/2″ extra ease) at the waist. In retrospect this was overkill. I didn’t factor in that button closure has a bit more give than zipper closure. The pants ended up hanging lower than intended. I tried adding a hook at CF, but it doesn’t really help much. Since the problem didn’t manifest fully until everything’s pretty much done it’s now too much trouble to go in & alter the side seams. So this will have to be my post-Xmas-feasting pants!
  • Because the pants ended up hanging lower, I had to increase the height of the hem cuff to keep this capri length (just), and tweak the inseam & side seam to preserve the flare design (just). I ended up with 1-1/2″ extra ease at waist, tapering to nothing at knee, then widen back to same hem width as original design.
  • You can tell from all the wrinkles that Pressing is my least favourite part of sewing. Yeap, won’t be applying for a spot on the Great British Sewing Bee anytime soon. I mean can you just imagine Patrick Grant’s reaction to this pair? Shock horror. I do wonder though whether men’s trousers are easier to press than women’s, especially slim trousers given that women’s may have more curves than men’s. Mine definitely doesn’t lay flat.

The Verdict

Good thing I don’t really like the colour of this fabric. So no tears over the less than stellar fit.

But isn’t interesting (& maddening) how the same Block fits differently in different fabircs? A bit like Goldilock: Last pair was a bit too tight. This one a bit too loose. Hopefully the next one would be just right!

Nakkashi Euphoria 11042 slim trousers

Putting my new Slim Pants Block straight to work now. First up is Slim Capri in the pants fabric from the Nakkashi Euphoria 11042 Anarkali outfit I ordered from India a while ago.

Style Shots & Mug Shots

WORN WITH: 1-2 Self-drafted Nakkashi 5036 choli top + Agnès b. Hommes shirt; 3 Burda 2016-08-125 stripe front tie T; 4 Self-drafted Nakkashi 11042 anarkali tunic & dupatta shawl;

The Design & Pattern

Design Inspiration:

You can’t see much under the tunic in the photo. So apart from a slim silhouette & capri length I had to make up the rest. I decided on fly front with button closure for a more yin-yan look. Would have added pockets and belt loop as well, but the fabric doesn’t have much give and frays badly. So I omitted this to keep the silhoutte slim and avoid tears during construction.

Block Used: Slim Pants/Trouser Block


Changes Made

  • Design: Mid-rise, F side dart, B 2 darts, capri length, Fly front, no pocket.
  • Fitting: To accommodate lining bulk & my middle age spread, added ease by sewing approx 1/2″ SA instead of the 3/4″ SA added to the pattern for side seams & inseams. This gave me approx 7/8″ extra ease at the waist tapering to no extra ease at the bottom of the legs, almost 1/2″ extra crotch length.

Fabric & Notions Used

Construction Notes

  • Interfaced waistband, front fly extensions
  • The Jacquard & lining both fray badly, so had to overlock as soon as the pieces were cut.
  • Stretched bias edges – inseams, leg side seams, back crotch fork – as much as possible, which is not much in this fabric with no give.
  • Because of the angles of my crotch points, it’s easier to sew the inseams first, then crotch seam. This does mean it’s not possible to fit the inseam as I sew (like suggested by Pants for Real People).
  • Sewed side seams & inseams with 1/2″ seam allowance instead fo 3/4″ tapering back to 3/4″ at hem.

The Verdict

Not the most comfortable slim trousers thanks to the fabric. I reckon it’s synthetic. There’s also not much give. So despite being almost the same pattern as my Slim Pants Wearable Muslin 5 (apart from waistline), this pair feel more restrictive. Of course I would finish something a bit thicker & not so breathable just in time for a heat wave. I still have a fair bit of the fabric left. I think a skirt or dress with more ventilation may be a happier match.

On to the next pair!