So, while we’re on the Knit Block detour we might as well finish this conversation.
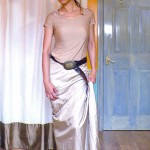
As you know, I’ve been using my adjusted Burdastyle 2012-09-123 T-shirt as my tentative Knit Block. And it’s been working OK. No major complaint apart from the sway-back type puddle in the lower back. So I thought I’d try designing with it. Nothing fancy, just a simple U-neck T.
I was going to make it with 3/4 sleeves. But the fabric I had in mind was a $1/yard remanent from FIDM’s Scholarship Store in LA, so not enough for long sleeve. No problem I thought. I’ll just make a short sleeve version.
Straightforward right? Sadly no.
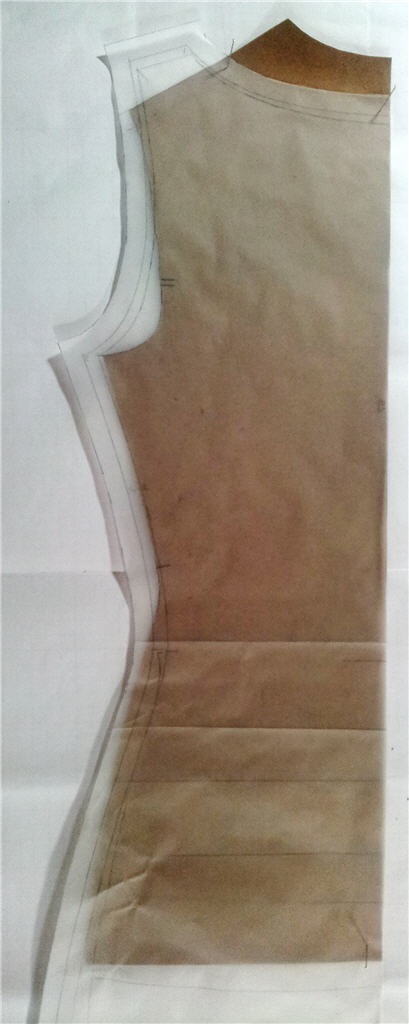
See those pulls emanating from the neckline towards the shoulder? I had no such problem with the previous makes based on this Knit Block. It could be the fabric, though this one seem just as stretchy. My bet though is on the short sleeve. All my previous makes were long sleeves. I think maybe the weight of the long sleeves pulled the shoulder seams in place. So I hadn’t really noticed that the shoulders were really too short.
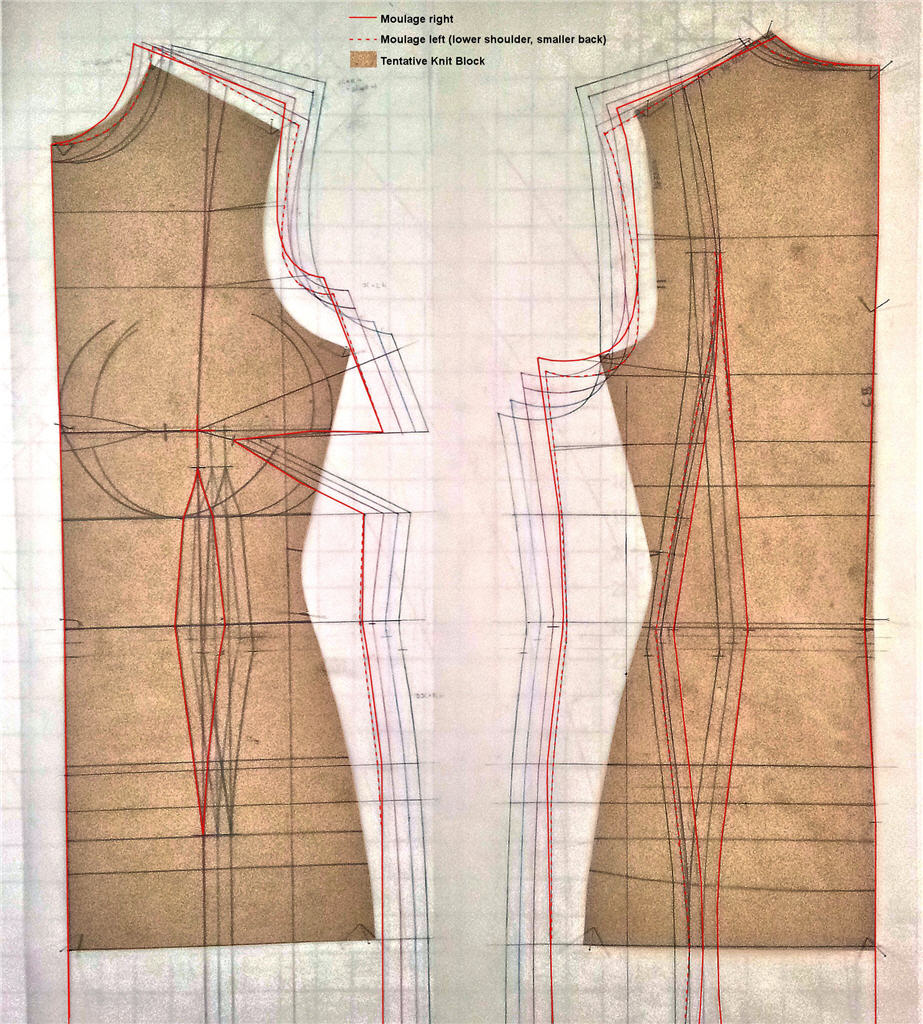
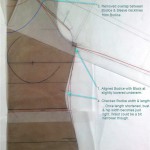
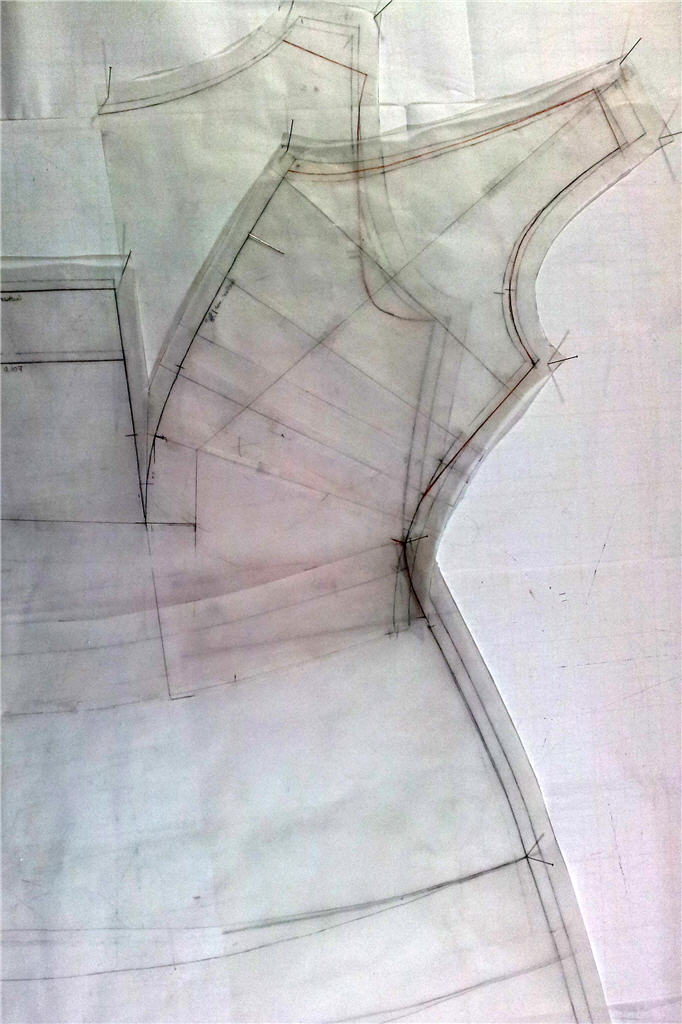
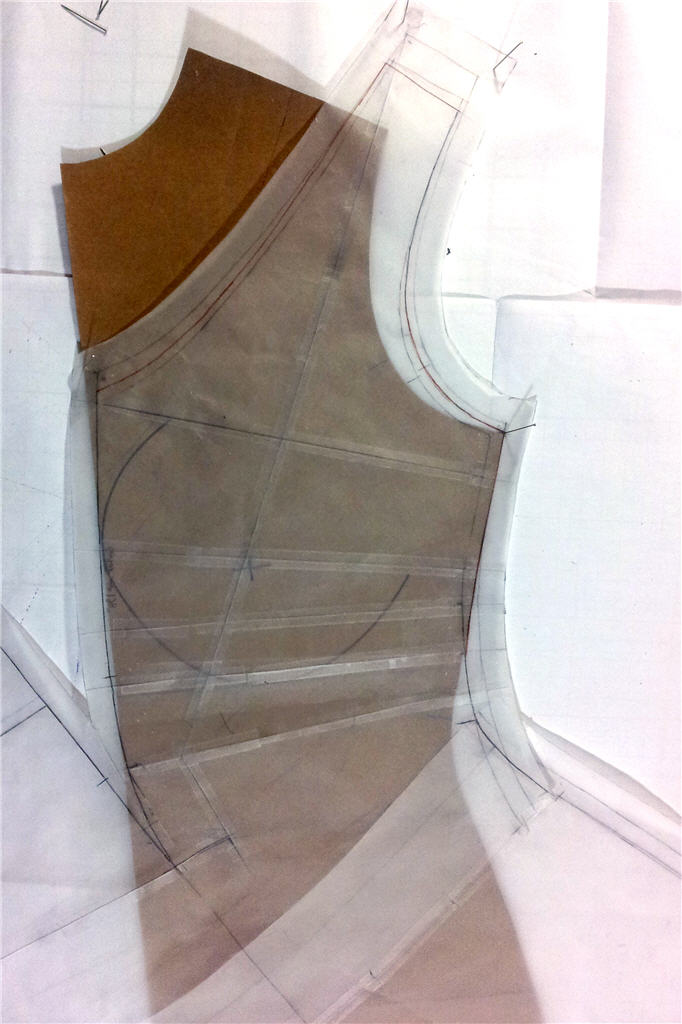
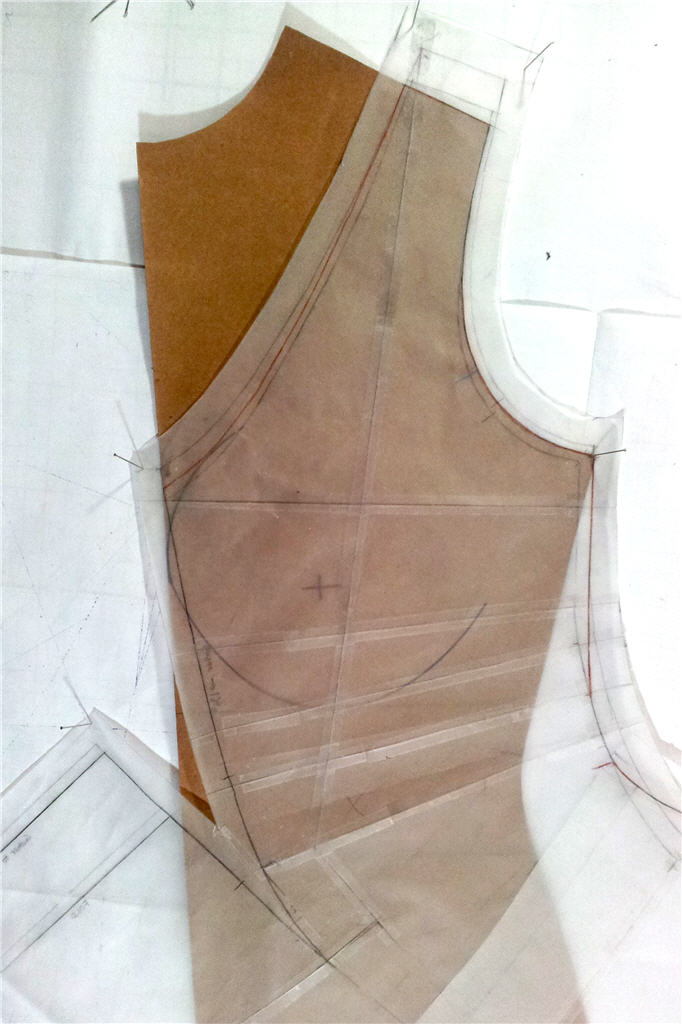
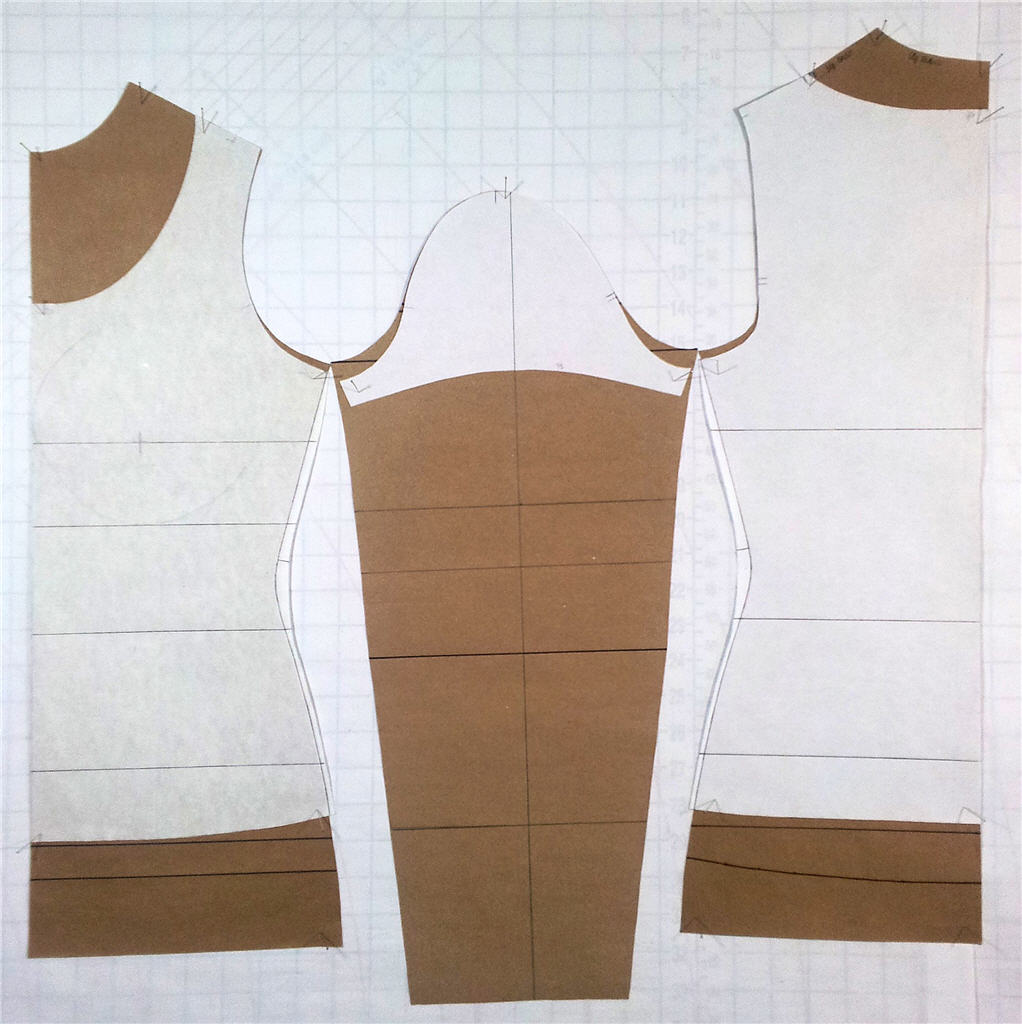
Apology for the confusing extra lines – they’re for the blouse/dress, jacket, & coat slopers. I’m waiting to test them out with muslins before separating them into heavy paper Blocks. The heavier red lines show the Moulage.
The shoulder is about 3/8″ too short. Waist is zero ease, and Bust & Hip are both currently negative ease (even accounting for the bit taken out by the Moulage darts).
I think I need to redo the Knit Block, get back to basic principles. Specifically, where it’s OK to have negative ease and where it should be kept at zero ease. And maybe figure out a totally zero-ease Knit Block for those less stretchy knit fabrics.
And I thought I was saving time by starting with a commercial pattern for knit! Sometimes there’s no substitute for learning properly, especially if one intend to get creative with pattern making.
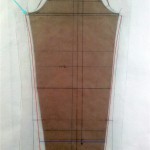
The dress form is still WIP. I’m no deft hands with the DIY, so the stand is taking a while to make. And I’m leaving the padding & cover till the last.
So how about a spot of Here’s One I Made Earlier?
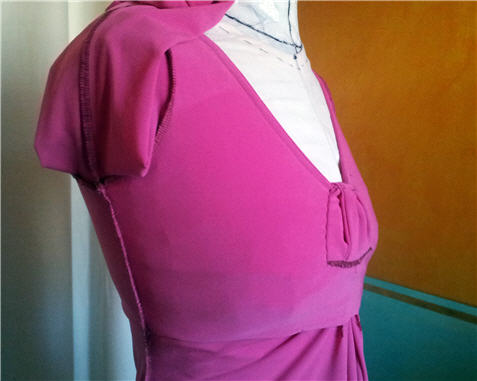
Well this one has been stewing since March. I was going to franken-pattern this bodice & sleeve with the front neckline of Burdastyle 2011-11-114. In the end I went for a simple modified Blumarine pattern because I couldn’t my head around that weird grafting. And I’m glad I did…
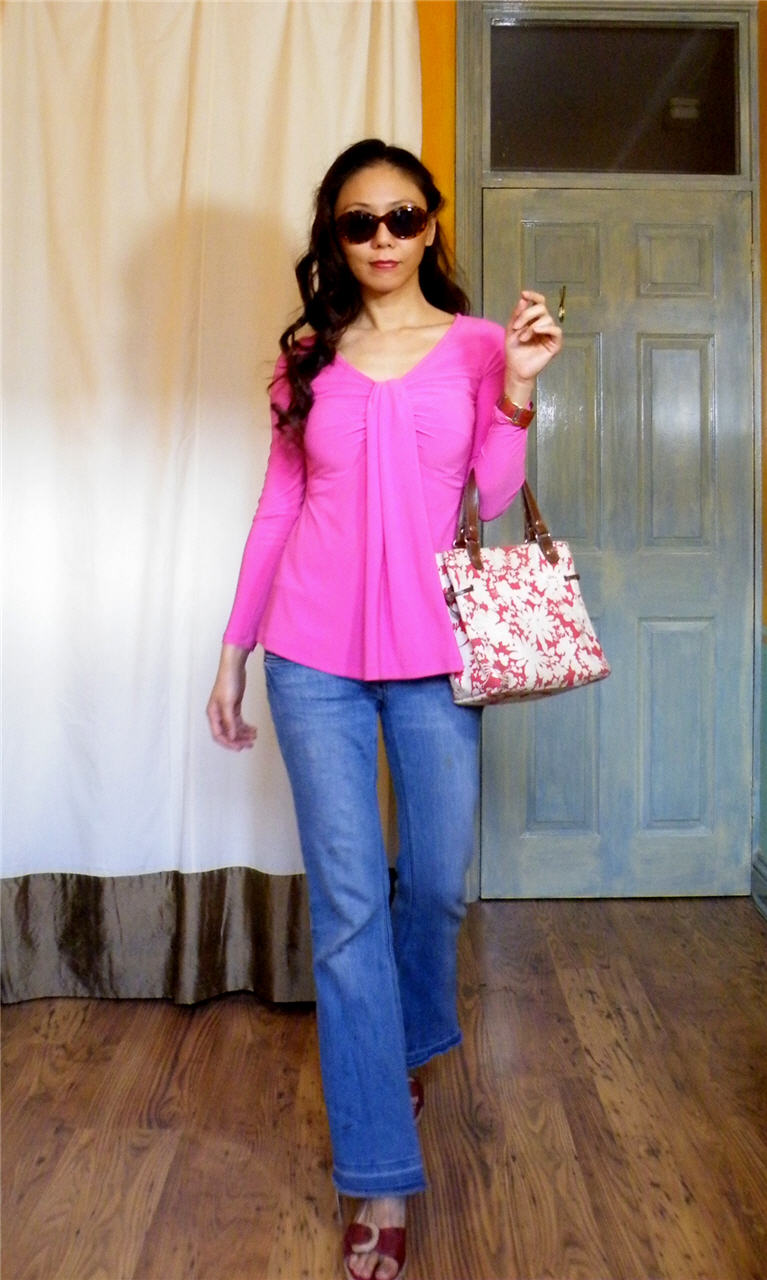
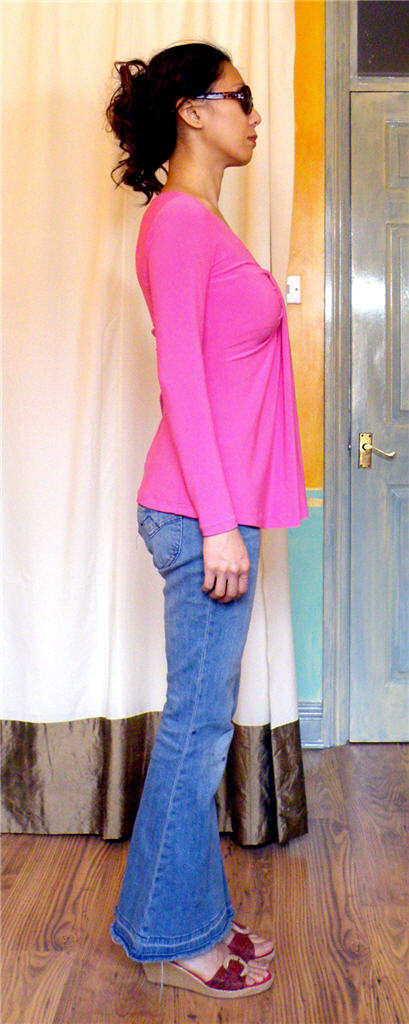
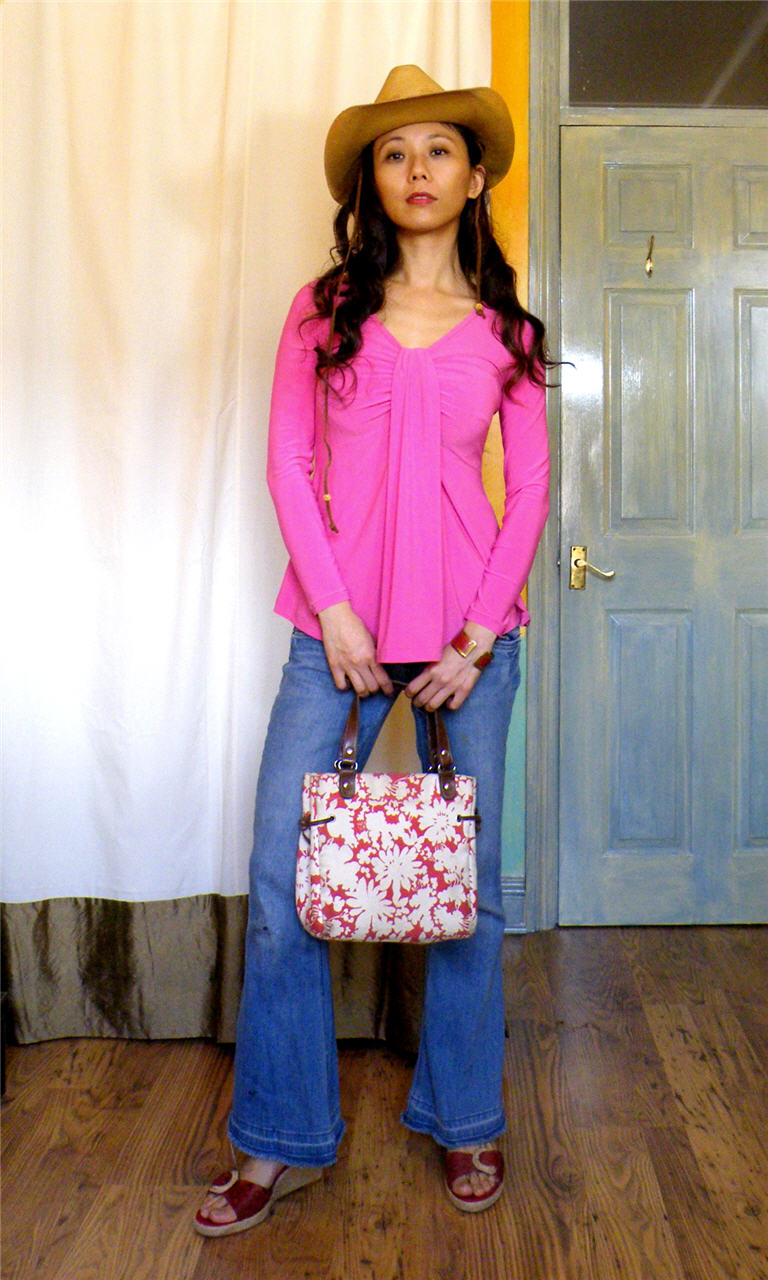
Style Shots & Mug Shots
That last set is my homage to the melodramatic Dolce & Gabbana 2013 ads 🙂 But you won’t catch me doing that in real life.
And last but not least, all the holiday snaps. Lucky top!
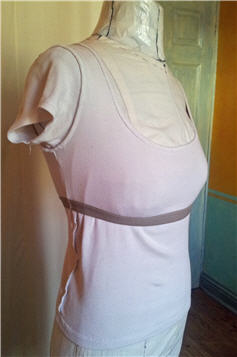
As you can see, I end up wearing this open most of the time, with the ties looped around my neck. I really should add a thread loop to the CB neckline seam to keep the ties in place. They get a bit unwieldy with the constant taking off & putting back on (especially in Taiwan where outside it’s freaking hot and inside it’s effing freezing with A/C everywhere).
34 because it was closest to my tentative Knit Block.
Changes Made
Fitting changes
Changed shoulder slopes to match my Knit Block.
Moved armholes & side seams down the same amount as the shoulder to match my Knit Block.
Moved waist up to match my Knit Block, plus other design element related to the waist: the hole for the tie bands & the position of the tie bands, the front wrap edge curve (which also improves bust coverage).
Shortened sleeves to match my Knit Block.
Moved shoulder matching mark on sleeves towards the front to match my Knit Block.
Design changes
Added armhole ease by lowering the underarm on all patterns.
Shortened bodice patterns to about 2″ below the hip.
Omit the collar.
Widen the front band pieces to 2″ finished width & cut as one continuous piece (ie without CB seam).
Verdict on the Instruction
Read & ignored as usual. Once I know how the pieces are suppose to fit together I prefer to follow my own batch work-flow and modifying where necessary to fit my design changes and fabric behavior.
Stabilized the back shoulder & tie band hole ares of the side seam with Vilene Bias Tape.
Overlocked shoulder seams & tie bands. Neatened tie band hole areas of side seams on the serger. Turn tie band inside out.
Overlocked armscye seam, one long edge of front band to neckline, and bottom edge of the front band folded back right sides together.
Overlocked the tie band sleeve – side seams, skipping the tie band hole areas. Top-stitched the seam allowances of the tie band holes in place.
Slip-stitched the narrow hems & front band / neckline seam by hand while on holiday in NYC!
All ready for sewing on the go!
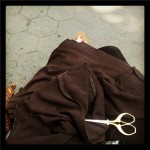
Hemming in the park…
Finishing just before flight check-in!
Would I sew it again / Would I recommend it to others
This modified top is fast becoming a favorite. It’s great for layering & goes with almost everything. It’s classy with a little flare of drama in the bell-shaped sleeves. Considering that I have a moth problem I will no doubt be making more of the same in the future.
And the dress version too. I already have in mind a muted gold stretch jersey as well as the same turquoise leopard print I used for the pencil skirt & cowl top you see in the photos above.
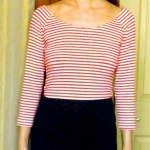
Next up in the Knit Block experiment queue is the rusched bust variation on the raglan T, again previously made as an unintentionally off-the-shoulder marinière top.
Judging by the tech drawings you’d think the fit of this one would be the same as BS 2010-02-112, the plain raglan T. But I discovered while altering both simultaneously this time that 122 is actually larger than 112. That might explain why many makes of 122 have the same fatal flaw – the persistent off-the-shoulder look, which makes an otherwise very wearable top unsuitable for office wear unless you got a jacket or cardie over it.
Again, another one from the stash that was a bit meh because the color doesn’t match the online store photo & the fabric feels a bit scratchy.
Size Used
Size 34 again instead of the recommended 36.
Changes Made
Fitting changes
The process is similar to what I did for 112. But the bust rusching complicates things. It’s been a while now, so I’m a bit hazy about how I did it. I think this is what I did…
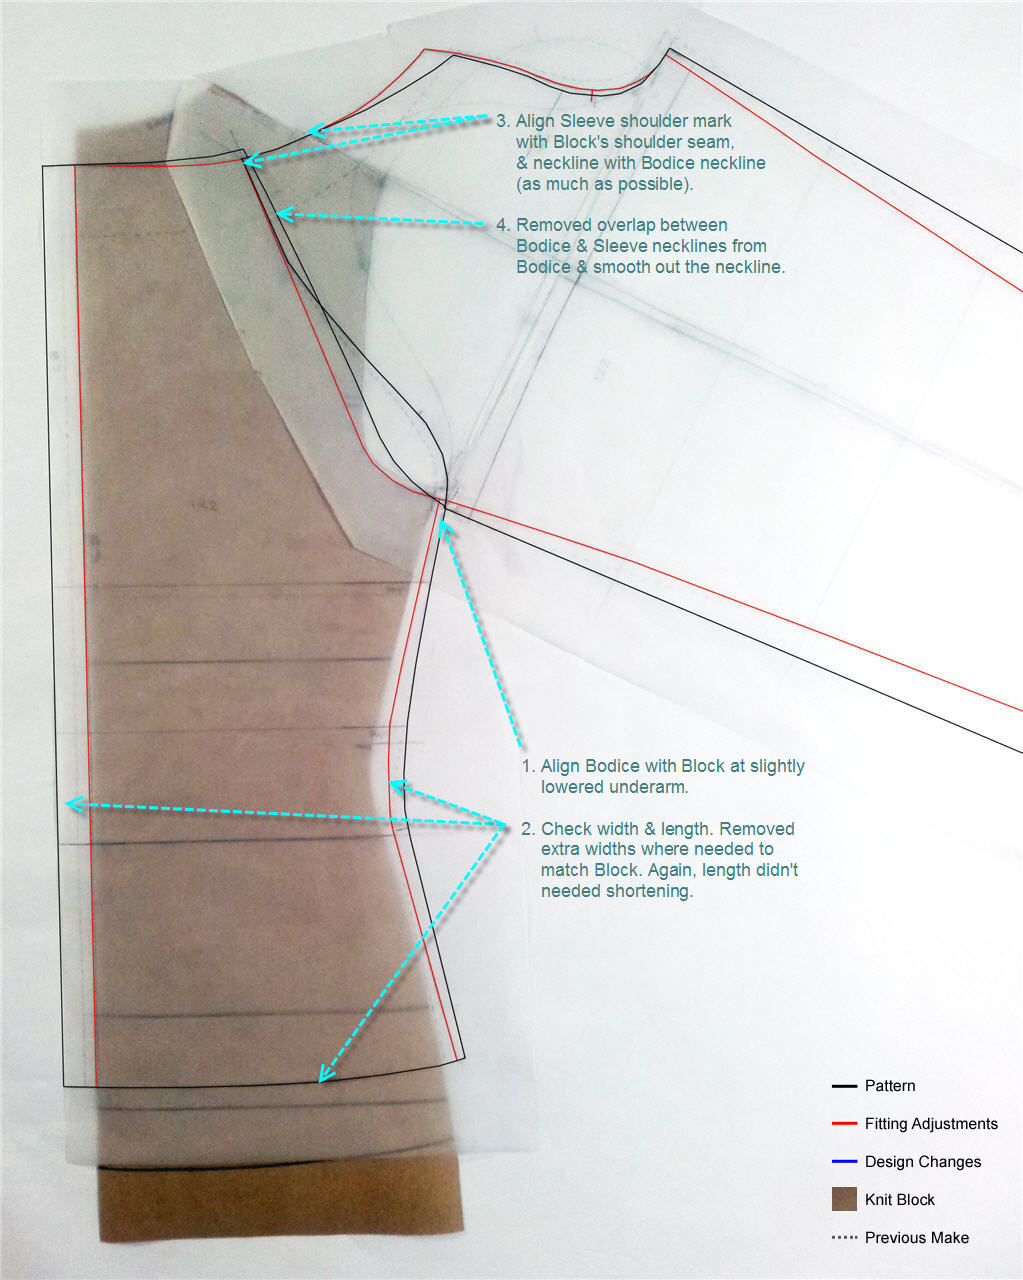
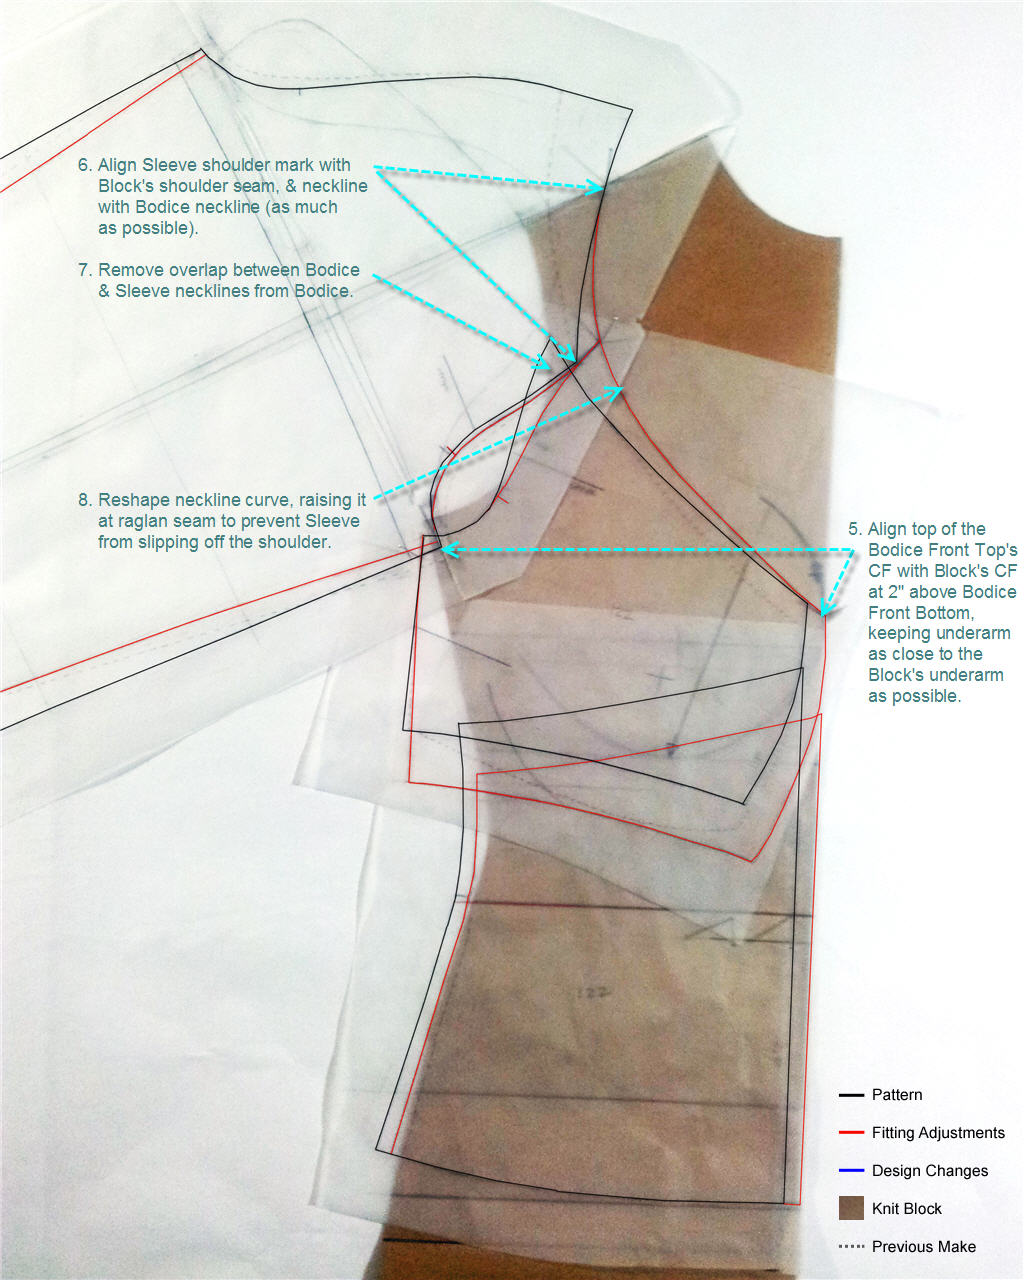
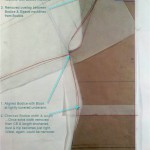
Aligned Bodice Patterns with Bodice Blocks at underarm. Again I lowered the pattern slightly for a little bit more ease underarm. The top & bottom of the Front Top Pattern’s CF are roughly equal distance from Block’s CF. Front Bottom Pattern is butted against Front Top Pattern at the side seam with the overlap at CF.
Because of the rusching which complicates the neckline, I checked the width & length first so I can establish how low the rusched CF neckline will be on my chest. Front Patterns were a bit too narrow and the Back Pattern too wide. I added / subtracted width-wise where needed to match my Block more closely. Interestingly the length is already the same as my adjusted 112 without any shortening!
The under-bust seam is way too high. So I lowered it to make it closer to my under-bust line indicated on the Block. The adjusted Front Top Pattern bulges out from the new CF in the same way the original pattern bulges out from the old CF.
I decided to keep the rusching 2″ in length. So I aligned the top of Front Top Pattern to 2″ above the Front Bottom Pattern at CF, keeping the underarm as close to the Block’s underarm as possible.
Aligned Sleeve Pattern’s shoulder mark with Bodice Block’s shoulder seam, then Sleeve Pattern’s neckline with Bodice Pattern’s neckline – or as close as possible, in this case the front doesn’t match exactly. Again, there’s a bit of overlap between the sleeve & bodice.
Removed the overlap at the neckline from the bodice.
The front raglan seam at the neckline seems dangerously close to the armscye. So I reshaped the curve to add a bit more fabric here.
Aligned Sleeve Pattern with Sleeve Block at underarm. Again, pattern lowered slightly for a bit more underarm ease.
Checked the Sleeve widths & lengths. The width again I only narrow towards the wrist. The length, like the Bodice length is almost where it needs to be without much shortening!
The lengths, the extra width at the neckline, and the high under-bust seam make me suspect the top was drafted to hang lower & bigger than 112. No wonder my first make of 122 was way more risqué than my first make of 112, despite making very similar changes.
Design changes
Shorten the sleeve to 3/4 sleeve.
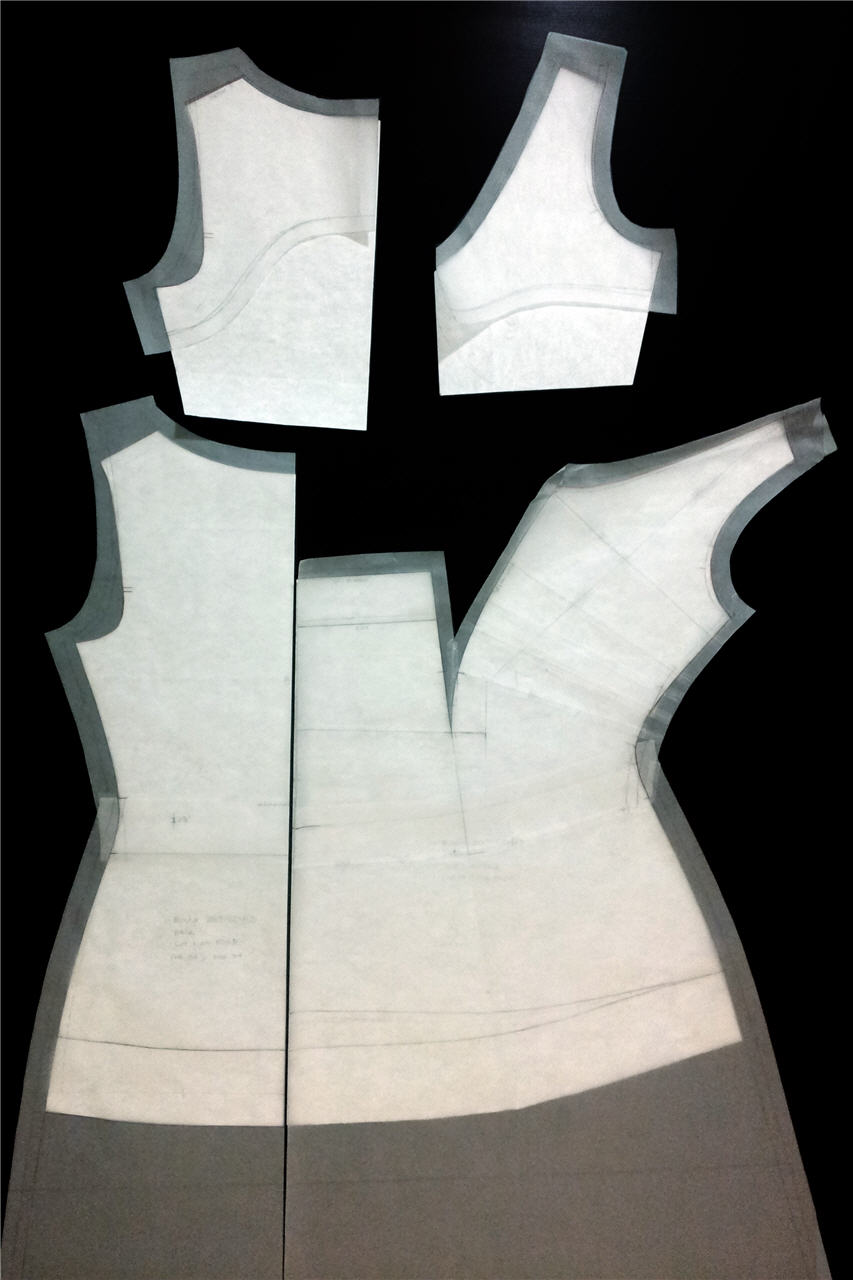
Here’s how the final pattern looks compared to the original size 34…
And how it compares to my previous make of the same pattern…
And the mug shot comparison…
Previous Make
Make 1 front
Make 1 side
Make 1 back
This Make
Make 2 front
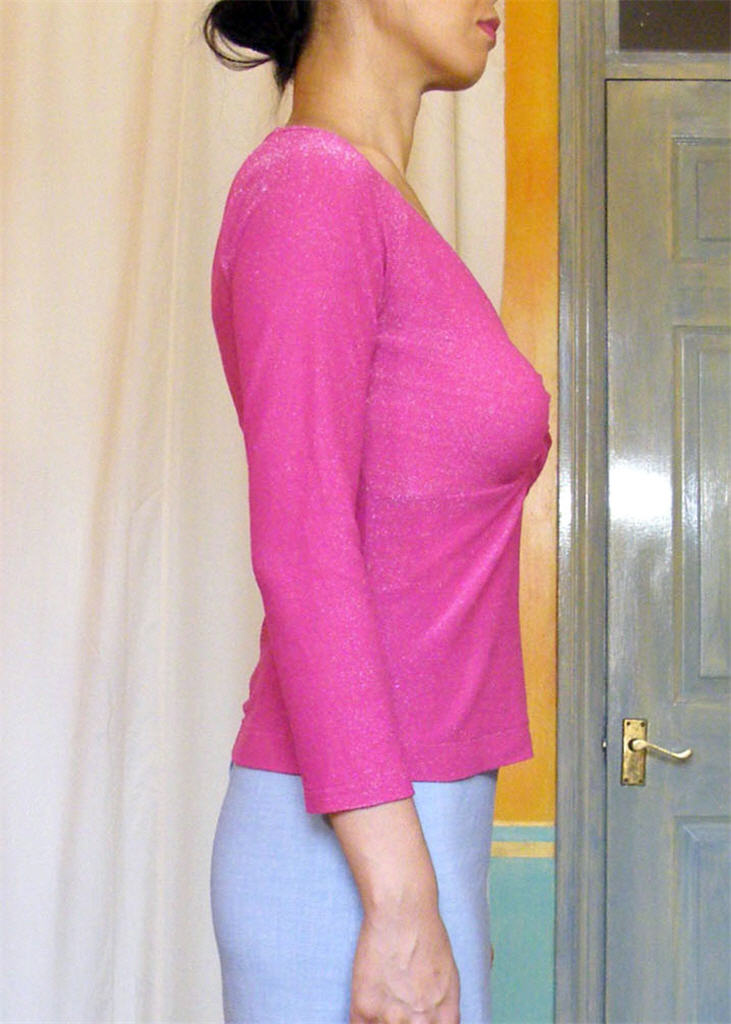
Make 2 side
Make 2 back
You can see from the various comparison photos why my previous make was falling off my shoulder – the neckline of the first make’s raglan sleeve was almost at my shoulder edge! That’s why its useful to have a knit block, even if you’re not using it for designing your own patterns.
Verdict on the Instruction
Again, the process was a bit of a blur by now…Probably batching. And there was no armscye interfacing to omit as the instruction for this one interface the neckline only!!!???
For the bust rusching I decided to pleat rather than gather. Gathering such meager extra fabric just result in a puffy fattening look IMO. I prefer the more graceful drape of irregular pleats for creating the illusion of a shapely bust.
I also did the rusching after I attached the facing – makes it easier to attached the facing without getting the drape caught in the top-stitiching.
Would I sew it again / Would I recommend it to others
It’s a flattering wardrobe basic I think. And now that I’ve adjusted it so it’s more wearable for work, I most definitely will be making a few more in different fabrics, maybe different length.
And I’d recommend it if you can take the time to correct the fit.
So way before my holiday(s?), I was testing out my knit block. First batch of experiments were on using the block to alter commercial patterns.
To 2-birds-1-stone it, I picked a couple of raglan-T patterns rather than yet another normal sleeved patterns. Actually make that 3-birds-1-stone. A long long time ago, I had made a couple of Burdastyle marinière tops, which despite fitting failings I still wear to death. So this will be the chance to try to rectify those fitting failings & multiply my supply of ever versatile (& flattering) marinière tops. First up, a plain Jane raglan T.
The fabric was from my stash. And I have loads of it. It was on sale for 5-meters lengths. The color doesn’t really match the online store photo. And the feel is a bit scratchy. So I wasn’t mad about it and happy to use it up for a wearable muslin.
Size Used
Size 34 instead of the recommended 36 since it’s closest to my knit block.
Pattern Changes Made
Fitting change
OK, this time I’m not going to itemize all the alteration measurements. I’ll just show you the process, since that’s the whole point of this experiment – altering with minimum measurements!
The key steps I went through in this test are…
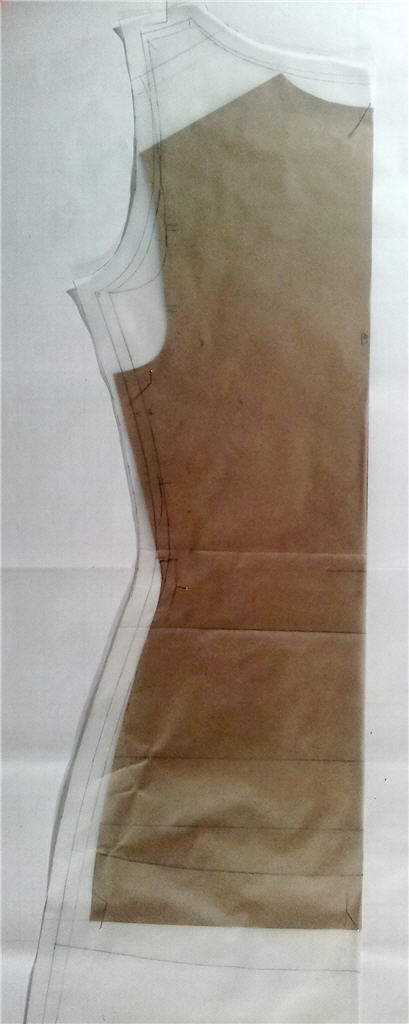
Front
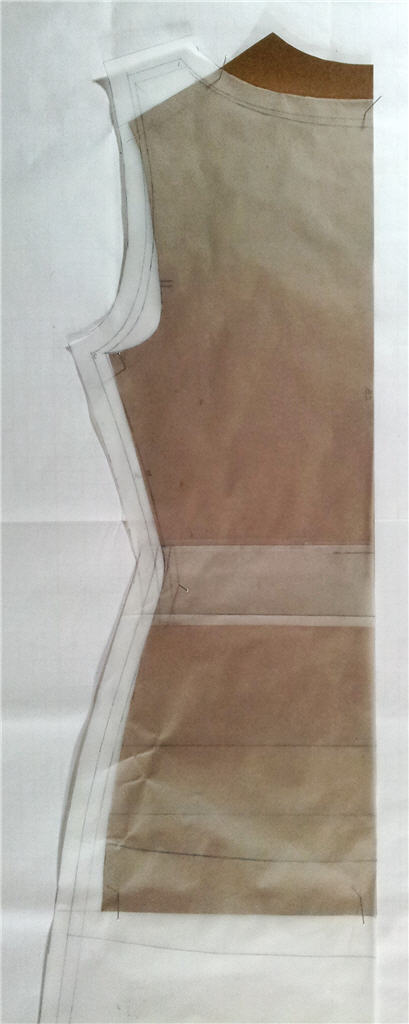
Back
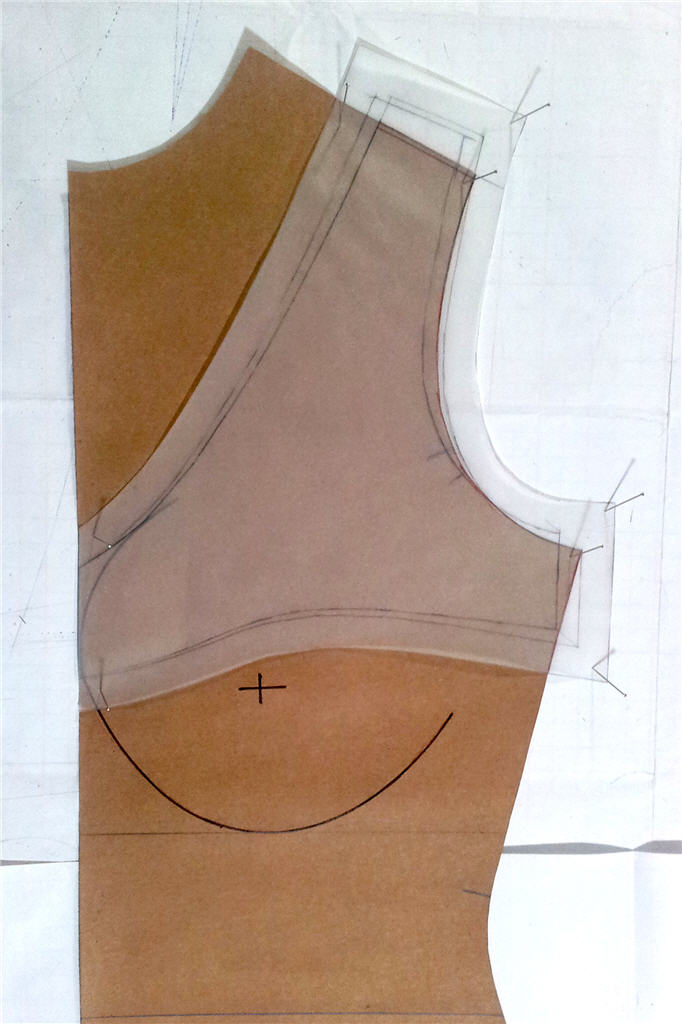
Sleeve
Align Bodice Patterns with Bodice Blocks at underarm. In this case I wanted a little bit more ease underarm, so I lowered the pattern slightly.
Align Sleeve Pattern’s shoulder mark with Bodice Block’s shoulder seam, then Sleeve Pattern’s neckline with Bodice Pattern’s neckline. In this case you can see there’s a bit of overlap between the sleeve & bodice.
Remove the overlap at the neckline – I choose to remove it from the bodice. This makes the neckline smaller, so less likely to fall off my shoulder or expose my bra straps. If I had gap instead of overlap, then I would have patch the gap instead to make the neckline just right.
Check the Bodice widths & lengths. The front just needed length adjustment, and narrowing the waist tiny bit. The back also needed width adjustment along the entire length.
Align Sleeve Pattern with Sleeve Block at underarm. Again, pattern lowered slightly for a bit more underarm ease.
Check the Sleeve widths & lengths. The Sleeve is a bit too long for me. Widthwise it’s wider than my Block, but I felt I could do with a bit more ease at the underarm. So I only narrow the sleeve further down.
Design changes
Lower & widen the necklines for a less conservative look.
Shorten the Bodice & Sleeve for a hipper retro look.
Here’s how the final pattern looks compared to the original size 34…
And how it compares to my previous make of the same pattern…
Previously I had just made the design changes without doing any fitting changes first. The result was quite wearable, but the neckline was a bit wide, resulting in one too many exposed bra straps. Here are the mug shot comparisons…
Previous Make
Make 1 front
Make 1 side
Make 1 back
This Make
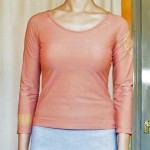
Make 2 front
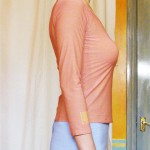
Make 2 side
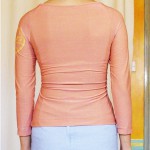
Make 2 back
OK, apart from the less risqué neckline, this make looks worse than the previous with all that draglines pointing to the bust in the profile, and the dreaded sway-back type draglines at lower back.
The back draglines are actually better than the previous make – the photos don’t show this that well. But obviously I haven’t crack this nut yet.
The bust draglines…I wonder if it’s to do with the fabric since the pattern widths are pretty much the same. In fact, in the new pattern I move a bit of width from the back to the front – the previous make’s back was a bit loose. The previous make was in what I presumed to be cotton lycra. But now I’m inclined to think it has some rayon in it. All the rayon fabrics I’ve used so far has that really lovely soft feel that just seem to mold to your shape in a knit, or drape flatteringly in a woven. I might have to make this again in a rayon lycra to test this theory.
Verdict on the Instruction
To be honest, it’s so long since I made the top, so I don’t really remember much about the process. I probably streamlined it by batching up seams to be sewn. (I was in production mode with this top & another 2 knit block tests.)
The main deviation I made was in omitting the armscye interfacing.
On normal sleeve knit tops I’ve been stablizing the shoulder seam but not armscye. Reason being I read that shoulder seams will stretch with weight of long sleeves if not stablized. But for close-fitting armscye like these I thought the armhole would be more comfortable if it retain its stretchability. The lycra in the fabric should theoretically help the armscye return to shape should it temporarily stretch out of shape.
For raglan sleeves I can’t figure out what would be the equivalent of the shoulder seam. So I just left out the stablizer altogether.
Now the embellishment…
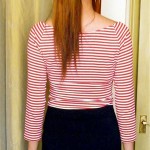
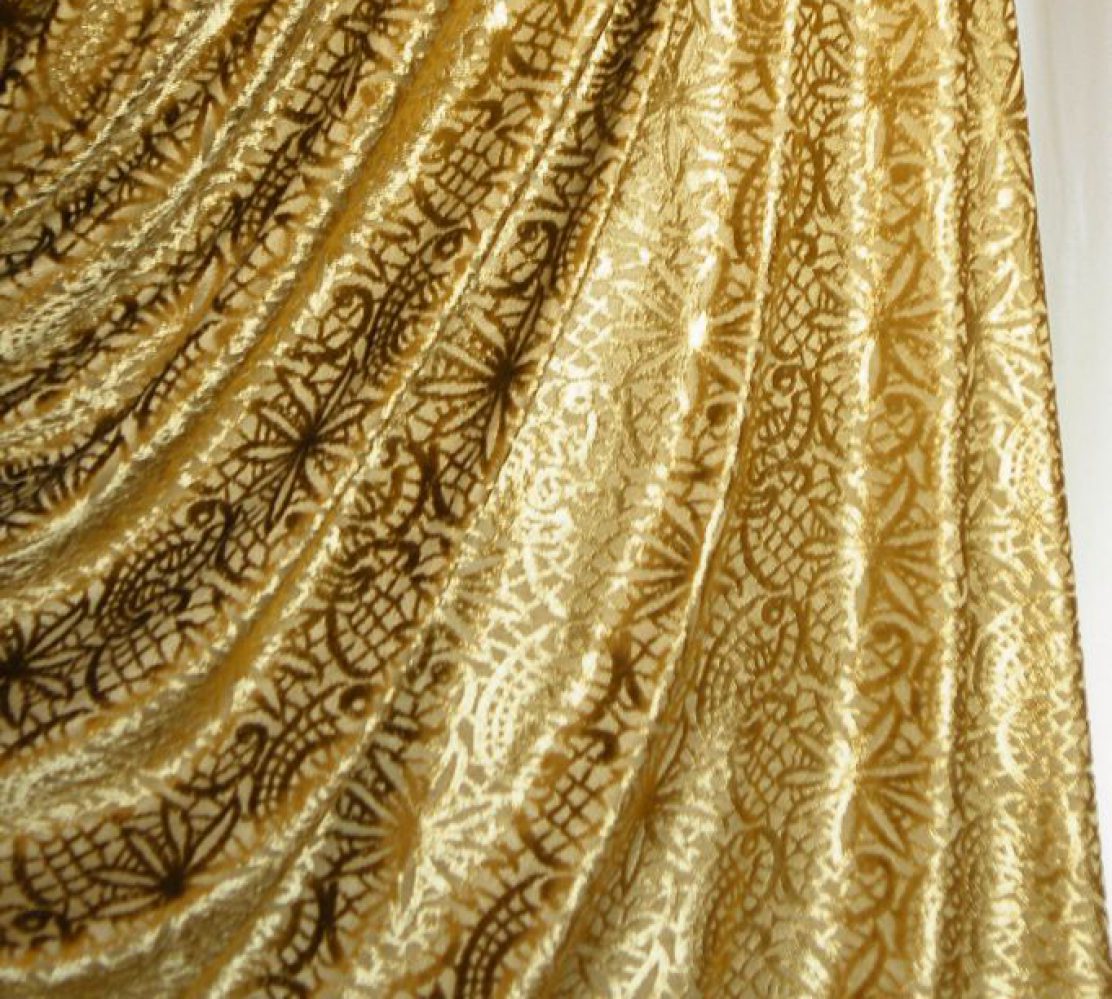
This being a plain T in an almost-not-there color – albeit with a subtle sparkle – I decided to add a bit of interest with fabric painting. Yes, again.
I thought it could be my commitment-phobe version of tattoos. However, standard tattoo black looks too harsh against the peach. So I picked Jacquard Lumiere 561 Metallic Gold which matches the metallic thread in the fabric perfectly.
I thought hers look cool not trashy. Her tattoos were also meaningful. So I adapted the designs to make them meaningful to me too.
Mine stands for “Be Present” with a playful twist. “Be” is in the Queen Bee design. “Present” is in the barcode. Read whatever you want into it!
I tried making a stencil for these like Savory Stitches did with her stenciled bees. But the lines were too fine, the fabric too textured, so I couldn’t get clean lines stenciled. In the end it was tracing paper transfer & free-hand again.
Would I sew it again / Would I recommend it to others
OK, last one in my current batch of 3 to write up.
This one started out as Muslin no. 2 for my Burda 2012-09-123, aka T-Shirt Block. It was a wearable muslin, but with a not very flattering over-stuffed sausage look. So as planned, I cut a new front with more drape, and reused the back and sleeves. Plus old front became the facings.
Cool photo. I was seduced. And the back & sleeve again look basic enough to re-purpose my wearable muslin. The front drape I thought would work much better for this thin and drapy fabric.
Another one graded down to a size 34, ignoring standard instruction for a 38.
Changes Made
Fitting changes
I’m still experimenting with pattern-to-Block comparison as a quicker way to make fitting changes. So don’t quote me on what I’m doing – I’m fumbling. So far it hasn’t worked out too badly for me yet. But it’s early days. And there are probably better, more logical ways to do this that I have yet to discover.
OK, let’s start with the back since it’s much more straight forward. Sort of.
I took the easiest way out, the least change option by aligning the pattern & Block at the underarm level. The above waist side seam then almost match exactly. So all I had to do was to trace the new shoulder seam and lower part of the armscye.
I then moved the pattern up until the below waist side seam almost match exactly & make a note of how much I had to move up.
That amount is then overlapped at the waist line.
Next the front. Not so easy. In fact it’s all a blur. I’d call it Black Magic, except the result wasn’t exactly magical. This is what I can piece together afterward.
I start with the easy part – the front facing. Again aligning at underarm level and CF. In this case size 36 came closer in width. So I use that as guide & marked out new shoulder seam & side seam.
I think for the actual front I just overlapped the same length at the waist level as on the back.Smoothed the side seam at the waist. Then matched the front & back side seam from the hem up & marked the waist level on the front.
Next compared the front side seam from waist level up against the Block, grading out to size 36 at the underarm level so the CF would align & the front wide enough at bust.
Finally, pivot & slide on the underarm point so the armscye align again with the original pattern & CF is still aligned (wide enough). Marked the new shoulder seam and called it done!
Design changes
I extended the CF drape’s cut on facing a bit because the short stub I see on other people’s versions looks a bit untidy to me.
I extended the facing length as well, originally intending to try adding a built-in shelf-bra that I see in a few of my Victoria’s Secret t-shirts / dresses. The shelf-bra didn’t work out because my fabric was too thin, so every bump shows. In retrospect I should have extended the facing all the way down to the waist where the extra drape in the front means a looser fit, so bumps less likely to show through.
Again, I deviated in places to suit my experiments. So here’s what I did:
Front details prepared per instruction.
I chose not to interface the entire facing. In stead, I stabilized only the shoulder & neckline with Vilene Bias Tape. Sewed shoulder seam. Overlocked hems.
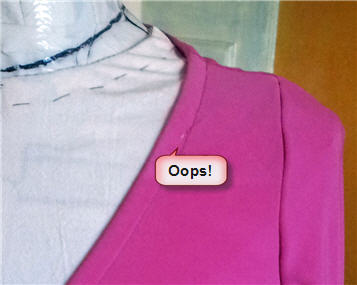
Sewed facing to bodice at neckline per instruction. Almost. See Oops & Improvement A below…
Finish off the front drape per instruction. Almost. See Oops & Improvement B & C below.
Sewed sleeves to bodice with facing handled like underlining.
Sewed sleeves & side seams with facing handled like underlining. See Oops & Improvement D below.
Finished sleeve & bodice hem with stretch seam.
Oops & Improvements
I made a boo-boo during cutting and end up with a gash right by the neckline in the shoulder area. As the front takes up a bit of fabric, and I’m still not 100% sold on this color, I decided not to recut a new front. Instead I tried patching the gash with a bit of iron-on interfacing on the wrong side, and top-stitching along the neckline for reinforcement. It’s good enough for yet another “Wearable Muslin”!
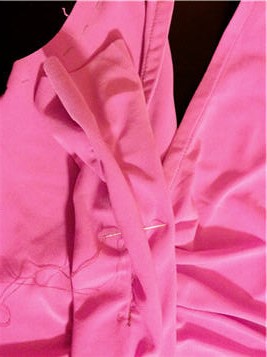
Some of the Pattern Reviewers mentioned that the heavy drape has a tendency to pull the facing to the outside. So I top-stitch the front bust seam to the facing to prevent the facing from shifting – see photo showing the stitching from the facing side. I think the extended facing and drape fold-over bit also help. I don’t have the same facing flopping out problem in my finished top.
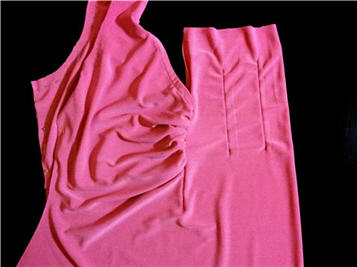
What didn’t work out so well is my attempt to control the hang of the drape. I wanted the drape to be more dramatic. So I tried stitched down pleats instead of gathering at the fold-line.
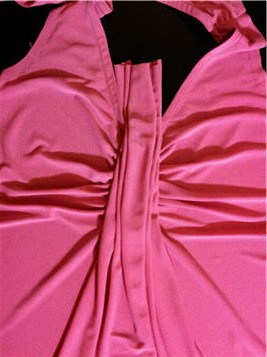
But the stitching was too visible in the finished result. Plus the way I overlocked the end and folded over the neckline meant the drape wasn’t hanging smoothly. So I had to unpick the pleat stitching. But I did learn from the process that irregular pleats – just bunching things up – gives me a nicer, more natural looking drape than regular pleating or gathering. In fact, I wish I had done the same with the bust gathering. Standard gathering just produce an unflattering big puffy mono-boob look.
The shelf-bra Oops. Well, this might not have been an Oops if I had used a more substantial fabric. The shelf bra idea is basically facing that goes down to your underbust with elastic sewn to the bottom edge so it forms a nice extra support for your girls. I had to take the elastic out. But the longer facing that’s sewn into the armscye and side seam does help support or counter-act the weight of the front drape nicely.
Would I sew it again / Would I recommend it to others
After all that I have to say I’m a bit Meh with the result. It’s partly the color. That one styling shown above was about the only combination that I could come up with. Nothing else in my wardrobe want to play nicely with this color and shape.
The mono-boob look also is a bit disturbing. Fine on younger, flatter busts. No so fine on my short-waisted torso with “maturing” girls. Maybe irregular pleats instead of gathering would help. Maybe a lower, deeper V-neckline might also deflate the melons a bit.
So learn from my mistakes. And if you are a perennial jean wearer by all means go for this. There are definitely other makes of this pattern out there that look really flattering on their owners.
In the meanwhile I’ll be wearing this around the house as one of my growing pile of slob-out wearable muslins!
Now back into the rabbit hole for my next batch. I think I should give myself a break from complicated pattern fitting puzzles and whip up a batch of easy T-shirts now that I have a TNT T-shirt Block. What do you think?

 I was going to make it with 3/4 sleeves. But the fabric I had in mind was a $1/yard remanent from FIDM’s Scholarship Store in LA, so not enough for long sleeve. No problem I thought. I’ll just make a short sleeve version.