WORN WITH: 1-2Self-drafted Nakkashi 5036 choli top + Agnès b. Hommes shirt; 3 Burda 2016-08-125 stripe front tie T; 4 Self-drafted Nakkashi 11042 anarkali tunic & dupatta shawl;
The Design & Pattern
Design Inspiration:
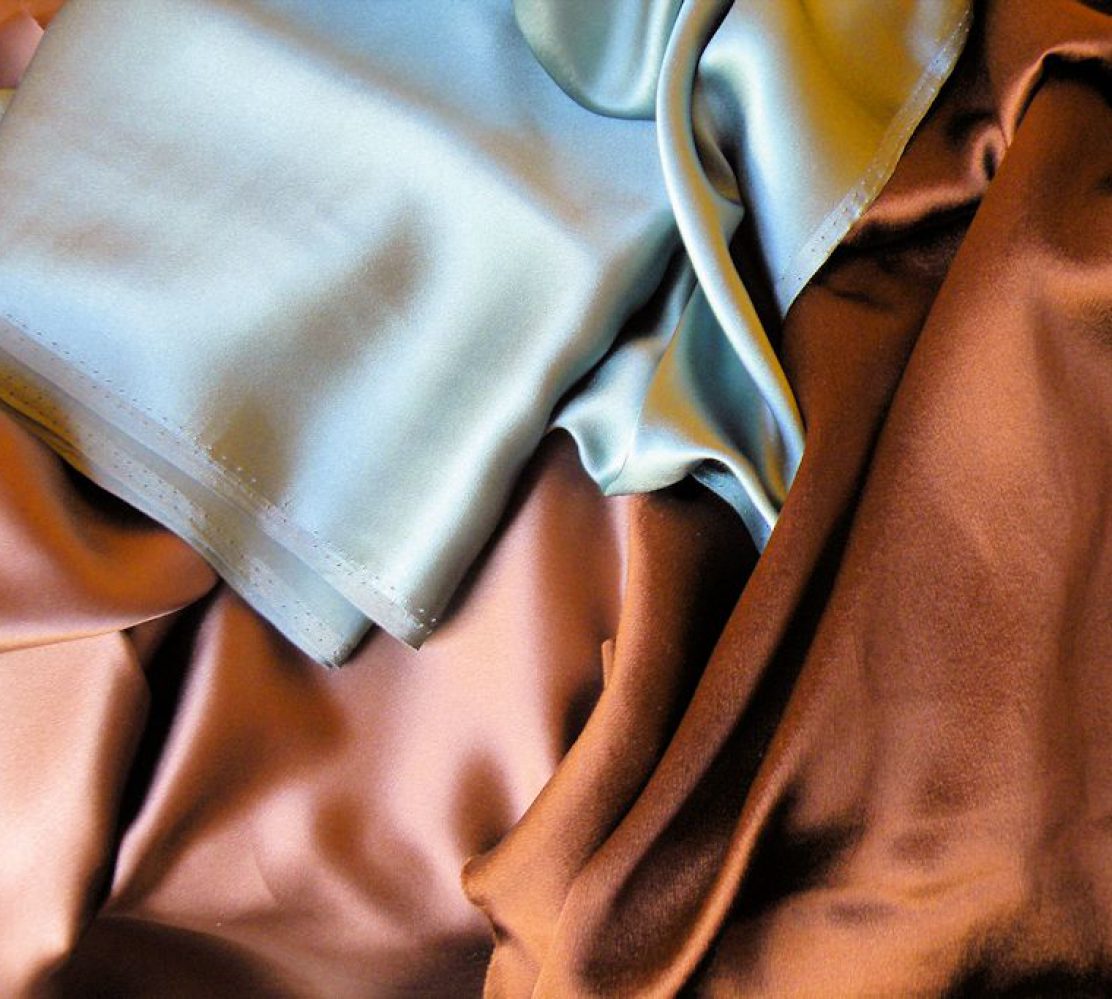
You can’t see much under the tunic in the photo. So apart from a slim silhouette & capri length I had to make up the rest. I decided on fly front with button closure for a more yin-yan look. Would have added pockets and belt loop as well, but the fabric doesn’t have much give and frays badly. So I omitted this to keep the silhoutte slim and avoid tears during construction.
Design: Mid-rise, F side dart, B 2 darts, capri length, Fly front, no pocket.
Fitting: To accommodate lining bulk & my middle age spread, added ease by sewing approx 1/2″ SA instead of the 3/4″ SA added to the pattern for side seams & inseams. This gave me approx 7/8″ extra ease at the waist tapering to no extra ease at the bottom of the legs, almost 1/2″ extra crotch length.
The Jacquard & lining both fray badly, so had to overlock as soon as the pieces were cut.
Stretched bias edges – inseams, leg side seams, back crotch fork – as much as possible, which is not much in this fabric with no give.
Because of the angles of my crotch points, it’s easier to sew the inseams first, then crotch seam. This does mean it’s not possible to fit the inseam as I sew (like suggested by Pants for Real People).
Sewed side seams & inseams with 1/2″ seam allowance instead fo 3/4″ tapering back to 3/4″ at hem.
The Verdict
Not the most comfortable slim trousers thanks to the fabric. I reckon it’s synthetic. There’s also not much give. So despite being almost the same pattern as my Slim Pants Wearable Muslin 5 (apart from waistline), this pair feel more restrictive. Of course I would finish something a bit thicker & not so breathable just in time for a heat wave. I still have a fair bit of the fabric left. I think a skirt or dress with more ventilation may be a happier match.
I wish I could tell you that turning a 0-ease Pants Block into a Slim Pants Block is as simple as adding ease to the side seams & inseams. It was not. At least not for me. I did eventually get a block that I’m OK with. But it took many many muslins & I’ve lost count of the tweaks.
So no tutorial. Just some mug shots demonstrating the effect of key alterations I tried. You be the judge of what you would be happy with if you try to do the same. Keep in mind that variable natural lighting may have affected how the muslin looked in the mug shots. And of course the same alterations may have different effect on different body shapes. Hopefully you will get to your happy point more quickly than I did.
Since this is a long & tedious road, let’s start with the destination – then you can skip the journey if details send you to zzzz…..
Slim Pants Block (for non-stretch wovens)
0-ease Pants Block vs Slim Pants Block
Final muslin
Wearable Muslin 5
Final Block (sort of)*
the road from 0-ease Pants Block
Apology for not giving step-by-step rationale for why I tried certain tweaks. The road was too windy & the journey too long ago. Plus I’ve threw away the WIP patterns in a fit of tidying up. In general, I was trying to get rid of wrinkles and add enough wearing ease. I’ve listed all the steps I noted down. The one crossed out were tweaks abandoned, mostly because they didn’t seem to make any difference.
the prep before the journey
Comparing old RTWs & pants made so far…
High St pants
Designer pants
BS 2017-11-107
Best fit seems to be the high street wide leg pants in drapy wool crepe. Torso & crotch was still quite fitted, but the legs were loose. There was hardly any puddling. Interestingly the back crotch fork area is stretched. Not sure if this was stretched during wears or if it was part of the design.
The designer fitted pants in stretch wool doesn’t fit so well. I got the usual draglines in the crotch & thigh area front & back. Even with stretch fabric, the thigh is still larger than my wearable muslins. But the drapy fabric helps make the legs look slimmer. BTW pardon my hot cross bum. Gotta sort out new undies now my behind has gotten more droopy & squishy }:-)
Both RTW pants have shorter crotch height, crotch length, shallower back crotch curve (not so scooped) than my wrap. Yet they still feel comfortable enough. Actually they’re closer to my crotch height measurement. For some reason the wrap derived 0-ease pants block ended up about 1″ longer in crotch height than by measurement.
My previous Burda 2015-11-107 fits better than the designer pants, but this was achieved through over-tight waist-to-hip + back princess shaping. Even then slight wrinkling in back thigh, not to mention weird pooling at front crotch – thigh inseam.
Research trouser fitting on Cutter & Tailor…
Granted, most discussion are about men’s trousers. But some of the basic fitting principles probably still apply. These influenced my decision to shift the knee match-points in most of my muslins & subsequent makes based on this Block. In my wrap, the front knee level is lower than the back knee level. I don’t actually manage to match the wrap knee levels precisely, I just try to reduce the difference as much as possible with iron work stretching-shrinking the side seam & inseam lines.
Don’t ask. This was a stillborn. Didn’t even made it into muslining.
Pattern 2
0) 0-ease Pants Block 1) Add ease at side seam (1/2″ total at waist, widened to 1-1/2″ total at hip) 2) Add ease at darts / princess line instead, with bigger darts (same amounts) 3) Lowered crotch 1/4″ 4a) Back hip tilt – pivot at side seam at hip level 1/2″ 4b) Curvier & lower back crotch (dotted line) 5a) Back hip tilt – pivot at side seam at bum crease level 1/2″ 5b) Add crotch inseam ease 1/8″ 6a) Back hip tilt – pivot at side seam at bum crease level 1″ 6b) Curvier & higher back crotch + Add leg ease at inseam (1/4″ with extra from thigh up) 6c) Right leg no shifting of match point / ironwork 7a) Straighten legs + Add more ease at inseam from knee up + Curvier Back crotch 7b) Right front add 1/2″ more ease above mid thigh with deeper dart
Pattern 3
8a) Add more ease at inseams (1/4″ – 1/ 2″) + Split darts into 2 per quarter + Increase Back dart width (1/4″ & shift side seam above hip to compensate) + Add more Front waist ease (1/8″ at side seam & decrease inner dart width by 1/8″) 8b) Right side raise waist 1/2″ at side seam 9a) Tried fitting book prominent calf adjustment (effectively deeper back crotch curve + lowered CB waist). No improvement. 9b) Legs straightened even more + Right side pivot at crotch at high hip level to increase side seam length 9c) Testing lengths & high-low waistline 9d) Final lengths for Wearable Muslin 1
⇒ Wearable Muslin 1
Gingham Capri with belt loop – Design Changes:
Lower F waist (1″ difference between CF & CB)
Contoured waistband 1-1/4″
Capri length
Fly front
Slant-front pockets
Belt loops
Assessment after days’ wear:
bum-thigh become saggy, waist seem to tilt front up & back down
knees baggy & twisted in front & excess pool in back just above knee – excess fabric from drooped back + angle of thigh vs calf too great & stacking of my upper over lower legs too wonky for slim but not skin tight fit to drape smoothly
Pattern 4
10a) More Back Hip Tilt pivoting at side seam bum crease additional 5/8″ (1-5/8″ total) + deeper curve (CB back to curved) 10b) Straighter CB above hipline 10c) Right raise waist 1/4″ at side seam 10d) Shift back thigh ease to inseam, increasing crotch length slightly + more ease from knee down, redistributed between F/B so both F/B knee down are straigher
⇒ Wearable Muslin 2
Gingham Capri without belt loop – Design Changes:
Lower F waist (1″ difference between CF & CB)
Contoured waistband 1-1/4″
Capri length
Fly front
Slant-front pockets
Assessment after days’ wear:
back crotch curve scoop seems too low
Pattern 5
11) Shallower back crotch curve + Less ease at thigh inseam
⇒ Wearable Muslin 3
Brown High-waisted Capri – Design Changes:
Lower waist equal 1/2”
Contoured waistband 2″
Capri length
Side invisible zip
Side-seam pockets
⇒ Wearable Muslin 4
Brown Mid-rise with Hem Zips – Design Changes:
Lower waist equal 3”
Contoured waistband 1-1/4″
Extended length
Fly front
Slant-front pockets
Hem zippers
Assessment after days’ wear:
Weird pooling at front crotch
Waist still seem to tilt front up & back down.
In high-waist version, this caused waist to stick out in the back
In low-waist version, this caused more bagginess in bum-thigh area
This problem made these 2 rather uncomfortable to wear. Possible causes…
waist to high hip ease + contoured waistline (low front high back) that enlarged waist further = waistline sits lower than intended
waist ease + full tummy + flat lower back = waistline level even out front-back or even tilt towards skinnier parts – higher in front & lower in back, resulting in back crotch not sitting as intended, drooping causing excess length further down
More hypothesis to test…
Not adding ease at waist-to-high-hip OR assume ease means pants will hang lower on waist evenly, so shorten evenly above hip
Try 0 ease back + front with pleat – ie all ease on front ???
Don’t do high-low waist unless waist-to-high-hip is skin tight & relies on fabric give for ease in this area.
Wider legs especially back thigh to calf so fabric doesn’t have to bend to conform to leg shape & ending up with fabric puddle instead above the knee & front twist at the knee – wide enough cone to skim over all curves
Reduce back crotch scooping, stretch back crotch fork if possible, raise crotch level a little
Pattern 6
12a) Reduce Back Hip Tilt at crease level by 3/8″ (1-1/4″ total)
+ Add Front Hip Tilt at hip level 1/4″
+ Shallower Back crotch curve
+ Reduce Back inseam thigh ease 12b) Front Hip Tilt at hip level 3/8″ more (5/8″ total)
+ Remove Back ease above high hip 12 c) Testing flared legs 12 d) Testing high-low waist & different rise…settled on:
CB 3/4″ higher than CF
mid-rise = 1″ — 1-1/2″ — 1-3/4″ lower than high-rise (waist)
low-rise = 1″ lower than mid-rise
ditch the extra-low-rise (1″ lower than low-rise)
+ Reduce Front ease above hip to 1/2″ at waist when lowering waist
Pattern 7 (final)
I thought I was done after Patter 6. Unfortunately shortly after I grew my donut waist. So a bit more adjustment was called for.
13) Shift crotch inseam 1/4″ to Back tapering to nothing at mid-thigh
+ shave 1/8″ off thigh side seam
+ increase Front flare 1/8″ below knee at inseam & side seam
+ straighten CF crotch adding 1/4″ ease at Front hip
+ straighten CB crotch adding 1/8″ ease at waist & deeper curve
Assessment after days’ wear:
Although there’s still slight bagging under the bum, I’m calling it done.
At least front crotch now looks normal.
It’s not as slim as I would have like, but can’t be helped if I want to be able to sit down.
Finishing up
Traced these onto card paper.
Broken the Front & Back pieces into components so I can mix & match style – eg different rises, dart options, leg styles below knee. This also make the Block easier to store in a small place. I don’t have the luxury of a rack of hanging full Block/Pattern pieces.
No seam allowance so that I can trace the combination I want to create fashion patterns.
Unfortunately I made a mistake when tracing. Instead of the high-low waistline of Wearable Muslin 5, I traced even level waistlines. No wonder the two pants/trousers I made using this Block came out less comfy than WM5. I only discover this as I prepared the illustrations for this post. Oops. Thankfully with the component approach I only need to redo the above hipline components.
My RTW jeans are on their last legs. So it’s Ginger Jeans time again. The last couple of pairs – my first jeans-making ventures – are great success judging by how frequently I wear them. But this time I need black versions. Actually I would have preferred grey. But the stores just don’t seem to want to sell me grey. So black it is and I’m hoping they’ll fade fast.
The last two pairs I made were pretty good. So the fitting changes I made last time were the starting point of this batch. I did tweak a couple of things:
Crotch: There was slight pooling at the front crotch on last two pairs, though after washes the pooling disappeared temporarily. This time I tried taking a small wedge off at thigh level (1/4″ at inseam tapering to nothing at side seam). The tilting made the front crotch extend beyond the leg a little bit & I end up shaving this little bit (made Front Crotch shorter). Shaved off similar amount from Back Crotch as well for my thinner thigh.
Lower legs: The last two pairs twisted slightly & was very snug because of my big calf & how X are stacked. I widened Front Leg below the knee – a bit more on the inseam than the side seam.
Design changes
I didn’t like the constantly falling down feeling of the low-rise jeans, so this time both pair were based on high-rise View B. But for one pair, I lowered the waist by 1″ for a mid-rise version. Front Leg (A) was shortened at the waist. Back amount was split between the Yoke (C) and the Back Leg (B).
For the mid-rise version I also added flaps to the back pockets based on one of my soon-to-retire RTW jeans.
For back pocket designs I used the Reinforced Straight Stitch (triple stitch) on my Husqvarna Sapphire to make the black-on-black design stand out a bit more.
For button holes I went with keyhole shape this time. The thick stem of jeans buttons didn’t like the straight slits of the Heirloom Buttonhole stitch I used on my last two pairs. (That is the stitch on my sewing machine recommended for Jeans.) They wore the stitches out too quickly. The RTW jeans all seem to have a slender tear-drop shape. I don’t have anything similar on my machine. So this time I went with a keyhole shape using a combination of Heirloom Buttonhole stitch for the straight portion of the keyhole & hand buttonhole stitch for the round hole bit.
My button & rivet attachment skills are still a bit rubbish. The button tool kit that came with the buttons I used this time did help with the button setting. But I didn’t have any tool kit for the ring rivets, so wasted several pairs when the posts went in slanted. Thankfully I didn’t have the problem of the post poking through the ring rivets that I had last time. These posts are less pointy, and maybe using the button die base to support the rivets also helped a little. I did also added a couple of scrap denim layers to deal with problem of the posts being too long instead of trimming the posts. However for some reason I always seem to have problem with the left front rivets. It came off one of my last batch, and same thing happened again with this batch during the first wash. Come to think of it, all the wasted rivets were for the left front too! Next time I’m going to try donut buttons & nipple rivets I bought from Citron Jeans in Japan (also available on Etsy). They both come with hand tool kits. If that doesn’t work better I might try DM Button’s Jeans Button/Buttonhole & Rivets service. – it seems like London’s answer to NYC’s Jonathan Embroidery Plus that the NYC sewing circle raves about.
The Verdict
Not so great. These new pairs are too tight! Because I did gain a bit of waist flab recently, I made sure to try these on before top-stitching the inseams & side seams. They were fine then. But after I finished them, threw them in the wash at low temp & line dried them, they came out too small. I couldn’t even button up. And this was before I even worn them once! Arrghhhh. (Yes I did pre-wash & even tumble-dried the fabric at least a couple of times before making these Gingers.)
After a few days of torture attempting to wear them in, I was able to slowly zip further & further up, and eventually button up. But I’m definitely getting the muffin-top with these, unlike with my previous Gingers. And they’re also not as comfortable as those old pairs either. These sit much closer to the body at the crotch giving me that constant wedgie feeling. Not sure if it’s the slightly shorter crotch or the fact that the too tight waistband went seeking for a smaller circumference further up (the waistline on these are not at the smallest bit of my waist), thus pulling the crotch up with it. The front waistband also twist a bit.
I think my woes may partly be caused by interfacing the wrong part of the waistband. Unlike last time, I interfaced the quilting cotton facing instead of the stretch denim outer. The quilting cotton is probably already stable (ie not stretchy) enough. This may have left the facing too constrictive & the outer unstable enough to twist.
Unfortunately there’s no easy way to alter these pairs. Because the waistband is cut with no side nor back seams, there’s no place to let out. I would have to replace the whole waistband if I want more comfort. Or do more waist exercise to lose the flab!
Note to self for next time:
Use the stretch denim for both waistband facing & outer, and interface the outer with knit interfacing. Hopefully even with top-stitching the stretch denim will be more accommodating than interfaced quilting cotton.
Cut waistband with CB seam to allow alteration in case waist continue to spread.
Back in July 2017 before I gave in to the middle age slump…
With so many beautiful choli blouse fabric in the Stash I really need to get some pattern block for choli blouse sorted. And I have in fact been working on it for ages. So much so that I now have way too many pattern pieces, muslins (wearable & not), & mug shots to confuse me never mind you…argh! Long story short, no cigar yet. But I have a hypothesis with 2 more pattern drafting approaches to test. On to the nitty gritty…
My 3 requirements for Choli Block:
Bust support lift & shaping: Depending on the back neckline design, I may not be able to wear a regular bra with my choli. So built-in bust shaping / support would be nice. But it needs to work for woven fabric & not constrict breathing.
Stay-put neckline: Allow low / open front & back neckline without the top falling off the shoulders
Fitted sleeve mobility: Allow arms up & forward without excessive sleeve width & winged effect on short sleeves
Since I already had a top block that seems to fit alright I thought I’d get better results using that as the basis for my draft rather than follow the relatively less personalised authentic Indian instructions. (Typical Westerner!)
I tried to raise my ageing bustline unsuccessfully. It was only like 1/2″ higher on my pattern. But I think my custom embroidery shrunk the pieces despite being stretch taut on a frame frame. And because I was worried about metallic embroidery thread being scratchy I didn’t extend the embroidery far enough into the seam allowance to allow me to let out at the shoulder seams. I ended up with some draglines in the upper bust area for my big day. (Did let out what I could afterwards. But there wasn’t much seam allowance to fix it entirely.)
Lowered neckline (aka unintentional off-the-shoulder look) wasn’t an issue in this version as I used the cross-back ties that one finds in many authentic Indian choli.
But limited sleeve mobility was an issue despite a moderately shallow cap. The bit that feels most restrictive was mid arm joint height, as if the cap area wasn’t wide enough.
I had to tweak my personalised pattern to fit the ready-made embroidery, which is presumably shaped to work with standard Indian pattern-drafting. Eg the allowance for back waist dart is smaller than my back waist dart, so some of mine had to be pivoted to the back cut-out area. In other areas I had to twist the fabric slightly to fit my pattern, or even patch a bald area with embroidered scraps.
Bust & neckline not an issue here as I didn’t attempt to lift the bust & this design has a back cut-out rather than lowered neckline.
Sleeve mobility wasn’t too bad, but comfort was my main issue here. I made the cap even more shallow & wider to increase mobility & tapered the sleeve width more sharply to minimise the winged look. The result was the heavily embroidered underarm areas getting too close for comfort. I felt like I was holding something with my armpits! Again had to suffer through it for a friend’s wedding, but redid the sleeve increasing the cap height (by shortening the sleeve seam length) & removed as much embroidery from the area as I could. Wearable. But now the sleeve’s more restrictive. So I wouldn’t reach for it naturally.
After armscye alteration…
Before
After – can’t raise arms as much
Before
After
Before
More muslins & research…
Stay-put lowered neckline:
Tried the instruction for lowered F&B neckline from K King’s Moulage book. It was a method devised by his Indian teacher. Didn’t work for me. Actually made the shoulders slip off even more easily. Maybe I didn’t follow the instruction correctly?
My patterns had the back neckline at shoulder blade width, but the muslin necklines all spread out more widely. Perhaps it was too much to ask the neckline to stay put at the shoulder blade peaks?
Sleeve mobility:
Tried cutting sleeve on the bias. Sleeve looked marginally less wrinkly, but made no noticeable difference to mobility nor decrease the winged look.
Tried on a me-made choli based on older bodice block for comparison & was surprised to find that it actually had better sleeve mobility without excess sleeve width & winged effect. I had thought the shoulder slope & sleeve cap fit was off on that version, causing excess fabric folds pointing to armpits & draglines from centres of neckline as if the sleeves were pulling the neckline outward. Comparing the latest sleeve draft to that choli (don’t have the pattern anymore) that earlier sleeve shape was actually closer to my immobile fitted sleeve – cap taller & narrower than my latest drafts…WTF!?!?!
Not much interesting sewing happening here lately. I still feel exhausted & low from last two years’ craziness. To keep Meaning-Of-Life questions at bay, I tried to keep myself distracted by replacing boring basics in the wardrobe & made a bunch of easy-ish T-shirts that refine my stretch blocks.
This is a straight replacement for a couple of RTW Ts that I wore to death. The pattern is essentially my Camden Town Kids Wannabe top minus the puff over-sleeves & the funky hem. I also tighten up a bit at the side seams since the cotton (+lycra?) knit I used for this version moulds to the body better, so can take on a body-con shape without draglines – unlike the totally artificial fibre fabric I used for the previous top.
For the shawl collar I used V2980 as a guide to shaping the pattern using my own Blocks. I cut the collar as an extension to the back piece rather than a separate piece – my fabric stinginess won the day again! But I ended up having to stabilise (with bias tape) & stitch down the facing side of the collar extension along what would have been the shoulder-neckline seam. 6 vs half-dozen blah blah [roll eyes].
As for the shawl pleating at the side seams, I tried to minimise bulk by pleating only the top layer (ie not the facing layer).
Like my take on V2980 I again added a shelf bra (this time with double layer of stretch net), with elastics at both the bottom of the shelf bra & its seam with the front neckline.
The initial result was a bit disappointing. The main problem was a gapping front neckline: I didn’t account for hollow at the chest that affects the fit of a lowered neckline. I also ended the shawl pleating too high up at the side seams. This resulted in the pleating being barely visible & the shawl not overlapping the front neckline enough, thus exacerbating the wide gapping neckline problem. To fix this I tried redoing the armscye – side seam: I narrowed the front neckline (cross-front width) slightly at the armhole, and reduced the depths of the pleats a bit so the shawl can end lower at the side seams (bustline now). It’s a bit better now. But I’m still not 100% sure I’ve cracked this silhouette.
3. Strappy T
Self-drafted Strappy T
This – along with a matching skirt – was actually an afterthought tagged on while making T #6 below. But as it’s based on the set-in sleeve block let’s talk about it first. It started with liking the fabric swatch combination. Unfortunately the result didn’t turn out like my doodle promised. The contrast band end up more wrinkly than planned. And my short straight figure just doesn’t do my doodle any justice. Last but not least, my attempt at built-in bust support with a darted shelf bra (as suggested by defunct Pattern School instruction for a Tankini) left an unsightly visible seaming bump. So a bit meh.
This 2-bird 1-stone T attempted to use up the last scrap of cotton (+lycra?) knit from 1 above & retest my tweaked Raglan Dartless Knit Block at the same time (Test 3 in my previous Raglan Knit Block post). I had problem with the armholes feeling too tight – riding up against the armpit – despite the Block being derived from a set-in sleeve version which fitted fine. So I tried simply lowering the armpit a little bit. It’s been a while since I made the tweak, so I wanted to test the fit again in this forgiving cotton knit. No luck. Wearable, but the armpit is still a tad too close for comfort & the bodice still rides up slightly. The neckline is also a bit smaller – sit higher than I thought it would.
It’s good enough to wear, but not successful enough to make again.
5. Tweaked again Raglan T muslin 1
Self-drafted Gothic Raglan T
This time I tried adding length to both the raglan bodice & sleeve about mid-way up the armscye. This does seem to work better comfort-wise. But as the fabric I’ve used for this one – thin cotton jersey & lightweight power mesh – are both quite stretchy anyway, I won’t call this tweak a success just yet.
Exact same pattern as T #5 above. Wanted to test the pattern on a different knit. This time a less malleable artificial fibre knit. The very same fabric I’ve made a raglan T in before – Burda 2010-02-112. I got way too much of this fabric that was on sale, & that older raglan T is getting a bit tatty. Just the chance to replace & test my tweaked Raglan Block at the same time. Gosh I love my 2-4-1s!!!
To jazz this up I again turned to gold stamping/painting Queen B on the back, swarm of worker bees on the front, & barcodes at the wrists. Unfortunately my initial attempt resulted in a poorly positioned worker bee on the front bodice. For a moment I thought I’d just own it like a proper feminist should. But I chickened out & invited more bees to disguised the mistake. I don’t like the resulting mess of a print as much, but hopefully it’ll make the T more wearable.


 You can’t see much under the tunic in the photo. So apart from a slim silhouette & capri length I had to make up the rest. I decided on fly front with button closure for a more yin-yan look. Would have added pockets and belt loop as well, but the fabric doesn’t have much give and frays badly. So I omitted this to keep the silhoutte slim and avoid tears during construction.


