First Wadder of the Year

So far this year I have sewn 0 item from my SWAP. Typical isn’t it? Straight after the Jungle January fever another exciting detour presented itself – an unexpected escape to balmy Jamaica. I thought I was sensible opting to air my underused summer dresses instead of cramming in last-minute Holiday SWAP. But I have little to wear as a beach cover-up. Enter the H&M scarf I had bought not so long ago precisely for this purpose. It shot straight to the front of the queue.

Style Shots

No mug shots this time because this is probably going straight back into the ReFashion pile.

Fabric & Notions Used

The Design & Pattern

This is one of those refashion challenges where you make it up as you go. So there isn’t a proper pattern. My initial idea was a simple kaftan. First up is checking pattern placement…

1-dsgn-pattern-placement

  • I first tried folding in half with the fold on the shoulder line. This made the pattern look like those Indonesian monster masks which I found too distracting. So that’s a NG.
  • I then tried folding on the bias. I liked the pattern placement. But I noticed the scarf isn’t perfectly square, so it makes the garment look lopsided. So again NG.
  • Lastly I tried folding in half again, but with the fold as the hem and the scarf border at the shoulder line. I like that the border adds interest at the shoulder and the pattern balance it out acting as big stretch of border print. The placement also make the pattern look like a potted flower or a dancing person. So happy days.

Once the pattern placement was decided, I pin-fitted. Unfortunately it looked frumpier on me than on Q because I have arms and she doesn’t. The silhouette becomes wider, which make the length appear shorter. So I decided to lop off the bottom portion of the sleeve area and use the same approach as I did on my altered RTW kimono top. The shorter sleeves shift the emphasis to the bodice area to create a stronger vertical silhouette.

Construction Notes

2-sew-details

  • As the fabric frayed badly & shifted easily, I spray-starched & stablized like crazy before I even cut.
  • The sewing was then fairly straight-forward: French seam for side seams & to join the bottom of the sleeves fronts to backs. Then hand-rolled hems for the bodice bottom and top of side seams & inside / underarm edge of sleeves. At the top the front & back are joined at shoulder, elbow, & wrist only. Then the starch & stablizer was washed out.

The Verdict

The top actually doesn’t look too bad. But look isn’t everything is it?

After one wear part of my side seam was already falling apart! I think I might have trimmed the seam allowance too aggressively for this fray-loving fabric. (Thank goodness for those dinky hotel sewing kit!) The whole thing just felt too delicate to wear on a relaxing holiday, especially when  sun-screened skin & sea-laddened air made everything feel so sticky. I was constantly worried that I’d rip the seams. Or the underarm slit when I put the top on or take it off. I may have slit this a tad too far – the sleeves felt like hanging chads, ready to detach at any time. What a bummer.

The print is too lovely though. So for now the top is going into the Re-Fashion pile.

Twin needle light bulb moment

You know how twin needle is supposed to mimic cover stitch & give you stretchy hem with just a sewing machine? Well I’ve never managed to get it to work. Not only do mine come out with an ugly ridge between the two rows of stitches they were never stretchy enough either.

But with my failed mock ribbing experiment came an eureka moment for my twin needle stitching. The Threads article on mock ribbing showed examples of how changing tension affects the twin needle stitching. Loose tension makes the ridge go away. Now I’m sure I’ve tried this before but ruled it out because it also make the zigzag of the bobbin thread disappear. But this time I had left long starting & ending thread tails, & stretched the sample afterward to see how much it’ll stretch. The thread tails got pulled in & gave me a bit more zigzag in the bobbin thread. Best of all the sample then stretched as much as the fabric would stretch!

2-sew-details-twin-needle-eureka

Now I’m not sure if this is how you’re suppose to sew it. The loose tension & bobbin thread that pulls easily worry me a bit. Would it be strong enough? But I reckon that as long as I secure the ends this properly stretchy hem surely must hold better than less stretchy ones that pop. Maybe it’s like willow in the wind – wimpy looking but in fact holds up better for going with the flow?

Anyway, I’ve tried it on the Crouching Batwing Hidden Python top. To make stretching in the bobbin thread easier I sewed the hem in two halves leaving  thread tails at both side seams. Maybe one day I’ll feel deserving of a serger with cover stitch (separate machine is not an option in my cramped home). For now I’ll give this new trick a few more chance to prove itself. What about you? What’s your favorite way to sew a stretchy hem?

Designer Love Child Wannabe Python peplum top

With pretension to be the Love Child of Vivienne Westwood & COMME des GARÇONS it’s no wonder this last snake was a Diva from the very start. After the first few seams it all became a blur. So forgive me for just jutting down what I remember & not making much sense.

Style Shots & Mug Shots

WORN WITH: 1-3 Burda 2011-08-121 skirt; 4 Altered drindl skirt; 5 TopShop skirt.

The Design & Pattern

So here are the inspirations…


I’ve always loved Vivienne Westwood’s adaptation of historical costumes & traditional tailoring with a twist of punk. I had this top bookmarked in a book on VW I own for ages. I thought the drape might be a great way to feature the New World Snake. Forgive my ignorance about the different types of corset…Is this 18th century corset style? Anyway, I was hoping it’ll give me some cleavage along with ever enticing cowl drape. Sleeveless wouldn’t be so practical for me since I’m a tropical baby. And waist length again would leave too much cold inducing belly airing. So I decided to add this side peplum detail from my early love – Comme des Garcons S/S 1987 collection. I had attempted a Wannabe before (shown by the sketch, the very wearable result long lost in the move across the Pond). I like how the peplum emphasizes the waist where it’s most visible – at the sides when viewed from the front/back. And I like the extra kinks of drape on either side of the center panels.

For the pattern, I adapted the instruction in Waisted Efforts: An Illustrated Guide to Corset Making for a 1690 style corset. The reviews for the book on Amazon weren’t great. But I bought the book in a bookshop way before Amazon. And I’m glad I did. I like the fact that it’s written for theatrical costume designer / patternmaker & focuses on pattern-drafting. I like that while it covers historical info it’s practical, taking into account that actors need to be comfortable enough to move & perform. And that actors come in different sizes & shapes. So creating a custom “French Block” (looks exactly the same as a Moulage!) is key. The patterns are derived from the “French Block” so again customized. I don’t think French Block is the same as sloper drafting taught in fashion schools as one reviewer said because most sloper instructions include wearing ease and seem to be drafted for standard (ie idealized) shapes. The French Block shown is skin tight and designed to fit all shapes & sizes – eg there was one showing rounded upper back adjustment. The inclusion of the French Block also makes these gridded patterns different from those found in other historical costume pattern books I’ve seen. Those give only one size. Here if you put in the effort you can figure out how to draft your own custom fit patterns based on your French Block rather than just scale up the gridded pattern. And the heavily punctuated, phrasy style of writing does not bother me at all. In fact, I find it much easier to understand than very very long sentences with no punctuation marks. Different strokes I guess.

Block Used:

My Kenneth King Moulage of couse!

Design Changes Made

I think this is a case of pictures worth a thousand words. So have a couple!

Fabric & Notions Used

Construction Notes

Sorry, following are really just notes for myself & not intended as proper sewing instruction for you guys. The construction order for this was rather complicated to figure out.  So if I don’t write down what I do remember it’ll be a royal pain to recreate something like this again. If they happen to be useful to you too that’s great. The usual pressing, grading, neat seam finishing along the way applies if you want to try it yourself!

  1. Shell:
    1. Stabilize CB with interfacing. Sew CB invisible zipper, then CB seam above zipper.
    2. Sew & top-stitch Inner Front Princess seams, Back Princess seams.
    3. Sew Sleeve & Cuff Underarm seams, then Cuff right side to Sleeve wrong side. Turn cuff out & tack/stitch in the ditch at Underarm seam.
    4. Stabilize Front & Back necklines, Back shoulder seams with interfacing and/or Vilene bias tape.
  2. Lining: Overlock Inner Front Princess seams, Back Princess seams, CB seam above zipper.
  3. Back Neckline: Sew Back Neck Facing lower edge to Lining, then Facing-Lining neckline to Shell neckline right side together. Understitch SA to Facing-Lining.
  4. Front Neckline: Sew Feature Panel cowl facing edge right side to Lining right side to Shell wrong side, stretching cowl facing edge to match neckline especially at curves near bust. Understitch SA to Facing-Lining.
  5. Feature Panel: Turn Feature Panel out over the Shell Front. Baste Feature Panel shoulder pleats. Vertically ruch/gather Feature Panel between bust & waist on both princess seams. Baste Feature Panel to Shell at shoulder, armscye, outer front princess seams.
  6. Shoulder Seams: Sew continuous seam from Shell armscye edge to Lining armscye edge.
  7. Outer Front Princess Seams: Sew & top-stitch Shell Front to Side, overlock Lining Front to Side.
  8. Peplum: Baste Peplum to Shell right sides together, aligning Peplum upper edge corners with Front/Back Panels hemlines. The Peplum goes up the side of of Front Panel, then across the bottom of the Side Panel, then down the side of the Back Panel.
  9. Bagging Lining: Baste Lining to Shell right sides together from CB hemline, along the Peplum basting, across CF hemline, along the other Peplum basting, & finally the other half of the CB hemline – only CB zipper length is left open.

    Be careful not to baste the wrong way like I did initially! Test by turning the garment right side out. The wrong way looks enticingly tidy wrong side out, but is impossible to turn right side out! Go with the weirdly twisted right way. Sew along basting. Turn right side out. Top-stitch Side Panel waistline seam to CB hemline.

  10. Armscye: Overlock Sleeve to bodice armscye (Shell & Lining).
  11. Finishing up: Slip-stitch Lining CB to zipper tape. Understich CF & CB hem by hand (pick-stitch) to keep Lining from peaking out. All done!

The Verdict

What I like:

  • The cowl! I like the asymmetry. It looks more natural. I like that there’s a fair bit of drape, but from the side it doesn’t give me a middle heavy look, and the attachment to the fitted lining keeps it from exposing too much!
  • The peplum! Especially how it disguise my droopy bum by breaking up that long stretch of hollow small of the back.

What didn’t quite work:

  • The corset idea didn’t really work. The stretchy fabrics undid all the good work! (But makes the top much more comfortable to wear!) So no heaving bosom this time. Any cleavage will have to come from additional shapewear & chicken fillets beneath.
  • The top feels a bit too short. I can only wear it with high waisted skirts & pants if I don’t want to catch a cold. I think the negative ease might have caused the top to contract vertically while stretching side-ways. I still haven’t gotten my head around stretch fabric tension lines, hence this oversight. I think next time I will make it 0 ease (rather than negative ease) and/or add a tad more length.

Overall though I think it’s a good effort and a pretty top. So much more could have gone wrong! But taking the time to baste & try on saved my bacon even if it meant Ms Diva missed the Jungle January Party. I’ve been let off only after Photoshopping her into a lush Jungle with her her own pet snake. Phew.

D&G Wannabe Python cardi

This one did make it to the party. It almost didn’t. I was still sewing the buttonholes at the eleventh hour. And this isn’t even like the Great British Sewing Bee. I had a whole month, not a meager couple of days for 3 projects. Again this should have been an easy make. But things didn’t go according to plan as I was trying new techniques that didn’t quite pan out.

Style Shots & Mug Shots

WORN WITH: 1 Burda 2011-08-121 skirt; 2 Burda 2012-05-113 skirt; 3 Altered Victoria Secret dress; 4 TopShop Martha jeans; 5 Modified Burda 2012-04-128 camisoleSelf-drafted skirt.

The Design & Pattern

Dolce & Gabbana cardi featured in Vogue US This one is a double agent: It’s a wearable muslin for all the cardis I planned to sew. But I’ve also wanted to make a feature panel cardi ever since I clipped this inspiration photo from Vogue US. Didn’t realized at the time that it’s a Dolce & Gabbana design. So it’s only incidentally a designer wannabe.

Block Used:

Stable Knit Fitted Top Block (Bodice & Sleeve)
Drafted using Stretch Pattern School’s One-Piece Swimwear + Tankini + Sleeve  instructions using 0% negative ease. Note that the Tankini instruction does add a little bit of ease to the waist and hip. So this block does already have positive ease there.

Design Changes Made

1-pat

  • Added extra ease to CF & CB, side seam, sleeve seam because this is suppose to go over other tops so can’t be too tight.
  • Lowered underarm slightly for the same reason.
  • Lopped off necklines & CF where I’m going to use binding for neck band & button placket.
  • Lopped off lower portions of bodices & sleeve where I’m going to use cuff ribbing.
  • Neck band & button plackets are rectangular binding pieces. They’re double layered with the fold at the neck / CF edge. The neck band length is length of the folded neck edge stretched at the seamed edge to match the bodice necklines to ensure that it’ll lie flat & smooth.
  • Bodice & sleeve cuff ribbing were originally going to be rectangular pieces as well. But I didn’t have matching ribbing fabric and my experiment with mock ribbing (see below) didn’t work. So I had to draft shaped bands instead. They’re also double layered with the fold at the bottom edge. I reduced the width a little bit to simulate the snug fit of real ribbing.

Things I’d do differently next time

  • I went waist length with the feature panel instead of the longer length in the inspiration because I thought blouson lower down wouldn’t work with my shortness & short-waistness. But as my mock ribbing idea didn’t work I think I might have gotten a better result if I had abandoned the blouson cardi idea and just made a fitted cardi top with the bottom band as a design feature.
  • 2-sew-details-3For this make I kept the bust dart. The font bodice is a layer of the thinner / drapier / stretchier New World Snake over a layer of the thicker / stiffer / less stretch Snake Bite Bandage. I was worried that the top layer might sag over time. So I sandwiched the dart seam allowances between the layers and tacked along the dart leg as extra insurance against downward migration of the New World Snake. Although my recent experiment with dartless stretch block didn’t work I might try again and see if I can get a dartless block for the other cardis.
  • I might also add more ease to the bodice & sleeve where they join the cuff ribbing for a more visible blouson effect. Otherwise the seam allowance shows through and the seam just look like a cutting mistake – like I cut them too short and had to patch with a band.

Fabric & Notions Used

Construction Notes

  • 2-sew-details-1I had hoped the mock ribbing technique that the Sewing Diva tried and described in details in Threads issue #64 Apr-May 1996 would work for me too. So that I can make sweaters & cardis from more variety of fabrics without having to find matching ribbing. But mine came out really stiff. Too stiff even to use single layer, which I wouldn’t want to anyway as it’s made with parallel rows of twin-needle stitches, so the back side has threads that could easily be snagged. It also curls up if left single layer. Maybe my fabric which is mid-weight like ponte is too thick for this technique. Maybe it would work for thinner, drapier knits. In any case, I had to switch to plain bands. And I think I will have to abandon the cardi idea for my SWAP blue sweater knit because it’s again a bit thick and stiff already. And I don’t have a matching ribbing.
  • I’ll have to rethink the construction order as well. A couple of areas were made more difficult to stitch because I went on auto-pilot:
    • I couldn’t figure out how to top-stitch the cuff seam allowance to the sleeve after the sleeve has been sewn together. The Walking Foot that I rely on to make sewing knit easier is really bulky, so can’t handle the claustrophobic narrow sleeve. So I didn’t top-stitch any of the cuffs & bindings. Hopefully the seam allowances won’t flip the wrong way and create unsightly ridges.
    • 2-sew-details-2I couldn’t use my machine’s one-step buttonhole this time because once the placket/binding was sewn to the front bodice & the seam allowance hidden in the placket, it became too uneven layer-wise for the one-step buttonholer to feel its way around where to start & stop. I had to resort to manual buttonholing with zig-zag stitches. The result wasn’t pretty.
  • The button spacing on this one wasn’t ideal because I was one button short. If this snake didn’t have a party to catch I would have waited until I can find another set of suitable buttons. As it is, the CF gap a little at crucial points like bust & waist, especially when I move.

The Verdict

Despite the warts I still quite like the result. Definitely worth making again with tweaks.

Stretch Pattern School Block Experiments

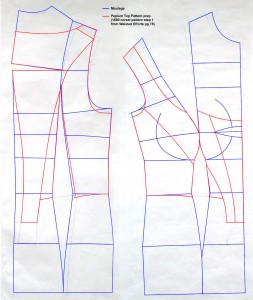
Before I show you the next snake I need to show you the Block it’s based on. This is like my Nth experiment to come up with a dependable Knit Top Block. I’ve tried:

The problem is that I didn’t really know what I was doing. And with so much variation in stretch fabrics, one minute I think I got it the next I get a wadder when I try to design from it. So my quest continues. And (Stretch) Pattern School website impresses with the theory, the background info, and the clear drafting instructions. So I thought it’s worth a try.

2020-07-20 update: GREAT NEWS! Mr Anderson is back from retirement with his (Stretch) Pattern School 2.0! I haven’t explored it in details yet, but he says the info has been updated to reflect latest developments in swim / dancewear technology. Unfortunately the free auto-generated custom block feature is gone because the company that host the new website doesn’t offer such sophisticated programming options. But there is now a Pattern & Block Shop for RTW designers & interested home-sewers. Presumably this will be standardised sizing rather than custom based on your measurements, but certainly better than nothing! There’s also a Pattern School Online Facebook group & he’s also on Instagram (pattern.school.online) if you want to get latest updates from him. Have fun!

2017-05-19 update: The Pattern School website is no longer available online, but Mr Anderson is still extremely protective of his copyrights. So to avoid lawsuits absolutely no sharing of his content if you saved pages for your own personal reference. Hopefully my report below on my experiment using his method does not constitute an infringement of his copyrights.

If you’re looking to draft your own stretch block you will have to look elsewhere for instruction. This method is no longer an option.

Since part of the fun of writing sewing blog is the sharing of experience, I’m going to look into replacing this set of blocks with one drafted from instructions that are still publicly available. Then hopefully when I design from my stretch blocks then you too can learn to create & design with your own stretch blocks. I’m thinking maybe Pattern Cutting for Lingerie, Beachwear and Leisurewear by Ann Haggar…or go back to Designing and Patternmaking For Stretch Fabrics since I’m not really looking for swimwear blocks. I may also experiment with adapting my 0-ease woven blocks – either my Kenneth King moulage or my body wraps.

If you’re looking to enter the swimwear design field & can expense professional books & subscriptions, maybe try Intimate Apparel Journal (ia-technical.com) website. They have articles on “Introduction to Swimwear Pattern Cutting Principles” & “Grading Swimwearavailable at $19.90 each. Or you can buy a subscription which costs $299/yr for verified students or $399/yr for professionals (4 issues/yr). Their shop also offers past issues of the IA Journal, special-topic compilations, or individual articles for purchase. The site is run by a Hong Kong professor with experience in the intimate apparel industry. But the above articles are written by David Morris, a British technical designer who worked for well-known intimate apparels brands & also taught at university level in the UK. David also runs Intimate Apparel Technical website (iatechnical.com) which offers a remote learning course on Swimwear Pattern Cutting & Grading for £250.)

Both are above my pay grade since I’m only sewing for myself, so I can’t comment on whether either professional sources are worthwhile. But I may just pay for an article or two from the Hong Kong site to learn the basic principles again from a publicly available source.

Anyway, back to the experiment. For not all theories works for everyone all the time. Theories need to be tested, especially when it comes to anything to do with infinitely variable human beings!

The Theory

For this experiment I tried Stretch Pattern School’s pattern drafting instruction for…

  1. One-Piece Swimwear Block for Stretchy Knit (75%+ stretch, 12% horizontal/0% vertical negative ease)
  2. Tankini Top Pattern based on 1 + variation for Stable Knit (0%/0% negative ease)
  3. Set-In Sleeve Block for Stretchy Knit

supplemented by

The Findings

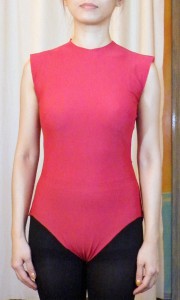
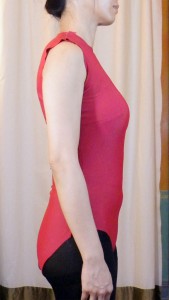
One-Piece Swimwear Block (12%/0% negative ease)

(Made with Matt Lycra from Tissu Fabrics / Tia Knight with 40%H/40%V stretch)

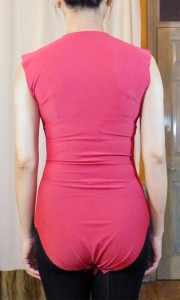
The first muslin came out quite well. But there were a few small issues…

  1. My Front side seam came out longer than the corresponding Back side seam, even with the dart.
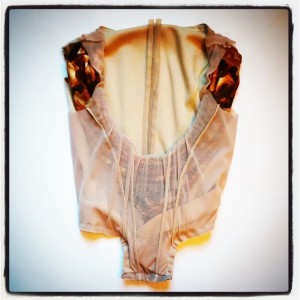
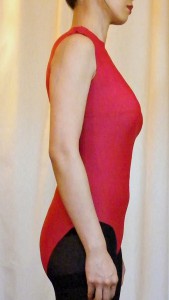
  2. There are some sway-back type draglines in the back.
  3. I got some draglines underarm and gapping in the armholes.
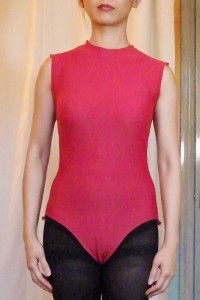
  4. The front neck chokes a bit.
  5. The crotch is a mess. My front gusset length came out longer than the Back.

1-pat1-1p
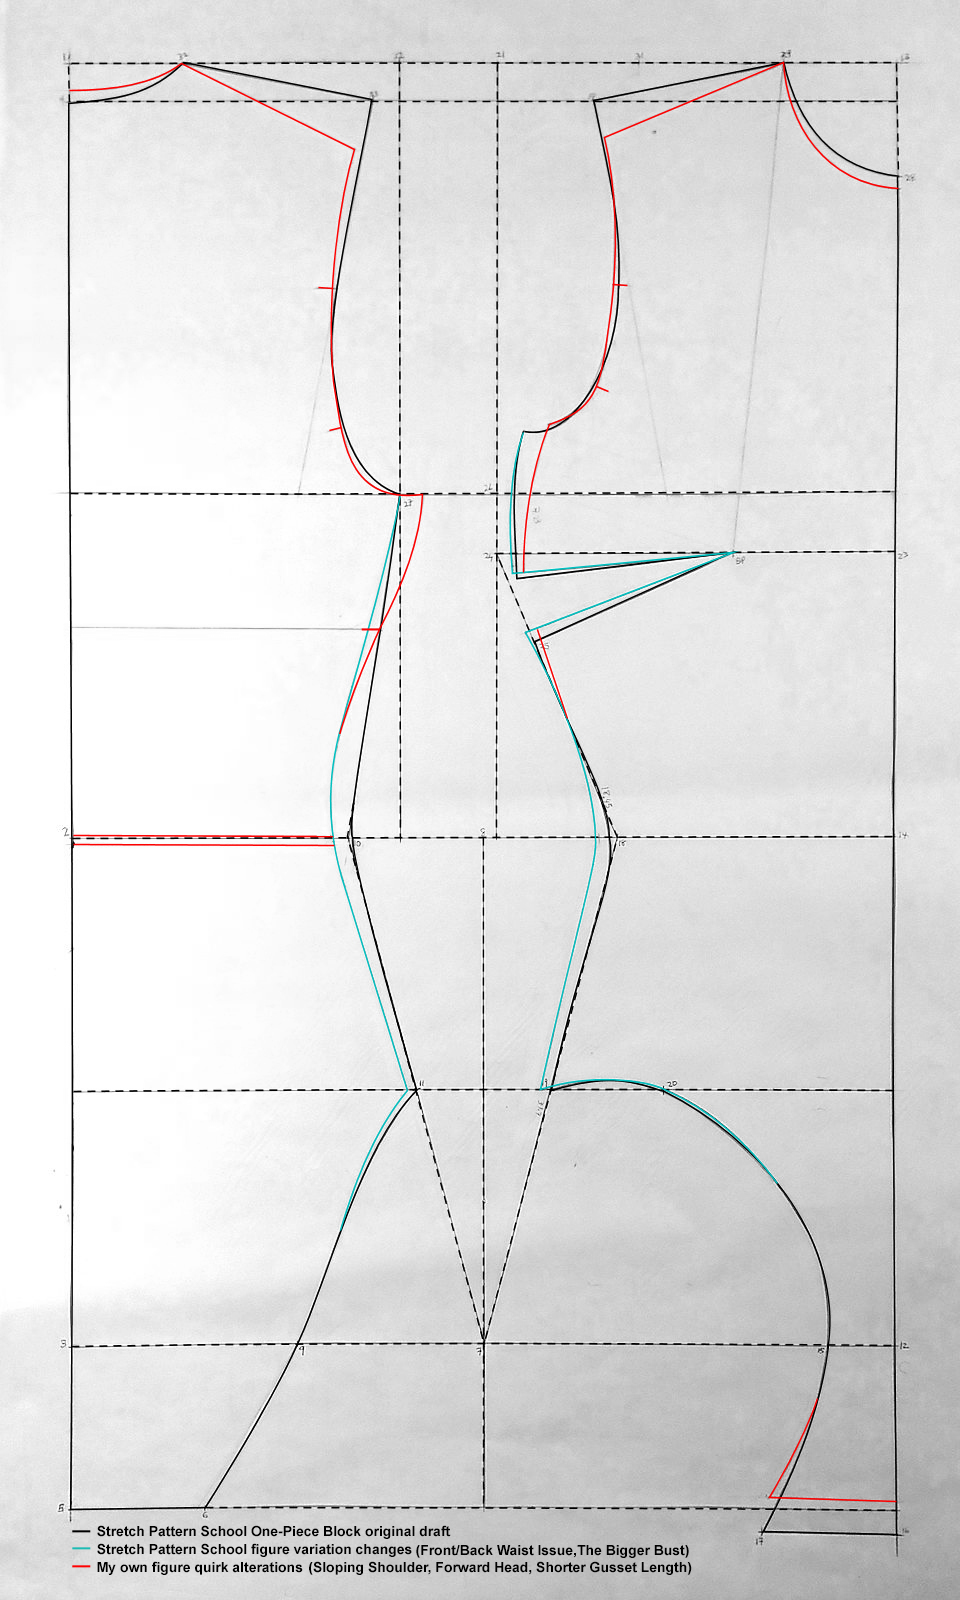
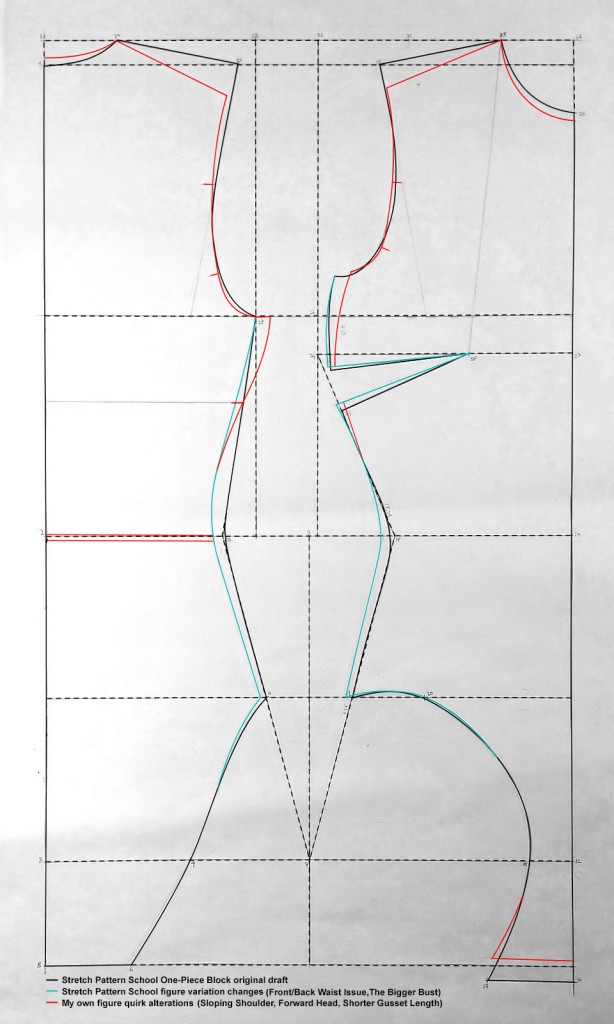
Having worked out what my key figure quirks through fitting wovens, I applied the advice from the Tweaking for Larger Sizes page for Front/Back Waist Issues and The Bigger Bust. Shifting the side seam towards the back at the waist solved #1 and mitigated #2.

Adjusting for sloping shoulder helped with #3. And forward head adjustment (raising back neckline & lowering front neckline) helped with #4.

#5 I haven’t solved yet. Not having sewn such garment before I don’t know if one has to insert the leg elastics first before one can check the crotch fit. It might also be possible that I have the “in thigh” figure quirk mentioned on the Tweaking for Larger Sizes page. Or the fact that I’ve put 4 big snaps in the gusset seam as temporary closure. In any case swimwear / bodysuit isn’t a priority, so I’m leaving this alone for now.

But I think in general wherever the instruction calls for “X cm +/-Y mm per size from size 10” it would be wise to check if the relevant Australian size 10 measurement he used matches yours. Eg going by the AUS size 10 measurement the front gusset length is in fact 0.5cm shorter than the back. I had calculated my back gusset length using the Wais-to-Waist (crotch length) and Waist-to-Crotch (crotch depth) measurements. But the front gusset length wasn’t given as a formula, so it came out longer than my back gusset length! Shortening this to back gusset length minus 0.5cm helped with #2 and #5 a bit.

Made with Matt Lycra from Tissu Fabrics / Tia Knight with 40%H/40%V stretch.

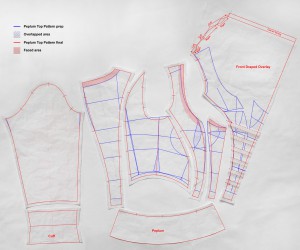
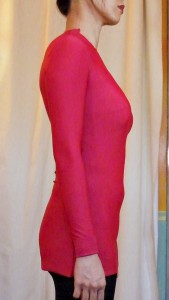
Tankini Top Patterns  + Sleeve Block

If this works it will become my new Fitted Knit Top Block. I’m hoping to have a set for

  • Stretchy Knits with 70+% stretch (12% negative ease)
  • Moderate Knits with 40-70% stretch (6% negative ease)
  • Stable Knits with 10-40% stretch (0% negative ease)

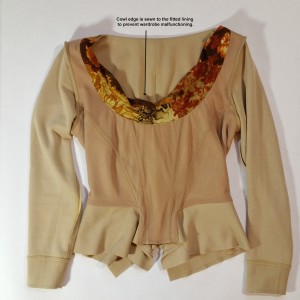
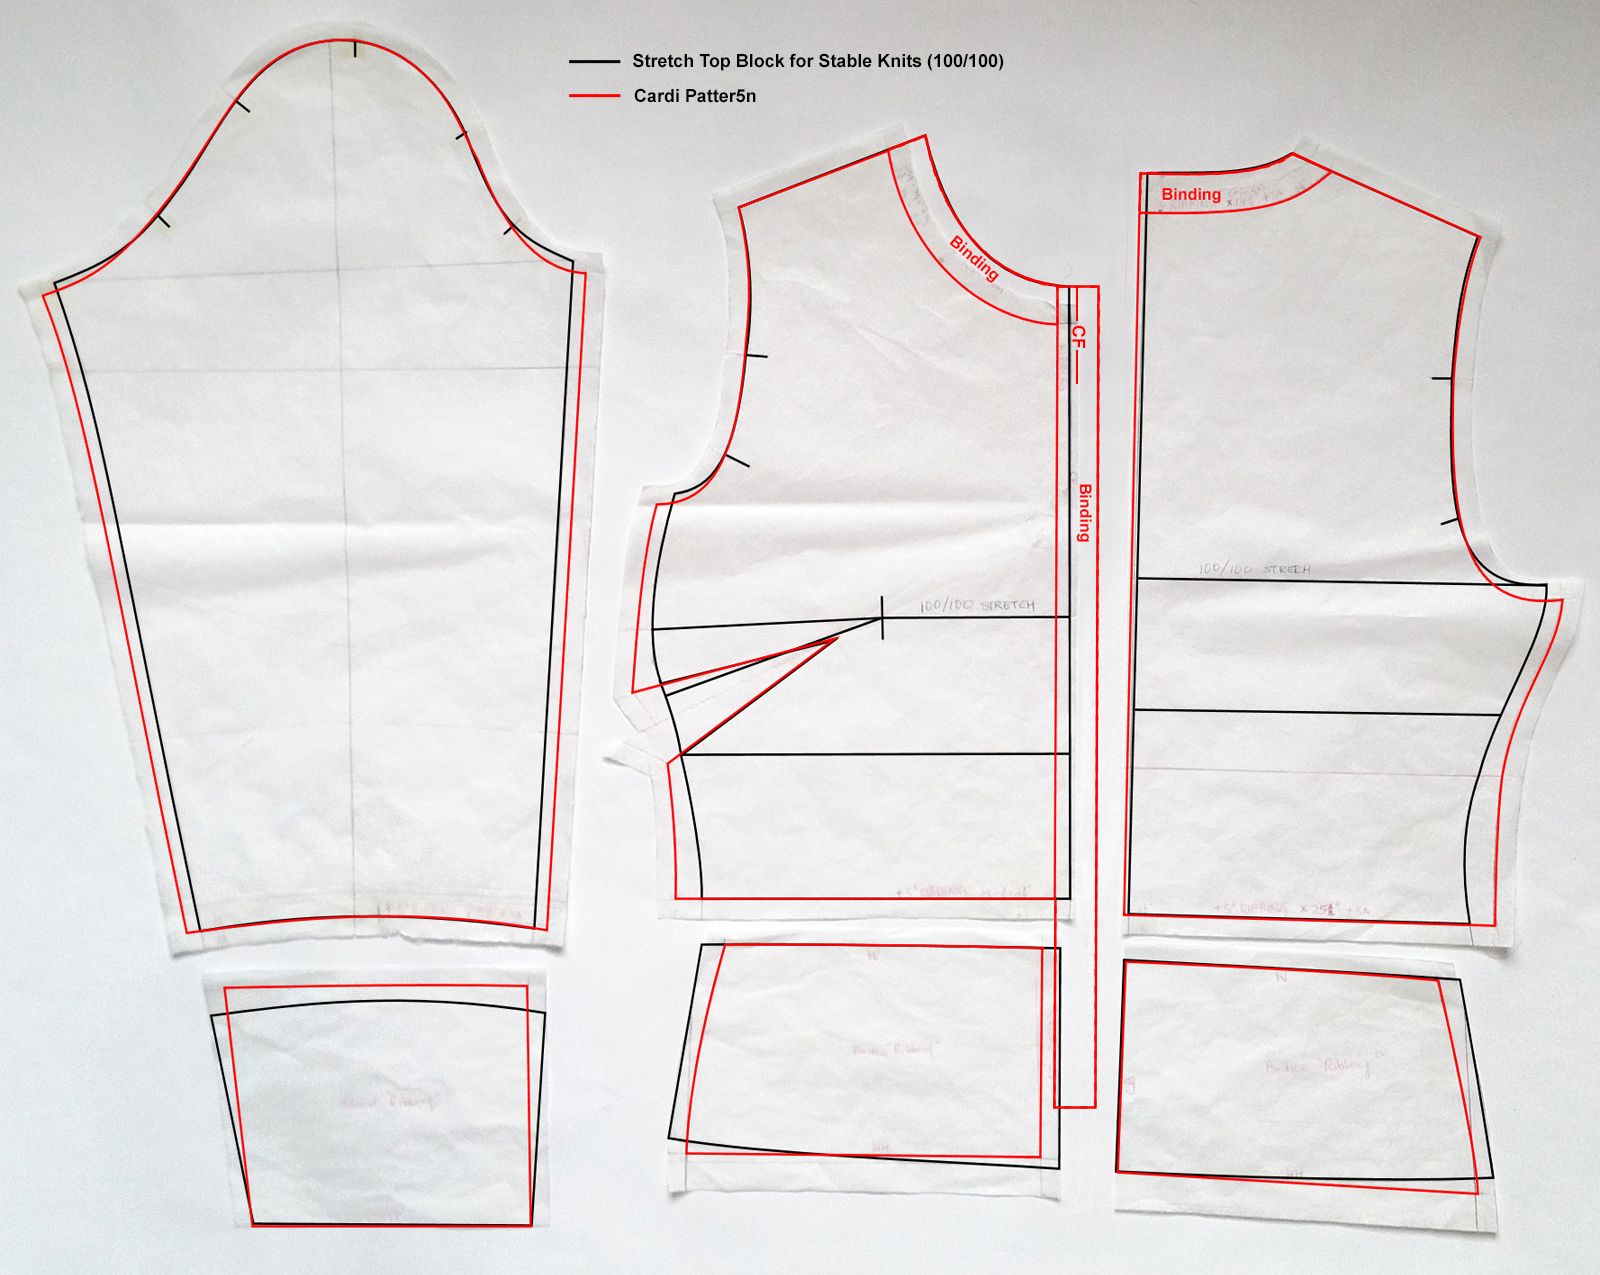
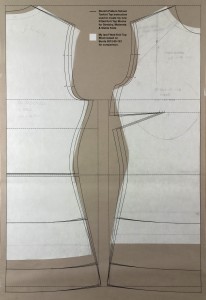
I used my adjusted One-Piece Swimwear Block as the starting point. Since I’m not making a tankini, I only followed steps 4-5, adding ease from bustline downward & shaping the hemline. I extended the hemline down to the One-Piece Block’s hip line, then superimposed my woven Pencil Skirt Block to mark where my high hip and hip levels are. These two are the most likely hemline references for tops I’d want to design from the block.

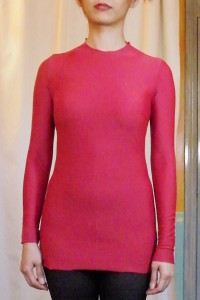
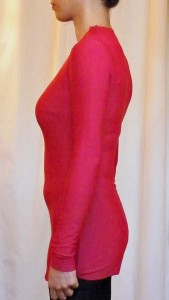
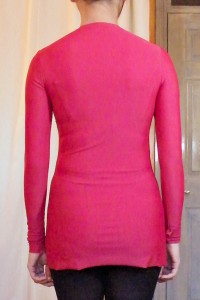
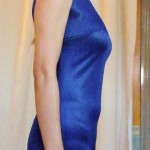
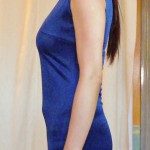
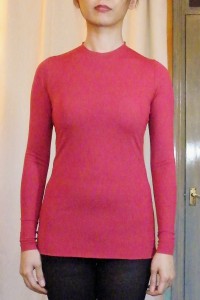
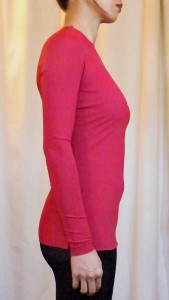
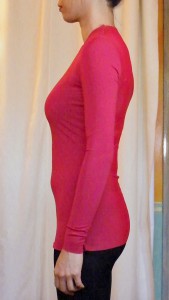
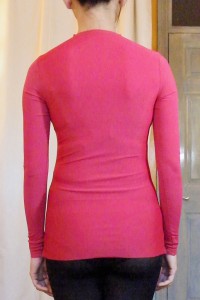
I drafted patterns for all three types of knit and muslined the Stretchy Knit and Stable Knit version. Both came out OK I think…

Stretchy: Made with Matt Lycra from Tissu Fabrics / Tia Knight with 40%H/40%V stretch.
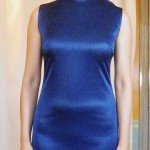
Stable: Made with Shimmer Jersey from Minerva Crafts with 10%H/5%V stretch.

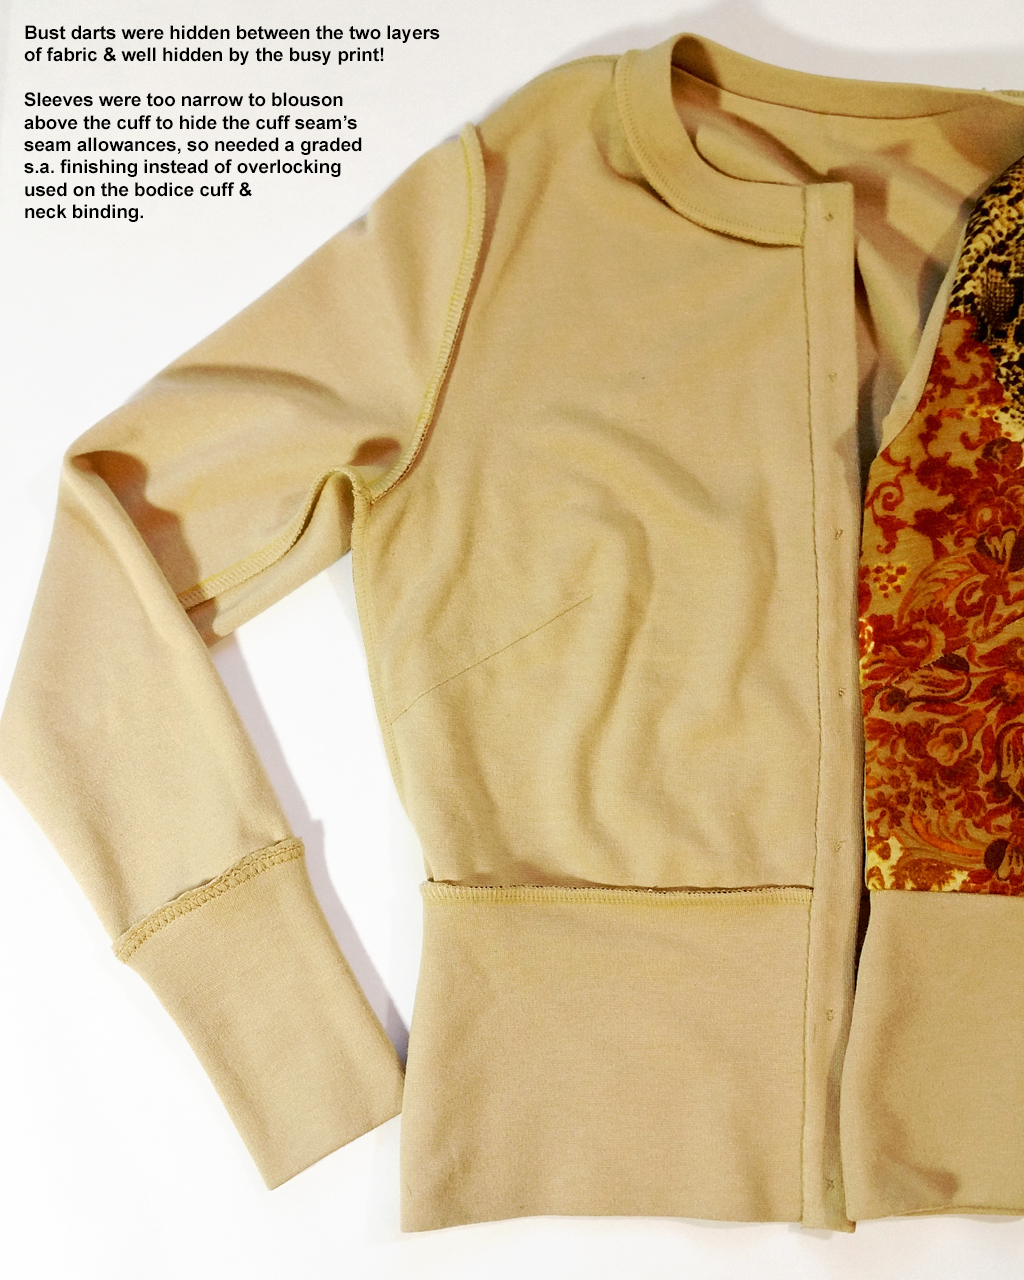
The bust dart on the Stable Knit version seems too high up. But the bustlines are exactly the same level on both version. Maybe the almost non-existent vertical stretch of my worst case scenario ‘Stable Knit’ test fabric is at fault. And to be honest I think I will avoid making fitted stretch tops out of such minimum stretch fabrics and instead use my Moulage with darts / princess seams for shaping and the minimum stretch for wearing ease.

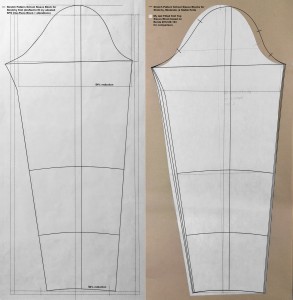
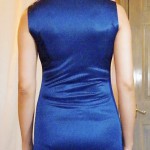
The sleeve I only muslined for the Stretchy Knit. It came out rather long! Also the default instruction doesn’t cater for my twisted arms. I shortened the sleeve & shifted some width at bicep / underarm from front to back and at wrist from back to front. So now it looks asymmetrical like my woven Sleeve Blocks but feels more comfortable.
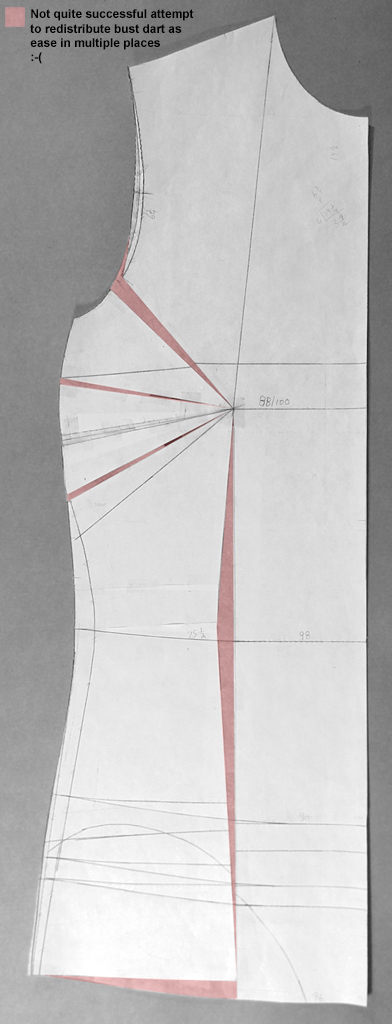
Going Dartless

1-pat3-top-dartlessFailThe holy grail of knit block of course is the dartless yet smooth fitted T for the busty gal. Is it possible? Stuart advise against it. So does the book I have on pattern drafting for stretch fabrics. But then in the Tankini instruction he did ofter the option of easing the dart into back side seam…provided that you also include a shelf bra which does have a bust dart.

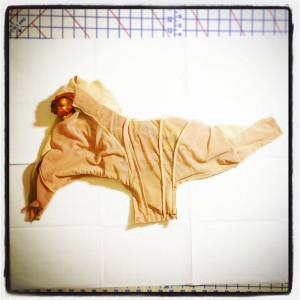
Naughty me thought I’d try my luck and see if I can pivot out the dart here like I did for the woven Tunic Block. The result wasn’t pretty…

Made with Matt Lycra from Tissu Fabrics / Tia Knight with 40%H/40%V stretch.

Maybe it’s the fabric. I might try again with a stretchier and/or heavier weight spandex knit. But for now I will work with the dart and try to incorporated the shaping into the designs rather than risk crow feet around my bust!