Pencil Skirt sloper quest

If only it were the height of summer instead of chilly winter here…So even though my bodice slopers are done, I can’t really put them to good use. Boo. I haven’t got sleeve slopers to make them practical for winter. And sleeves sound like they’d be a royal pain to draft and fit.

So what do I do? Move on to a pencil skirt sloper of course. I mean, how difficult can they be to fit right? Well, maybe just a tiny bit if you’re fussy not only about the wrinkles, but also about any potential frump factor. I like my pencil skirts fashionlicious, not corporate teamaker ready.

Since I had fairly good success with Kenneth King’s bodice moulage, and saw the success Clio  had with her Kenneth King pencil skirt, I decided to start with Mr King’s Skirt draft instructions. Here are the results based on following the instruction strictly:

1-f1-sR1-b1-sL

Hmm…They may be the instruction taught by the Parisian couture pattern drafting system, but my result looks a tad frumpy to me. That’s the thing isn’t it, there are all sorts of experts and systems out there. But you just don’t know if their vision of loveliness is to your taste or not. And we also know that taste and trends change. So are the instructions from the various pattern-drafting camps up to date with current trends? Do all those couture dissecting books examine current couture and not just past examples?

Even if they are current, are they designing for the target market that you’re aspiring to?
Dennic Chunman Lo talks about a designer’s signature fit in his Patternmaking book, how clothing aimed at mass market may have a different cut to those at higher price designer end (and how nowadays jacket shoulders have a lot less ease / shoulder extension than before). Maybe some of the industry experts instruction are geared towards designs for a different audience than you.

Of course it could simply be that my figure isn’t suited to pencil skirts and no amount of tweaking is going to fix that. Maybe they only look fab on stick insect models or curvy goddesses. Also, have you notice a lot of these skirts are shown with legs crossed or slightly apart? Maybe at attention stance doesn’t show off these skirt well. (And I don’t know why some people call untapered skirts pencil skirts. To me they’re just straight skirts. I mean pencils have tapered points, right? You can’t write with them otherwise. Why call them pencil skirts if they’re not similarly tapered???)

Anyway, long story short, I tried tweaking the muslin to my taste. I want a more noticeable tapering at the hemline. And a bottom hugging back.

What can I say, I have booty envy. Mine are a bit flat. So I’m unable to fill out normal cuts like some of you can. I’m not sure how one would achieve this. Can you just taper more at the back side seams? Have anyone tried that? Does it cause weird twisting of the side seams or rippling in the stitching (due to difference in degrees of bias between the front side seam and the back side seam)?

I checked out a few high street shops and noticed some pencil skirts seem to taper on CB seam as well as the side seams. I’ve never seen this in commercial patterns and pattern-drafting book. Have you?

My last resort would be to add back princess lines and use them to add more tapering to the back. I’ve done this before with previous pencil skirts, some of which were perhaps a bit too tapered – making going to the bathroom a bit troublesome, especially in dresses with such over-tapered skirts!

That reminds me I need to be careful that I don’t over do the tapering so that it’s hard to walk / sit / climb the stairs in, or go to the loo! (Note to self: must test drive the final muslin like Clio does.) That’s another gripe I have with existing pattern-drafting / fitting instructions – they may tell you how to add ease, but not why that much or why add it there. Not knowing the principles makes it impossible to adjust the instruction to update or personalize the fit.


That’s why I’ve ordered the reprint of Theory of Garment-Pattern Making by W. H. Hulme from the 1950s. It supposedly covers things like the effect of anatomy, proportion, and movement on garment design and pattern drafting. I’m hoping it’ll answer my question about what ease is really necessary where. Here’s Fashion Incubator’s review of the book.

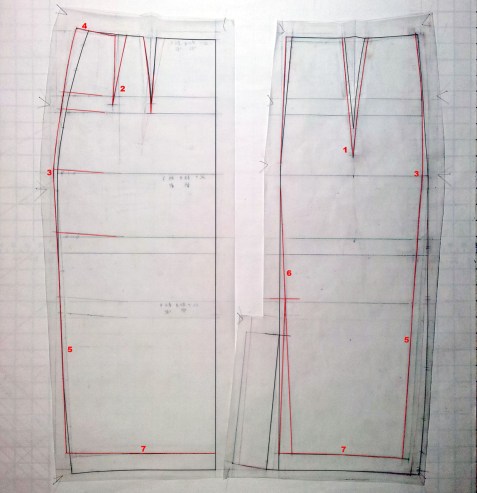
In the meanwhile I tried the following changes:

pencil-skirt-sloper-fit-pat-alt

  1. Increased the dart depths and made side curve above the hip shallower to match my bodice moulage.
  2. In the front I split the deeper dart depth into two darts per side. When I tried one deeper dart, it points right at the hollow between my tummy and my protruding thigh, so looked wrong. Splitting into two allows me to have one dart accommodate my tummy and the other my protruding hipbone.
  3. Moved almost all the hip ease to the front so that the back would hopefully hug my bottom better and the front accommodate my protruding thigh and forward limb movement (walking, sitting).
  4. 2-0alt-front-thigh Added the front ease for protruding thigh using the technique shown in Fitting and Pattern Alteration. The slight tilting up at the side seam seems like it might also push the ease forward rather than side-way and make the front view slimmer looking. I think the side-way expansion of the standard draft doesn’t skim my front-back body well, so makes the skirt look slightly too big and therefore frumpy.
  5. Straighten the side tapering (the original draft has slight curve) and made back side seam match the front side seam angle (for some reason, my original draft based on the calculation instruction came out with less tapering on the back vs the front).
  6. Tried tapering a little bit at CB below the hip as well. Above the hip I made the tapering less deep so it’d match my bodice moulage. Why? Oh, I don’t really know. Maybe “why mess with a moulage that seems to fit”?
  7. Shortened the skirt about 1″. I would never understand guidelines that recommend the same length for everyone.

Here’s the result:

2-f2-sR2-b2-sL

I hope I’m not deluding myself here. I think the changes does make the skirt look smarter, more like how pencil skirts look on all you gorgeous gals. Short of getting booty boosting Spanx I think this will be as close as I’m going to get to a practical yet flattering pencil skirt without the princess seams. I might still add princess seams occasionally for a even more tapered look on some skirts. But for dresses this will definitely be as tapered as I’m going to go unless the fabric has more stretch.

Now should I try this out in a bog standard corporate wool? Or should I go for variations in some funkier fabrics? I already have three fabrics lined up for this silhouette, if not exactly this bog standard boring darts+CB vent pattern.
231

TNT Knit Block…or is it?

So, while we’re on the Knit Block detour we might as well finish this conversation.

As you know, I’ve been using my adjusted Burdastyle 2012-09-123 T-shirt as my tentative Knit Block. And it’s been working OK. No major complaint apart from the sway-back type puddle in the lower back. So I thought I’d try designing with it.  Nothing fancy, just a simple U-neck T.

bs201209123mod1_0dsgn-1 I was going to make it with 3/4 sleeves. But the fabric I had in mind was a $1/yard remanent from FIDM’s Scholarship Store in LA, so not enough for long sleeve. No problem I thought. I’ll just make a short sleeve version.

Straightforward right? Sadly no.

See those pulls emanating from the neckline towards the shoulder? I had no such problem with the previous makes based on this Knit Block. It could be the fabric, though this one seem just as stretchy. My bet though is on the short sleeve. All my previous makes were long sleeves. I think maybe the weight of the long sleeves pulled the shoulder seams in place. So I hadn’t really noticed that the shoulders were really too short.

Here’s how it compare with my zero-ease Moulage pattern:

bs201209123block_1fit
Apology for the confusing extra lines – they’re for the blouse/dress, jacket, & coat slopers. I’m waiting to test them out with muslins before separating them into heavy paper Blocks. The heavier red lines show the Moulage.

The shoulder is about 3/8″ too short. Waist is zero ease, and Bust & Hip are both currently negative ease (even accounting for the bit taken out by the Moulage darts).

I think I need to redo the Knit Block, get back to basic principles. Specifically, where it’s OK to have negative ease and where it should be kept at zero ease. And maybe figure out a totally zero-ease Knit Block for those less stretchy knit fabrics.

And I thought I was saving time by starting with a commercial pattern for knit! Sometimes there’s no substitute for learning properly, especially if one intend to get creative with pattern making.

A year older a tad younger

Last week I finally made the pilgrimage to the Queen’s brassiere, Rigby & Peller, for a bra-fitting after reading about Karen’s experience on Did You Make That like over a year ago. I meant to go sooner. But I know I’d only trust the branches that are in the snootier part of town, and I never visit those part of town. Too Upper East Side (in NYC parlance) for my taste.

What finally got me off my behind was my upcoming birthday present from my DOH. This year I asked for help making a replacement for Big Bertha, my Duct Tape Double, who sadly passed away this last week. I thought if I’m going to get taped up I might as well see if something can be done to prop up my girls, who have been heading south ever since I hit 40.

And the (surprisingly young) Fitting Assistant did not disappointed. As Karen pointed out, they don’t use tape measure at R&P. These girls are trained to determine your size by observing your body & rack shape and how your current bra fits (if you’re wearing one at the time of fitting – no, thankfully I didn’t have to flash the FA). And she pleased me by announcing that I’m a D on a smaller band size rather than the A-B on the larger band sizes that I’ve been wearing thanks to misinformation from the standard bra sizing charts. I’m pleased because it reinforces my current theory that I should be sewing with a FBA’ed size 8, rather than a standard B-cup size 12. And doubly pleased because all those expensive Vogue designer patterns that I’ve stupid cut out to size 8 decades ago will now be salvageable.

Obviously I won’t flash you either. But I can report that the band now sit level, the underwires fit right against my rib cage under my girls, and there are no longer gaps at the top edges of the cups. My old bras use to ride up in the back and I’d get gaps at the top of the cups which made me think that the cup was too big. In fact it was the opposite. Who would have known!

R&P ain’t cheap. But I was hoping once I got a well-fitting bra I might one day attempt making my own, like so many of you are doing. Unfortunately the two I went for are both molded cups. Maybe next time then.

So, do my girls defy gravity now? Well, there’s no turning back the clock completely. But I think I do detect the slightest rebellious lift…

What do you think? Have you ever been professionally fitted?

P.S. Now I just need a bit of bum padding. (Oh damn you gravity!)

Moulage Fitting continued

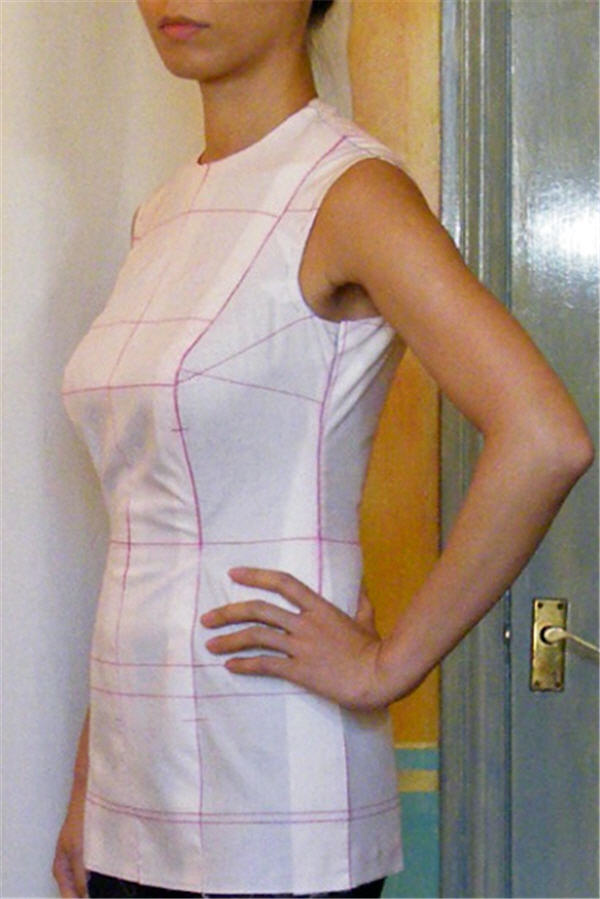
OK, this is as good as it’s going to get fitting a moulage by myself.

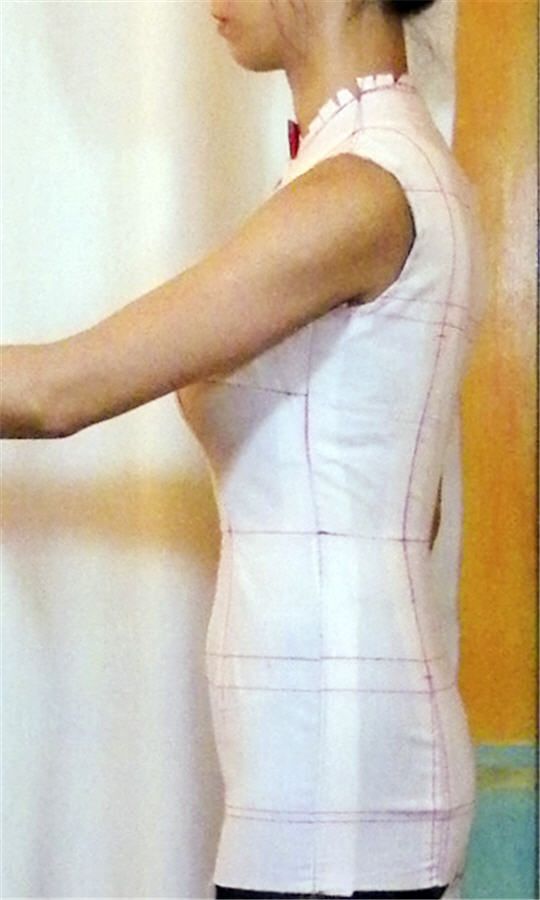
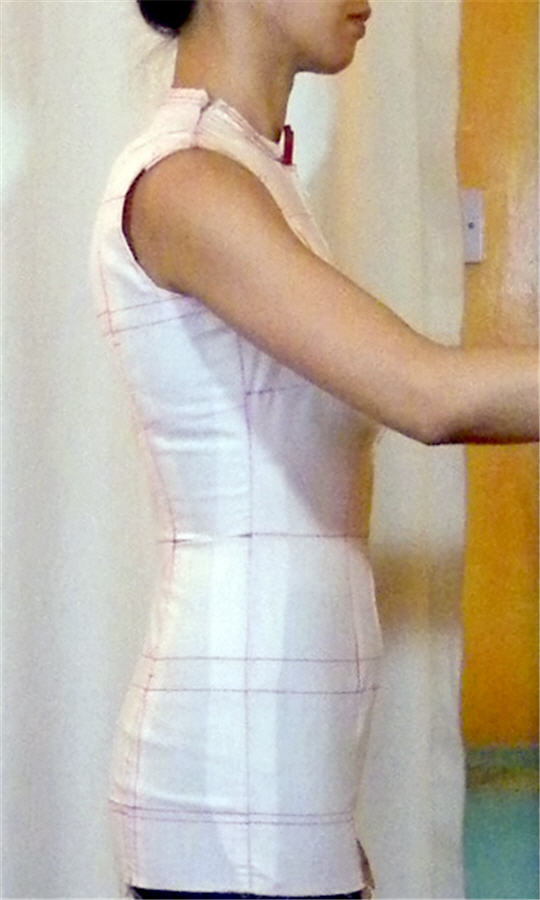
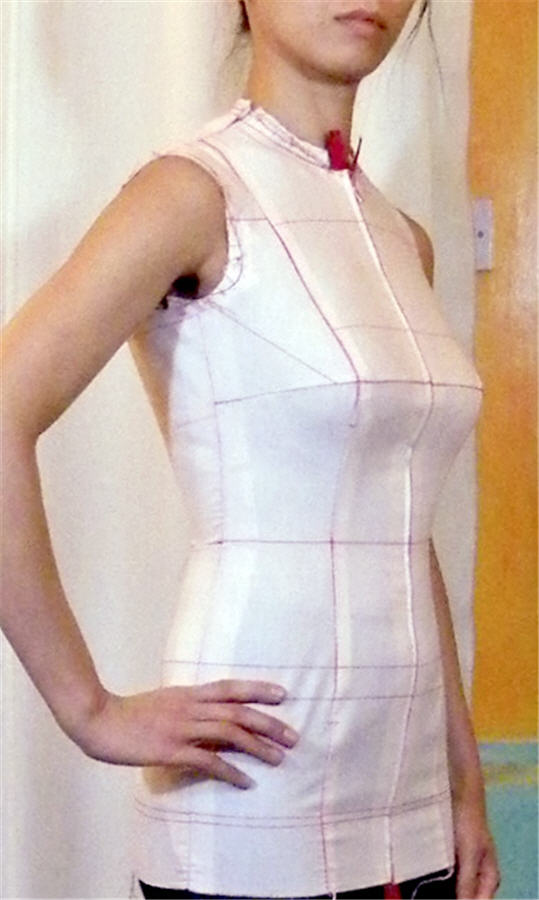
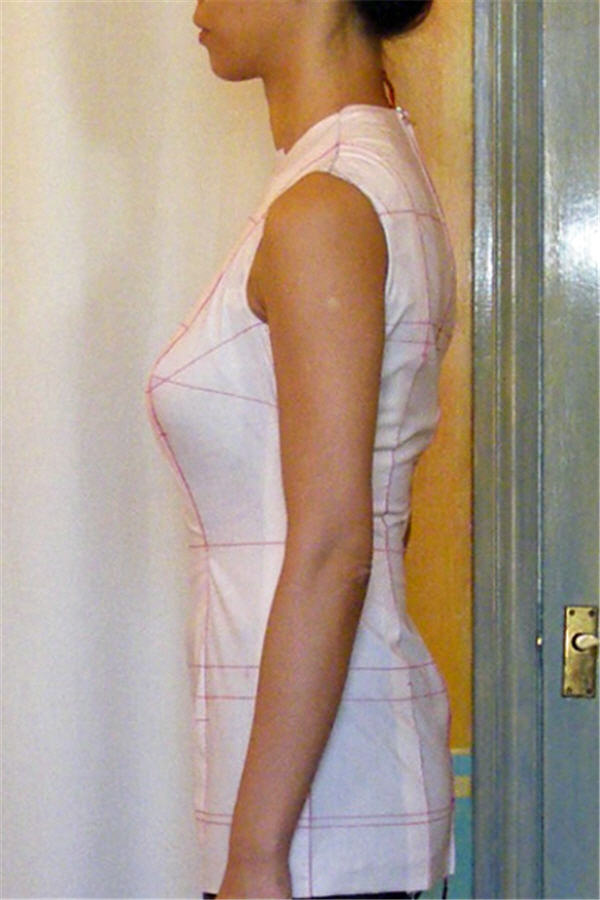
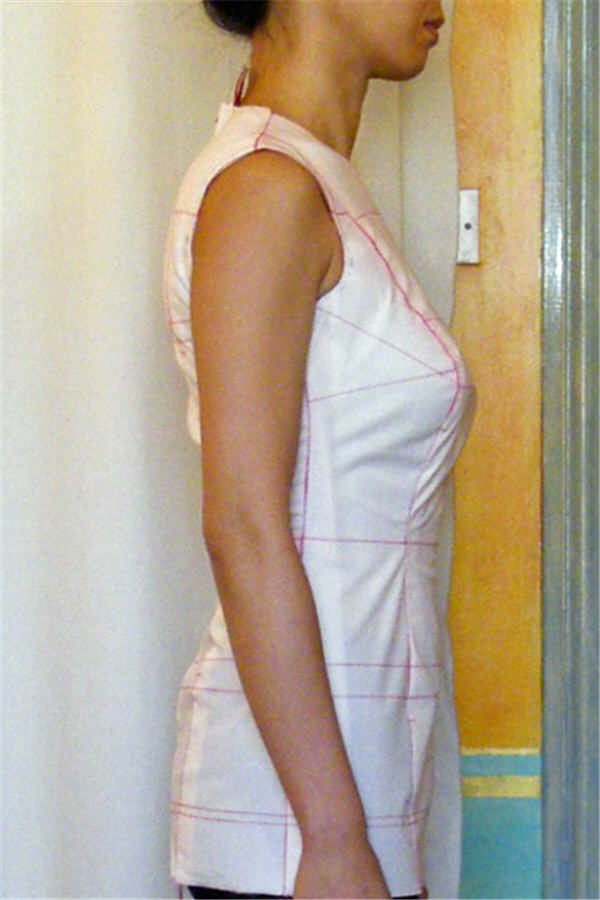
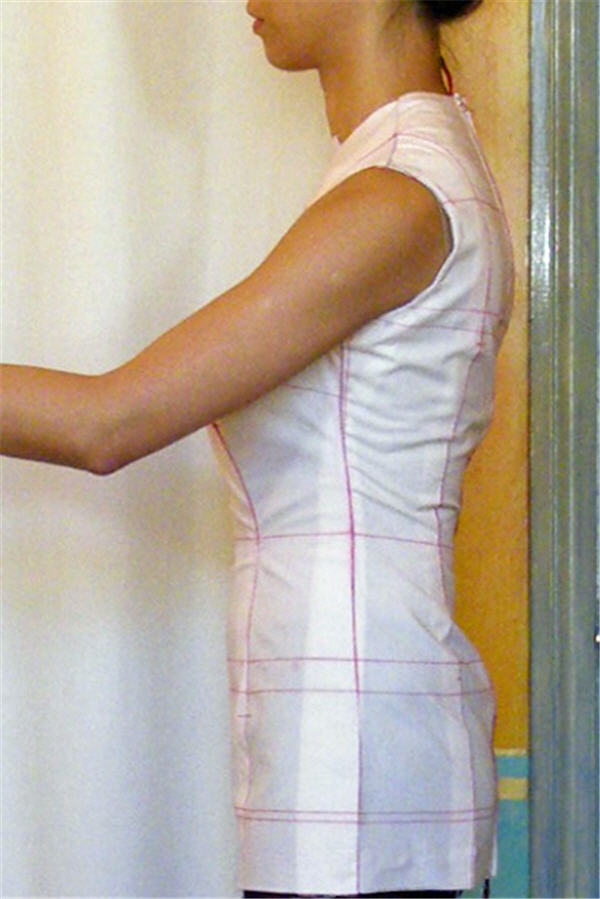
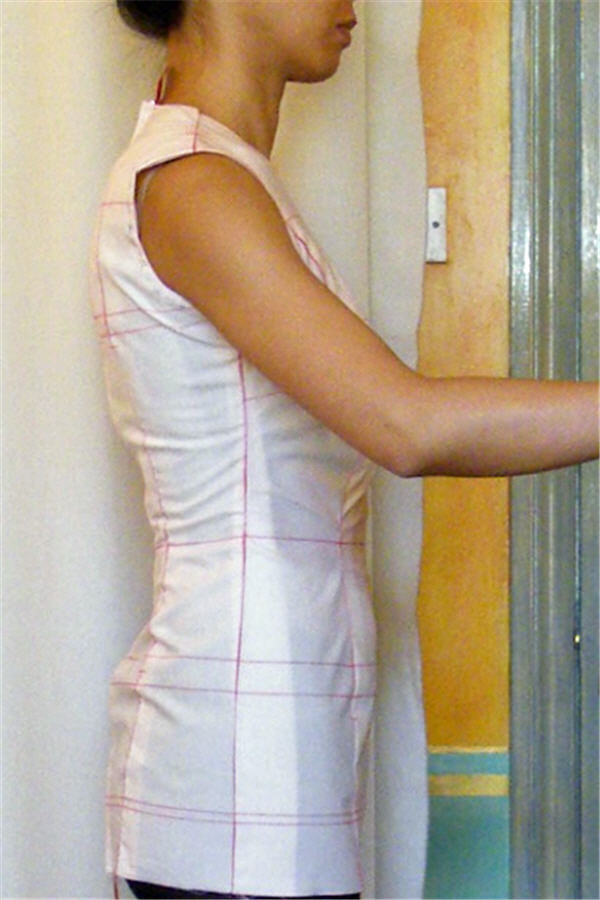
Adjusted muslin 2:


So I’ve taken in all the suggestions I got on Pattern Review & Artisan Square – including feedback from the Master himself – Mr Kenneth King! OMG! This is what I’ve done:

  1. Reshaped the under-bust princess seam to better match my curve. This fixed most of the loose folds I had under the bust on the front.
  2. CF waist was still a bit low, so I removed the FBA length adjustment from front. On side front this length removal tapers to nothing at the side seam.
  3. Adjusted the armscye curve. This fixed a lot of my back underarm draglines. Ironically, removing tiny bit from the side seam just below the armpit so that the side seam is straighter also removed the remaining dragline at the armpit. You’d have thought it was too tight, not too loose!
  4. CB waist was also a bit low. Making a Sway Back horizontal dart across the waistline fixed this & also helped removed the back draglines above the waist and some below the waist.
  5. The remaining draglines at the back below the waist were more difficult to get rid off. I tried all sort of combinations & I’m still not sure if it’s 100% there yet. But this good-enough-for-now fix involved letting out at the back princess seams below my high hip while taking in at the side seam from under-bust all the way down.
  6. Finally, the lopsided shoulder adjustment seem to affect the neckline & shoulder-width as well. The lower shoulder side’s neckline is closer to my neck base, so the shoulder end point is further in. I redrew the neckline & upper armscye on the higher shoulder side to match. Interestingly, most low shoulder adjustment instructions don’t mention this potential side-effect of making one shoulder more sloped than the other. But Cabrera-Meyers’ “Classic Tailoring Techniques: A Construction Guide for Men’s Wear” has a different approach to low shoulder adjustment which also fix this side effect at the same time: The whole top area roughly above the bust line on the lower shoulder side is tilted, so not only is the shoulder lowered, but the neckline and shoulder is also further to the side. Interesting that they didn’t just tell you to pad out the lower shoulder.

There still seem to be minor wrinkles. But after reading Suzanne Stern‘s 8-9/1993 Threads article on fitting a custom dress form cover, I’ve decided to stop fiddling.

She worked as première main for Jacques Fath, one of the original Paris couturiers, so should know what’s she talking about. In a series of articles she demonstrated how they’d customize a dress form to mirror clients’ figures. The dress form cover is essentially a skin-tight draped moulage.

She mentioned that even in a properly fitted moulage / muslin sloper there might still be persistent minor wrinkles that wouldn’t appear in the final garment; that the wrinkles are due to the light-weight nature of muslin, especially when not all parts of the garment are attached yet – eg sleeves, skirts; and that there’s no need to spend unnecessary time trying to pin these away.  (The articles are available on the Threads Archive DVD.)

One thing you may have noticed is that I’ve got a CF seam here and the zipper has been moved here from CB. Much easier to fix the back without that stiff separating zipper in the way. Plus much easier to zip in & out too!

Still need to transfer these changes to the patterns. I might test the modified patterns again in another muslin. Maybe I’ll use  heavier weight ticking so the result can be used for the paper tape dress form I plan to make soon. Two birds one stone – love it!

A Moulage Fitting without the Master

…Sadly. I wish I were still living in NYC. If I were I’d sign up for one of Kenneth King’s Moulage class. As it is I have to make do with the Moulage CD book by itself. Don’t get me wrong, the first (actually make that two) muslins are pretty good. But it would have been even better to get that expert tweak and learn to read the wrinkles – what need to go and what can stay. Because for us novice it is so easy to overfit. Or want to overfit. I know they Photoshop skin wrinkles out of fashion photos. Do they do the same with wrinkles in the clothing?

Anyway, I need your help. Especially if you’ve taken the Moulage class with the Master. I don’t have a Fitting Buddy here in London. So I’m trying to fit myself and could do with your second opinions. (On the Birthday Wishlist – a replacement dress form. Big Bertha has become a little bit misshapen. This time I might try Connie Crawford’s paper tape version instead of duct tape double.) I’ve posted on both Artisan Square & Pattern Review boards already. But doesn’t hurt to get the word out again here does it! So the Moulage….

First the back story:

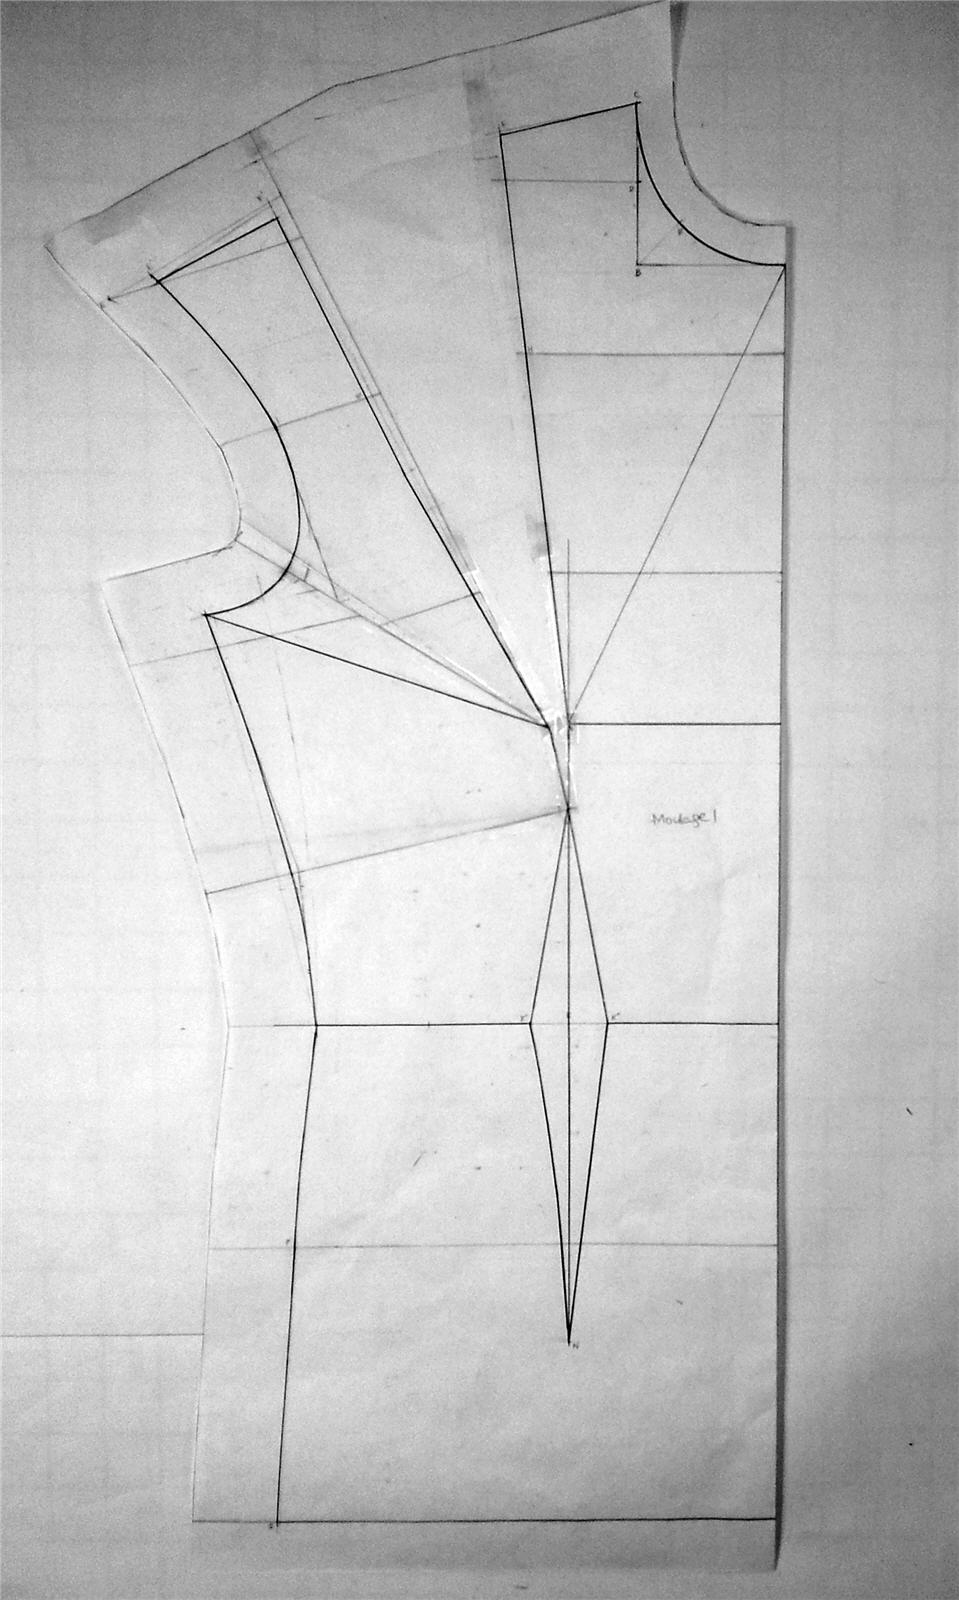
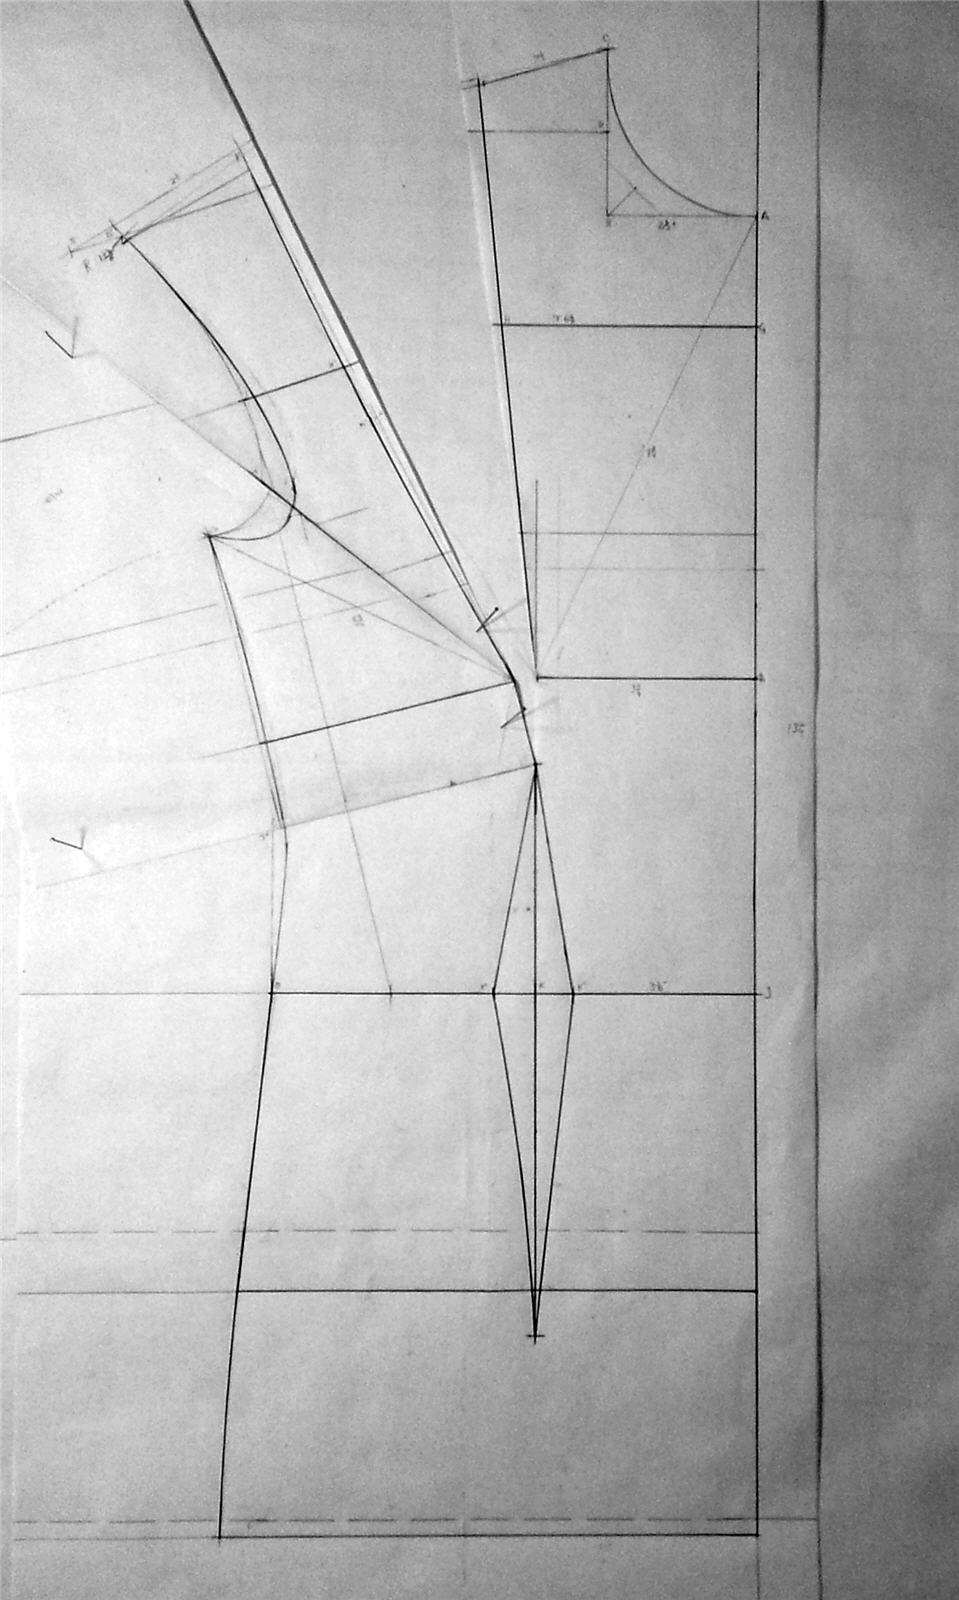
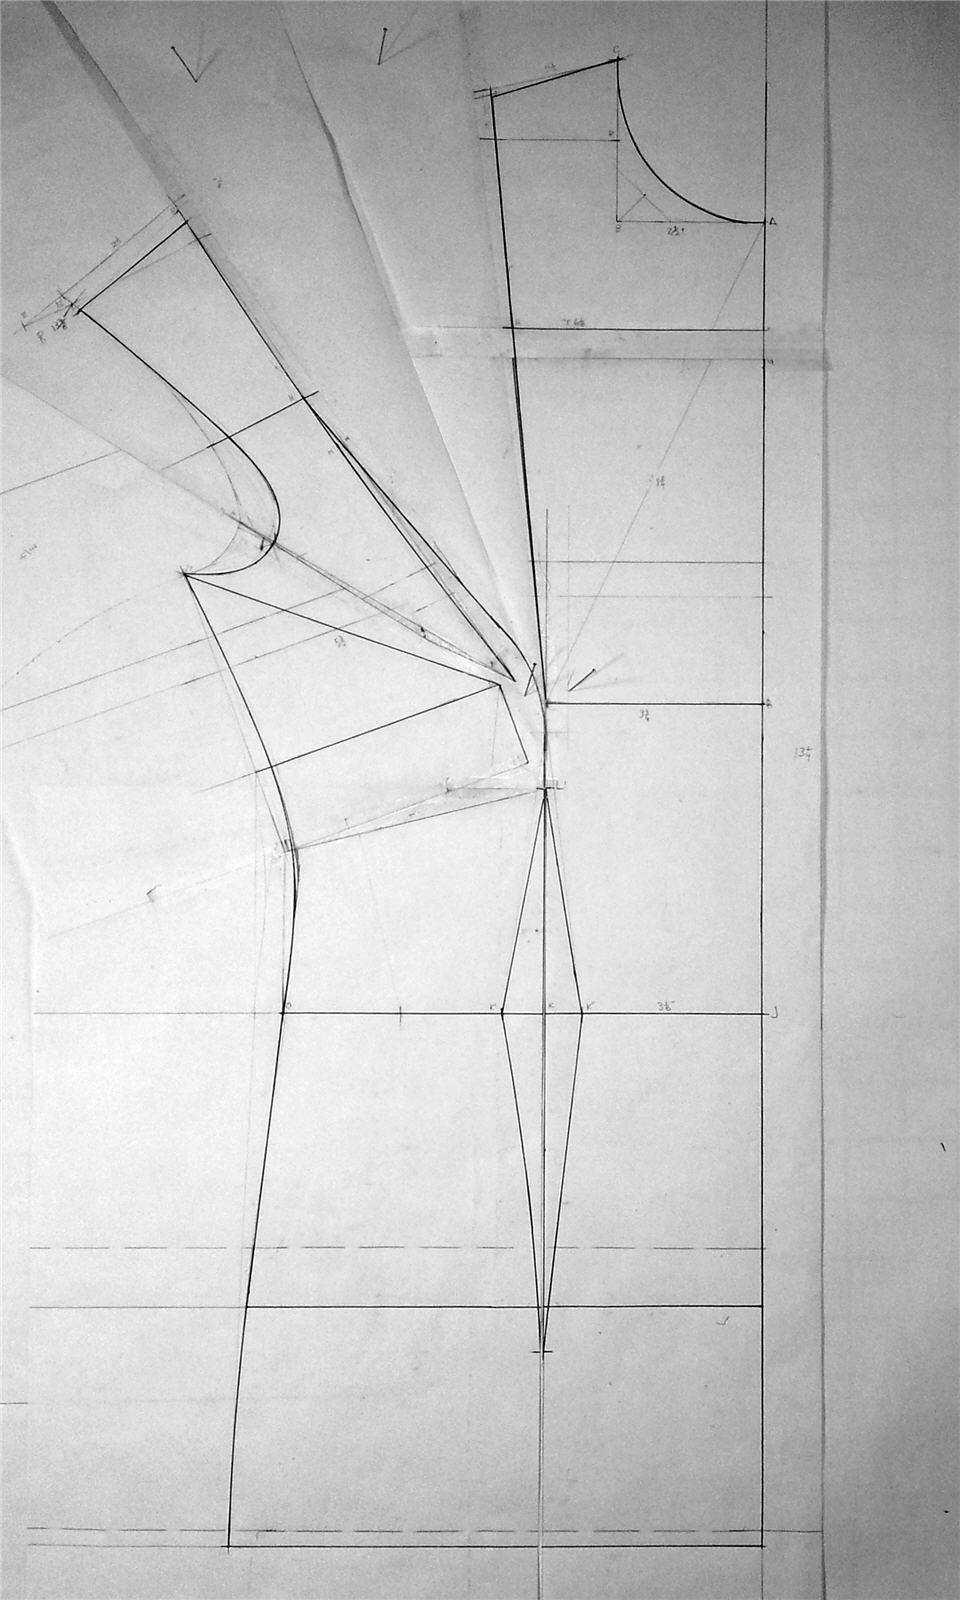
I actually made two muslins. The first one I panicked when my front pattern step 10 came out looking really funny:

I ended up moving width to the front bust from the back bust (instead of using the formula given). While my OH isn’t exactly a perfectionist with measurements, a difference of 5″ between front bust & back bust seems too great to be just inaccuracy.

This first muslin seemed fairly good, but there were still some wrinkles:

In the name of science (yeah right), I decided to start again & try to stick to the instruction more closely. But as the front pattern looked too narrow after step 13, I again deviated. I mixed in the instruction given for D-cup+, but used the standard amounts given for waist dart end point (L’) and the armhole dart (T’).

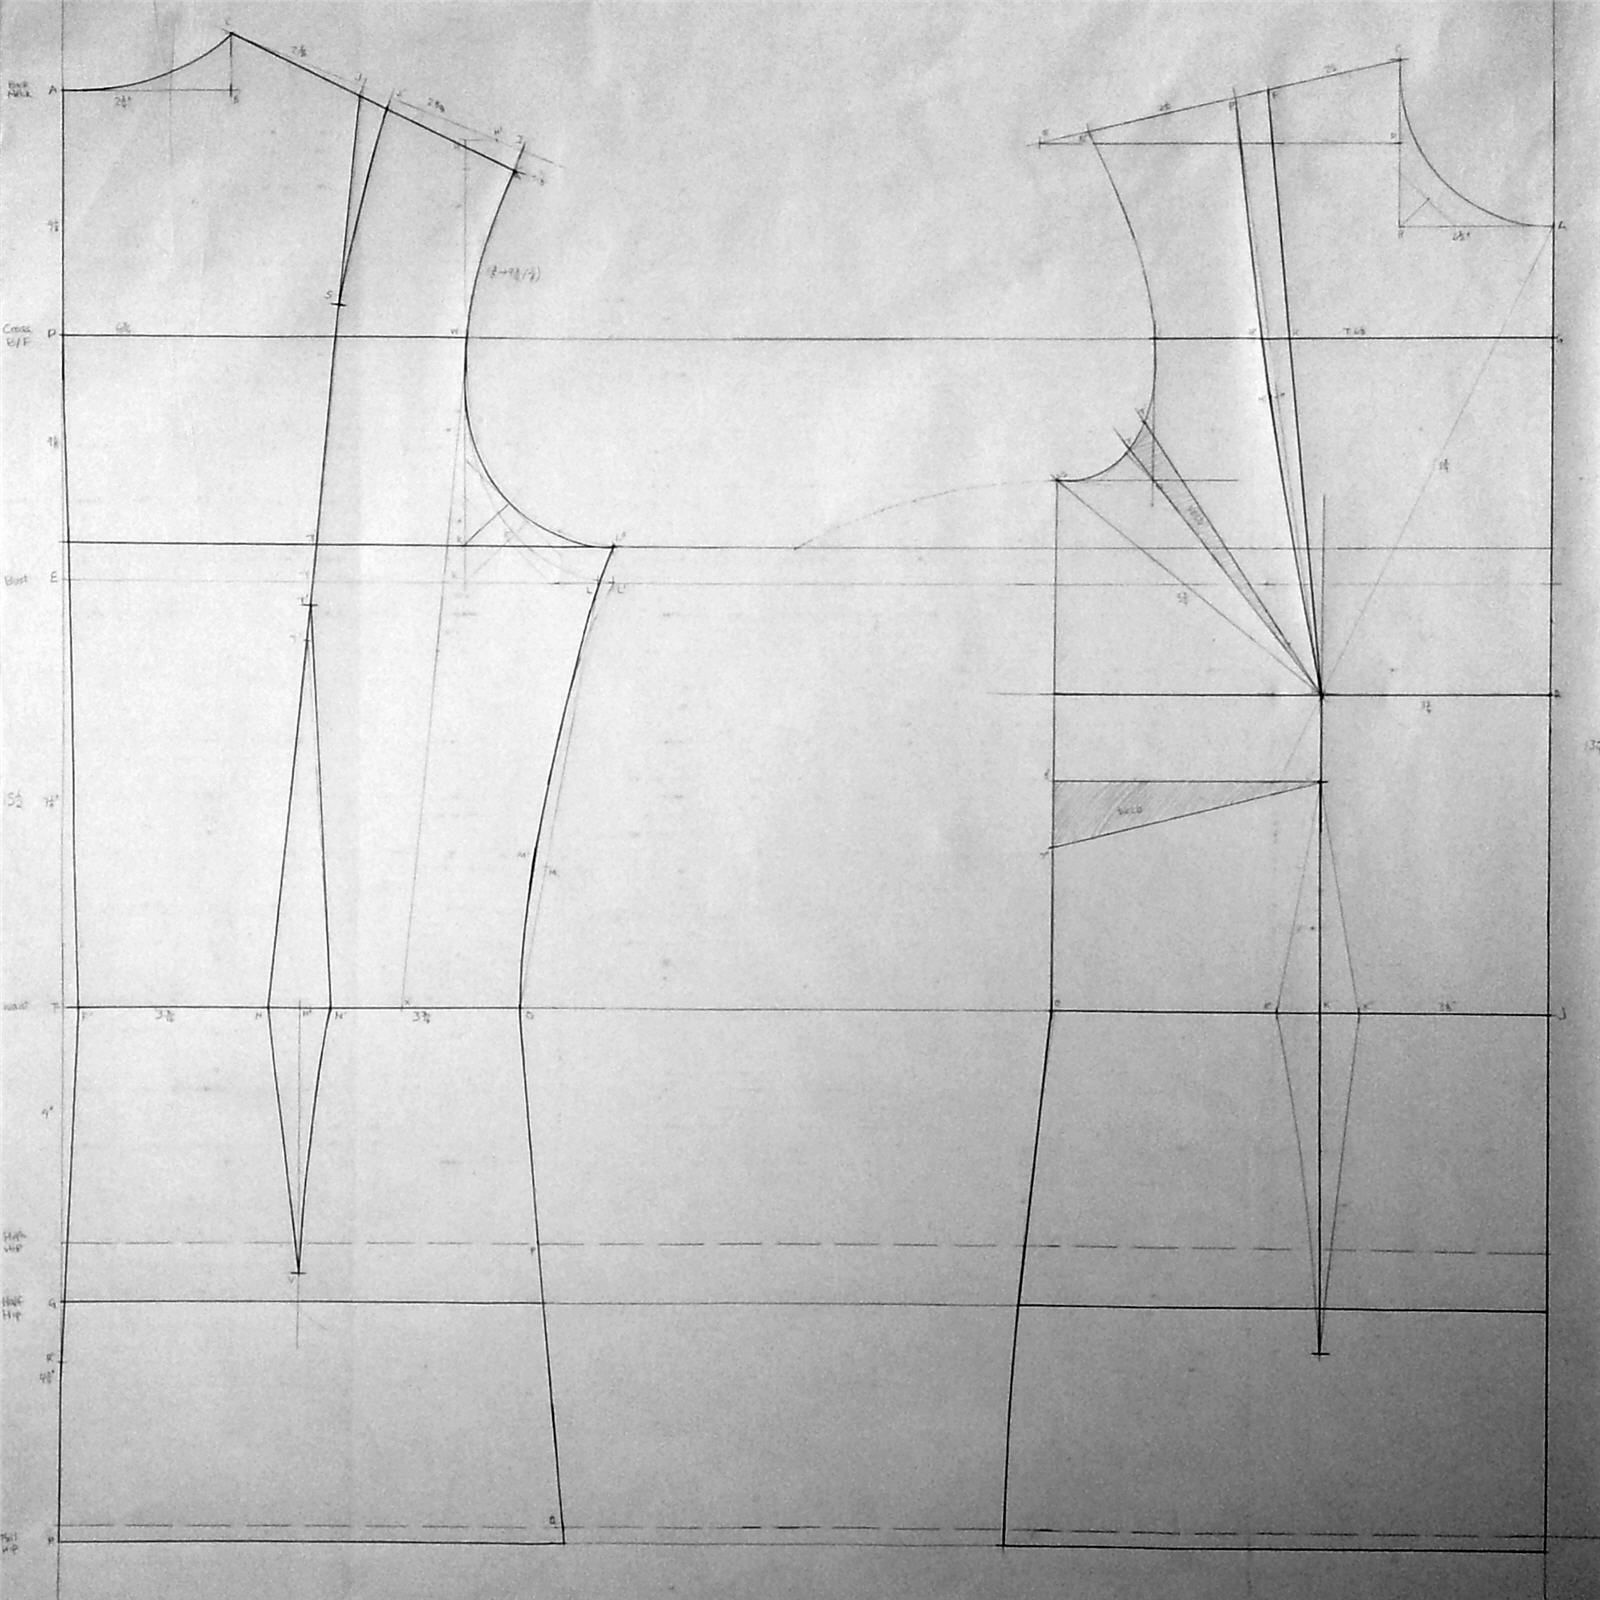
Standard instruction:
Bastardized D-cup+ instruction:

What’s not shown in the pattern photos above is the lowering the left shoulder & armscye following the instruction in Special Cases section.

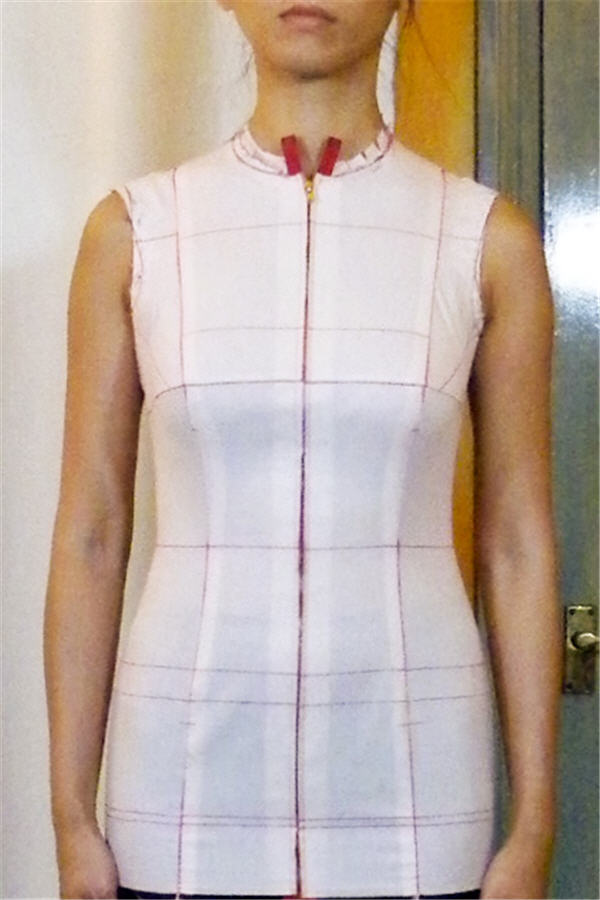
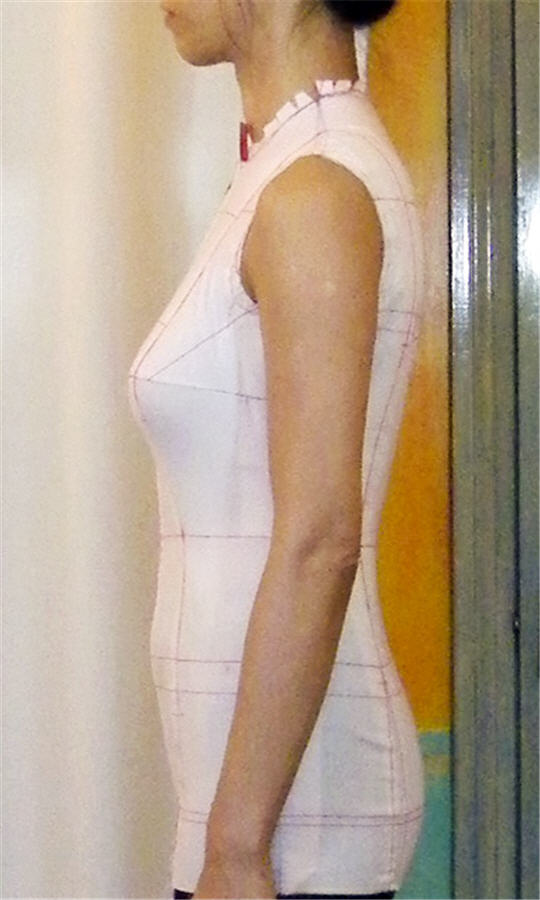
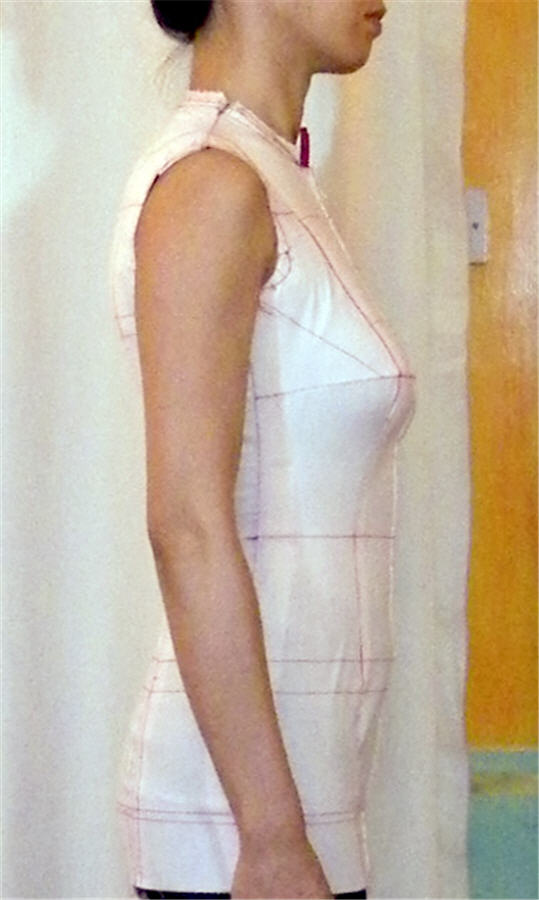
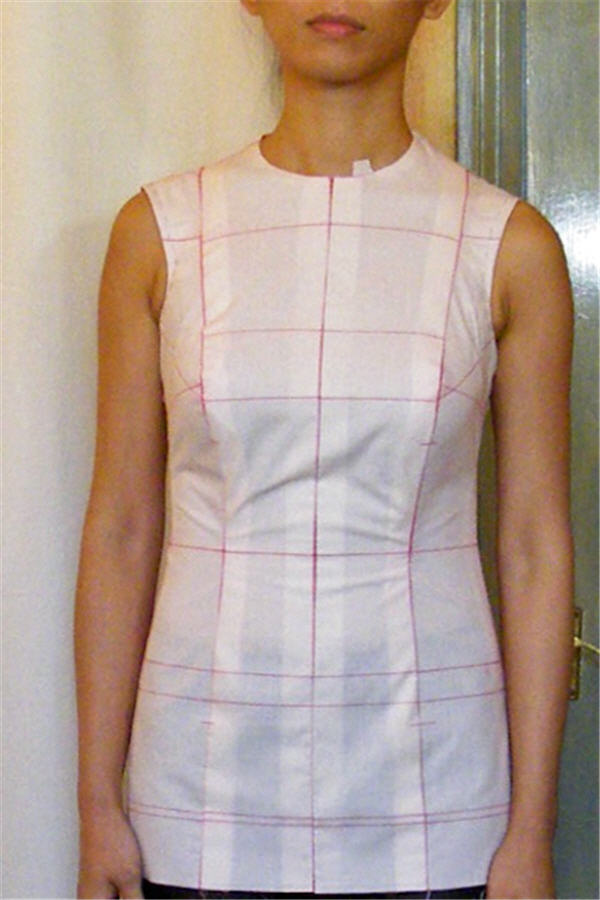
So here is muslin 2:


I’m not good at reading muslin wrinkles, and have a tendency to over-fit, so could really do with your second opinions. Keep in mind this is meant to be skin-tight with zero ease.

What looks off to you?

What needs fixing and what needs to be left well alone?

Do you think I need to…

  1. Do a little bit of sway back adjustment?
  2. Scoop out back armscye a bit more?
  3. Lower right shoulder & armscye a little bit?
  4. Shorten the CF a little – is the looseness under the bust normal?
  5. Make front lower armscye curve more shallow – is it normal to have such a gap there or should it be closer to the arm crease?

Thanks in advance for your feedback & help! 😀