Jungle Cocktail Dress…aka Burdastyle 2012-04-128A

Jungle January 2014And just before time is called on Jungle January 2014, this tortoisey snake finally slither its way into the party with its ratty tail barely clearing the closing door.

So let’s get straight down to businesses and boogie down to that last five minutes of the Jungle wailings…

Style Shots & Mug Shots

BS 2012-04-128aBS 2012-04-128aBS 2012-04-128aBS 2012-04-128a

BS 2012-04-128aBS 2012-04-128a

BS 2012-04-128a BS 2012-04-128a BS 2012-04-128a BS 2012-04-128a

BS 2012-04-128a BS 2012-04-128a BS 2012-04-128a
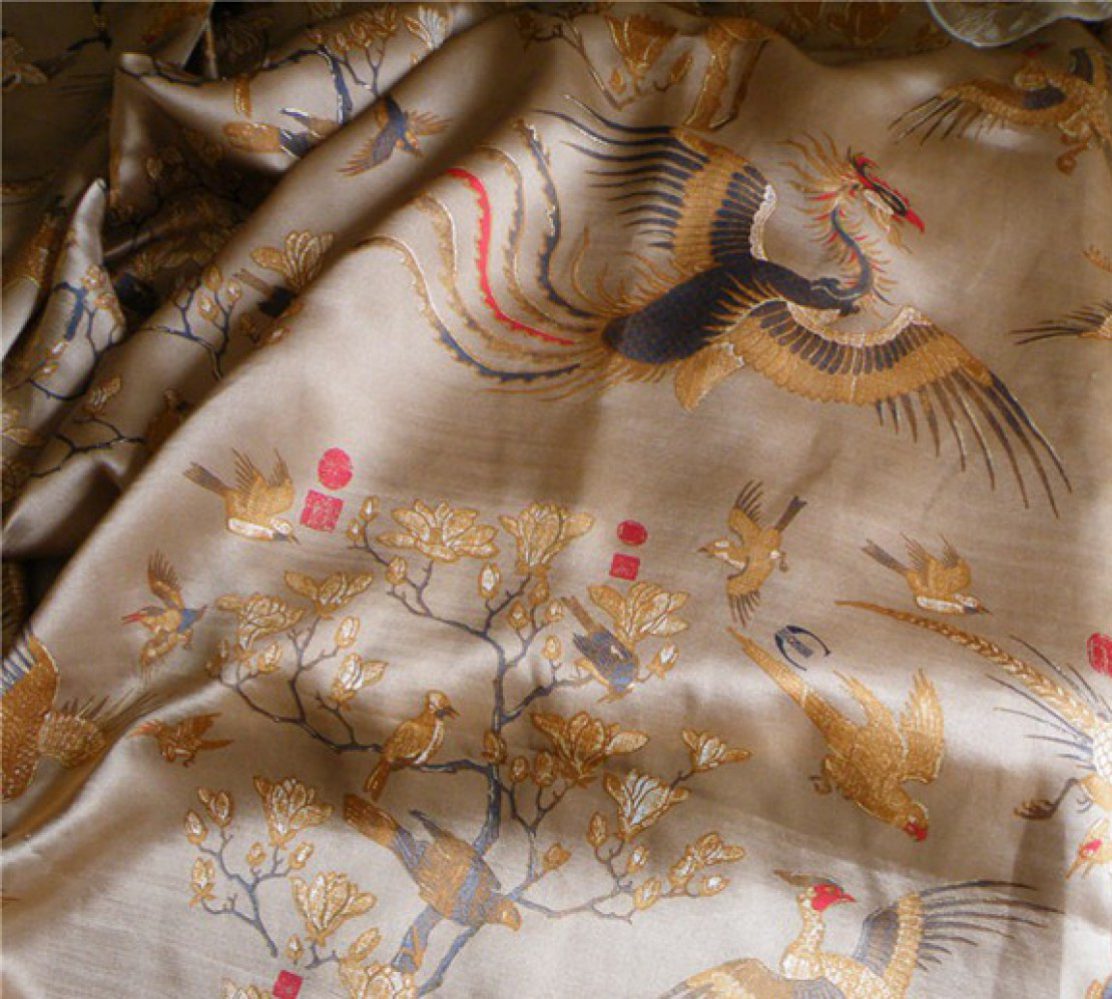
Next up must be the fabric of course. Says so on the party invite dress code.

Fabric & Notions Used

I got this snake print fabric 2-1/2 years ago, and by the time I realized that I’m in love, I couldn’t get any more of it 🙁 Thankfully I got 3 meters originally. So there should be enough for another garment.

It has a lovely drape and isn’t too difficult to sew. But it does feel slightly plasticky (hence the delay in attempt to get more). And – my pet hate – like all jerseys it curls at the edges. Normally I’d starch the hell out of these curly edges. But this time starch has no effect. Maybe it’s 100% water-hating petro fiber. Who knows.

As a non-snake person – I’m terrified of them, even earthworms & eels that remind me of them – this first foray into snake print is suitably timid & subtle. Maybe next year I’ll be bolder. In fact I already have a couple of loud prints with splashes of snakes from my last NYC trip. And it might be a good idea for me to start preparing them early. Who knows, I might even come to Jungle January 2015 on time!

OK, on to the hangover drone that is the pattern review…

(Or if you prefer more jungle action, check out the Jungle January 2014 Flickr photo stream!)

 The Pattern

I actually didn’t get the magazine when it came out – much to my regret now – so had to download the PDF version from Burdastyle website. And while I do appreciate the second chance, downloadable patterns are a royal pain. It’s better than not being able to get the pattern at all. But given the choice, I’d take pre-printed patterns any day. Yes, even Burda’s unwieldy jungle of  overlapping pattern lines.

So the pattern itself…I was rather surprised to find virtually no makes out there on the interweb. Nada on Burdastyle.com. And a paltry one make on Pattern Review which unfortunately featured only action shots, so hard to see the dress clearly. Burda Russia of course have a few more – including the longer view B, but still not as many as this pretty dress deserves I thought.

Size Used

This time I went with 36, which happens to be the recommended size for me according to the sizing chart. But this is only because 36 matched my new Basic Top Block most closely in the key measurements.

Changes Made

Fitting changes

For a change I didn’t use my Block to gauge alterations needed. Instead I pressed Q into tissue-fitting service. I started with the lining pieces because it has less drapes / is more fitted, so is easier to fit. Once I figure out the main changes needed, I apply the same changes to the shell pieces.

The alterations this time are fairly minimum.

  • Short, aging body shape adjustments: Shortened between bust & waist, waist & hip, and hip & knee. This kept the widths at all the key levels unchanged.
  • Small hip adjustment: Graded down at the side seam from waist down.
  • Front-back body shape adjustment: Shifted a little bit of the waist shaping from the side seams to the darts. In other words, made the darts wider at the waist and added the amount this removed back at the side seam waist. So side seam is straighter. (In Frabjous Couture‘s recent discussion about shape & pattern drafting, I’d be a less dramatic Liz.)
  • Shortened bust dart for my low hanging girls, and lengthened the back darts above waist for my narrow lower back.
  • Sloping uneven shoulder adjustment: I narrowed the upper back a little bit so the straps won’t hang too close to the edge of my shoulders. The strap then had to be adjusted in length to accommodate this. I also shortened the left strap to accommodate my lower left shoulder. Hopefully there won’t be any jumping off the shoulder cliff drama with these precautions.

There’s one more change I’d make if I were making this in bias woven. And that is to take account of bias stretching when assessing the pattern length. Kenneth King mentioned a rule of thumb of 1/4″ stretch per 6″ length in his Moulage book. If I were to cut on the bias as instructed, then I might want to shorten everything accordingly – including the darts and torso shaping. In a shapeless dress you might be able to just shorten at the hem as needed. But this dress actually is a body skimming sheath. So I’d want to make sure the torso shaping hasn’t elongated after gravity has worked it’s lousy magic.

This time I didn’t make this adjustment because my fabrics were all knits, so I cut on the standard straight grain.

Design changes
  • I had to lengthen the lining and add another layer of underlining to preserve my modesty. My snake print was way too see-through. The lining was lengthened from hip length to just below my bum. The underlining is knee length & just slightly shorter than the snake print. The underlining pattern is the dress pattern minus the front neckline pleats and the skirt side extension. I left a vent where the side extension would have been.

Verdict on the Instruction

The instruction is OK, though mention of length extension was confusing. Maybe it was referring to the magazine pattern. The PDF version looks like the full pattern, so I didn’t lengthen anywhere. Other than that, I did the usual thing of giving the instruction an once over, then doing my own thingy.

Theoretically this should be quick to make. But I ended up sewing each layer with slightly different seaming technique because, well as you know, knits are temperamental divas. And I have 3 of them to deal with:

  • The lining is stitched & top-stitched on the sewing machine with stretch stitches.
  • The underlining has stretch-stitched & hand top-stitched darts, and 3-thread narrow overlocked side and back seams.
  • And saving the best for the outside, the snake print has hand-stitched darts to minimize stretching & wavy seams. But the side & back seams were again done in 3-thread narrow overlock to keep the dress floaty. Unlike the under layers, I didn’t cut off the dart seam allowances on this layer because I like how the shading adds slimming vertical style lines to the dress.
  • All three have 2-thread rolled hem done on the overlocker. I like the lightness of the result. But there were lots of oops with the rolled stitch not catching the fabric edge. Urgh. Hand blanket stitch to the rescue.
  • And the straps I had to stabilize with stay tapes to prevent it stretching & showing off more of me than intended. Lots of hand sewing here too.

Would I sew it again / Would I recommend it to others

With all the fussy fabrics it’s no wonder I’m so late to the party! One thing for sure: There’ll be no swinging like Tarzan in this delicate dress with all its Oops. But I like the result well enough to want to wear it to a relative’s summer wedding coming up soon.

I think the pattern would also be really pretty in the recommended bias georgette (or even chiffon). But I’d only make it in those fabrics if I can figure out a way to avoid the wavy seam like on the pattern view B photo:

1-fit-lining-fAnd those double french darts – I just love how they looked on Q in the stiffish tissue paper. It gave Q sideway curves where she and I have none. This detail is a bit lost on droopy fabrics like georgette or mesh jersey. So I just might adapt the pattern to work with a crisper fabric like silk shantung. I’d have to do away with the neckline drapes and pleats, and the skirt side extension of course. It’d make a nice little cocktail party dress for ladies who lunch! 🙂

TNT Knit Block…or is it?

So, while we’re on the Knit Block detour we might as well finish this conversation.

As you know, I’ve been using my adjusted Burdastyle 2012-09-123 T-shirt as my tentative Knit Block. And it’s been working OK. No major complaint apart from the sway-back type puddle in the lower back. So I thought I’d try designing with it.  Nothing fancy, just a simple U-neck T.

bs201209123mod1_0dsgn-1 I was going to make it with 3/4 sleeves. But the fabric I had in mind was a $1/yard remanent from FIDM’s Scholarship Store in LA, so not enough for long sleeve. No problem I thought. I’ll just make a short sleeve version.

Straightforward right? Sadly no.

See those pulls emanating from the neckline towards the shoulder? I had no such problem with the previous makes based on this Knit Block. It could be the fabric, though this one seem just as stretchy. My bet though is on the short sleeve. All my previous makes were long sleeves. I think maybe the weight of the long sleeves pulled the shoulder seams in place. So I hadn’t really noticed that the shoulders were really too short.

Here’s how it compare with my zero-ease Moulage pattern:

bs201209123block_1fit
Apology for the confusing extra lines – they’re for the blouse/dress, jacket, & coat slopers. I’m waiting to test them out with muslins before separating them into heavy paper Blocks. The heavier red lines show the Moulage.

The shoulder is about 3/8″ too short. Waist is zero ease, and Bust & Hip are both currently negative ease (even accounting for the bit taken out by the Moulage darts).

I think I need to redo the Knit Block, get back to basic principles. Specifically, where it’s OK to have negative ease and where it should be kept at zero ease. And maybe figure out a totally zero-ease Knit Block for those less stretchy knit fabrics.

And I thought I was saving time by starting with a commercial pattern for knit! Sometimes there’s no substitute for learning properly, especially if one intend to get creative with pattern making.

Wrap Cardie: modified BS 2011-06-139

The dress form is still WIP. I’m no deft hands with the DIY, so the stand is taking a while to make. And I’m leaving the padding & cover till the last.
So how about a spot of Here’s One I Made Earlier?

The Pattern

Well this one has been stewing since March. I was going to franken-pattern this bodice & sleeve with the front neckline of Burdastyle 2011-11-114. In the end I went for a simple modified Blumarine pattern because I couldn’t my head around that weird grafting. And I’m glad I did…

Style Shots & Mug Shots

bs201106139_v1_4mug_fbs201106139_v1_4mug_sLbs201106139_v1_4mug_b
bs201106139_v1_4style1_4bs201106139_v1_4style1_1bs201106139_v1_4style1_3
bs201106139_v1_4style2_5bs201106139_v1_4style2_6bs201106139_v1_4style2_9
bs201106139_v1_4style3_11bs201106139_v1_4style3_10bs201106139_v1_4style3_8

That last set is my homage to the melodramatic Dolce & Gabbana 2013 ads 🙂 But you won’t catch me doing that in real life.

And last but not least, all the holiday snaps. Lucky top!

nyc-me-made-o4-1_
Columbus, OH, USA
nyc-me-made-o7-7_Coney Island, NYC, USA
bs201106139_v1_4style-taiwan-2-
My old elementary school in
Taipei, Taiwan
bs201106139_v1_4style-taiwan-1-
Jioufen Gold Mine Museum in
Taipei, Taiwan

As you can see, I end up wearing this open most of the time, with the ties looped around my neck. I really should add a thread loop to the CB neckline seam to keep the ties in place. They get a bit unwieldy with the constant taking off & putting back on (especially in Taiwan where outside it’s freaking hot and inside it’s effing freezing with A/C everywhere).

Fabric & Notions Used

Size Used

34 because it was closest to my tentative Knit Block.

Changes Made

bs201106139_v1_1fit

Fitting changes
  • Changed shoulder slopes to match my Knit Block.
  • Moved armholes & side seams down the same amount as the shoulder to match my Knit Block.
  • Moved waist up to match my Knit Block, plus other design element related to the waist: the hole for the tie bands & the position of the tie bands, the front wrap edge curve (which also improves bust coverage).
  • Shortened sleeves to match my Knit Block.
  • Moved shoulder matching mark on sleeves towards the front to match my Knit Block.
Design changes
  • Added armhole ease by lowering the underarm on all patterns.
  • Shortened bodice patterns to about 2″ below the hip.
  • Omit the collar.
  • Widen the front band pieces to 2″ finished width & cut as one continuous piece (ie without CB seam).

Verdict on the Instruction

Read & ignored as usual. Once I know how the pieces are suppose to fit together I prefer to follow my own batch work-flow and modifying where necessary to fit my design changes and fabric behavior.

  • Stabilized the back shoulder & tie band hole ares of the side seam with Vilene Bias Tape.
  • Overlocked shoulder seams & tie bands. Neatened tie band hole areas of side seams on the serger. Turn tie band inside out.
  • Overlocked armscye seam, one long edge of front band to neckline, and bottom edge of the front band folded back right sides together.
  • Overlocked the tie band sleeve – side seams, skipping the tie band hole areas. Top-stitched the seam allowances of the tie band holes in place.
  • Slip-stitched the narrow hems & front band / neckline seam by hand while on holiday in NYC!

Would I sew it again / Would I recommend it to others

This modified top is fast becoming a favorite. It’s great for layering & goes with almost everything. It’s classy with a little flare of drama in the bell-shaped sleeves. Considering that I have a moth problem I will no doubt be making more of the same in the future.

And the dress version too. I already have in mind a muted gold stretch jersey as well as the same turquoise leopard print I used for the pencil skirt & cowl top you see in the photos above.

Other people’s makes on Burda & Pattern Review all look great as well. So definitely would recommend. You can still buy the PDF version of the pattern online at Burda website. So what are you waiting for!

Knit Block experiment 2: BS 2010-02-122

Next up in the Knit Block experiment queue is the rusched bust variation on the raglan T, again previously made as an unintentionally off-the-shoulder marinière top.

The Pattern

Judging by the tech drawings you’d think the fit of this one would be the same as BS 2010-02-112, the plain raglan T. But I discovered while altering both simultaneously this time that 122 is actually larger than 112. That might explain why many makes of 122 have the same fatal flaw – the persistent off-the-shoulder look, which makes an otherwise very wearable top unsuitable for office wear unless you got a jacket or cardie over it.

Style Shots

(Obviously not for the office…)

bs201002122-v2-4style-2bs201002122-v2-4style-6bs201002122-v2-4style-15bs201002122-v2-4style-13

Woohoo wind machine!

Fabric & Notions Used

Again, another one from the stash that was a bit meh because the color doesn’t match the online store photo & the fabric feels a bit scratchy.

Size Used

Size 34 again instead of the recommended 36.

Changes Made

Fitting changes

The process is similar to what I did for 112. But the bust rusching complicates things. It’s been a while now, so I’m a bit hazy about how I did it. I think this is what I did…

  1. Aligned Bodice Patterns with Bodice Blocks at underarm. Again I lowered the pattern slightly for a little bit more ease underarm. The top & bottom of the Front Top Pattern’s CF are roughly equal distance from Block’s CF. Front Bottom Pattern is butted against Front Top Pattern at the side seam with the overlap at CF.
  2. Because of the rusching which complicates the neckline, I checked the width & length first so I can establish how low the rusched CF neckline will be on my chest. Front Patterns were a bit too narrow and the Back Pattern too wide. I added / subtracted width-wise where needed to match my Block more closely. Interestingly the length is already the same as my adjusted 112 without any shortening!
  3. The under-bust seam is way too high. So I lowered it to make it closer to my under-bust line indicated on the Block. The adjusted Front Top Pattern bulges out from the new CF in the same way the original pattern bulges out from the old CF.
  4. I decided to keep the rusching 2″ in length. So I aligned the top of Front Top Pattern to 2″ above the Front Bottom Pattern at CF, keeping the underarm as close to the Block’s underarm as possible.
  5. Aligned Sleeve Pattern’s shoulder mark with Bodice Block’s shoulder seam, then Sleeve Pattern’s neckline with Bodice Pattern’s neckline – or as close as possible, in this case the front doesn’t match exactly. Again, there’s a bit of overlap between the sleeve & bodice.
  6. Removed the overlap at the neckline from the bodice.
  7. The front raglan seam at the neckline seems dangerously close to the armscye. So I reshaped the curve to add a bit more fabric here.
  8. Aligned Sleeve Pattern with Sleeve Block at underarm. Again, pattern lowered slightly for a bit more underarm ease.
  9. Checked the Sleeve widths & lengths. The width again I only narrow towards the wrist. The length, like the Bodice length is almost where it needs to be without much shortening!

The lengths, the extra width at the neckline, and the high under-bust seam make me suspect the top was drafted to hang lower & bigger than 112. No wonder my first make of 122 was way more risqué than my first make of 112, despite making very similar changes.

Design changes

  • Shorten the sleeve to 3/4 sleeve.

Here’s how the final pattern looks compared to the original size 34…

bs201002122-v2-2fit-5

And how it compares to my previous make of the same pattern…

bs201002122-v2-2fit-6

And the mug shot comparison…

Previous Make

This Make

You can see from the various comparison photos why my previous make was falling off my shoulder – the neckline of the first make’s raglan sleeve was almost at my shoulder edge! That’s why its useful to have a knit block, even if you’re not using it for designing your own patterns.

Verdict on the Instruction

Again, the process was a bit of a blur by now…Probably batching. And there was no armscye interfacing to omit as the instruction for this one interface the neckline only!!!???

For the bust rusching I decided to pleat rather than gather. Gathering such meager extra fabric just result in a puffy fattening look IMO. I prefer the more graceful drape of irregular pleats for creating the illusion of a shapely bust.

I also did the rusching after I attached the facing – makes it easier to attached the facing without getting the drape caught in the top-stitiching.

Would I sew it again / Would I recommend it to others

It’s a flattering wardrobe basic I think. And now that I’ve adjusted it so it’s more wearable for work, I most definitely will be making a few more in different fabrics, maybe different length.

And I’d recommend it if you can take the time to correct the fit.

Knit Block experiment 1: BS 2010-02-112

So way before my holiday(s?), I was testing out my knit block. First batch of experiments were on using the block to alter commercial patterns.

To 2-birds-1-stone it, I picked a couple of raglan-T patterns rather than yet another normal sleeved patterns. Actually make that 3-birds-1-stone. A long long time ago, I had made a couple of Burdastyle marinière tops, which despite fitting failings I still wear to death. So this will be the chance to try to rectify those fitting failings & multiply my supply of ever versatile (& flattering) marinière tops. First up, a plain Jane raglan T.

The Pattern

Style Shots & Mug Shots

bs201002112-v2-4style1-1bs201002112-v2-4style1-2bs201002112-v2-4style2-3bs201002112-v2-4style2-old-western

(Mug shots further down for very good reasons!)

Fabric & Notions Used

The fabric was from my stash. And I have loads of it. It was on sale for 5-meters lengths. The color doesn’t really match the online store photo. And the feel is a bit scratchy. So I wasn’t mad about it and happy to use it up for a wearable muslin.

Size Used

Size 34 instead of the recommended 36 since it’s closest to my knit block.

Pattern Changes Made

Fitting change

OK, this time I’m not going to itemize all the alteration measurements. I’ll just show you the process, since that’s the whole point of this experiment – altering with minimum measurements!

The key steps I went through in this test are…

  1. Align Bodice Patterns with Bodice Blocks at underarm. In this case I wanted a little bit more ease underarm, so I lowered the pattern slightly.
  2. Align Sleeve Pattern’s shoulder mark with Bodice Block’s shoulder seam, then Sleeve Pattern’s neckline with Bodice Pattern’s neckline. In this case you can see there’s a bit of overlap between the sleeve & bodice.
  3. Remove the overlap at the neckline – I choose to remove it from the bodice. This makes the neckline smaller, so less likely to fall off my shoulder or expose my bra straps. If I had gap instead of overlap, then I would have patch the gap instead to make the neckline just right.
  4. Check the Bodice widths & lengths. The front just needed length adjustment, and narrowing the waist tiny bit. The back also needed width adjustment along the entire length.
  5. Align Sleeve Pattern with Sleeve Block at underarm. Again, pattern lowered slightly for a bit more underarm ease.
  6. Check the Sleeve widths & lengths. The Sleeve is a bit too long for me. Widthwise it’s wider than my Block, but I felt I could do with a bit more ease at the underarm. So I only narrow the sleeve further down.

Design changes

  • Lower & widen the necklines for a less conservative look.
  • Shorten the Bodice & Sleeve for a hipper retro look.

Here’s how the final pattern looks compared to the original size 34…

bs201002112-v2-2fit-4

And how it compares to my previous make of the same pattern…

bs201002112-v2-2fit-5

Previously I had just made the design changes without doing any fitting changes first. The result was quite wearable, but the neckline was a bit wide, resulting in one too many exposed bra straps. Here are the mug shot comparisons…

Previous Make

This Make

OK, apart from the less risqué neckline, this make looks worse than the previous with all that draglines pointing to the bust in the profile, and the dreaded sway-back type draglines at lower back.

The back draglines are actually better than the previous make – the photos don’t show this that well. But obviously I haven’t crack this nut yet.

The bust draglines…I wonder if it’s to do with the fabric since the pattern widths are pretty much the same. In fact, in the new pattern I move a bit of width from the back to the front – the previous make’s back was a bit loose. The previous make was in what I presumed to be cotton lycra. But now I’m inclined to think it has some rayon in it. All the rayon fabrics I’ve used so far has that really lovely soft feel that just seem to mold to your shape in a knit, or drape flatteringly in a woven. I might have to make this again in a rayon lycra to test this theory.

Verdict on the Instruction

To be honest, it’s so long since I made the top, so I don’t really remember much about the process. I probably streamlined it by batching up seams to be sewn. (I was in production mode with this top & another 2 knit block tests.)

The main deviation I made was in omitting the armscye interfacing.

On normal sleeve knit tops I’ve been stablizing the shoulder seam but not armscye. Reason being I read that shoulder seams will stretch with weight of long sleeves if not stablized. But for close-fitting armscye like these I thought the armhole would be more comfortable if it retain its stretchability. The lycra in the fabric should theoretically help the armscye return to shape should it temporarily stretch out of shape.

For raglan sleeves I can’t figure out what would be the equivalent of the shoulder seam. So I just left out the stablizer altogether.

Now the embellishment…

bs201002112-v2-3design-be-presentThis being a plain T in an almost-not-there color – albeit with a subtle sparkle – I decided to add a bit of interest with fabric painting. Yes, again.

I thought it could be my commitment-phobe version of tattoos. However, standard tattoo black looks too harsh against the peach. So I picked Jacquard Lumiere 561 Metallic Gold which matches the metallic thread in the fabric perfectly.

The designs mimic the tattos that my favorite Japanese singer has.

217925I thought hers look cool not trashy. Her tattoos were also meaningful. So I adapted the designs to make them meaningful to me too.

Mine stands for “Be Present” with a playful twist. “Be” is in the Queen Bee design. “Present” is in the barcode. Read whatever you want into it!

I tried making a stencil for these like Savory Stitches did with her stenciled bees. But the lines were too fine, the fabric too textured, so I couldn’t get clean lines stenciled. In the end it was tracing paper transfer & free-hand again.

Would I sew it again / Would I recommend it to others

A raglan T knit block? What do you think?