Barely There Python ruched panel skirt (Burda 2011-08-121)

This should have been an easy make. But my fabrics conspired against me. So this snake missed the  Jungle January 2015 party.

The Pattern

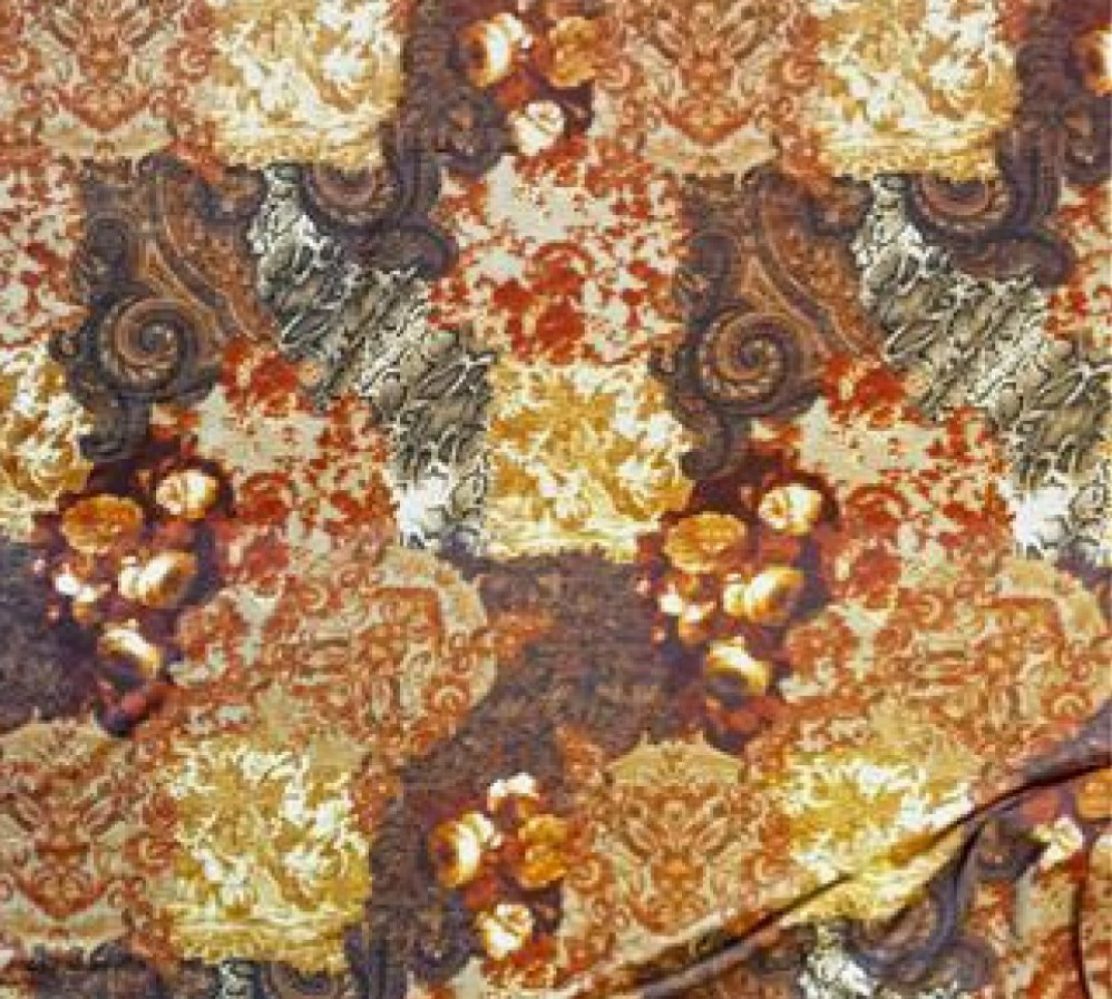
Again this pattern wasn’t my first choice. When I thought I’d go ruching & front panel I had in mind the skirt portion of Burdastyle 2014-05/115 asymmetric dress. But I wasn’t sure the one-sided ruching would look as nice in a plain pencil skirt. It might have appealed to me initially because one shoulder bodice drive home the asymmetry point. Without that it might lack conviction and look like a mistake. Plus it would eat up my precious print. So I went with this simpler symmetrical rusching skirt.

Style Shots & Mug Shots

WORN WITH: 1 Self-drafted Alexander Wang S/S 2010 Wannabe sweater, tote v2; 2 Burda 2013-11-111 shrug, Burda 2012-05-109 top ; 3 Burda 2013-11-117 jacket ; 4 Self-drafted Martin Margiela SS 1997 Wannabe top / jacket ; 5 Self-drafted Vivienne Westwood – Comme des Garcons Love Child top ; 6 Burda 2013-12-119 top ; 7 Self-drafted Dolce & Gabanna Wannabe cardi

Size Used

34 as it was closest to Psychedelic Leopard 2: Burdastyle 2012-05-113 draped skirt I made previously which fitted well.

Changes Made

1-patAlt

Fitting changes
  1. Tweaks in widths which probably weren’t necessary.
  2. Sway-Back Alteration: Lowered waistline at CB tapering to nothing at Side Seam.
Design changes
  1. Extended the length to below knee, which is almost the same length as #122. I checked the ruching length. It was about 1.5 times longer than the corresponding front panel length. So I increased the ruching panel length accordingly.
  2. Pegged the side seam for a more shapely skirt. Hem is 2″ smaller.
  3. Omitted the vent. My fabric had enough stretch to accommodate walking.
  4. Added a facing to the lining instead of edge to edge lining. Wasn’t necessary, but since I didn’t manage to squeeze a snake into the front ruching panel I had to sneak the snake back in this way!
  5. I also ended up removing the extended waist. The high waist wasn’t doing anything for my short-waisted torso. More importantly I screwed up on the ruching so it started too low and looks really weird. Plus I stretched the skirt through over-handling. Lowing the waist hid these mistakes.

Fabric & Notions Used

Construction Notes

  • Pencil skirts are so easy so I didn’t really follow the instruction, especially as I made some design changes like extra top-stitching along the princess seams & omitting the vent.
  • 2-sew-details-2But I did follow the instruction for facing the upper skirt edge. I’ve had trouble getting a clean finish to the zipper opening at the waist before. This instruction gave me a tidy finish there. So thumbs up – I will be using it again.
  • I kept the zipper even though it might not be necessary in a knit skirt, especially with my narrow hip. I like my waist snug. So I didn’t want it stretched out of shape with fabrics of questionable stretch recovery rate.
  • 2-sew-details-1My New World Snake might not have been the ideal fabric for the ruched panel. Despite the narrower pattern (presumably the horizontal stretch would keep the ruching under tension & help it fight gravity) my snake sagged. While some might like the sweep the floor drape look, it’s not my cup of tea. I don’t like my drapes too low. So I had to tack the ruching in place along the CF at multiple points.
  • 2-sew-details-3My lining gave me hell. I originally chose a lighter weight tricot. But it doesn’t seem to have much stretch, but when sewn up the stitching lines all seem too tight. The fabric would sag between the vertical seams with draglines pointing to the seams. I could have tried my serger. But I was too crossed with the fabric to give it a second chance. I went with the same lining fabric I used for the Turquoise Leopard skirt and this time overlocked the seams. But no luck overlocking the hem. Twin needle stitch was NG as well. I resorted to hand blind catch stitch.

The Verdict

Despite the hassle this snake gave me I’m chaffed with the result. Not sure I can wear it over tights or anything bulky or bumpy. But nothing like a knit skirt to give a straight up & down girl some shape right?

Crouching Batwing Hidden Python top (Burda 2013-12-119)

The Sun has finally decided to come out in London today. So I can finally finish this post. Sorry to keep you guys waiting.

Of all the s Jungle January 2015 snakes this one was the most laid back and agreeable thanks to the ready-made pattern with a loose fit. It was the last one conceived yet the first one finished.

The Pattern

Originally I was going to make Burda 2014-04/111 asymmetric funnel neck top. But even the talented ladies on Russian Burdastyle couldn’t make this look comfortable & chic, with the asymmetry frequently too subtle to look like a feature & more often look like a sewing Oops. So I gave up on that pattern.

Thank goodness I had mentally bookmarked Tia Dia’s fabulous party bronze version of this cowl-neck batwing top before. I drooled over hers, not Burda’s. I hadn’t even bought this issue. Anyway, it now came in handy. I wanted drape. The original Vivienne Westwood dress inspiration had drape. The fabric craved drape. So this is perfect, even if it lacks the asymmetry that I liked in the VW original.

Style Shots & Mug Shots

WORN WITH: 1 Self-drafted skirt; 2 Burda 2011-08-121 skirt; 3 Burda 2012-04-128a dress; 4 RTW pants; 5 Self-drafted skirt

Size Used

Mindful of the generous ease & off the shoulder tendency that Tia Dia mentioned I graded down to a 34 (my usual size selection for Burda stretch garments).

Changes Made

1-patAlt-1

Fitting changes
  1. Short-Waist Adjustment: Shortened Front & Back Bodices at the same level (in this case bust) & narrowed Sleeve same amount at corresponding points at cap tapering to nothing at wrist.
  2. Forward Shoulder / Neck Adjustment: Shortened Front Bodice at cross-front level & narrow Sleeve again the same way as 1.

Now my adjustments to the sleeve might be unorthodox. I get rather confused about how to alter sleeve when I’ve made changes to the armscye – eg raising under arm, decrease front length at chest/cross-front, increase width at side seam, drop shoulder. Do you adjust the cap height, extend the sleeve seam length, extend the sleeve width, etc.? In this case, since I was worried about the bat-wing swamping me, I chose the two birds one stone approach of reducing width. There’s not much of a cap height to reduce anyway. This also saves on fabric required, allowing me to get more for my money. Me like!

Design changes
  1. Like Tia Dia I also shortened the hip band to high hip length because I like her version.
  2. I also raised the underarm seam / narrowed the Sleeve at armscye. Too chicken to go full bat-wing at waist level, this change raised it so that the bat-wing starts at under-bust rather than waist level.
  3. Shortened sleeve. My arm is shorter than standard. But this top seem to have extra long sleeve anyway – maybe as part of the drape design. Again, to avoid being swamped I removed some of the extra length.
  4. Narrowed/ensured the Sleeve has no ease at wrist so that I can also wear this with the sleeve pushed up to 3/4 length. I did this on the Back only to cater for my inward rotating arm.
  5. Mindful of Tia Dia’s warning about off the shoulder tendency I double checked on the B bodice where the shoulder seam starts & bring it in another 1/4″ as insurance. I was also prepared to add bra stays if necessary. But seems like my grading down to size 34 + the 1/4″ adjustment were more than enough to keep the neck opening on my shoulders.

Fabric & Notions Used

Construction Notes

For a change I followed most of the instruction given. The only deviation was location of the gap for inserting the waist elastic – I left a gap in the casing’s side seam instead of the casing top-stitching. I also overlocked most of the seams.

2-sew-detailsSome people don’t like how Burda finishes the neck edges, preferring bindings that mimic RTW. But I don’t mind it. The instruction gives a clean finish. It only looks homemade if you’ve been brainwashed by RTW on how things should look.

With troubled birthing elsewhere I was happy to mindlessly follow this top’s instruction. Hence it’s the first one hatched.

The Verdict

Yeap, I can live with this python bat. I don’t feel swamped in this, both size-wise and pattern-wise. The drapy fabric helps.

I don’t know if I would make more of these. How many bats do I need nesting in my closet at any one time? But it’s good to have alternatives to fitted tops. I would definitely make it again if this bat flies away.

I might need to fix that pooling of fabric at my hollow lower back though. It’s bad enough not having enough padding on my bum to counter balance that thickening boob / middle at the front. I don’t need no fabric puddle shouting about it.

Jungle Snake Pit The Origin

OK, this is what I would have brought to the Jungle January party if I had been more organized.

Jungle-January-2015

Yeah, it’s all fake. You would never find me near a real snake in this life time – too slimy looking. Damn you Pretty Grievances for enabling me to squander weeks on Jungle Makes & days on Photoshop Element Photomerge Compose instead of job hunting. I guess it’ll be pot noodles for the foreseeable future.

But I’m glad they’re all done now and The Stash is down 2 and a bit. I’m loving my Inner Scot and her mini-collection approach. I could never have squeezed 6 items out of these if I hadn’t done them as a batch to optimize cutting layout. I will go into more details about each later. But since they all use the same fabrics and the fabrics were the starting point for this lot let’s cover that off in one go shall we.

The Star: New World Python

cropped-2013-us-fabrics-93.jpgBefore I subscribed to Pretty Grievance’s blog I would not have had the courage for this mad print with a bit of everything: floral, damask, toile, paisley, and animal. But by her guiding light I now see how the craziest of prints can look great while having all the fun. So I took the plunge.

This mix reminds me of the Age of Discovery. All that heavy floral baroque prints, the conquistadors & their ladies. The Amazonian pythons sneaking up on them.

I got it thinking I’d make something like this Vivienne Westwood jersey dress I saw in the store.

c0e71f1a9d6c56c02259f36166b9709dI liked the asymmetric drape & sleeves (one side has drop shoulder with wider bodice). The fabric had similar drape & hand. But this catalog photo looks so unappealing that I was put off the idea. In any case I was too chicken to commit to a whole dress in this busy print. So I ended up using it mostly as feature panels. Plus one whole top as a compromise. Baby steps.

The fabric from NY Elegant is a wool / polyester / spandex mix according to my illegible notes (the NYC fabric stores aren’t so good with detailed descriptions). It has a really lovely hand similar to challis, and is warm & soft with not a bit of scratchiness. It stretches about 40% width- & length-wise, but sews easily with the aid of a walking foot. It does curl a little bit, so I also spray startched it before cutting & sewing. I bought this back in 9/2012, but it was still on display when I visited again in 10/2014.

Supporting Cast: Snake Bite Bandages

Now this light stone rayon/spandex “Morgan Crepe” from Tissu Fabrics was a bit of a disappointment when it arrived. I hadn’t intended to order yards of bandages. But that’s exactly what it looks & feels like. I was at a loss what to do with it.

So when I saw the Reiss bandage dress that Duchess of Cambridge wore to greet the Obamas I thought that was the answer. But being a more complicated pattern to draft it didn’t happen.

Then by chance it met the New World Python during one of my Get the Stash Out & Play Dress Up sessions. And it was opposites attract love at first sight.

vogue-floral-2 The cupid was this Dolce & Gabbana cardigan from a Vogue US clipping. Just the combination to tame the print while jazzing up the bandage. From there on the rest of the feature panel designs came tumbling out.

BTW, despite the humble look of the Snake Bite Bandages, like the New World Python it’s a pleasure to sew and wear. Equally soft, it’s heavier in weight, has the hand of ponte knit, and stretches about 30% width- & length-wise. And quite cheap too. I don’t think I will get any more, but I’m glad I managed to make something decent out of it.

So there you have it, the origin of this mini-collection of Jungle Snake Pit.

Wait! Wait for us Jungle January!

Jungle January 2015
Just as the gate is about to close on another year’s Jungle January,
my pet Snakes finally slither their way into the party…

Thank goodness the party’s held in the Americas, affording me a few extra hours to get them ready. This year’s Jungle Pets are actually quintuplets. Or maybe that should be sextuplets since I manage to squeeze a couple of scarfs in too. Unfortunately two of the batch didn’t hatch in time. So all you’re getting are these two + scarfs.

I really must start next year’s Jungle Beasts early…Like in Jungle June or July?

SWAP Shrug BS 2013-11-111

Following through with my SWAP F/A 2014, here’s the long sleeve shrug from the mohair gauze leftover.

The Inspiration, Design & Pattern

My inspiration was a shrug that I found at some online shop the name of which eludes me now. I briefly considered shrug patterns that were essentially a rectangle sewn into a tube with a stretch in the middle of the seam left unsewn. But I thought either the sleeve will be too loose or the bodice too small, so I went searching for other options. Burdastyle 2013-11-111 pattern has a bit of shaping to it so I thought it might make a good starting point.

Style Shots & Mug Shots

Size Used

I used 36 this time, which is what the size chart would have me use. I frequently use 34 for a better fit. But because the pattern was designed for knit, and I’m using woven, I decided to go with the size closest to my Top/Dress Block for wovens. In this case it was size 36.

Changes Made

Fitting changes

1-patAlt-bs2013-11-111

It was quite a visual process this time, so I’ll let the picture do the talking. You can see how I’ve laid my Top/Dress Block + Basic Sleeve Block together to assess the Burda pattern and decide what needs changing. I think the changes might be due to my sloping shoulder plus the posterior position  & pitch of my arm joints.

Design changes
  • Added 4″ knitted 2×2 rib for collar / bodice extension.

Fabric & Notions Used

Construction Notes

  • Construction is pretty much the same as the Cowl-Neck A-line Sweater the Second. The neckline/back hem were stablized with Vilene Bias Tape & overlocked. The seams were stitched & 3-thread overlocked.
  • 2-knitting-collar-instagramCollar/back hem extension is 2×2 ribs hand knitted with 2.75mm – 4.5mm needles, so it flares out without any increases to confuse me! 🙂 The casting on was again approx 8 stitches per inch & multiples of 4 (my rib pattern).
  • The sleeve hems I ended up hand-overcasting, then weaving in a few extra yarns near the edge so that they’re denser like the salvedge.

The Verdict

On the plus side I’m glad I added the knitted collar/back hem extension. This now feel more like a little bolero jacket that’ll stay on rather than detached sleeves that I might have to constantly tugged at. And the Oops…The sleeves on this one are a bit tight for something that’s a cover up. I can only wear this with short-sleeve & sleeveless tops. The fabric again makes it a delicate garment. And what’s with the mini-wings at my back armholes right?

I’ll wear this alright…if only I have more white / pale color clothing & accessories to go with it…