
This one did make it to the party. It almost didn’t. I was still sewing the buttonholes at the eleventh hour. And this isn’t even like the Great British Sewing Bee. I had a whole month, not a meager couple of days for 3 projects. Again this should have been an easy make. But things didn’t go according to plan as I was trying new techniques that didn’t quite pan out.
Style Shots & Mug Shots


WORN WITH: 1 Burda 2011-08-121 skirt; 2 Burda 2012-05-113 skirt; 3 Altered Victoria Secret dress; 4 TopShop Martha jeans; 5 Modified Burda 2012-04-128 camisole, Self-drafted skirt.


The Design & Pattern
 This one is a double agent: It’s a wearable muslin for all the cardis I planned to sew. But I’ve also wanted to make a feature panel cardi ever since I clipped this inspiration photo from Vogue US. Didn’t realized at the time that it’s a Dolce & Gabbana design. So it’s only incidentally a designer wannabe.
Block Used:
Stable Knit Fitted Top Block (Bodice & Sleeve)
Drafted using Stretch Pattern School’s One-Piece Swimwear + Tankini + Sleeve instructions using 0% negative ease. Note that the Tankini instruction does add a little bit of ease to the waist and hip. So this block does already have positive ease there.
Design Changes Made
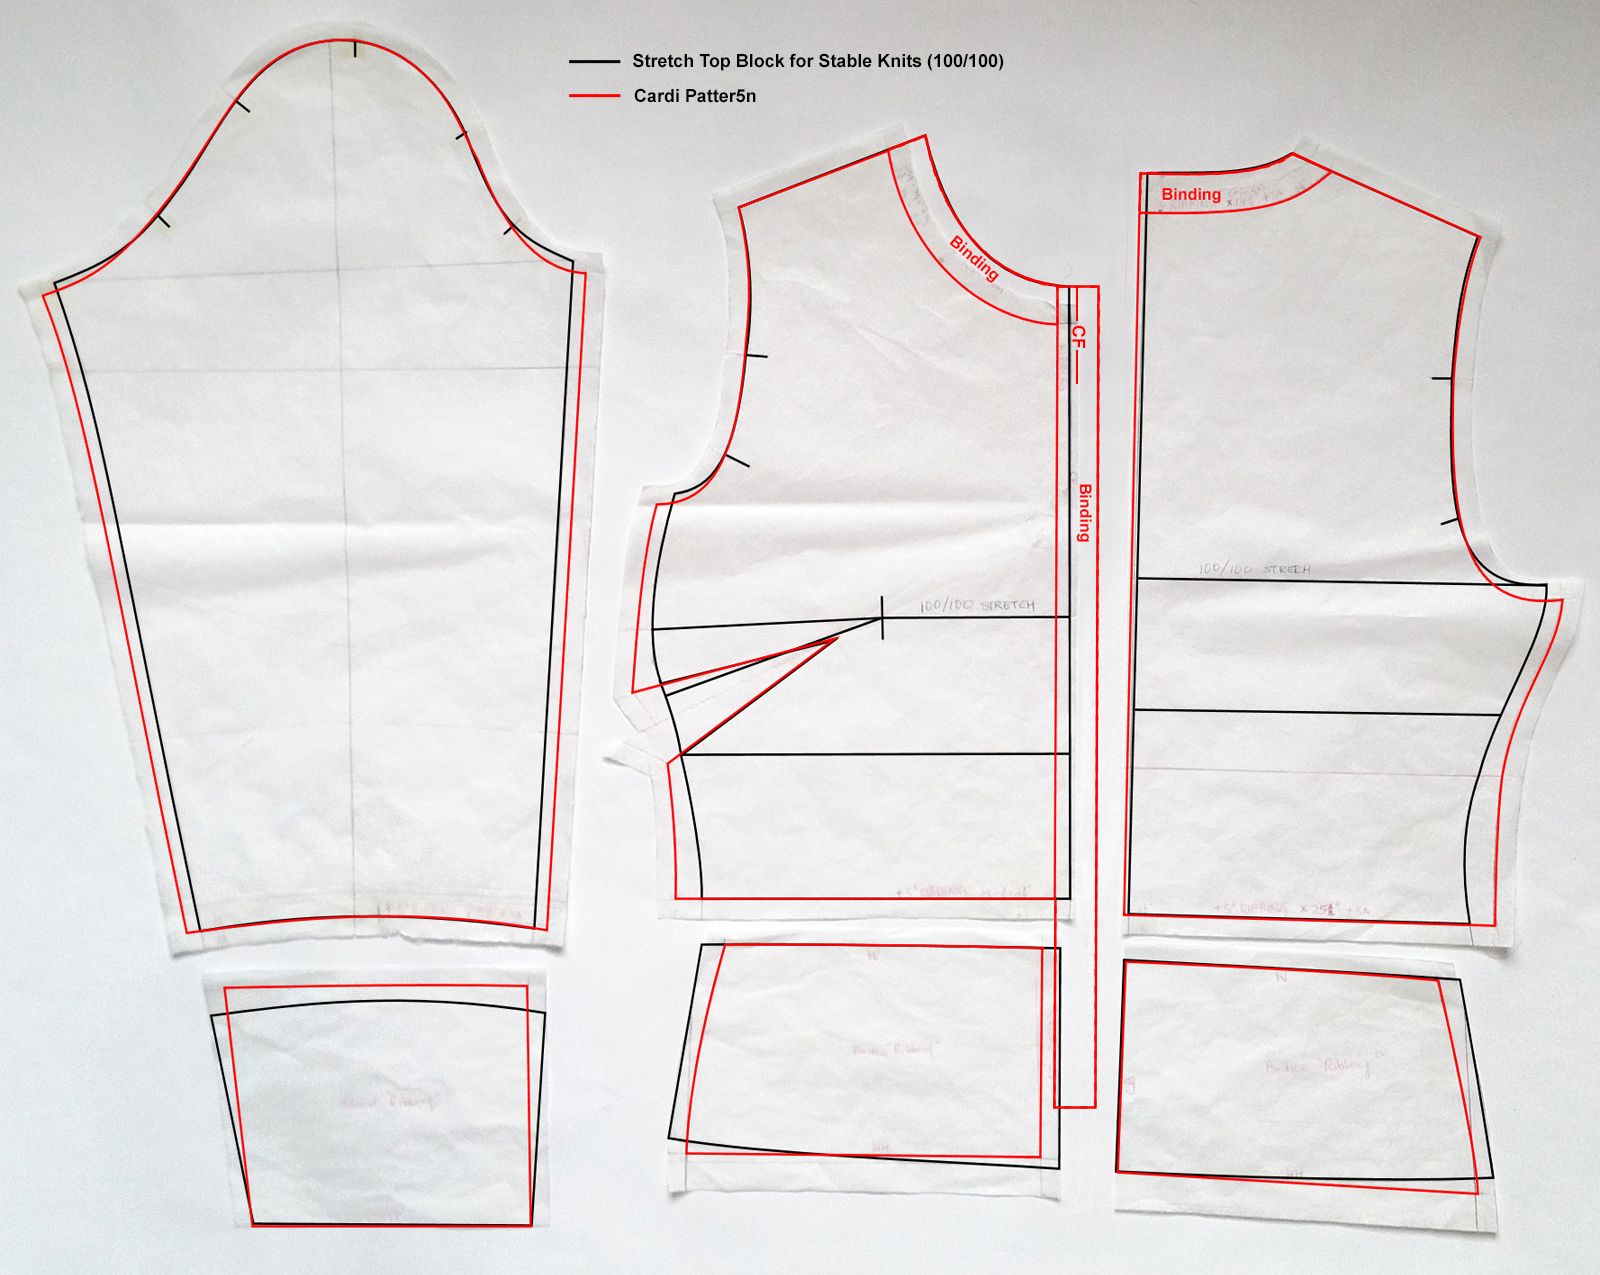
- Added extra ease to CF & CB, side seam, sleeve seam because this is suppose to go over other tops so can’t be too tight.
- Lowered underarm slightly for the same reason.
- Lopped off necklines & CF where I’m going to use binding for neck band & button placket.
- Lopped off lower portions of bodices & sleeve where I’m going to use cuff ribbing.
- Neck band & button plackets are rectangular binding pieces. They’re double layered with the fold at the neck / CF edge. The neck band length is length of the folded neck edge stretched at the seamed edge to match the bodice necklines to ensure that it’ll lie flat & smooth.
- Bodice & sleeve cuff ribbing were originally going to be rectangular pieces as well. But I didn’t have matching ribbing fabric and my experiment with mock ribbing (see below) didn’t work. So I had to draft shaped bands instead. They’re also double layered with the fold at the bottom edge. I reduced the width a little bit to simulate the snug fit of real ribbing.
Things I’d do differently next time
- I went waist length with the feature panel instead of the longer length in the inspiration because I thought blouson lower down wouldn’t work with my shortness & short-waistness. But as my mock ribbing idea didn’t work I think I might have gotten a better result if I had abandoned the blouson cardi idea and just made a fitted cardi top with the bottom band as a design feature.
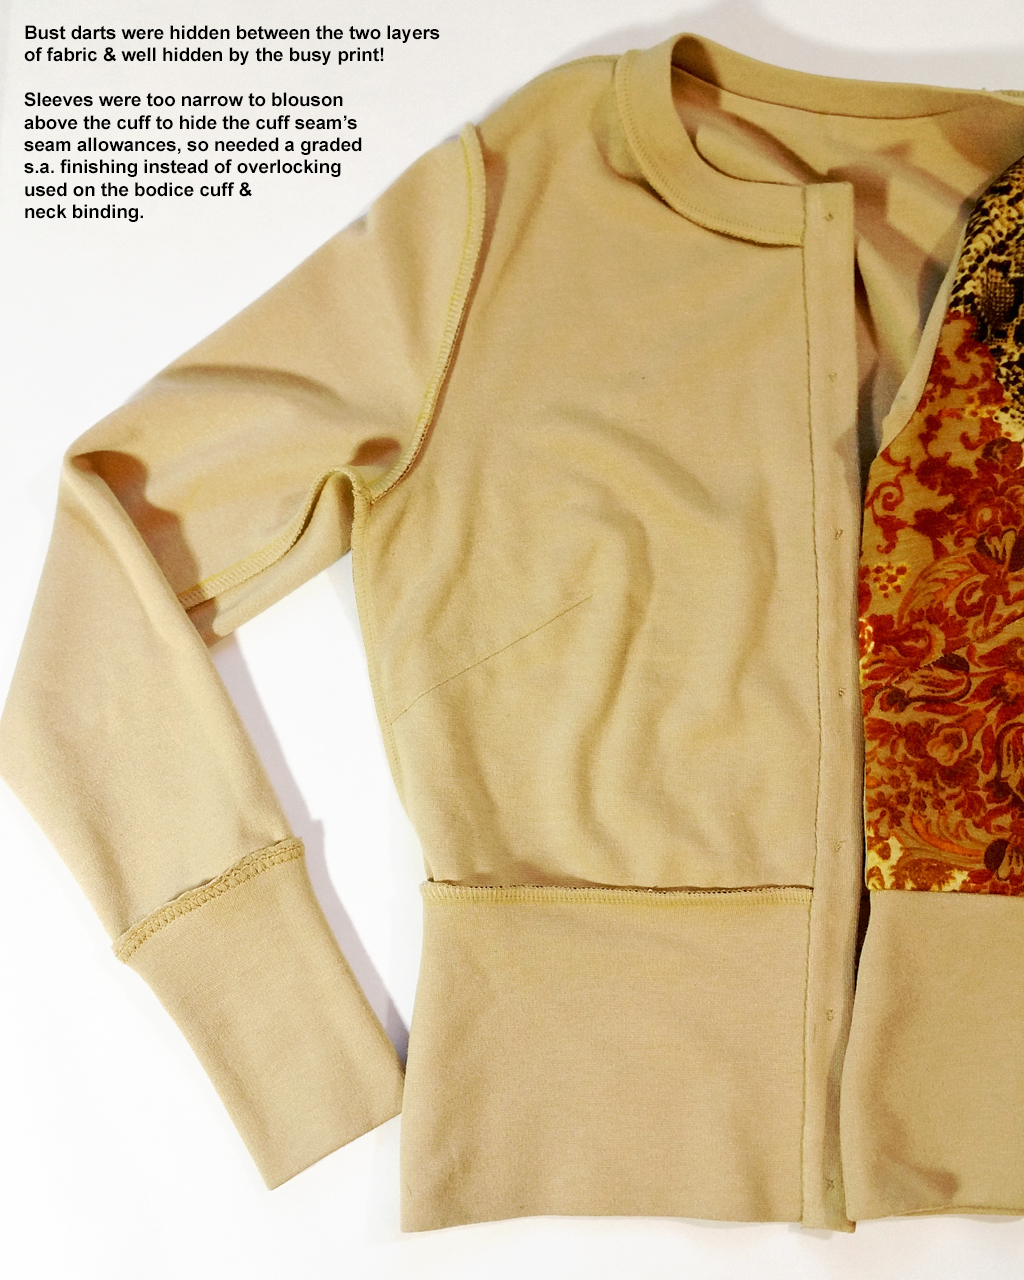
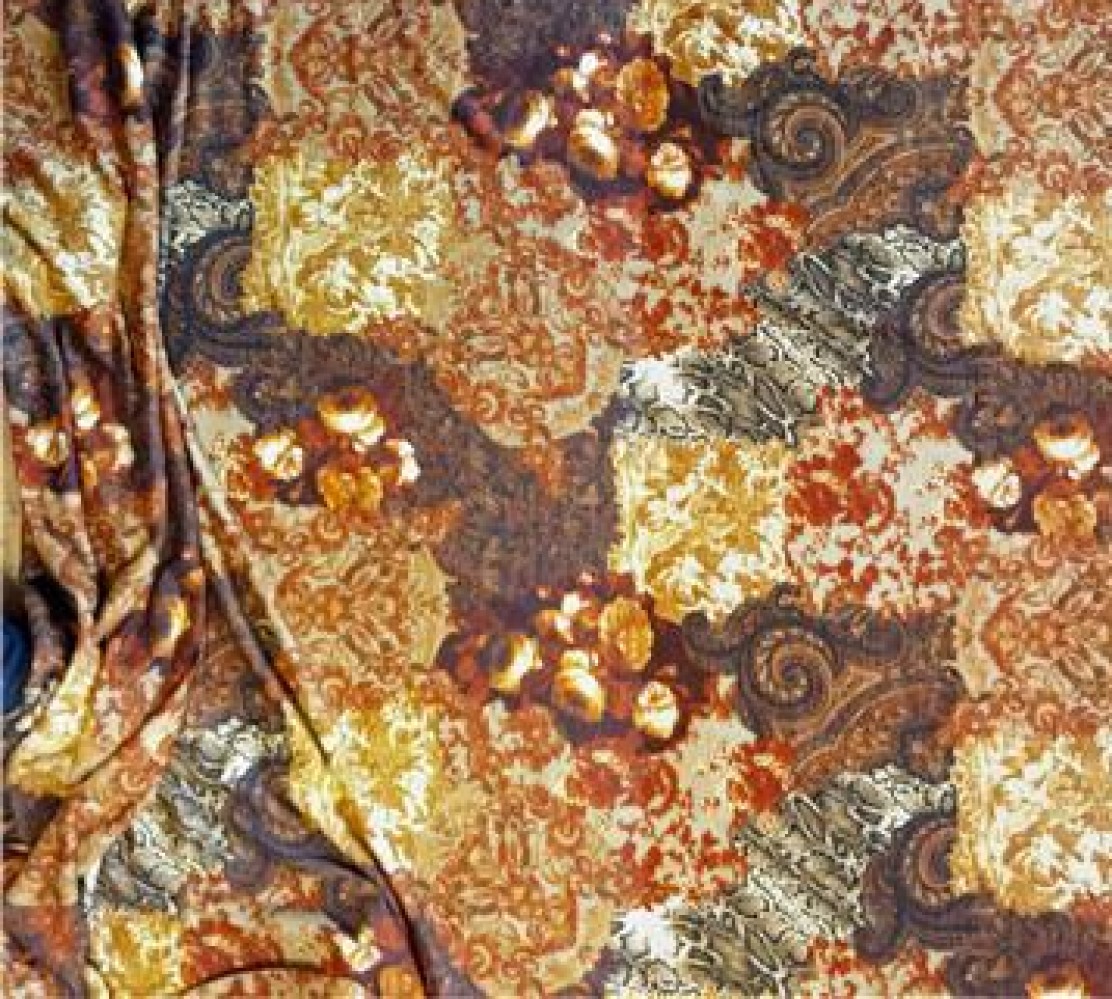
 For this make I kept the bust dart. The font bodice is a layer of the thinner / drapier / stretchier New World Snake over a layer of the thicker / stiffer / less stretch Snake Bite Bandage. I was worried that the top layer might sag over time. So I sandwiched the dart seam allowances between the layers and tacked along the dart leg as extra insurance against downward migration of the New World Snake. Although my recent experiment with dartless stretch block didn’t work I might try again and see if I can get a dartless block for the other cardis.
- I might also add more ease to the bodice & sleeve where they join the cuff ribbing for a more visible blouson effect. Otherwise the seam allowance shows through and the seam just look like a cutting mistake – like I cut them too short and had to patch with a band.
Fabric & Notions Used
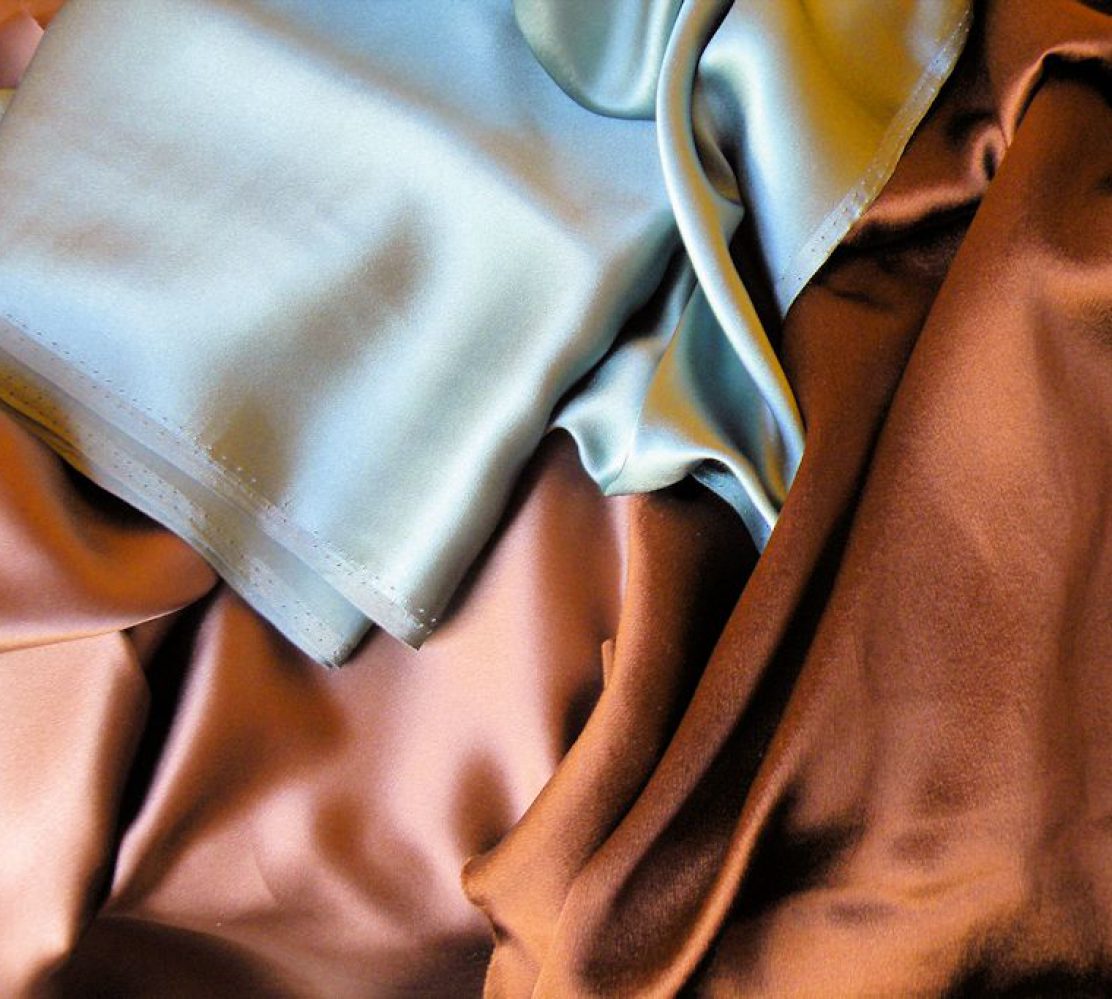
- New World Python (wool/polyester/spandex printed jersey) from NY Elegant
- Snake Bite Bandages (light stone rayon/spandex “Morgan Crepe”) from Tissu Fabrics
- Vilene Bias Tape.
- Walking foot, spray starch
Construction Notes
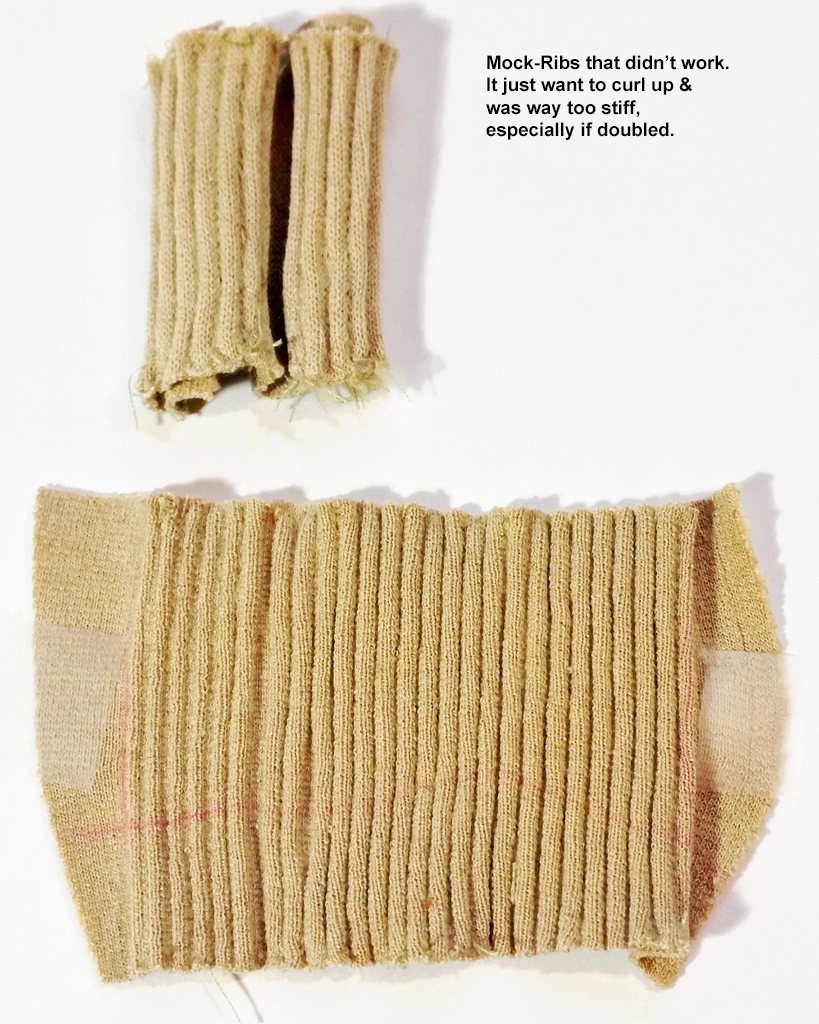
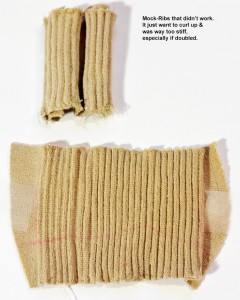 I had hoped the mock ribbing technique that the Sewing Diva tried and described in details in Threads issue #64 Apr-May 1996 would work for me too. So that I can make sweaters & cardis from more variety of fabrics without having to find matching ribbing. But mine came out really stiff. Too stiff even to use single layer, which I wouldn’t want to anyway as it’s made with parallel rows of twin-needle stitches, so the back side has threads that could easily be snagged. It also curls up if left single layer. Maybe my fabric which is mid-weight like ponte is too thick for this technique. Maybe it would work for thinner, drapier knits. In any case, I had to switch to plain bands. And I think I will have to abandon the cardi idea for my SWAP blue sweater knit because it’s again a bit thick and stiff already. And I don’t have a matching ribbing.
- I’ll have to rethink the construction order as well. A couple of areas were made more difficult to stitch because I went on auto-pilot:
- I couldn’t figure out how to top-stitch the cuff seam allowance to the sleeve after the sleeve has been sewn together. The Walking Foot that I rely on to make sewing knit easier is really bulky, so can’t handle the claustrophobic narrow sleeve. So I didn’t top-stitch any of the cuffs & bindings. Hopefully the seam allowances won’t flip the wrong way and create unsightly ridges.
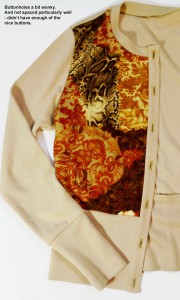 I couldn’t use my machine’s one-step buttonhole this time because once the placket/binding was sewn to the front bodice & the seam allowance hidden in the placket, it became too uneven layer-wise for the one-step buttonholer to feel its way around where to start & stop. I had to resort to manual buttonholing with zig-zag stitches. The result wasn’t pretty.
- The button spacing on this one wasn’t ideal because I was one button short. If this snake didn’t have a party to catch I would have waited until I can find another set of suitable buttons. As it is, the CF gap a little at crucial points like bust & waist, especially when I move.

The Verdict
Despite the warts I still quite like the result. Definitely worth making again with tweaks.


 So when I saw the Reiss bandage dress that Duchess of Cambridge wore to greet the Obamas I thought that was the answer. But being a more complicated pattern to draft it didn’t happen.


