The Camisole Hunt…or BS 2012-04-128 was my Mom

When I was making the Georgette lace applique top I agonized over lining the see-through top or not. I’m not fond of the bra + transparent top look. Not so much because it’s risque as much as not liking how the horizontal band of the bra make my already short waisted torso look wider and squatter. Over a bustier or long-line bra would be OK though. But I wasn’t ready to tackle shapewear! So I settled on a more form fitting slip-like camisole that can also be worn on its own.

The Inspirations

My inspiration started out with the blue camisole above that I found on Etsy (can’t find it again). It turns out to be almost the same as a bias camisole that’s demonstrated in Draping: The Complete Course, one of the draping books I own. I tried to follow the draping instruction. But couldn’t get it to be close fitting without horizontal draglines across the front. Maybe I was using the wrong type of muslin. But trying again with the China Silk yielded no better result. And the cowl drape wouldn’t work for a camisole that need to work under other tops as well. So I decided to adapt the pattern I used for the Snake Print Dress I made earlier this year. After all, it was originally designed for chiffon cut on the bias, and is slip like with waist shaping.

Style Shots & Mug Shots

The Pattern

Size Used

36, the recommended size for me according to the sizing chart.

Changes Made

As I’ve already made fitting changes when I made the dress, I used the altered pattern as a starting point.

Design changes

I recruit Q to help me with this.

  1. First I used style tape (1/4″ black twill tape) on her to figure out the neck edges, hem, and internal seam / style lines I want.
  2. Then I pin fitted the Burdastyle 2012-04-128 lining pattern tissue on Q and pin out the drape on the front neckline. I used the lining pattern because it has less drape than the shell pattern, so less confusing to alter. I marked the alteration, the style line, and other alterations I wanted to make on the pattern tissue.
  3. Next I made the flat pattern alteration by pivoting and tracing onto a fresh tissue paper. The changes are:
    • Transferred the pinned out CF bust dart to the french dart by pivoting on the bust point. Judging from the front armhole gap and comparison to my Fitted Top Block, I might not have pivoted enough. But it was hard to tell with tissue fitting. When I tested this new pattern on Q it was quite snug already. Maybe I should have made a muslin for such close fitting garments that have lowered neck edge since the whole chest-boob area is such a varied landscape.
    • Moved the back dart towards CB to match Q / my Fitted Top Block. I wanted the straps to visually continue the line created by the back dart seam. I also hoped that closer set straps would be less likely to fall off my sloping shoulder.
    • Moved some of the waist ease from the F/B darts to the side seam to create a slightly more nipped in waist look.
    • Reshaped neckline / top edge per style line on Q.
    • Reshaped hem per style line on Q.
  4. Added Georgette band details to the front neckline & the hem. The neckline band pattern is per the style line on Q. The hem band is just bias strips.

Fabric & Notions Used

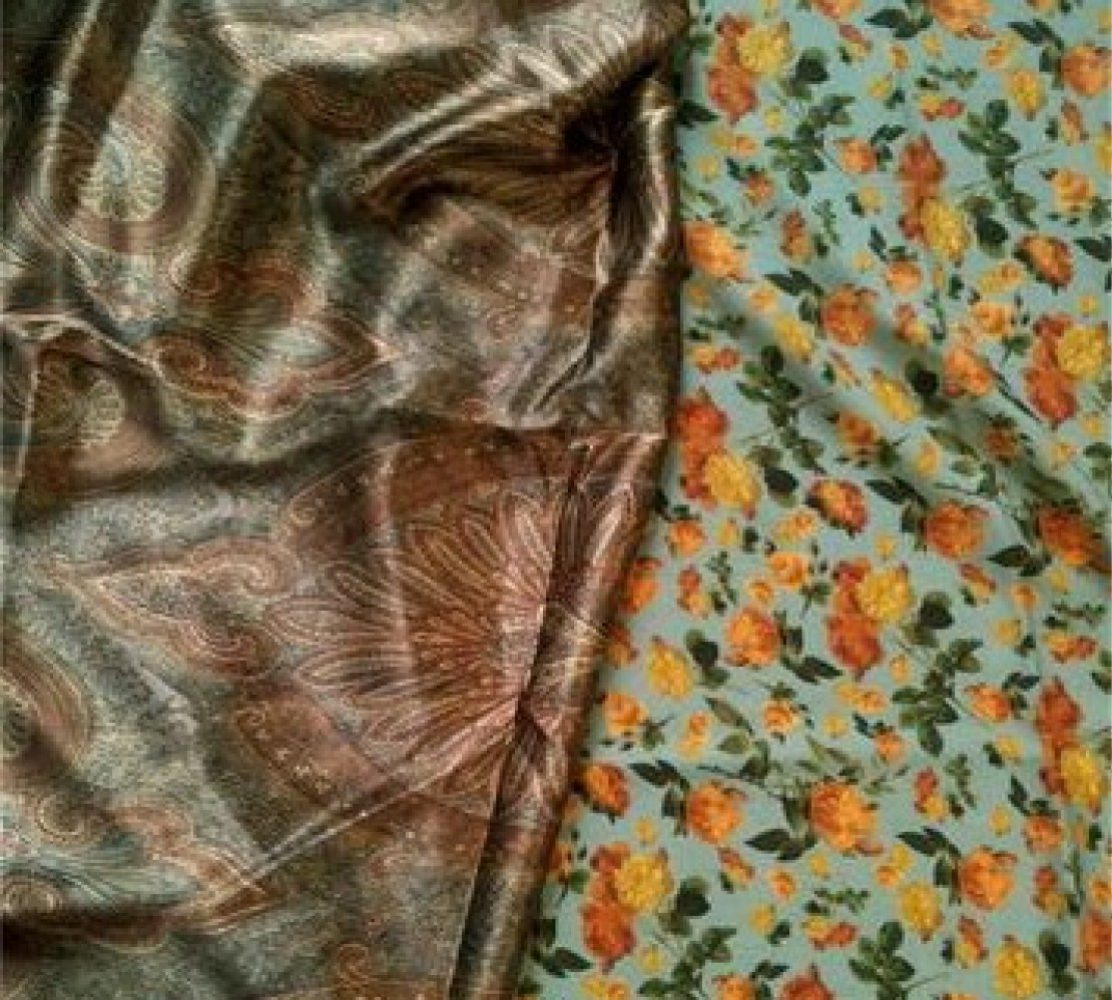
  • China Silk from B&J Fabrics, NYC. It was a toss up between this & the Charmeuse I used for the lace skirt. But since I’m cheesed off China Silk after a jacket lining made from it became tattered way too quickly, I decided to try to use up my stash of China Silk asap & not get anymore. It feels so smooth & soft, but actually is a bit, erm, bouffant, floaty. So I really struggle to think of designs that would work well in it. Anything requiring voluminous drape probably won’t work. But a slip top might be fine. And this is a nice ivory color that goes well with the Silk Georgette…
  • Silk Georgette from Borovick Fabrics, London for front neckline and hem accent.
  • Notions: Clear elastic; Small snaps
  • Sewing Helpers: Spray starch; Fray Check

Construction Notes

  • China Silk is a bit thin & translucent. So I decided to double it up with a self-fabric lining. That solves my neck edge seam finish in one stroke. No fiddling with facing or binding.
  • The translucency also means you see shadow of the SAs. So I kept most SAs skinny with 3-thread overlock seams. But for the shell layer darts I kept the SA because I like how their vertical wedges create an optical illusion of a slimmer bodice. I had to trim the deeper french dart SAs down to match the other dart SAs so the shadows will look intentional, and not just an oversight.
  • I picked overlocked seams because I thought maybe their stretchiness would grow with the bias seams and avoid puckering. The jury’s still out on whether it worked or not.
  • For hem I left the edges raw. Then sew the bias Georgette strip on the fold line to the shell about 1/2″ from the hem edge. The Georgette is then pressed downward, giving me a nice graduated transition from more see-through hem to relatively opaque bodice. I love the airy effect this creates!
  • Because I will be washing the top, so will need to press out the wrinkles, I decided to keep the lining separate from the shell at the hem. It’s easier to press each layer separately. But for dressing & undressing, it’s easier if the layers function as one. So I added snaps at the side seam hem to keep the layers together but separable.
  • Now the Oops…
    • Oh you d*** straps! Unfortunately setting them closer together in the back still didn’t prevent them from falling off my shoulders. I tried inserting clear elastic in them, having read about this trick on PR. But it only hoist the whole camisole up and the straps slip right off again. Boo. Maybe it’s because my top is so light and not skin tight. Perhaps that trick only works when there’s horizontal tension (like bra band) and/or vertical tension (like swimsuit crotch or weight of a heftier dress) to anchor the bodice and activate the strap elastic tension.
    • Gap-ahoy becomes puckering-ahoy. I really needed that muslin! As I said above, I might not have pivoted enough from CF bust to the french dart. (There actually was a small wedge left. But Q said it was tight enough already.) I only discovered this once the two layers were sewn together at the top edge. My only option was to undo & add another dart from the front armhole, OR add clear elastic to the top edge SA. Both are ugly. One’s a lot less work. Which do you think I went for? Next time I swear.
    • Sharp turn ahead. The Georgette band at front neckline really doesn’t work because of the sharp turn where it joins the China Silk. The style line looked fine on Q. So not a clue. Live & learn I guess.

The Verdict

Well, I like the hem? And the idea of the Georgette neckband too. But the execution is really a fail. Not enough though to make this unwearable. After all, it’s first & primary purpose is to exist underneath other garments. It looks fine under the Georgette lace applique top, and under a jacket or open front shirt. In short with anything that will hide it’s warts. So mission accomplished is all I can say.

But the hunt for the perfect camisole pattern continues…

Lace applique top (BS-2012-05-109)

OMG. I actually followed through with a sewing plan! When I bought the cotton lace a year ago for the white lace straight skirt, I said I was going to use the leftover for this Burdastyle top. And now I really did it. Unheard of! To follow through with my plan. And to use a fabric so SOON after purchase! 😉

The Pattern

I liked this outfit even before I got the lace. But it was waiting for the right fabric to come along. Yes amongst my overflowing stash there was nothing right for this.

I was also a bit terrified of anything not fitted. Because of my height. Or lack of. Plus the impending middle age spread. So I have tended towards fitted styles in recent years. But I think it’s time to rethink. Because so many edgy kids rock it! So I vow to explore how volume can be incorporated without out looking like the Michelin Man. This is my first baby step towards that direction.

Style Shots & Mug Shots

4-style8-1b4-style9-1b4-style9-2b

Fabric & Notions Used

  • Silk Georgette from Borovick Fabrics, London. I chose limp, drapy, and translucent Georgette to counter the boxier shape. Along with the bias cut I hope it will make this looser fitting top less scary to wear. Plus it makes this top go with the lace skirt I just made should I ever want the coordinated look.
  • Cotton Lace from NY Elegant Fabrics, NYC.
  • Sewing Helpers: Spray starch; Fray Check

Size Used

34. Going by sizing chart I would be 36. But checking the sizes against my Fitted Top Block shows that 34 should have enough ease.

Changes Made

1-pattern

Fitting changes

OK, alteration of looser fitting garment is a bit of a black art to me. I don’t know how to approach it methodically. So I wing it with lots of trial & errors. Then of course I don’t remember exactly how I get to the end. I think I might have done the following…

  1. Align CB/CF of pattern with my Block, with Neck-Shoulder (NS) point of pattern on the Block shoulder seam. Back is more straight forward – there’s only one place where these meet. I then see where that is on the shoulder seam and try to get the front NS to be on same horizontal level.
  2. Check widths & lengths:
    • I did this simultaneously since the side seam is shaped. So where I shorten will affect the widths at the key levels (underarm, bust, underbust, waist, high hip, hip).
    • Since there’s no guide to how long the top should be, I decided to go hip length. Hem width was just about right for hip length. So I didn’t want to shorten at the hem and mess up the hip width.
    • I needed to shorten different amounts in the front and the back. I also took into account how low the armhole goes and where I want the narrowest part of the top to be. So I ended up shortening in two places:
      • Armhole level just above where the side seam starts. This allows for different amounts for front (1″) and back (5/8″) without affecting the side seam. It also shorten the armhole to reduce risk of indecent exposure.
      • Side seam level at the waist. This is equal amount front & back (both 2″) to avoid mismatched side seam lengths.
    • It may look like the back doesn’t have enough widths in places. But there’s a bit of extra width in the front. Plus the back darts won’t be sewn. Plus there’s already a bit of ease built into the Block I’m checking against. So the back is actually fine pattern-wise. I presume a bias cut would also provide a little bit of needed stretch.
Design changes
  • Added shaped CB seam. Firstly because I didn’t have enough Georgette left. And since I have to add the seam I might as well put it to good use by adding a little bit of waist shaping (3/4″ each side, 1-1/2″ total). It’s yet another one of my Figure Flattery theory. That with looser fitting tops, because of my body shape & posture,  I’d look too tubby from the side view if both front & back hang straight down from the fullest parts (bust / shoulder blade). I know, most people aren’t going to look at me from the side. But the Stylist In Me won’t let it slide. She’s in agreement with Alexander McQueen about going after a “cut and proportion and silhouette that works all the way round the body” by starting with the “worst angle of the body” – ie the side with “all the lumps and bumps, the S-bend of the back, the bum.” But for all that you can hardly see the difference in this top. Bummer!

So that’s the changes I made. Whether it works or not I’m not 100% sure. Especially my attempt to shape and skim my figure. Because this will be cut on the bias. And bias supposedly stretch and droop. Especially on limp drapy fabrics like Georgette. So will my attempt at shaping be totally pointless? Will the pattern’s bust and waist and hip end up lower in the finished garment thanks to gravity pulling on the stretchy bias?

Has anyone found sound advise on evaluating bias garments patterns for fitting adjustments? Do all the shaping like vertical darts needs to be shortened and by how much? The only advise I’ve seen is in Kenneth King’s Moulage CD book where he mentioned a rough rule of thumb of expecting every 6″ of bias length to stretch an extra 1/4″ (ie to 6-1/4″). I presume this is a really rough estimate and different fabrics will stretch different amount, and possibly depending on the bias direction (which direction the grain and cross grain end up).

Construction Notes

  • Burdastyle instruction is of course as cryptic as ever. I wonder if the new BS US edition of the magazine gives better instruction. In this case, because of the drawstring casing, I did read through the instruction to get a sense of what need to be done when. I think a crucial step is missing – the side seams – not mentioned anywhere!!!??? I did mine (and my new CB seam) before step 1 so that I can do french seams on these more easily.
  • I also took advice on sewing on the bias and started with larger SA on vertical seams, thread traced seam & hem, basted and hanged the top for a day, then checked the fit before sewing permanently, hanged again & checked the hem before hemming. And with this Georgette there is definitely different amounts of stretch along the two different bias grainlines. When I cut out I was careful to ensure that the lengthwise grain run from left shoulder to right hip on both front & back. After hanging, one side the hem did grow longer than the other. Sorry, I forgot which side and forgot to take pictures. Anyway, I recut the hem to make it level before hemming. Hopefully it’s not going to grow any further and I won’t end up with an unintentionally lopsided top!
  • Again, I used loads of spray starch while cutting and sewing to make the bias Georgette easier to handle. But neither that, nor the advice to stretch the bias seam as you sew, helped in preventing puckering bias seams. Urgh. I wonder if it is possible to sew on the bias without puckering. Or do I have to resort to the Madeleine Vionnet method (bias garment with diagonal seams on the straight / cross grains)?
  • 2-applique-gather-control The front neckline gathering looked a bit puffy. But I was able to hide all that with the applique lace by not applying it flat to the Georgette (which would have resulted in puffing in the lace as well). Instead I used the lace to pull in the gather so that the lace is relatively flat when worn.
  • The back neckline I tried to stabilize with a strip of selvedge prick stitched by hand. I was never fond of machine stay-stitching. The visible stitch (even if it’s only on the inside) looks ugly to me. Plus on bias in a shifty fabric I was worried that the neckline would stretch as soon as the pattern is off anyway. I’ve read somewhere that for stabilizing bias edges you should stay stitch with the pattern still on – ie sew through both the pattern and the fabric. But still ugly. So I generally use the fusible Vilene Bias Strip that Burda recommends for edge stablization nowadays. I couldn’t use that this time because the fabric is translucent. So self-fabric selvedge cut to the length of the edge line seemed like the best solution.

The Verdict

I’m fairly happy with the top. The construction quality could be better. But I do like the design and my fabric choices. I think it’ll be a good wardrobe builder, a team player with a bit of textural interest, who could swing for both feminine and masculine outfits. Just my cup of tea!

BTW, the top also looked nice before I gathered the front neckline and added the lace. The same pattern is actually also used for a cowl neck top in the magazine (BS 2012-05-110). While I might not make another one immediately (too many other designs to try!) I’d definitely sew this again when this top gets tatty, and then I might also experiment with cowl front neckline with draw string only in the shoulder seams.

BTW, my lace was pieced from scraps in the same way as the matching lace skirt. As I was in hand-sewing purgatory on a roll I thought I might as well let my inner Scottishness shine! Can you spot the seams? 😉

Martin Margiela S/S97 Dress Form Top Wannabe

After weeks of cajoling, the Photographer-In-Me finally reluctantly put down her cocktails for a sec to help out. So here’s the first of a few recent project posts I’ve queued up earlier…

With fitting over, the Fitting Muslin for my Fitted Top Block can now finish her Cinderella story. Let’s let her have her moment of glory first shall we?

Style Shots & Mug Shots

4-style13-5

The Inspiration & Design

Considering that she started life as a sloper fitting muslin (so wasn’t made up with due care), then was repeatedly manhandled as the bodice for my three fitted sleeve / gusset experiments, I’m lucky that her make-over inspiration was the deconstructed aesthetic of Maison Martin Margiela Spring-Summer 1997 collection:
0inspiration_martin-margiela-1997ss-60inspiration_martin-margiela-1997ss-4
PHOTOS: found at Dusty Burrito blog…

I’ve always loved the look of old fashion dress forms, and have a thing for shabby chic potato sack aesthetic (hello burlap Louis chairs!). So this is right up my alley.

The sleeve in the left photo is meant to look like dress form arms, which you can make for your own dress form. A few tutorials I like: Pandemic Apparel blog’s free tutorial, “Make an Arm for your Dress Form” in Threads issue 90 p57-59 (available via online subscription or on DVD), Connie Crawford’s commercial pattern for dress form arm. I haven’t made one for Q (my paper tape dress form) yet. But when I do I will probably base the pattern on plastic wrapping the Duct Tape arm that MR helped me make ages ago.

As I have fitting muslin for the bodice and the sleeve already, I went for the one with the sleeve. And as it’s pre-existing pieces, the neckline & sleeve cap / shoulder area deviates from the designer original. Mine is also slightly more finished than the original, which judging from the photo seem to have raw edges for bodice armholes.

Being the indecisive type I also made my sleeves detachable so the top can be worn as a sleeveless or a sleeved top.

Now, that funky armpit ventilation design detail isn’t entirely new to me. My designer idol of yore COMME des GARÇONS incorporated armpit ventilation into a few collections in the early 90’s. In fact, at one point I owned a CdG jacket with this detail.

Very handy for a sweaty gal like me! 😉 I also vaguely recall reading about detachable sleeves in European garments of the Renaissance. So while it looks strange and avant-garde to modern eyes, it’s nothing new nor always on the edge.

Now the best bit about me-made designer wannabes…I can customize it to my own taste, do a mash up of details I like from different designers & inspiration sources, add in those silly little insider jokes & Easter Eggs that keeps me chuckling to myself through the days I wear my me-mades! 🙂

  • So the back, I added a decorative hanging tab on the outside in homage to tongue-in-cheek Jean-Paul Gaultier. I had a JPG skirt once with this detail and I’ve been adding it to my me-mades here & there.
  • And instead of pretending to be “semi-couture” I paid homage to sewing with my “Woof Form” spoof on Wolf Forms, credit Q, my current dress form on which this pattern is based with “Model 2014Q”, and wore my age “43” proudly.
  • Finally, for an emphatic “I’m definitely a Dress Form” look, I machine stitched all the fitting guidelines with contrasting threads so they’re visible on the outside.

The Pattern

1-pattern

Block Used:

Fitted Top / Dress Block + Fitted Sleeve Block (minus cut-on gusset)
Both are based on instruction in Kenneth King’s CD books (Moulage, Basic Sleeve) with body variation alteration tweaks.

Original Top Sloper MuslinAs I was turning the Fitted Top Block muslin (pictured here) into this top, I decided to tweak the waist ease placement to give me a tinsy bit more waist definition. Originally the waist ease was added at the side seam per instruction. But because I’m fairly straight up & down at the sides, following my natural shape at the side would give me no visible waist. So I moved the waist ease to the front princess waist darts while keeping the bust & hip ease at the side seams. This gives me a tiny bit more nipped in look at the side.

So to summarize, here’s the ease I added to my skin-tight 0″-ease Moulage to get my Fitted Top Block…

0″ ease moulage + horizontal ease
(total) + vertical ease
Neck-CF down 1/2″
Neck-CB down 1/8″
Neck-side out 1/4″
Shoulder out 1/4″ up 1/8″
Cross-front out 0″ (0″)
Cross-back out 3/8″ (3/4″)
Armpit out 1/2″ (2″) down 3/8″
Bust out 1/2″ (2″)
Under-bust out 1/4″ + F waist dart width reduced 1/4″ (1-1/2″)
Waist out 0″ + F waist dart width reduced 3/8″ (3/4″)
High Hip out 1/4″ (1″)
Hip out 1/2″ (2″)

Design Changes Made

  • 2-sleeve-1Added the shoulder pad shaped pieces for attaching the removable sleeves. And I guess I was trying to (unsuccessfully) approximate the original shoulder line by adding wadding & pad stitching to these shoulder pieces.
  • Left short wrist slits in the sleeve seams so I can get my relatively large hand through the slim sleeve’s wrist opening.
  • Made it hip length…because that’s what I’ve already cut out for the muslin fitting.
  • Cut CF with seam allowances (but no overlap) for a butted CF opening with hook & eye closure.
  • Left the horizontal CF bust level dart unsewn.
  • Shrink 1/4″ ease in the back armholes at shoulder blade level to reduce sleeveless armhole gaping while accommodating the blade curvature. This is something I picked up from two of my tailoring books: Classic Tailoring Techniques: Men’s Wear & Vintage Couture Tailoring.

What I should have also done is to add a bit more bust & waist ease to account for the extra layers of fabric involved! The fitting muslin wrinkle easily. So to get the “I’m a Dress Form” look I interface all pieces with fusible woven interfacing. This make the inside ugly, so lining was called for as well.

These extra layers & their respective seam allowance layers at the 8 vertical seams ate up a big chunk of those vainly spartan breathing / wearing ease I added. If you reckon each interface seam fold lose 1/32 – 1/16″, then that’s a whopping 1/2 – 1″ less ease then I bargained for. Without the extra layers the Fitted Top Block is slouch happy. With the layers and it’s only fit for the straitlaced I-Can-Hold-My-Breath days. Oops. Live & learn.

The lining is edge to edge because…well, the shell seam allowances were a bit tatty from the manhandling to serve as hem allowances. So I picked a contrasting lining for that erm, “intentional” two sided look. This way, the top can be worn as a fitted jacket over camisoles hooked only at the waist & the reverse A side peeking out from time to time.

Fabric & Notions Used

Construction Notes

  • Construction order wasn’t efficient because of the gusset experiment detour. So I had to hand fell-stitch the lining in place at the armhole & CF hook & eye tape.
  • 2-sleeve-2How to attach the removable sleeves was a conundrum. I considered solid skirt / trouser hooks, velcro, before deciding on the buttons & elastic option. I think this might be best for an area that will move a bit as I raise my arm sideways & forward. The button at the peak of the shoulder piece / shoulder seam near the neckline is on sewn the underside of the sleeve shoulder piece, with a slit left in the shoulder seam as button hole. Two additional buttons are sewn just inside the bodice armhole at the cross-front & cross-back level, with corresponding elastic buttonhole  loops sewn into the sleeves. I originally had these two buttons on the sleeve & the elastics on the bodice, but found the elastic peeking out after a day’s wear & stretch. Reversing this allows the attachment mechanism to remain hidden sleeveless or sleeved.
  • And the other Oops along the way…
    • That funky alternate side shading…As this was originally a fitting muslin, I didn’t pay attention to which side of the fabric I used. It seems like the fabric, which was an used bed skirt, have faded on one side from exposure to sunlight over the years, so not reversible anymore. Thankfully my random cutting followed a pattern of alternating side (LF & RB, RF & LB). So I can just about pretend the funky shading was erm, “intentional” & part of the “deconstructed look”!
    • Fusing bubbles…It could be my poor fusing technique. Or it could be the fact that the interfacing has been laying around for over 20 years and the adhesive has disintegrated. Again, thank to the “deconstructed” design I can try to pass this off as “erm, it’s intentional”! :-p

The Verdict

Considering this fitting muslin would have gone to fabric recycling purgatory, I’m  pleased as Punch with the result.

It’s a top to be worn with attitude (aka confidence). No shrinking violet here. Not with all the Oops that one has to spin as “all part of the Deconstructed Look”!

Fitted Sleeve Sloper: part 2 – built-in gusset

So, as I was saying, I also made some vanity tweaks to my Kenneth King fitted sleeve sloper, which led eventually to an experiment with sleeve gusset.

Slimming Down

While the fitted sleeve that was drafted as instructed is fine for most people, it has a little bit more ease in the upper arm & elbow than I wanted. Because my hip is relatively narrow, I want to de-emphasize my wider top to appear more proportional. My arms are relatively thin, so I thought I’d push the envelop & see how fitted I can go before it becomes a straitjacket. I slimmed the sleeve down a tinsy bit at the elbow instead of having a straight line going from bicep to wrist. This leaves me with 1-1/4″ ease at bicep, elbow, & wrist.

And here is a summary of the changes I’ve made…

fitted-sleeve-2

The Legend of the Anatomical Armhole

OK, so I got the fitted sleeve to look how I wanted it now. But but can I move in it? I can bend my arms at the elbow. But arms up and arms forward not so much.

armhole-position-shapeAccording to some, if the armhole is high & close to the arm joint, and the bodice armhole shape is anatomically correct (more scooped in the lower front, less in the lower back – so effectively oval pointing towards your bust), then that should give a decent range of motion. Mine is quite close to this. The only deviation is that the lower back portion of my armhole is also scooped a bit. I find normal armhole shape already a bit binding there (probably because of my Posterior Arm Joint). So to make it even more shallow in this fitted top sloper would be uncomfortable with my arms resting at the side never mind swinging my arm backward.

I think this  “anatomically” correct armhole that people talk about needs clarification. The dress form that Bunka Fashion College and the Digital Human Research Center developed using 3D scans of the college’s students (so presumably as “anatomically” correct as can be) looks like the armhole I have on my Paper Tape Double dress form Q. So the “anatomical armhole” may not be in terms of the shape of the joint. It’s more likely to be about the typical forward movement that Fashion Incubator talks about in her book for design entrepreneur.

It seems like I’m not the only one confused by this subtle difference between static anatomy vs anatomy in motion. Someone else asked the same thing on Cutter & Tailor Forum about shape of the arm joint (like mine) vs the bodice armscye (scooped in the front but not in the back). Professional tailor Jeffrey Diduch confirms that it is indeed about the arm’s motion. He also posted an interesting old diagram showing how the arm joint shape may be affected by the posture…

3971376789_13042f79b5

So while in professionally tailored suit jackets the armholes are indeed shaped as prescribed by this “anatomical armhole” concept, even Jeffery warned not to over do it lest it creates a mess at the back armhole. And even with this allowance for forward arm movement, if you look at men in suit jackets raising their arms forward, the sleeves still look a bit binding. Almost everyone agree that you can’t have both total mobility AND a streamlined look. If you want a smart suits (in traditional woven) you’re not going to be able to play sport in it.

So what do I do about my straitjacket of a fitted top & sleeve°? I decided to give sleeve gusset a go to see if that improves mobility beyond 30° sideway & forward that my fitted sleeve gives me without adding messy folds at the armpits.

The Grand Gusset Experiment!

I’ve read about sleeve gusset before. But it was always in the context of a kimono sleeve. Kenneth King’s Basic Sleeve CD Book is really the first time I came across the concept of a built-in / cut-on gusset for fitted set-in sleeves. It promised slim sleeves with decent mobility. He says it’s used frequently in bridalwear where the bride want to look svelte but still need to be able to raise her arm to dance with her Husband or Dad. There was instruction for drafting such pattern, but no photo demonstrating what it looks like when worn. My interest was piqued, but Google found very little additional info on this technique. To save you some hassle, here are the best links I found…

set-in-gusset-inspirations

On built-in / cut-on gusset (aka “pivot sleeve” ?):

  1. Kenneth King 2-piece pivot sleeve on a jacket (different shape / instruction than the Basic Sleeve CD Book as it’s for 2-piece sleeves), and Fashion Incubator’s comment on this type of sleeve gusset. (There’s another type of 2-piece pivot sleeve in The Modern Tailor Outfitter and Clothier – Vol 1 that’s sort of similar concept, but shaped differently. The description says it’s “chiefly confined to sporting coats, such as are used for shooting and golfing” and “the finished appearance is very much like the ordinary sleeve, excepting that a deep pleat is formed in the underside at back scye.”)
  2. A historical costume reference to gusset for fitted sleeves, both separate gusset & built-in “flare”. Interestingly their 1-piece fitted sleeve is cut with the sleeve seam in a different place – looks like the back sleeve seam of a 2-piece sleeve.
  3. “The Poetry of Sleeves”, by Rebecca Nebesar, Threads issue 9 Feb/Mar 1987, p24-29 on Threads Archive DVD. This one looks like Kenneth’s 1-piece sleeve built-in gusset, but joins up with the original sleeve seam at the bicep rather than a little bit further down.
  4. “A Ball Gown Built for Comfort”, by Karen Seaton, Threads issue 51 Feb/Mar 1994, p36-39 on Threads Archive DVD. Mine end up looking most like the illustration for this one, but the instruction says to determine the shape when you’re fitting the sleeve on the wearer, so maybe it doesn’t always come out the same shape.
  5. Built-in gusset also seems to be used in dance costumes as well. Here’s an pattern instruction for “Dance Sleeve Gusset”. Note how the gusset shape is flipped vertically, so you have 3 mountains! Look really odd so I didn’t try it. But Wild Ginger Pattern Software also suggest the same type of built-in gusset.
  6. And finally, an informative advice from a theater costume professional on Cutter & Tailor forum about gusset, high armhole, and range of motion. Not many sources mention the different solutions needed for sideway vs forward range of motion…”Yes it is possible to cut high armholes with gussets- we do it all the time for theatre. I doubt though if many “regular” tailors do…In terms of movement and sleeves you have to determine if you need forward reaching movement or raising your arms above the head movement. They require different manipulations.Reaching forward requies a longer hindarm and that is usually accomplished with a sleeve that has a shallower sleeve cap height and is therefore wider in the upper arm as well. This can be done and doesn’t have to look messy- I think it gets messy when the shoulders aren’t fit properly, along with an excess of back width, and the extra length in the back of the sleeve all combined.Reaching upwards requires more length at the front and front underarm area with little extra length added at the back. If done correctly this kind of a gusset is barely noticable when the arm is at rest. The width of the sleeve is not noticeably changed.”

On separate gusset piece for set-in sleeves:

  1. Fashion Incubator’s version of the set-in sleeve gusset is more (American) football shape than diamond shape of traditional kimono sleeve gusset. But it’s shown for a looser fitting shirt. Part 2 of the article here.
  2. This blog article about raising the armhole also went for football shape gusset. It has a link to a more fitted dress supposedly with set-in sleeve gusset.
  3. “Add a Gusset to a Sew-In Sleeve”, by Kenneth King, Threads issue 156 . Sadly it’s not on my Threads Archive DVD & requires login for online viewing, so I haven’t read this article 🙁 In the teaser photo the gusset looks like a 2-piece – ie with a fish-eye dart in the middle.

In the interest of sewing science progress, here is a summary of my experiment with both built-in & separate football shape gussets, + san gusset as experiment control…

The Patterns:

0-pattern

As you can see, mine are hodge-podge of the different gusset approaches. So many experts, so many options, how does a girl choose, right? 😉

My built-in gusset started out like Kenneth’s. But because of the alteration done for my Posterior Arm Joint (shifting sleeve seam towards the front), it wasn’t clear where the pointed bit of the gusset should be – should it shift with the seam? Also the angle of the gusset at the sleeve seam became quite extreme with this alteration & difficult to sew. So, I end up rounding the gusset near the sleeve seam like the Dance Sleeve / Wild Ginger version, but with a more gradual transition rather than a sharp turn into the two mini-mountains to make it easier to sew.

My separate gusset is football shaped. But given the shape of my bodice armhole it became too deep & round. I was worried about the amount of extra fabric, so decided to add the fish-eye dart that’s sometimes used for traditional kimono sleeve gusset.

Les Mugs:

Observations:

  • Both gussets help with sideway motion.
  • Forward motion is definitely still restricted, with strains that seem to radiate from the armpit & run across the front bicep. It’s the same type of wrinkles I observe on men’s jacket, even on the well tailored ones. So I presume that if you pick fitted sleeve with deep sleeve cap, then there’s no way to eliminate the strain entirely.
  • Both are fairly inconspicuous with arms at the side.
  • I can definitely feel the gusset fabric against my armpits when the armhole is already cut high. There doesn’t seem to be much difference between the two gussets I tested despite one being on the bias. So it’s an acquired taste. Not for the slouching days! Perhaps if the gusset merge back into the original sleeve seam further down rather than at the bicep (ie increase bicep width slightly), then the gusset won’t press so closely to the armpits? Experiment for another day / someone else!
  • The football shape gusset which has bias going in a different direction than the built-in gusset offers marginally more mobility.
  • The football shape gusset which has a horizontal fish-eye dart to cut down on fabric bunching looks so ugly when the arms are up! The built-in gusset, on the other hand, looks rather cool when the arms are up.

In conclusion

I think I’m more inclined to go with built-in gusset if I were to make any woven, normal grain tops with very fitted sleeves. It’ll definitely be good enough for my desk job, and is OKish for holding on to handrails on public transport.

I wonder though, what if the sleeve is cut on the bias? I mean fitted kimono sleeve  are sometimes at an angle to the bodice right? So surely they must be on the bias? Will a set-in sleeve cut on the bias with built-in gusset give me even more range of motion? Or will it just give me loads of other griefs?


Fitted Sleeve Sloper: part 1

Where’s a gusset for a set-in sleeve when you need one eh? So long story long, recent days? weeks? (I’ve lost track) have been lost to sleeve slopering. Remember my top / dress sloper that’s based on a Kenneth King moulage?

top-v-moulageTop/Dress sloper muslin

I needed a matching sleeve so I can start making practical tops for the typical London summer (too cold to go sleeveless).

The Starting Point…

fitted-sleeve-1 I started again with Mr King’s instruction for a basic fitted sleeve. First a few words from The Man himself (Thanks Mr King!) in case you have similar questions about the instruction as I did:

  1. Pg 20, Basic Sleeve Outline, Step 8: What are the pros & cons of the two methods for getting E’F’ distance [cap height]? Would the shallower cap height produced by method 1 be more comfortable to wear?
    Kenneth: The shallower cap height is indeed easier to wear, as it has more lift.  The trade-off with cap height and bicep width is one of appearance versus mobility.  A higher cap yields a shorter bicep, which looks well when the arms are down at the sides.  Suits look better with this situation.  But the higher cap height limits mobility somewhat—but you don’t do jumping jacks in a suit jacket, generally.  A shorter cap height gives more mobility, but you sacrifice some in appearance, as there is a rumple of fabric under the arm when the arm is down at the side.  Men’s dress shirts have the short cap height/long bicep situation.
  1. Pg 22, Basic Sleeve Outline, Step 9: If my half-bicep is less than 6″ (I have skinny arms), FF’ and FF’ would still be zero right?
    Kenneth: That’s correct.
    So when I get to step 11 my curve should stop at H and be horizontal from H to H’ to F right?
    Kenneth: That’s correct.
  1. Pg 25, Basic Sleeve Outline, Cap ease: Is there a minimum amount you would recommend? Can one get away with 0″ cap ease? Would that cause any sort of fitting or comfort problems?
    Kenneth: Cap ease is dependent on fabric.  If you are cutting for leather, then close to zero is good.  For dresses and blouses, where thin fabric is used, 1/2”, to a maximum of 3/4” is plenty.  I generally go with 1/2”.  For tailored garments, I go with 1”-1 1/2” maximum, depending on fabric.  If you’re working with a really spongy woolen, the cap can absorb much more, but gabardine or Super 120 will need much less (that 1/2”).
  1. Pg 53, Fitted Sleeve with Elbow Dart, Step 5: Once I folded on B’D’ and trace out the front B’F’JMD’ I find my bicep line is no longer perpendicular to EM. Is that suppose to happen or did I do something incorrectly? If it’s correct, what line do I use as the grainline – should it be the original EM line (ie the bicep will be slightly off the crossgrain)?
    Kenneth: Your bicep will tilt slightly because of this folding.  Generally I will draw a new bicep from the intersections of the armhole and the seam on the sleeve, and make the grain line perpendicular to the new bicep line—that’s the gold standard.
    However, the grain line can change—when I’m fitting a sleeve, if I have a situation where the pitch of the sleeve is markedly forward or back (this is dependent on the particular wearer’s anatomy), then, when I set the proper pitch of the sleeve, I’ll drop a plumb line from the top of the cap and re-establish the grain line so it’s perpendicular to the floor.  This isn’t so important if the garment is made from solid colored fabric, but any pattern, plaid, or stripe—it’ crucial that the sleeve rain lines be parallel to the grain lines on the body, which generally are perpendicular to the floor.  (the exception here is bias garments.)

OK, so the result was pretty good (sorry, forgot to take mug shots). But I had to make some minor adjustments because of quirks of my arm joint/posture…and vanity.

The Fitting Quirks…

Origin of the Big Bust Impersonator?

armhole-position-shape

FPA-09I used to think my problem was a Forward Shoulder Joint (Fitting & Pattern Alteration #9), but now I think maybe I have a combination of a Posterior Arm Joint (F&PA #10) + Forward Shoulder Joint. Sounds contradictory doesn’t it. What I mean is that my shoulder sits further back on my torso, but is tilted with the top of the shoulder pointing forward and my elbow further back. This may explain why my bodice side seam is more towards the front if I want it perpendicular to the floor. According to F&PA, Posterior Arm Joint may occur with #33 Prominent Bust (the common FBA by another name). I wonder if that’s why according to most instructions I’m a B-cup bodice, but in fact I need a FBA for the front to fit well.

FPA-10Anyway, so my moulage bodice looks more like the resulting bodice for Posterior Arm Joint adjustment (except my back side seam is straighter & back waist darts wider): I’ve allowed the top/dress sloper’s bodice side seam to tilt backward a little bit (1/2″) for better balance between front & back at armpit level, but there is still more of the armsyce on the back bodice (9″) than on the front bodice (6-7/8″). So I had to move my 1-piece sleeve’s underarm seam towards the back as well if I want this seam to match up with the bodice side seam and still get the right pitch / tilting of the sleeve to match the way my arm hangs. The sleeve adjustment is done as instructed for Posterior Arm Joint, moving the underarm seam (7/8″) only at the armpit, tapering back to original seam line at the wrist.

FPA-48I was getting closer, but the sleeve twist a little bit at the elbow with dragline from sleeve cap center towards front / inner elbow. I ended up moving the underarm seam towards the front (3/8″), a bit like #48 Inward Rotation of Elbow, but without increasing the elbow width. This makes the upper arm portion a bit twisted when flat, but feels straight when worn. The temptation to straighten it out is great, but maybe the body is just too wonky to obey?

fitting-probsTo Cap Ease or Not to Cap Ease

Lastly, on the can of worm that is sleeve cap ease…I ended up with about 3/4″ ease. I started out with almost 0″ ease. But I found that on very fitted sleeve like this one, where the shoulder seam isn’t extended out beyond the curve at the top of my arm, I get draglines pointing towards where the arm bulge out of the shoulder joint without this ease. The draglines disappears when I increase the cap height (to 5″). But this added the 3/4″ ease.

Now there’s a bit of debate online on whether sleeve cap ease is really needed. Some of the discussion implies that the reason ease was added originally was an attempt to improve arm mobility. This argument against sleeve ease is that if the armsyce is shaped correctly (mirrors the arms’ typical range of motion, which is more forward than backward), then sleeve cap ease is not needed. I have to admit I don’t know why ease are added by the various sewing professionals – the RTW pattern drafting, home sewing, couture, & tailoring books I own all mention some sleeve cap ease.

But when I shrink-wrapped my Duct Tape Double arm, then cut the wrap open to make it lay flat, I ended up with a series of little darts at the armsye that add up to about 2″ ease. So it would seem like the ease would be useful for accommodating this bulging out of the arm from the shoulder joint.

DTD-arm-07

I can see that if the shoulder seam is longer / extended out, covering some / all of this bulge, then the sleeve can drop straight down (like on men’s suits) and little / no ease would be needed. Alternatively, if the fabric is loosely woven & easy to stretch, maybe armsyce can be 0″ ease and the fabric in the cap area stretched out to accommodate the arm bulge (don’t know if this would pass the laundering / dry-cleaning test).

sleeve-cap-ease

The other argument against sleeve cap ease is that some fabrics are a pain to ease.  But if the arm bulge needs accommodating, then that need doesn’t go away, right? It would make more sense to me to use a different shoulder / sleeve design for these fabrics, eg extended shoulder seam; more casual shirt like sleeve with shallower cap and attendant excess fabric / folds at the armpit. Any of you experts out there manage to accommodate this arm bulge without any cap ease in difficult to ease / non-stretch / tightly-woven fabrics? Pictures proof please!

Next up, vanity tweaks. Here’s a sneak peak of the resulting pattern. But you’ll have to wait for the details!

fitted-sleeve-3