
Pencil skirts should be dead easy once you got the fit sorted right? But the Artiste in me obviously can’t live with a life that easy. So the first 3 pencil skirts this year will all have torturous kinks to them & take indecent amount of time to make.
First out of the studio…a sporty reversible (almost) skirt that will have a matching Moto Jacket based on Burdastyle 11/2013 #117. And maybe even a matching Aviator Cap!
Style Shots & Mug Shots


Fabric & Notions Used
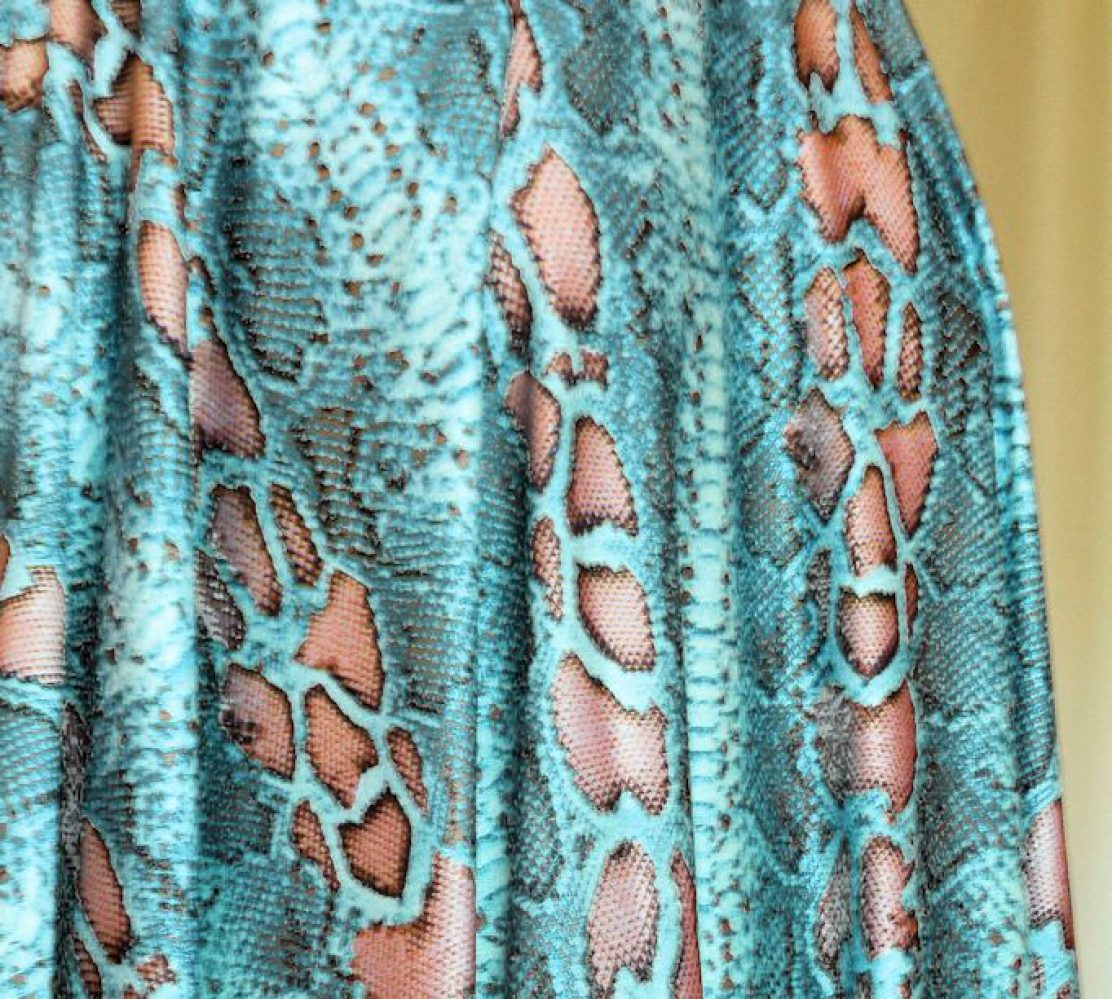
 Teal & Brown Wool Acrylic Print Novelty Knit from the sweater knit section Mood NYC bought during my pilgrimage there last year. I was a bit unsure about it to start with. It feels like sweatshirt material on the teal side – and I don’t really do sporty. But the contrasting brown print on the other side made it irresistibly edgy. So I took the plunge. Sadly it’s not available from the Mood online shop.
 YKK Excella #5 (5mm teeth) Metal Zippers from Sil Thread. They have these in a range of tape colors which don’t seem to be available anywhere else. I bought two long separating zippers one and had Sil Thread split them into 6 zippers ($1 per cut / bit added on). Should have ended up with 2 separating & 4 closed end zippers, but I only got 1 separating one in the end. Forgot to check before I headed back to London d***it.
- Petersham Ribbon for facing / reverse side contoured waist band. Mine was gifted to me by my thrifting friend. It looks like grosgrain ribbon, but is made of shapable fiber (cotton, acetate, rayon; not polyester) & the ribs run edge-to-edge, so look scalloped. MacCulloch & Wallis in London carries them.
- Vilene Bias Tape interfacing. Skirt hook & eye. Stitch Witchery fusible bonding web.

The Design & Pattern
Design:
 Used princess seams for color blocking with both sides of the fabric. I was a bit unsure whether to have the print on the side panels or center panels. Initial design has it on the sides on the assumption that the darker color at the sides creates a slimmer look.
Block Used: One Dart Pencil Skirt F&B

My original Pencil Skirt Block has 2 front darts & 1 back dart per side (ie 6 darts altogether). And you can see in the design I was going to convert the back dart & one front dart into princess seam. But because the fabric seemed a bit thick for darts I ended up drafting a one-dart front. It doesn’t fit as well as the two-dart front – I have tummy & hip bone bulges. But I reckon it’ll do fine in this slightly stretchy fabric
Design Changes Made

- Converted the darts to princess seams. The back princess seam has shaping above & below the hip – basically connecting the waist & hem darts. The front princess seam has shaping only above the hip (waist dart). Below it was just a style line which slant slightly towards CF to add illusion of more shaping. I ended up shifting the front princess seam slightly towards the CF to get a more balanced color blocking effect. Hopefully the slight stretch of the fabric will compensate for waist dart shaping not in exactly the right place.
Construction Notes
This project has a few firsts for me. I tried a few different seaming techniques on scraps. But in the end decided to go with the following combination which was inspired by a Jean-Paul Gaultier knit skirt I had in my youth.
- First time I used flatlock seaming. And boy was it scary. For the vertical seams one side has no seam allowance and the other side only 1/4″. They’re sewn wrong sides together on the overlocker with 2-thread flatlock (so seam allowance sticking out). Then pulled in opposite direction to flatten the seam. Not sure if I did it correctly, but mine end up overlapping that 1/4″ & I had to use blunt sweater needle to coax the underlayer’s 1/4″ SA flat – it was folding in half, so won’t lay flat. Flatlock seam just look so delicate. Fingers crossed the seams won’t pop open during wear. (Maybe I should carry a back up skirt around if I’m wearing this outside the house?) You could theoretically reinforce the seams from the inside by fusing a thin strip of interfacing over the seam as recommended by various serger books. But then it won’t be reversible. And I can’t decide on which color blocking design I prefer.
- First time I used 2-thread wrap overlock edge finishing. Again scary with no seam allowance. And the thread loops around the edge look so vulnerable to snags. Plus stretchy fabric means waist & hem risk stretching out of shape. So I tried to stabilize both waist & hem with Vilene Bias Tape fused so it wrap over the edge (1/2 on outside, 1/2 on inside). Then I did another layer, but this time basted it so that the adhesive is facing out. Next came the overlock. And finally pressing to fuse the overlock stitches to the 2nd layer of Vilene Bias Tape. Hopefully it’ll tame the loopy treads.
- First time I sewn an exposed zipper. I’m usually an invisible zipper fan, but decided to go with exposed zipper because (a) the matching moto jacket will have 3, and (b) I couldn’t figure out how to make flatlock seams work with invisible zippers. I’m not a fan of the type of exposed zipper that has the tape on the outside. So for the planned version, the tape edge is hidden. But now that the skirt has turned out reversible (almost), the reversed version does have the tape on the ‘outside’. I mostly followed this tutorial on exposed zipper with a seam, though Husqvarna’s animated tutorial for a slit version is pretty good too. The seam allowance is trimmed, then the tape edge fell-stitched on the reverse side, the bottom of the tape folded under. BTW the CB is a fake flat-lock seam because I wanted to extend the flat-lock look to the CB slit. Each side was flat-locked separately as a single layer. Then the stretch between the zipper bottom & the slit joined with top-stitching. (Except I didn’t plan properly, so the reverse side wasn’t psuedo-flat-locked all the way from zipper bottom downward.)
- First time I used Petersham ribbon for skirt waist facing. I was hoping it would act as interfacing to stabilize the waist. In this case it also act as a nice belt / waist-band like finishing for the reversed version. It was steam pressed into a slight curve before being fell-stitched in place over the the 2-thread wrap overlock edge finishing. At the zipper, the ends were folded under and overlapped slightly so a flat skirt hook & bar can join the ends unobtrusively. I added a extra fold on the top end so that it mirrors the overlap and make a box feature over the zipper end to mimic a fabric belt buckle.
The Verdict
I’m pretty pleased with the skirt. The pattern is basic enough to be reused with different details which I hope to demonstrate with the next two pencil skirts planned.
And for a commitment-phobe, I’m relieved that it turn out reversible, almost. What keeps it from being properly reversible is the zipper. So I have to be really careful zipping up / unzipping when I wear this inside out.
So it’s onward with the matching jacket. Let’s see if I can also make that (almost) reversible too shall we?

Love the idea and sooo practical. The outfit is sensational.
Absolutely gorgeous! I love all the details in this skirt, and it looks great with all the tops you’ve mugged around with.
Thank you! I’m glad I took the chance with this fabric and the sportswear details. Sometimes it pays to take risks!
Very flattering and well executed, especially given the flatlock seams… yeah I’m a bit scared of them as well and haven’t gone that far with my overlocker yet! I’m completely indecisive about which side looks best as well, both are very slimming. Not that you need that, but the whole point of a pencil skirt is to provide that narrow silhouette IMO. You’ll probably arrive at a preference just by wearing it in the end.
Thank you! I’ve worn the skirt a couple of times now. So far so good, no wardrobe malfunction thank god! Saved by the non-ravely fabric I guess. Mind you I did try be move more lady like while wearing it.
This suits you very well! I am so impressed you were able to draft/redraft the pattern to include princess seams for color blocking.
Thank you! Hopefully my experiments will inspire more people to play with their TNT pencil skirt patterns! 🙂