Tunic Block (or Going Dartless)

As no machine sewing could done the whole of December, I prepared a couple of projects from SWAP batch 1 that required knitting which I did in the living room. First on the conveyor belt is Cowl-Neck A-line Sweater the Second.

3-mug1-4SRCowl-Neck A-Line Sweater The First was a franken-patterned Burda 013-02-121. While it’s wearable, there’s room for improvements. Being a loose fitting top, the pattern had enough width to go around the bust. But obviously something isn’t quite right if the hem hitch up at the front, right? Simply adding width maybe isn’t the best way to accommodate a pseudo-D-cup. How do you well endowed ladies achieve a great fit with a dartless top?

Anyway, being too impatient to wait for your advice (still welcome if you have any), I decided to experiment drafting my own dartless top pattern. And being a control freak I wanted to find some logic to hiding the darts rather than just haphazardly redraw the seam lines without the darts.

The Tunic Block experiment:

pat_bunka-1 The most obvious option is to pivot all the dart allowances into a massive unsewn waist dart. But surely that would result in a tent, which might be fine in limp drapy fabric, but not so great in the lofty sweater-like mohair gauze I’m using for the sweater.

pat_bunka-2 I checked all the pattern drafting books I have for other options, but found no definitive answer. The closest I got was this page in Bunka Fundamentals of Garment Design text book. I tried a variation of this, but distributed the dart allowances in more places to ensure that none are too big. So did it work? Let’s see shall we?

The Muslin Mug Shots:

Hm, why do muslin photos always come out worse than it looks in the mirror? I was quite pleased with the muslin before these photos. Now I hear the sirens calling tweaks. But I’ve had enough for now.

1-bs-2013-02-121_photo Despite the minor imperfections I think this is good enough to turn into a wearable muslin, something a bit like the Burdastyle 013-02-121 Flared Tunic that I used for Cowl-Neck A-line Sweater the First.

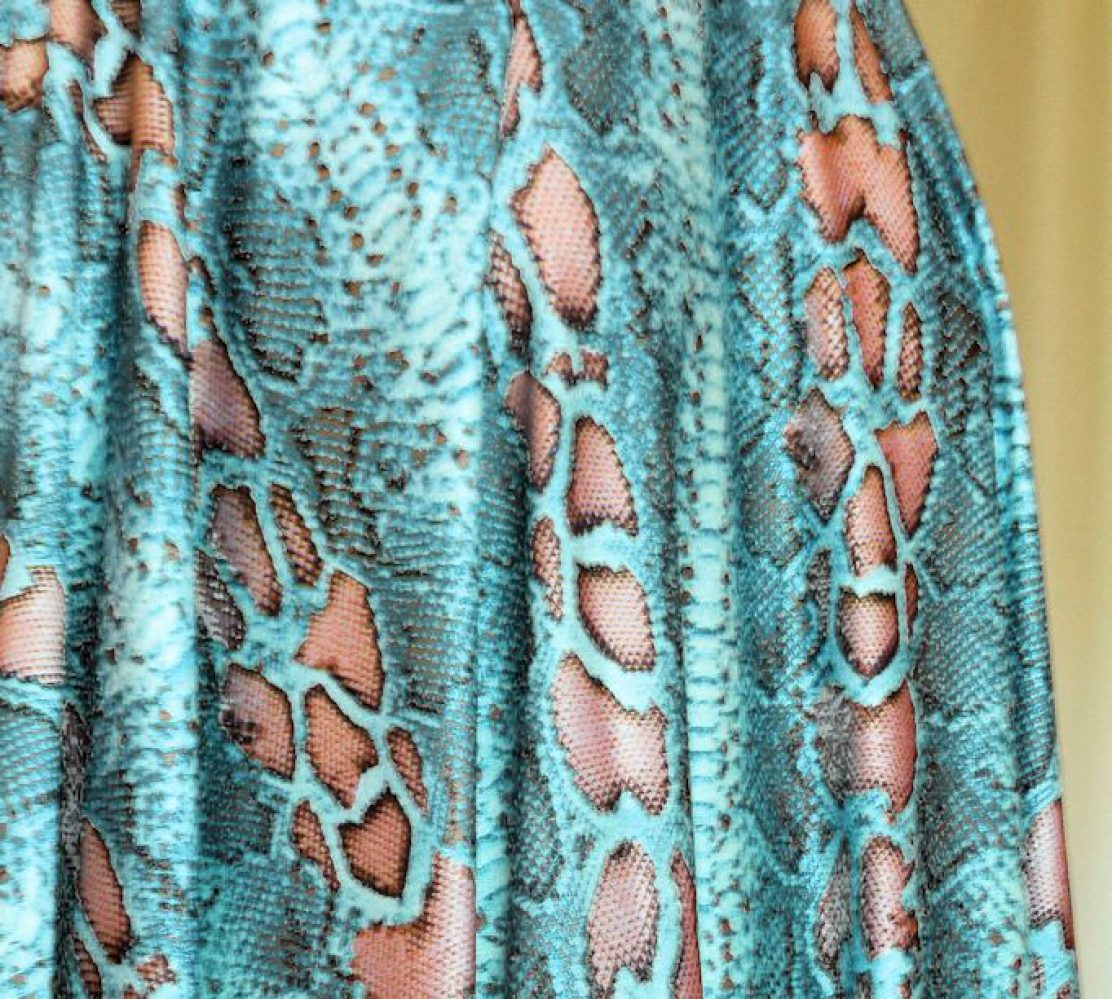
The fabric is from Tia Knight, which mainly sells stretch fabrics. I took a chance on this non-stretch linen woven & was a bit disappointed. The color didn’t quite match the picture on their website, so it was a bit blah. But with the right trims maybe it’ll look suitably Moroccan-inspired & holiday ready. I even added enough seam allowance in the sleeves to go casually bell shape.

The Block & How It’s Made:

Bodice:

pat_tunic-v-top

  1. Taking my Fitted Top/Dress Block, I pivoted the side front dart into a little bit of ease in the neck (3/8″), shoulder (3/8″), armhole (1/2″), side seam (3/8″), and the remainder in the unsewn waist dart. I chose the amounts based on how much I think I can ease in at seams & hems without puckering or too much gaping. The back dart allowances are simply left unsewn (waist darts) or eased into the seam (shoulder dart).
  2. Before making a muslin, I also adjusted the side seam to get the Tunic silhouette I wanted, which is somewhat fitted through the bust, then flared from the under-bust down. I worried that flaring right from the armpit would result in a frumpy look on my non-modelesque figure. And to avoid a pregnant look I reduced the front flare at the side seam, but took care to ensure it doesn’t go into negative ease territory by comparing it to the 0-ease Moulage at High Hip & Hip.
  3. Next up was the muslin which looked pretty good (sorry forgot to take pictures). There was no bust drag lines, my guidelines all looked straight and level, the front wasn’t hiking up like in the Franken pattern. But of coursfe I couldn’t leave well alone.
  4. Having ease in both front & back shoulder basically cancelled each other out, resulting in an unintentionally slightly too wide shoulder. I considered using stay tape, but ended up removing the front shoulder ease at the armscye. I find that the combination of too much cross-front width plus a somewhat fitted sleeve tends to restrict my forward arm movement.
  5. The underarm seem to have been lowered by all the front dart pivoting, so I raised it slightly (1/4″) & also shorten slightly at shoulder seam (1/8″ each, 1/4″ total).
  6. At the side seams I found I could comfortably reduce the circumference in the under-arm to under-bust area a tiny bit further for a slimmer fit (3/16″ each seam, 3/4″ total). The A-line silhouette was a bit too subtle, so I also flare out the hem a little bit more from under-bust to under-bum (1/2″).

Sleeve:

  1. Converted my Elbow Dart Fitted Sleeve Block to Basic Fitted Sleeve Block (no elbow dart):
    1. Designing Apparel Through the Flat Pattern The cap curve is the same, but below the bicep line I made the sleeve front & back symmetrical (as instructed in most pattern drafting books, I’m using Designing Apparel through the Flat Pattern).
    2. I also marked a wider wrist because the original was sized for my relatively skinny wrists, but it’s a bit tight for my normal sized hands to go through when dressing/undressing.
    3. I made no alteration for my “Posterior Arm Joint” & “Inward Rotation of Elbow” like the original sleeve block because…erm, I couldn’t figure out how when there’s no elbow dart to ensure front & back sleeve seam match in length. I just prayed that the extra ease at the wrist accommodate the wonkiness of my arms!
  2. Convert the new Basic Fitted Sleeve Block into a more relaxed fitting Tunic Sleeve Block:
    1. Removed the cap ease by lowing the cap height slightly & redraw the top bit of the cap curve
    2. Designing Apparel Through the Flat PatternConvert to a shallower cap by moving the bicep line up (reduced cap height by 1-1/4″); pivot at shoulder seam crossmark so the armsyce slopes to the new bicep line (bicep ease increased from 1-1/4″ to 2-3/4″); remeasured sleeve length at traced center line; square out at wrist level & cross-marked wrist width (same width as on my new Basic Fitted Sleeve Block); connect new armscye end points to wrist width cross-marks. BTW, my shallower tunic cap height is still closer to the Medium cap height calculated using the generic cap height formula mentioned in Dennic Chunman Lo’s Patternmaking: Portfolio Skills. The same formula would make my fitted sleeves are closer to a High cap height. The formula is basically AH/4 for Medium, then +”1-1/2″ ~ 2-1/4″ for High or -1-1/2″ ~ 2-1/4″ for Low.
    3. For the wearable muslin tunic’s bell shape sleeve I added 7″ to wrist width (3-1/2″ at front & back), but connect this to the original sleeve seam at about mid upper arm in the hope of keeping the arm looking slimish.

The Verdict:

Good enough for now but no cigar. I need to look into…

  1. Why the tunic want to tilt towards the back at the neck, creating that dread bust dragline, higher front hem, lower back pooling. Making the back neckline more shallow doesn’t help. Maybe I have rounded upper back problem requiring more shaping there to keep the upper back in place?
  2. If the sleeve setting can be improved. Not sure if draglines in the front & back is natural for a shallower cap or if the pitch is not quite right, or maybe I do also need some sort of  “Posterior Arm Joint” & “Inward Rotation of Elbow” adjustments for dartless sleeves.

Now a note in case you’re well endowed and want to try the experiment too…I’m not really a D-cup. But maybe because my arm joints seem to be set further towards the back, my front bodice sloper’s bust darts are closest in size to Vogue 1004 Fitting Shell’s D-cup pattern (in size 8 – my old size – rather than the size 12 the sizing charts would have me buy). If I connect the bust darts to the bust point, measure & add up the side & waist darts, the total angle measures about 57º. If you’re super well endowed, it may be that you need a dart to achieve the best looking shape. But maybe this approach can still give you a more relaxed fit without totally obscuring your figure.

Next up: Cowl-Neck A-line Sweater the Second proper.

Skirt Blocks redux

Next couple of projects on my plate are two I planned for this Year Of The Skirts: the 2nd & 5th from the left below…

0plans-skirts

So I better catch you up on more tweaks (yes again!) to my skirt blocks.

A while back I drafted & muslined my Pencil Skirt & “Straight Skirt” (looks more A-line to me) Blocks. They are based on Kenneth King’s Skirts CD book. I had already derived an 1-Dart Princess Pencil Skirt Block from them and made it into my reversible teal+brown floral print pencil skirt (middle skirt in the skirts sewing plan above).

Then I got talking to Barbara, a long-time sewer who trained in fashion design & patternmaking at Pratt. She advised that I create a group of mix & match block pieces so I can quickly create new designs with minimum fuss using different combinations of bodice, sleeves, skirts, etc.

Great idea. But here’s the gotchas with my current Blocks:

  1. The Top & the Skirt Blocks were developed separately. The skirts are each drafted from scratch rather than based on the Moulage/French Block. So the waist darts don’t match. Now there’s no rule that they have to match, and in fact maybe you’d achieve better fitting separates if you can consider bodice & skirt separately. But aesthetically, I really wanted the option to continue that dart seam line from bust to hip for dresses with a waist seam. (I guess for dresses without waist seam – ie with fisheye dart from bust to hip – I should be using the hip length French Top Block.)
  2. Also, when I was fitting the pencil skirt before, I made Fitting & Pattern Alteration style protruding thigh alteration. This threw some irregularities into the side seam (front is hitched up, and the front & back side seams are different angle). The irregularities made deriving further design blocks very confusing since the instructions in my flat pattern design books don’t deal with quirky patterns of non-standard bodies!

So I experimented with…

  • Moving the skirts’ darts to match the Top Block’s waist darts.
  • Adjust the side seam shaping to reflect my hip-length Top Block side seam. This also made front & back side seam more similarly shaped / angled, with the front more uniformly larger than the back.
  • Accommodating my prominent front thigh with wider front darts instead of the F&PA method.

Here are my revised pencil & straight skirt blocks:

I muslined the tweaks again, and thankfully the changes have not thrown anything off. In fact, I think the tweaked pencil skirt block might actually look a tad more flattering. Even though the side seam has the same amount of tapering at the hem as before (1″), the deeper darts seem to have shifted volume from side-side to front-back. So from the front the skirt looks a tad slimmer.

Sorry, I forgot to take photos of the new muslins for comparison. But I liked how the muslin look so much that I’m considering turning them into vintage-inspired wearable top & skirts. So you may still see them yet!

I also discovered that I can sort of get away with different positions for the darts as long as they’re within a certain range. Most of my lower half mounds (tummy, bum) don’t have as clearly defined a peak as the bodice mounds (bust points & shoulder blades). So there doesn’t seem to be an one & only one “correct” position for the skirt dart points.

However, with my front darts, I do find I get slightly better result if I split it into two darts, one for the tummy & one for my protruding hip bone (which like the bust. does have a more clearly defined peak).

So this experiment has been productive. I now know that I have options when I use my skirt blocks to design my own skirt patterns. And that comes in especially handy for my next project – the pencil skirt with the floral motif CF panel.

Martin Margiela S/S97 Dress Form Top Wannabe

After weeks of cajoling, the Photographer-In-Me finally reluctantly put down her cocktails for a sec to help out. So here’s the first of a few recent project posts I’ve queued up earlier…

With fitting over, the Fitting Muslin for my Fitted Top Block can now finish her Cinderella story. Let’s let her have her moment of glory first shall we?

Style Shots & Mug Shots

4-style13-5

The Inspiration & Design

Considering that she started life as a sloper fitting muslin (so wasn’t made up with due care), then was repeatedly manhandled as the bodice for my three fitted sleeve / gusset experiments, I’m lucky that her make-over inspiration was the deconstructed aesthetic of Maison Martin Margiela Spring-Summer 1997 collection:
0inspiration_martin-margiela-1997ss-60inspiration_martin-margiela-1997ss-4
PHOTOS: found at Dusty Burrito blog…

I’ve always loved the look of old fashion dress forms, and have a thing for shabby chic potato sack aesthetic (hello burlap Louis chairs!). So this is right up my alley.

The sleeve in the left photo is meant to look like dress form arms, which you can make for your own dress form. A few tutorials I like: Pandemic Apparel blog’s free tutorial, “Make an Arm for your Dress Form” in Threads issue 90 p57-59 (available via online subscription or on DVD), Connie Crawford’s commercial pattern for dress form arm. I haven’t made one for Q (my paper tape dress form) yet. But when I do I will probably base the pattern on plastic wrapping the Duct Tape arm that MR helped me make ages ago.

As I have fitting muslin for the bodice and the sleeve already, I went for the one with the sleeve. And as it’s pre-existing pieces, the neckline & sleeve cap / shoulder area deviates from the designer original. Mine is also slightly more finished than the original, which judging from the photo seem to have raw edges for bodice armholes.

Being the indecisive type I also made my sleeves detachable so the top can be worn as a sleeveless or a sleeved top.

Now, that funky armpit ventilation design detail isn’t entirely new to me. My designer idol of yore COMME des GARÇONS incorporated armpit ventilation into a few collections in the early 90’s. In fact, at one point I owned a CdG jacket with this detail.

Very handy for a sweaty gal like me! 😉 I also vaguely recall reading about detachable sleeves in European garments of the Renaissance. So while it looks strange and avant-garde to modern eyes, it’s nothing new nor always on the edge.

Now the best bit about me-made designer wannabes…I can customize it to my own taste, do a mash up of details I like from different designers & inspiration sources, add in those silly little insider jokes & Easter Eggs that keeps me chuckling to myself through the days I wear my me-mades! 🙂

  • So the back, I added a decorative hanging tab on the outside in homage to tongue-in-cheek Jean-Paul Gaultier. I had a JPG skirt once with this detail and I’ve been adding it to my me-mades here & there.
  • And instead of pretending to be “semi-couture” I paid homage to sewing with my “Woof Form” spoof on Wolf Forms, credit Q, my current dress form on which this pattern is based with “Model 2014Q”, and wore my age “43” proudly.
  • Finally, for an emphatic “I’m definitely a Dress Form” look, I machine stitched all the fitting guidelines with contrasting threads so they’re visible on the outside.

The Pattern

1-pattern

Block Used:

Fitted Top / Dress Block + Fitted Sleeve Block (minus cut-on gusset)
Both are based on instruction in Kenneth King’s CD books (Moulage, Basic Sleeve) with body variation alteration tweaks.

Original Top Sloper MuslinAs I was turning the Fitted Top Block muslin (pictured here) into this top, I decided to tweak the waist ease placement to give me a tinsy bit more waist definition. Originally the waist ease was added at the side seam per instruction. But because I’m fairly straight up & down at the sides, following my natural shape at the side would give me no visible waist. So I moved the waist ease to the front princess waist darts while keeping the bust & hip ease at the side seams. This gives me a tiny bit more nipped in look at the side.

So to summarize, here’s the ease I added to my skin-tight 0″-ease Moulage to get my Fitted Top Block…

0″ ease moulage + horizontal ease
(total) + vertical ease
Neck-CF down 1/2″
Neck-CB down 1/8″
Neck-side out 1/4″
Shoulder out 1/4″ up 1/8″
Cross-front out 0″ (0″)
Cross-back out 3/8″ (3/4″)
Armpit out 1/2″ (2″) down 3/8″
Bust out 1/2″ (2″)
Under-bust out 1/4″ + F waist dart width reduced 1/4″ (1-1/2″)
Waist out 0″ + F waist dart width reduced 3/8″ (3/4″)
High Hip out 1/4″ (1″)
Hip out 1/2″ (2″)

Design Changes Made

  • 2-sleeve-1Added the shoulder pad shaped pieces for attaching the removable sleeves. And I guess I was trying to (unsuccessfully) approximate the original shoulder line by adding wadding & pad stitching to these shoulder pieces.
  • Left short wrist slits in the sleeve seams so I can get my relatively large hand through the slim sleeve’s wrist opening.
  • Made it hip length…because that’s what I’ve already cut out for the muslin fitting.
  • Cut CF with seam allowances (but no overlap) for a butted CF opening with hook & eye closure.
  • Left the horizontal CF bust level dart unsewn.
  • Shrink 1/4″ ease in the back armholes at shoulder blade level to reduce sleeveless armhole gaping while accommodating the blade curvature. This is something I picked up from two of my tailoring books: Classic Tailoring Techniques: Men’s Wear & Vintage Couture Tailoring.

What I should have also done is to add a bit more bust & waist ease to account for the extra layers of fabric involved! The fitting muslin wrinkle easily. So to get the “I’m a Dress Form” look I interface all pieces with fusible woven interfacing. This make the inside ugly, so lining was called for as well.

These extra layers & their respective seam allowance layers at the 8 vertical seams ate up a big chunk of those vainly spartan breathing / wearing ease I added. If you reckon each interface seam fold lose 1/32 – 1/16″, then that’s a whopping 1/2 – 1″ less ease then I bargained for. Without the extra layers the Fitted Top Block is slouch happy. With the layers and it’s only fit for the straitlaced I-Can-Hold-My-Breath days. Oops. Live & learn.

The lining is edge to edge because…well, the shell seam allowances were a bit tatty from the manhandling to serve as hem allowances. So I picked a contrasting lining for that erm, “intentional” two sided look. This way, the top can be worn as a fitted jacket over camisoles hooked only at the waist & the reverse A side peeking out from time to time.

Fabric & Notions Used

Construction Notes

  • Construction order wasn’t efficient because of the gusset experiment detour. So I had to hand fell-stitch the lining in place at the armhole & CF hook & eye tape.
  • 2-sleeve-2How to attach the removable sleeves was a conundrum. I considered solid skirt / trouser hooks, velcro, before deciding on the buttons & elastic option. I think this might be best for an area that will move a bit as I raise my arm sideways & forward. The button at the peak of the shoulder piece / shoulder seam near the neckline is on sewn the underside of the sleeve shoulder piece, with a slit left in the shoulder seam as button hole. Two additional buttons are sewn just inside the bodice armhole at the cross-front & cross-back level, with corresponding elastic buttonhole  loops sewn into the sleeves. I originally had these two buttons on the sleeve & the elastics on the bodice, but found the elastic peeking out after a day’s wear & stretch. Reversing this allows the attachment mechanism to remain hidden sleeveless or sleeved.
  • And the other Oops along the way…
    • That funky alternate side shading…As this was originally a fitting muslin, I didn’t pay attention to which side of the fabric I used. It seems like the fabric, which was an used bed skirt, have faded on one side from exposure to sunlight over the years, so not reversible anymore. Thankfully my random cutting followed a pattern of alternating side (LF & RB, RF & LB). So I can just about pretend the funky shading was erm, “intentional” & part of the “deconstructed look”!
    • Fusing bubbles…It could be my poor fusing technique. Or it could be the fact that the interfacing has been laying around for over 20 years and the adhesive has disintegrated. Again, thank to the “deconstructed” design I can try to pass this off as “erm, it’s intentional”! :-p

The Verdict

Considering this fitting muslin would have gone to fabric recycling purgatory, I’m  pleased as Punch with the result.

It’s a top to be worn with attitude (aka confidence). No shrinking violet here. Not with all the Oops that one has to spin as “all part of the Deconstructed Look”!

Fitted Sleeve Sloper: part 2 – built-in gusset

So, as I was saying, I also made some vanity tweaks to my Kenneth King fitted sleeve sloper, which led eventually to an experiment with sleeve gusset.

Slimming Down

While the fitted sleeve that was drafted as instructed is fine for most people, it has a little bit more ease in the upper arm & elbow than I wanted. Because my hip is relatively narrow, I want to de-emphasize my wider top to appear more proportional. My arms are relatively thin, so I thought I’d push the envelop & see how fitted I can go before it becomes a straitjacket. I slimmed the sleeve down a tinsy bit at the elbow instead of having a straight line going from bicep to wrist. This leaves me with 1-1/4″ ease at bicep, elbow, & wrist.

And here is a summary of the changes I’ve made…

fitted-sleeve-2

The Legend of the Anatomical Armhole

OK, so I got the fitted sleeve to look how I wanted it now. But but can I move in it? I can bend my arms at the elbow. But arms up and arms forward not so much.

armhole-position-shapeAccording to some, if the armhole is high & close to the arm joint, and the bodice armhole shape is anatomically correct (more scooped in the lower front, less in the lower back – so effectively oval pointing towards your bust), then that should give a decent range of motion. Mine is quite close to this. The only deviation is that the lower back portion of my armhole is also scooped a bit. I find normal armhole shape already a bit binding there (probably because of my Posterior Arm Joint). So to make it even more shallow in this fitted top sloper would be uncomfortable with my arms resting at the side never mind swinging my arm backward.

I think this  “anatomically” correct armhole that people talk about needs clarification. The dress form that Bunka Fashion College and the Digital Human Research Center developed using 3D scans of the college’s students (so presumably as “anatomically” correct as can be) looks like the armhole I have on my Paper Tape Double dress form Q. So the “anatomical armhole” may not be in terms of the shape of the joint. It’s more likely to be about the typical forward movement that Fashion Incubator talks about in her book for design entrepreneur.

It seems like I’m not the only one confused by this subtle difference between static anatomy vs anatomy in motion. Someone else asked the same thing on Cutter & Tailor Forum about shape of the arm joint (like mine) vs the bodice armscye (scooped in the front but not in the back). Professional tailor Jeffrey Diduch confirms that it is indeed about the arm’s motion. He also posted an interesting old diagram showing how the arm joint shape may be affected by the posture…

3971376789_13042f79b5

So while in professionally tailored suit jackets the armholes are indeed shaped as prescribed by this “anatomical armhole” concept, even Jeffery warned not to over do it lest it creates a mess at the back armhole. And even with this allowance for forward arm movement, if you look at men in suit jackets raising their arms forward, the sleeves still look a bit binding. Almost everyone agree that you can’t have both total mobility AND a streamlined look. If you want a smart suits (in traditional woven) you’re not going to be able to play sport in it.

So what do I do about my straitjacket of a fitted top & sleeve°? I decided to give sleeve gusset a go to see if that improves mobility beyond 30° sideway & forward that my fitted sleeve gives me without adding messy folds at the armpits.

The Grand Gusset Experiment!

I’ve read about sleeve gusset before. But it was always in the context of a kimono sleeve. Kenneth King’s Basic Sleeve CD Book is really the first time I came across the concept of a built-in / cut-on gusset for fitted set-in sleeves. It promised slim sleeves with decent mobility. He says it’s used frequently in bridalwear where the bride want to look svelte but still need to be able to raise her arm to dance with her Husband or Dad. There was instruction for drafting such pattern, but no photo demonstrating what it looks like when worn. My interest was piqued, but Google found very little additional info on this technique. To save you some hassle, here are the best links I found…

set-in-gusset-inspirations

On built-in / cut-on gusset (aka “pivot sleeve” ?):

  1. Kenneth King 2-piece pivot sleeve on a jacket (different shape / instruction than the Basic Sleeve CD Book as it’s for 2-piece sleeves), and Fashion Incubator’s comment on this type of sleeve gusset. (There’s another type of 2-piece pivot sleeve in The Modern Tailor Outfitter and Clothier – Vol 1 that’s sort of similar concept, but shaped differently. The description says it’s “chiefly confined to sporting coats, such as are used for shooting and golfing” and “the finished appearance is very much like the ordinary sleeve, excepting that a deep pleat is formed in the underside at back scye.”)
  2. A historical costume reference to gusset for fitted sleeves, both separate gusset & built-in “flare”. Interestingly their 1-piece fitted sleeve is cut with the sleeve seam in a different place – looks like the back sleeve seam of a 2-piece sleeve.
  3. “The Poetry of Sleeves”, by Rebecca Nebesar, Threads issue 9 Feb/Mar 1987, p24-29 on Threads Archive DVD. This one looks like Kenneth’s 1-piece sleeve built-in gusset, but joins up with the original sleeve seam at the bicep rather than a little bit further down.
  4. “A Ball Gown Built for Comfort”, by Karen Seaton, Threads issue 51 Feb/Mar 1994, p36-39 on Threads Archive DVD. Mine end up looking most like the illustration for this one, but the instruction says to determine the shape when you’re fitting the sleeve on the wearer, so maybe it doesn’t always come out the same shape.
  5. Built-in gusset also seems to be used in dance costumes as well. Here’s an pattern instruction for “Dance Sleeve Gusset”. Note how the gusset shape is flipped vertically, so you have 3 mountains! Look really odd so I didn’t try it. But Wild Ginger Pattern Software also suggest the same type of built-in gusset.
  6. And finally, an informative advice from a theater costume professional on Cutter & Tailor forum about gusset, high armhole, and range of motion. Not many sources mention the different solutions needed for sideway vs forward range of motion…”Yes it is possible to cut high armholes with gussets- we do it all the time for theatre. I doubt though if many “regular” tailors do…In terms of movement and sleeves you have to determine if you need forward reaching movement or raising your arms above the head movement. They require different manipulations.Reaching forward requies a longer hindarm and that is usually accomplished with a sleeve that has a shallower sleeve cap height and is therefore wider in the upper arm as well. This can be done and doesn’t have to look messy- I think it gets messy when the shoulders aren’t fit properly, along with an excess of back width, and the extra length in the back of the sleeve all combined.Reaching upwards requires more length at the front and front underarm area with little extra length added at the back. If done correctly this kind of a gusset is barely noticable when the arm is at rest. The width of the sleeve is not noticeably changed.”

On separate gusset piece for set-in sleeves:

  1. Fashion Incubator’s version of the set-in sleeve gusset is more (American) football shape than diamond shape of traditional kimono sleeve gusset. But it’s shown for a looser fitting shirt. Part 2 of the article here.
  2. This blog article about raising the armhole also went for football shape gusset. It has a link to a more fitted dress supposedly with set-in sleeve gusset.
  3. “Add a Gusset to a Sew-In Sleeve”, by Kenneth King, Threads issue 156 . Sadly it’s not on my Threads Archive DVD & requires login for online viewing, so I haven’t read this article 🙁 In the teaser photo the gusset looks like a 2-piece – ie with a fish-eye dart in the middle.

In the interest of sewing science progress, here is a summary of my experiment with both built-in & separate football shape gussets, + san gusset as experiment control…

The Patterns:

0-pattern

As you can see, mine are hodge-podge of the different gusset approaches. So many experts, so many options, how does a girl choose, right? 😉

My built-in gusset started out like Kenneth’s. But because of the alteration done for my Posterior Arm Joint (shifting sleeve seam towards the front), it wasn’t clear where the pointed bit of the gusset should be – should it shift with the seam? Also the angle of the gusset at the sleeve seam became quite extreme with this alteration & difficult to sew. So, I end up rounding the gusset near the sleeve seam like the Dance Sleeve / Wild Ginger version, but with a more gradual transition rather than a sharp turn into the two mini-mountains to make it easier to sew.

My separate gusset is football shaped. But given the shape of my bodice armhole it became too deep & round. I was worried about the amount of extra fabric, so decided to add the fish-eye dart that’s sometimes used for traditional kimono sleeve gusset.

Les Mugs:

Observations:

  • Both gussets help with sideway motion.
  • Forward motion is definitely still restricted, with strains that seem to radiate from the armpit & run across the front bicep. It’s the same type of wrinkles I observe on men’s jacket, even on the well tailored ones. So I presume that if you pick fitted sleeve with deep sleeve cap, then there’s no way to eliminate the strain entirely.
  • Both are fairly inconspicuous with arms at the side.
  • I can definitely feel the gusset fabric against my armpits when the armhole is already cut high. There doesn’t seem to be much difference between the two gussets I tested despite one being on the bias. So it’s an acquired taste. Not for the slouching days! Perhaps if the gusset merge back into the original sleeve seam further down rather than at the bicep (ie increase bicep width slightly), then the gusset won’t press so closely to the armpits? Experiment for another day / someone else!
  • The football shape gusset which has bias going in a different direction than the built-in gusset offers marginally more mobility.
  • The football shape gusset which has a horizontal fish-eye dart to cut down on fabric bunching looks so ugly when the arms are up! The built-in gusset, on the other hand, looks rather cool when the arms are up.

In conclusion

I think I’m more inclined to go with built-in gusset if I were to make any woven, normal grain tops with very fitted sleeves. It’ll definitely be good enough for my desk job, and is OKish for holding on to handrails on public transport.

I wonder though, what if the sleeve is cut on the bias? I mean fitted kimono sleeve  are sometimes at an angle to the bodice right? So surely they must be on the bias? Will a set-in sleeve cut on the bias with built-in gusset give me even more range of motion? Or will it just give me loads of other griefs?


Fitted Sleeve Sloper: part 1

Where’s a gusset for a set-in sleeve when you need one eh? So long story long, recent days? weeks? (I’ve lost track) have been lost to sleeve slopering. Remember my top / dress sloper that’s based on a Kenneth King moulage?

top-v-moulageTop/Dress sloper muslin

I needed a matching sleeve so I can start making practical tops for the typical London summer (too cold to go sleeveless).

The Starting Point…

fitted-sleeve-1 I started again with Mr King’s instruction for a basic fitted sleeve. First a few words from The Man himself (Thanks Mr King!) in case you have similar questions about the instruction as I did:

  1. Pg 20, Basic Sleeve Outline, Step 8: What are the pros & cons of the two methods for getting E’F’ distance [cap height]? Would the shallower cap height produced by method 1 be more comfortable to wear?
    Kenneth: The shallower cap height is indeed easier to wear, as it has more lift.  The trade-off with cap height and bicep width is one of appearance versus mobility.  A higher cap yields a shorter bicep, which looks well when the arms are down at the sides.  Suits look better with this situation.  But the higher cap height limits mobility somewhat—but you don’t do jumping jacks in a suit jacket, generally.  A shorter cap height gives more mobility, but you sacrifice some in appearance, as there is a rumple of fabric under the arm when the arm is down at the side.  Men’s dress shirts have the short cap height/long bicep situation.
  1. Pg 22, Basic Sleeve Outline, Step 9: If my half-bicep is less than 6″ (I have skinny arms), FF’ and FF’ would still be zero right?
    Kenneth: That’s correct.
    So when I get to step 11 my curve should stop at H and be horizontal from H to H’ to F right?
    Kenneth: That’s correct.
  1. Pg 25, Basic Sleeve Outline, Cap ease: Is there a minimum amount you would recommend? Can one get away with 0″ cap ease? Would that cause any sort of fitting or comfort problems?
    Kenneth: Cap ease is dependent on fabric.  If you are cutting for leather, then close to zero is good.  For dresses and blouses, where thin fabric is used, 1/2”, to a maximum of 3/4” is plenty.  I generally go with 1/2”.  For tailored garments, I go with 1”-1 1/2” maximum, depending on fabric.  If you’re working with a really spongy woolen, the cap can absorb much more, but gabardine or Super 120 will need much less (that 1/2”).
  1. Pg 53, Fitted Sleeve with Elbow Dart, Step 5: Once I folded on B’D’ and trace out the front B’F’JMD’ I find my bicep line is no longer perpendicular to EM. Is that suppose to happen or did I do something incorrectly? If it’s correct, what line do I use as the grainline – should it be the original EM line (ie the bicep will be slightly off the crossgrain)?
    Kenneth: Your bicep will tilt slightly because of this folding.  Generally I will draw a new bicep from the intersections of the armhole and the seam on the sleeve, and make the grain line perpendicular to the new bicep line—that’s the gold standard.
    However, the grain line can change—when I’m fitting a sleeve, if I have a situation where the pitch of the sleeve is markedly forward or back (this is dependent on the particular wearer’s anatomy), then, when I set the proper pitch of the sleeve, I’ll drop a plumb line from the top of the cap and re-establish the grain line so it’s perpendicular to the floor.  This isn’t so important if the garment is made from solid colored fabric, but any pattern, plaid, or stripe—it’ crucial that the sleeve rain lines be parallel to the grain lines on the body, which generally are perpendicular to the floor.  (the exception here is bias garments.)

OK, so the result was pretty good (sorry, forgot to take mug shots). But I had to make some minor adjustments because of quirks of my arm joint/posture…and vanity.

The Fitting Quirks…

Origin of the Big Bust Impersonator?

armhole-position-shape

FPA-09I used to think my problem was a Forward Shoulder Joint (Fitting & Pattern Alteration #9), but now I think maybe I have a combination of a Posterior Arm Joint (F&PA #10) + Forward Shoulder Joint. Sounds contradictory doesn’t it. What I mean is that my shoulder sits further back on my torso, but is tilted with the top of the shoulder pointing forward and my elbow further back. This may explain why my bodice side seam is more towards the front if I want it perpendicular to the floor. According to F&PA, Posterior Arm Joint may occur with #33 Prominent Bust (the common FBA by another name). I wonder if that’s why according to most instructions I’m a B-cup bodice, but in fact I need a FBA for the front to fit well.

FPA-10Anyway, so my moulage bodice looks more like the resulting bodice for Posterior Arm Joint adjustment (except my back side seam is straighter & back waist darts wider): I’ve allowed the top/dress sloper’s bodice side seam to tilt backward a little bit (1/2″) for better balance between front & back at armpit level, but there is still more of the armsyce on the back bodice (9″) than on the front bodice (6-7/8″). So I had to move my 1-piece sleeve’s underarm seam towards the back as well if I want this seam to match up with the bodice side seam and still get the right pitch / tilting of the sleeve to match the way my arm hangs. The sleeve adjustment is done as instructed for Posterior Arm Joint, moving the underarm seam (7/8″) only at the armpit, tapering back to original seam line at the wrist.

FPA-48I was getting closer, but the sleeve twist a little bit at the elbow with dragline from sleeve cap center towards front / inner elbow. I ended up moving the underarm seam towards the front (3/8″), a bit like #48 Inward Rotation of Elbow, but without increasing the elbow width. This makes the upper arm portion a bit twisted when flat, but feels straight when worn. The temptation to straighten it out is great, but maybe the body is just too wonky to obey?

fitting-probsTo Cap Ease or Not to Cap Ease

Lastly, on the can of worm that is sleeve cap ease…I ended up with about 3/4″ ease. I started out with almost 0″ ease. But I found that on very fitted sleeve like this one, where the shoulder seam isn’t extended out beyond the curve at the top of my arm, I get draglines pointing towards where the arm bulge out of the shoulder joint without this ease. The draglines disappears when I increase the cap height (to 5″). But this added the 3/4″ ease.

Now there’s a bit of debate online on whether sleeve cap ease is really needed. Some of the discussion implies that the reason ease was added originally was an attempt to improve arm mobility. This argument against sleeve ease is that if the armsyce is shaped correctly (mirrors the arms’ typical range of motion, which is more forward than backward), then sleeve cap ease is not needed. I have to admit I don’t know why ease are added by the various sewing professionals – the RTW pattern drafting, home sewing, couture, & tailoring books I own all mention some sleeve cap ease.

But when I shrink-wrapped my Duct Tape Double arm, then cut the wrap open to make it lay flat, I ended up with a series of little darts at the armsye that add up to about 2″ ease. So it would seem like the ease would be useful for accommodating this bulging out of the arm from the shoulder joint.

DTD-arm-07

I can see that if the shoulder seam is longer / extended out, covering some / all of this bulge, then the sleeve can drop straight down (like on men’s suits) and little / no ease would be needed. Alternatively, if the fabric is loosely woven & easy to stretch, maybe armsyce can be 0″ ease and the fabric in the cap area stretched out to accommodate the arm bulge (don’t know if this would pass the laundering / dry-cleaning test).

sleeve-cap-ease

The other argument against sleeve cap ease is that some fabrics are a pain to ease.  But if the arm bulge needs accommodating, then that need doesn’t go away, right? It would make more sense to me to use a different shoulder / sleeve design for these fabrics, eg extended shoulder seam; more casual shirt like sleeve with shallower cap and attendant excess fabric / folds at the armpit. Any of you experts out there manage to accommodate this arm bulge without any cap ease in difficult to ease / non-stretch / tightly-woven fabrics? Pictures proof please!

Next up, vanity tweaks. Here’s a sneak peak of the resulting pattern. But you’ll have to wait for the details!

fitted-sleeve-3