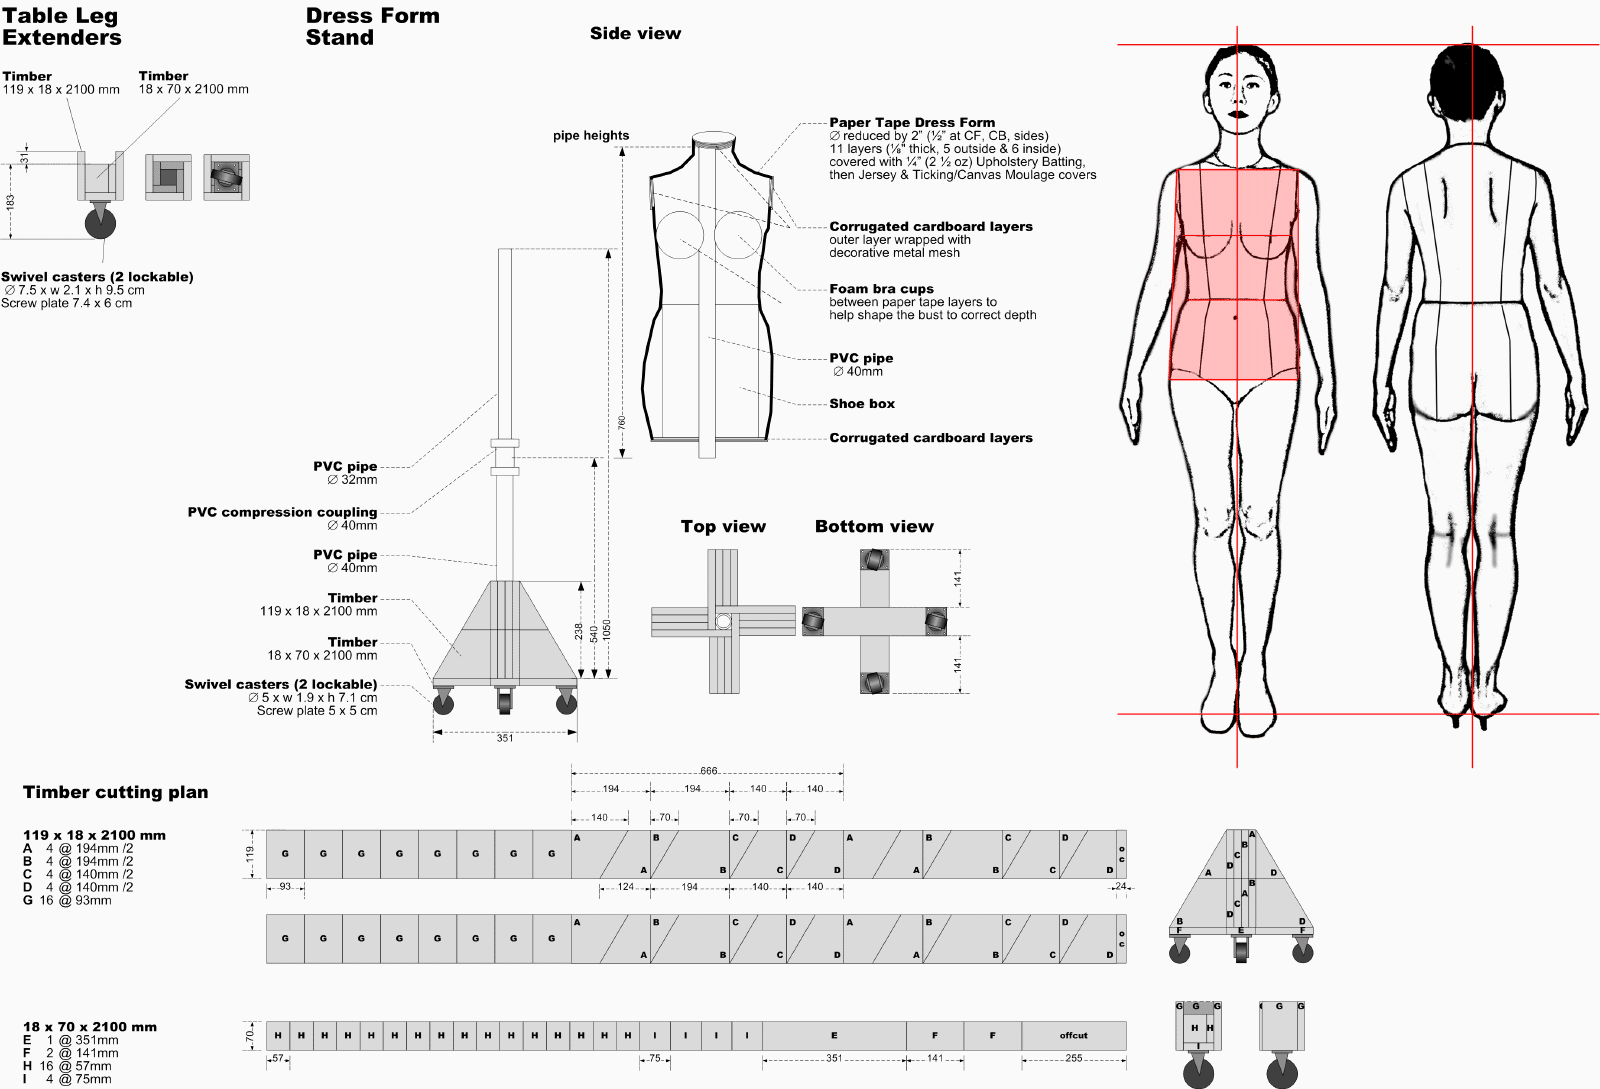
As you’ve already met Q, let’s get straight down to business shall we.
Most of the following steps are a hodgepodge of Suzanne Stern‘s couture dress form customization instruction on Threads Archive DVD (issues 44, 45, 48) and Wolf Forms production process article again on Threads Archive DVD (issue 141) and the How It’s Made TV segment on Wolf Forms on YouTube.
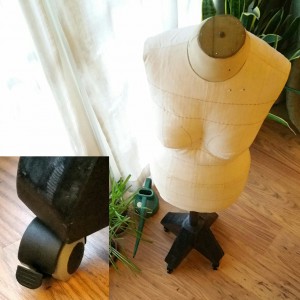
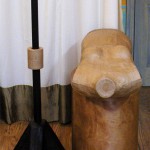
 To recap, I’ve now got Q post reduction surgery and on her one flimsy PVC leg with a hefty wooden hoof. Next up was fattening her back up.
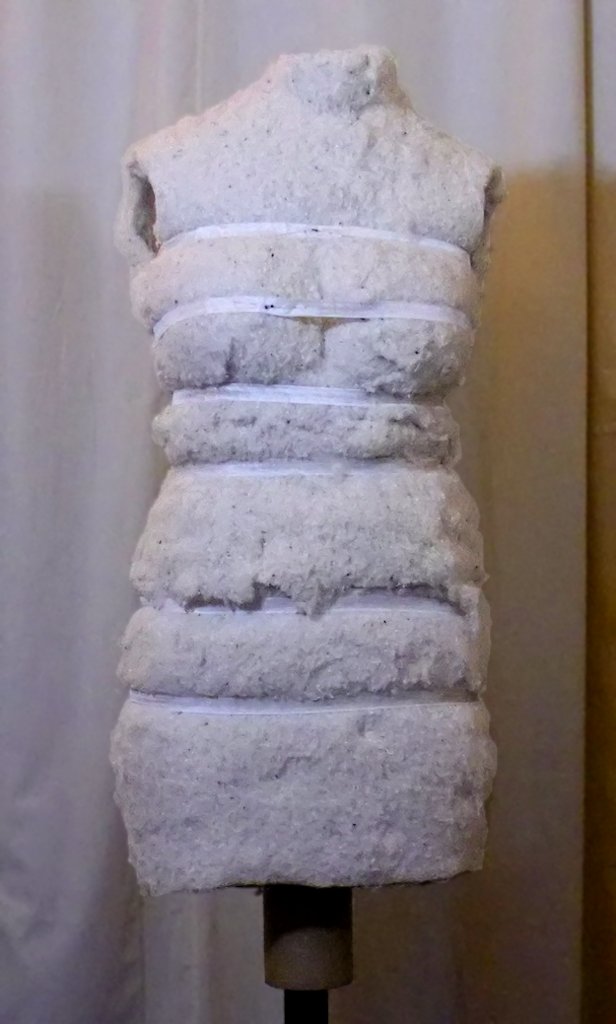
As she was originally my size with a fairly uniform reduction (1/2″ at CF, CB, sides), theoretically I can put an even layer of padding on her. But I might have complicated things a little bit by also taking in a little bit for the breathing ease that was wrapped into the original paper tape – I want the option to be able to make skin-tight corset or evening dress.
So one precaution I took was to cut rayon seam binding tapes measured to my key circumference measurements (+ a bit for overlapping & pinning / sewing close). After I wrapped an even layer of 2-1/2 oz cotton-wool blend upholstery padding, I wrapped these seam binding tapes around the padded form and made sure the fluffy padding can be compressed to the right size. If the tapes won’t close at the markings then there’s too much padding, if it’s loose then there’s not enough padding. Here she is with her lovely rolls spilling over the tapes!


A second precaution is to use my moulage pattern for the thin non-woven interfacing that covers the fluff. This way, I can adjust the padding to better fit the cotton drill moulage cover that will be Q’s final skin.
First though I needed to do a final check on the moulage fit. So I made the cotton ticking moulage cover next:


OK, there still seems to be some draglines in the photos. It actually doesn’t look as bad in real life. As I’m not a starlet who’ll be papped on the red carpet for the tabloids I gave myself permission to ignore the less than perfect photographed results.
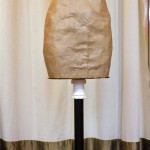
 So with moulage pattern checked, I cut and pinned together the thin non-woven interfacing version. I then put this on Q with CF closure and checked the amount of padding again. Most of it was fine. It was a tight fit, but with a bit of careful tug and occasional spot fusing with a dry iron, I was able to rein in the fluff and get the interfacing moulage on.
The bust was a problematic area. I had to add extra padding to fill the bust out. I also used the underwires from an old decent-fitting bra to check the bust shaping. A pin was hammered in between the girls to get the cleavage right. Once it all checks out, I fuse the interfacing to the padding with dry iron on wool setting. The pins holding the interfacing moulage together came out after I’ve fused the seams.


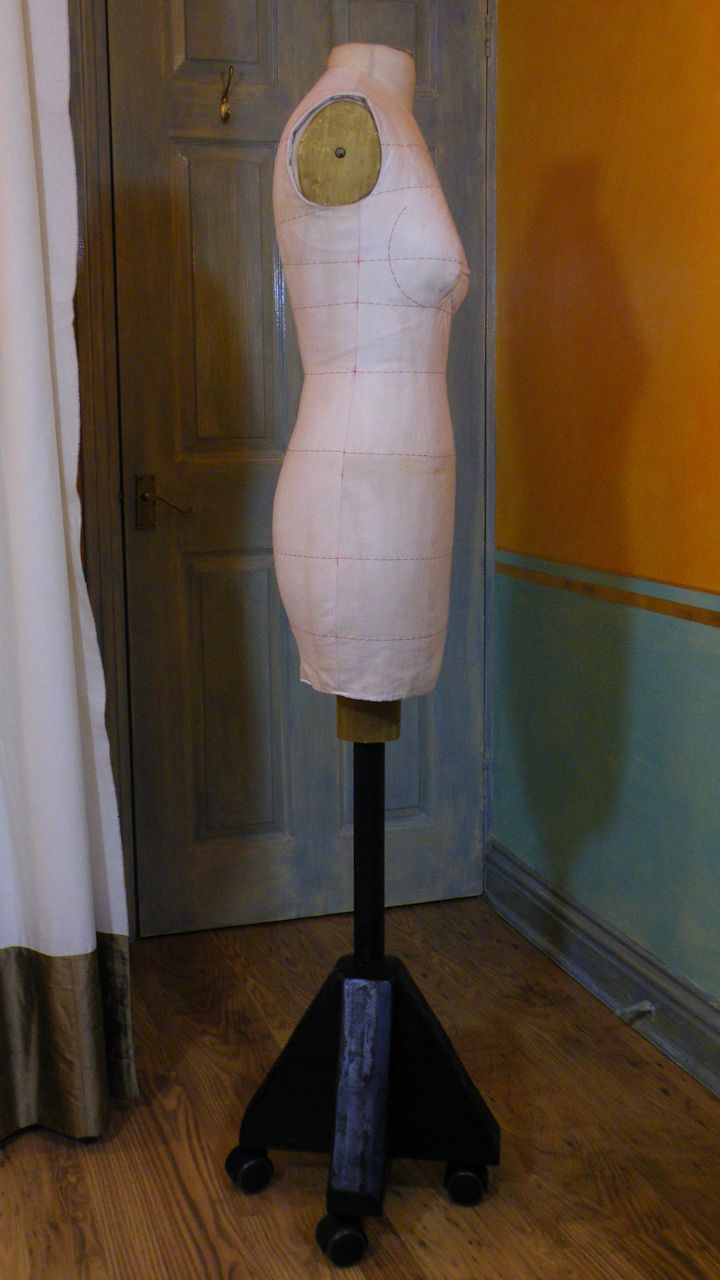
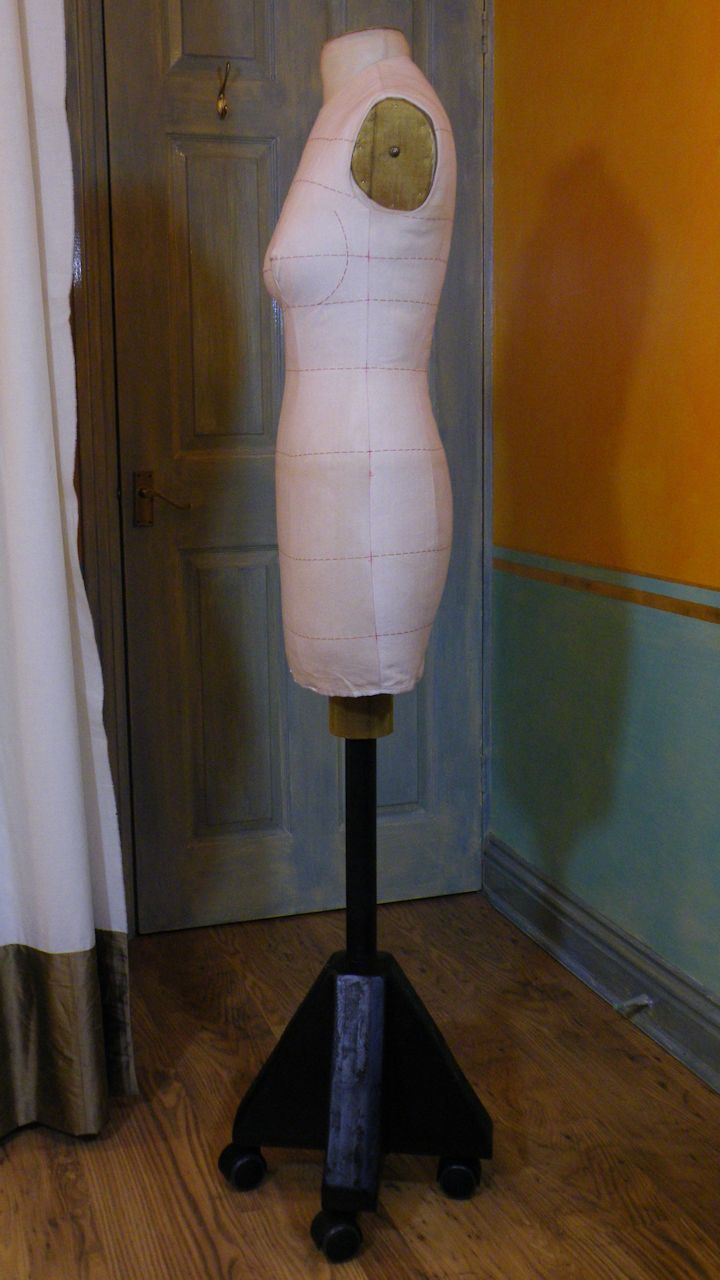
Here’s Q after interfacing wrapping, still sporting her rolls:


Next up is a thin cotton jersey cover. I needed this extra layer because my cotton ticking cover doesn’t cover the neck.


This was actually a hand-me-down from Big Bertha, my previous Duct Tape Double. So it was already shaped to fit my figure and just needed closing off at the neck and armholes.
Again, I hammered pins in to create the underbust and cleavage shaping. The bottom, like the interfacing layer, is folded over the hem edge and in this case stapled to Q’s cardboard bottom using a staple gun leftover from my collage days. (The interfacing was just fused to the cardboard.) … And where have the rolls gone?
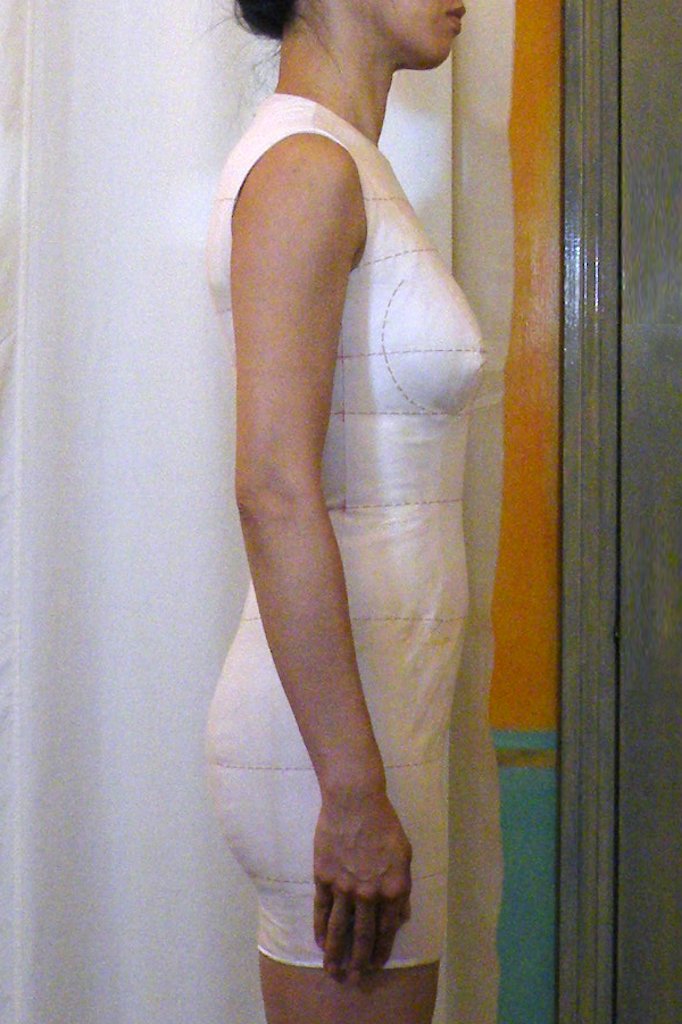
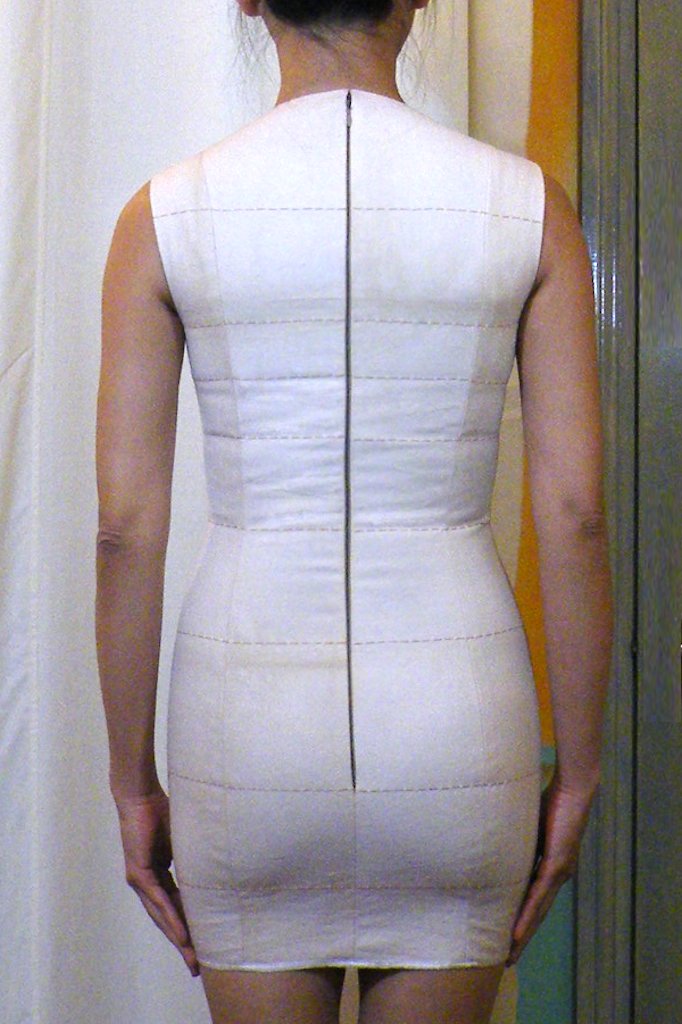
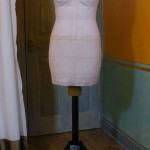
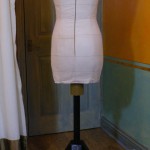
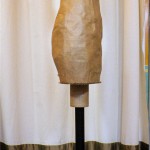
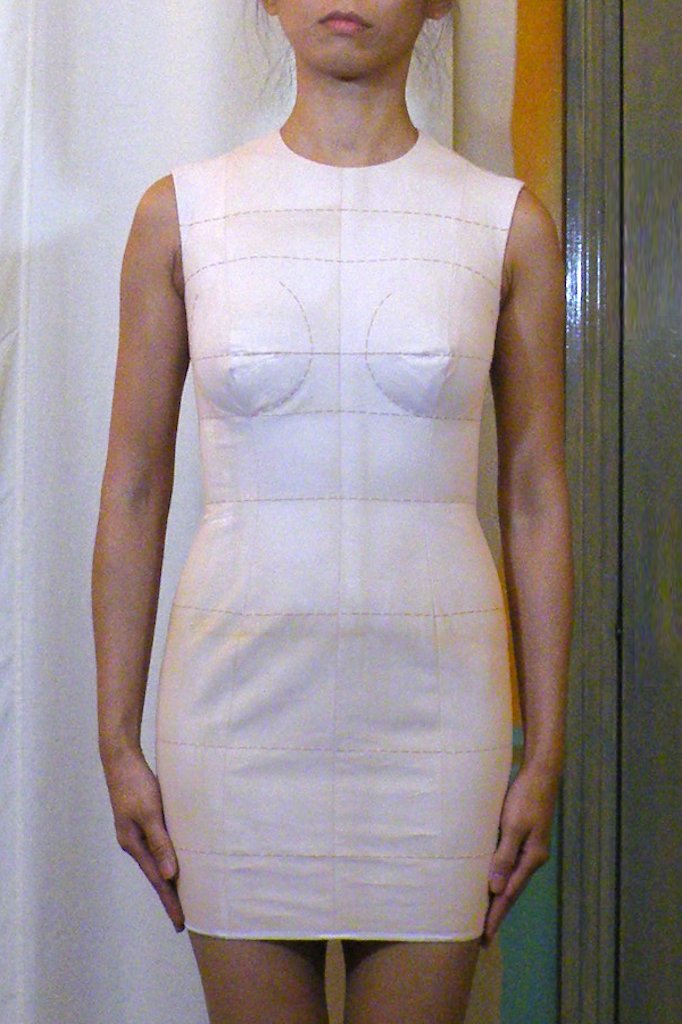
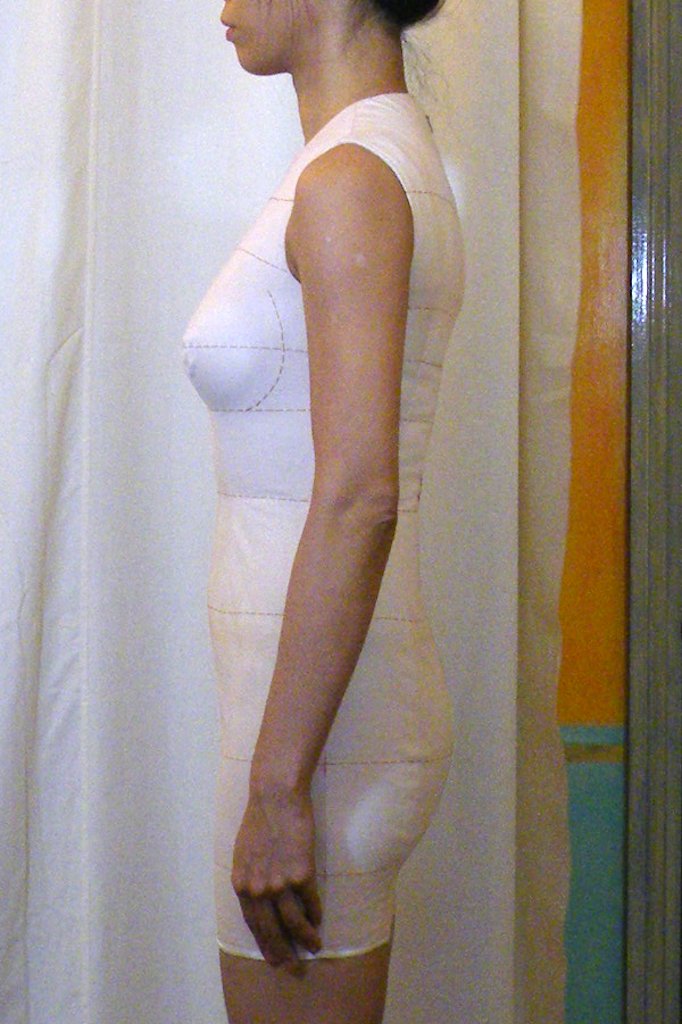
And this brings us up to date and those photos of Q in her cotton ticking moulage skin, which is made with a center back zipper so it can be taken off if I ever want to check the fit on myself again.


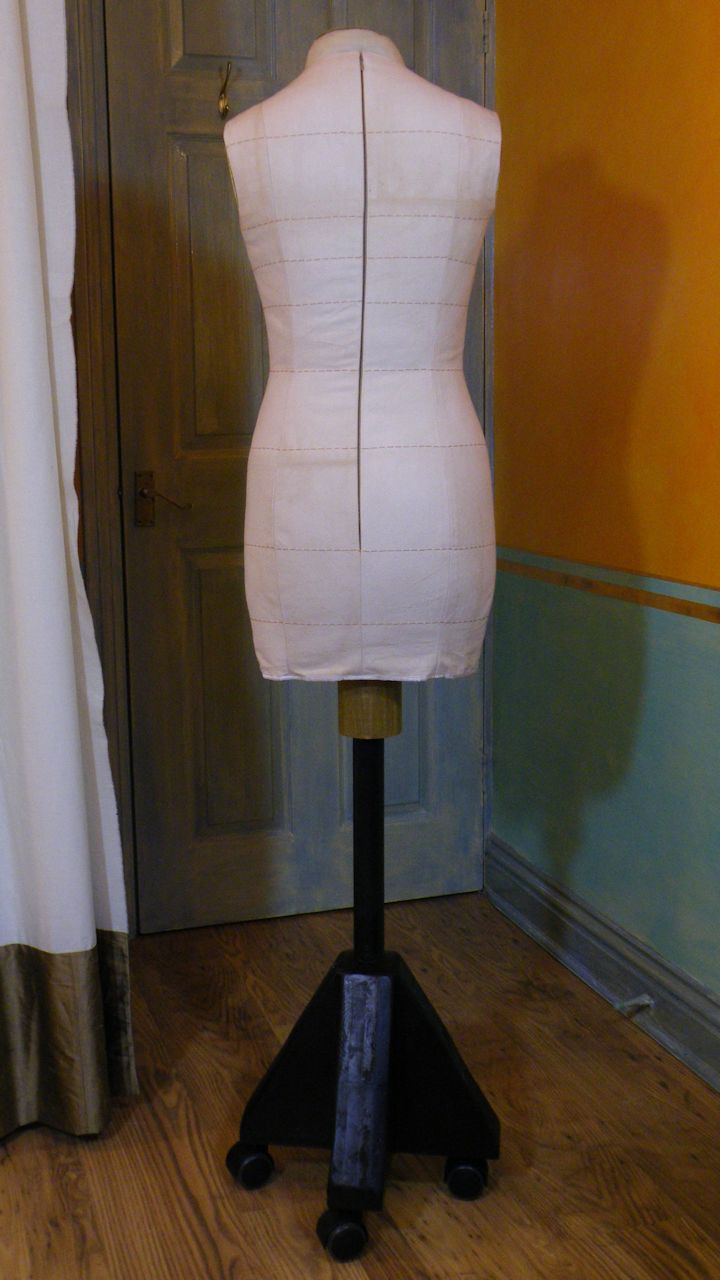

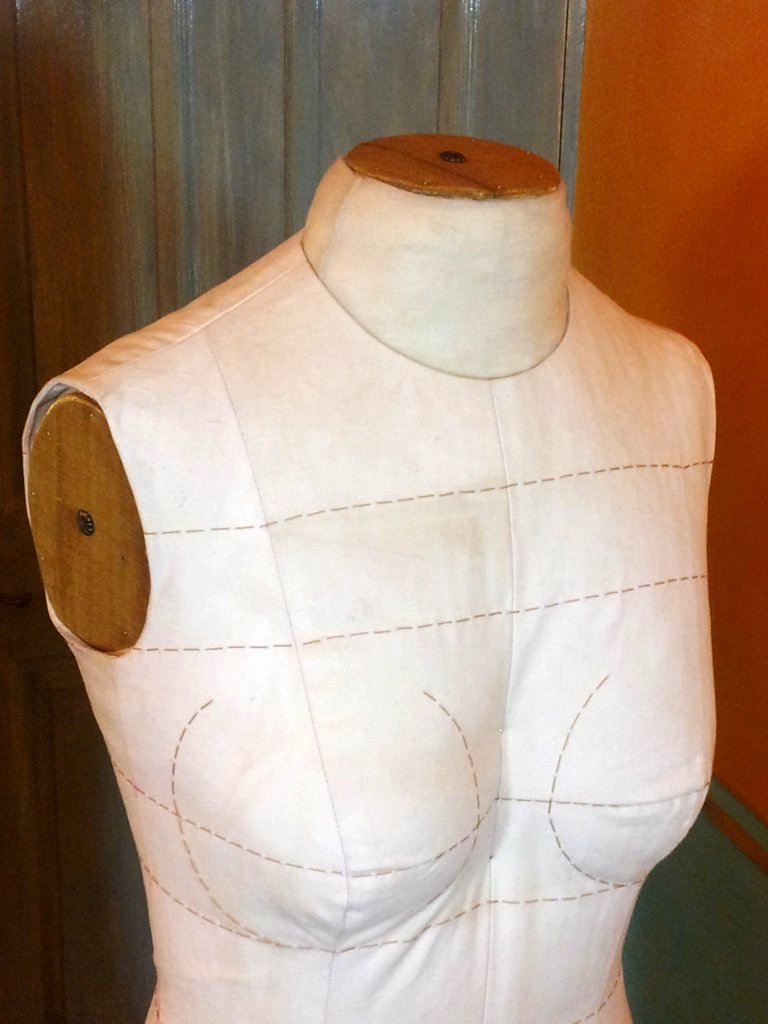
The ticking I got from John Lewis’ home decor fabric department is relatively thick – probably mid to heavy-weight. It covers any stubborn left-over rolls. You could probably use drill or canvas as well. I stained mine with cheap tea to give it an antiqued look. And although I added a CF bust fish-eye dart, I still hammered yet more pins for a more defined cleavage. The key circumferences are thread traced with top-stitching threads to guide future draping projects.
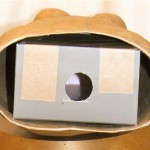
The neck and armholes I could have just left with the jersey covering. But as I had some craft brass wire mesh and decorative floral head tacks in the stash, I added metal looking caps to make Q look even more like the Wolf Forms. The mesh is wrapped around a cardboard layer, then tack in the center to the cardboard layers already covering these holes. More pins are hammered in closer to the edge of the disc to make it more secure. One downside of this prettification is that the cut edges of the wire mesh is a bit scratchy. Hopefully they won’t snag any fine fabric draped on Q.
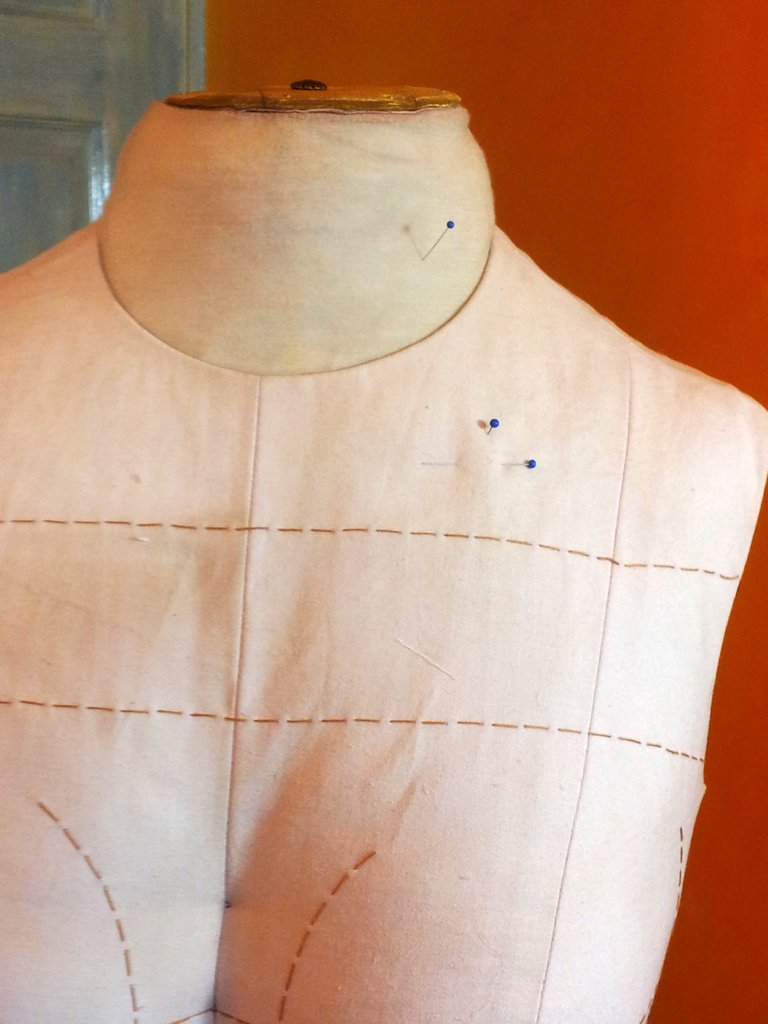
And look, Q takes pins no problemo! I could pin into just the ticking cover or I can stick one right into her. The middle pin is as far as the pin will go and it looks pretty secure.
So mission accomplished. Well done Q!
Now obviously not everyone’s going to go through the trouble for a dress form. So maybe I’ll write up some tips & learnings from my experience next time.

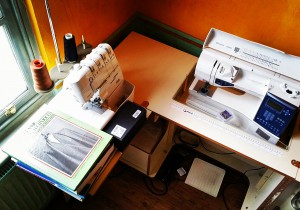 For my sewing machine, I got a sewing cabinet which has adjustable platform for flatbed & free-arm sewing, as well as hiding the machine away when not in use. For my overlocker I’ve had to improvise with stacks of books for now as there isn’t space for more sewing cabinet!