
I wish video internet was as viral when I made Big Bertha as it is today. Today I got a spamail from Threads magazine advertising their latest Dress Form Making tutorial. Boy, was I glad I didn’t junk it straight away. It turned out to be a great video tutorial on making a Duct Tape dress form. Quite a few good tips it has. And clear video demonstration obviously doesn’t hurt either. Enjoy!
gadgets


Oh boy! New toy(s)!
The other day the door bell ranged, and I thought it might be the tracing paper I ordered for pattern drafting.
The long & short of tracing paper in the UK…
 Morplan ‘tracing paper’,
next to Big Bertha for scale.
I had previously ordered a roll of “tracing paper” from Morplan, which turned out to be absolutely useless for tracing. It was in fact opaque, despite being described as “tracing paper” and lightweight at 45gsm. Plus it was so humongous and heavy, it’s quite an ordeal to unroll and cut a piece off for use. Still, it would be too much of a waste to throw away. So I kept it for pattern drafting that doesn’t involved tracing, or for tracing commercial pattern with a tracing wheel. But for my current nth sloper project, I needed translucent paper so I can trace & pivot easily.
 Before that I had gotten all my tracing paper in America. So I don’t know why it’s so difficult to get proper tracing paper here in the UK. I know others used greaseproof paper / baking parchment, and that was going to be my back up plan if I can’t find any proper tracing paper in the UK. But as they tend to be narrow, so require taping for bigger pieces, they aren’t my first choice.
 Artifolk tracing paper,
next to Big Bertha & Morlan’s version for scale.
I eventually ordered 3 rolls of 33″ x 27 yd (84cm x 25m) 62gsm tracing paper from Artifolk.co.uk. They were the cheapest art / office grade tracing paper I can find and works out about £0.89/sq m if you order 3 rolls or more. That’s about twice the price of greaseproof paper, but you get the advantage of wider width. If you need wider still, London Graphic Centre has slightly more expensive 63gsm tracing paper rolls that are 40″ x 21.87 yd (101.6cm x 20m).
One thing I found out is that you can’t judge “tracing paper” by the paper weight indicator – the gsm number. I read a few discussions where people were assuming lower gsm means more transparent. As my experience with Morplan shows, that’s not the case. You must look for “transparent” or “translucent” in the description.


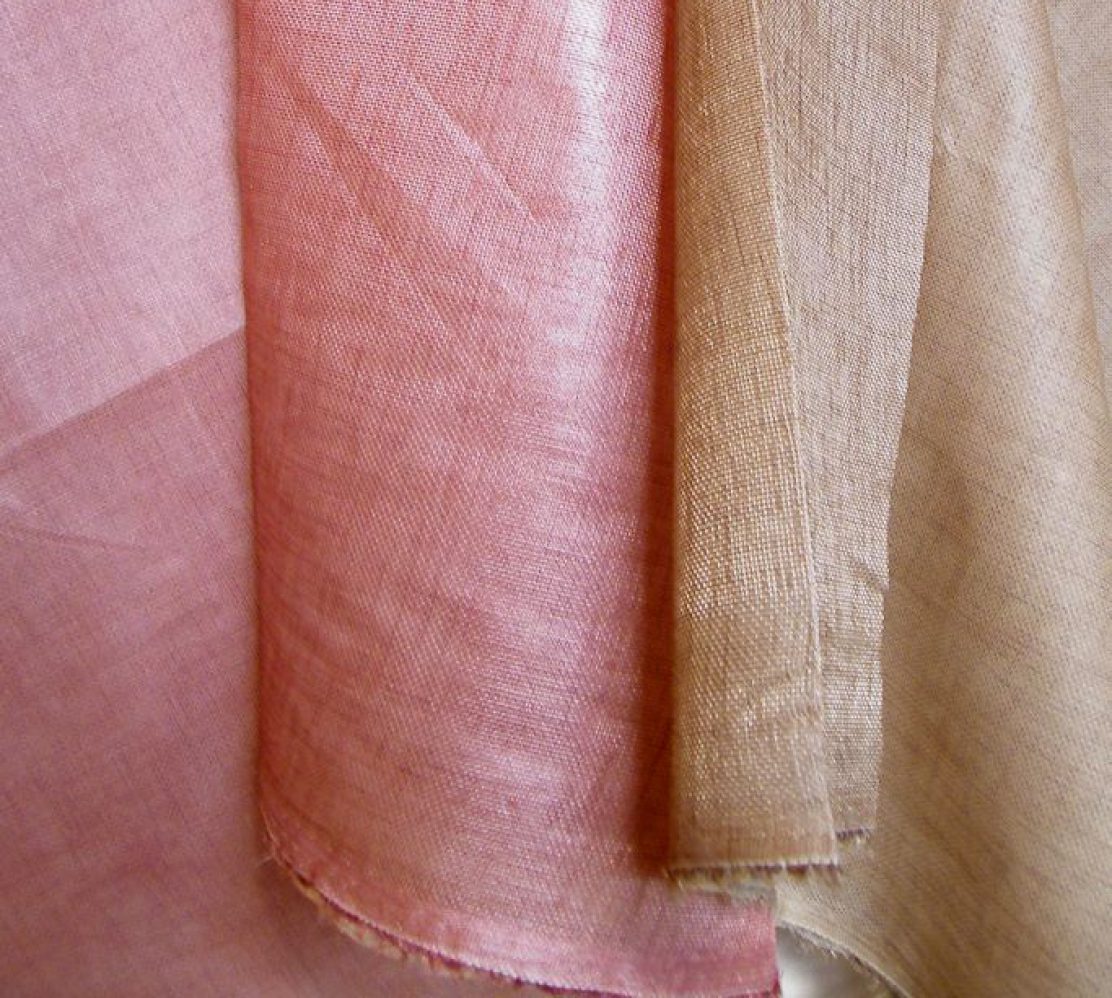
Morplan (white bag pattern) vs Artifolk (translucent sheet over sloper)
The new rolls I ordered are indeed proper tracing paper. They’re heavier weight, but similar to some of the tracing paper I’ve used in the past. So I know they’ll be fine.
But what an ordeal to get them delivered – thanks to the new & improved (not!) Parcelforce service. The door bell turned out not to be the paper. No, I had to trace my package online only to discovered it was sent via their new deliver to psychics only scheme. Basically, you had to guess when the courier will be at the door. No door bell, no sorry-you-were-out card. If you guess wrong, then your package is going back to the sender. Clever innit. Unfortunately my psychic power is a bit anemic and I nearly missed my package. Thank god for online tracking. But no thanks for having to trace and retrieved the heavy package from not the nearest post office, but the one 15 minutes away. British logic really confounds my simple American mind sometimes.
Now back to the door bell…This was in fact an altogether much more pleasant surprise…
My very first serger / overlocker

 There’s a story to go with it as well. But first I have to thank Lakaribane for steering me towards a serger instead of a handbag for my birthday present. I did consider the highly praised Brother 1034D as well.
 But in the end I went for this also highly praised Bernina 1150MDA because I thought I might want 2-thread overlock stitches for a flatter seam allowance finishes on woven garments.
 I was considering Juki too because I see it so often mentioned as an industrial brand. And industrial means reliable and professional right? But Juki seems hard to come by in the UK. Then I read somewhere that Bernina sergers are in fact made by Juki, but with a heftier price tag. And as my boyfriend’s paying…Mea culpa. I think this will have to be my Birthday presents for last year, this year, and next year.
 It could have been worse of course. I could have gone for a Baby Lock Evolution like the Selfish Seamstress. But £1000+ present seems obscene to ask for. And I was paranoid that the miraculous Baby Lock air threading system will one day breakdown and leave me in tears. I work with computers. So I don’t trust clever clever technology!
But I almost didn’t get this Bernina 1150MDA.
I went down to the local sewing machine store and asked for Bernina 11-something serger. The guy told me they don’t make that model any more and tried to sell me a Frister & Rossman overlocker.
Now that wasn’t a clever move. Throw a curve ball at me like that and I’m more likely to walk out the store empty handed. I would have to go home and confer with my online sewing community first before making my mind up.
 I had in fact come across mention of Frister & Rossman on an UK sewing forum, but hadn’t seen enough reviews & mentions to trust it. They did had the Brother 1034D. But actually, comparing the rolled stitch sample they had set up on the F&R and Brother, I had to say no to the Brother one. It looked crooked and amateurish. And I don’t know enough about serger to tell if the Brother was simply poorly set-up. The F&R sample seemed better. And it was branded Jaguar! Now that would have been funny to brag about. But it was a 3-4 threader.
I was about to go home empty-handed, but decided to ask about the next model up in the Bernina line. That’s when he checked his catalogue and we discovered that we were talking at cross-purpose. They do indeed carry the 1150MDA – as advertised on their own website no less! But he thought I was asking about a previous version, a 1100 or something. Next time I’ll know to memorize the exact model number!
So the deed was done. The order placed. The boyfriend’s credit card handed over. It was to be delivered when they can source it from another branch in about a week.
Then a mere 2-3 days later the door bell rang and my present arrived. Hurrah! But my boyfriend made me wait till my birthday to open it up. Boo.
So, my birthday finally arrived. And here’s the Bernina 1150MDA strip-tease…


And that’s as far as I got with my new toys. Now back to that d*** sloper & fitting puzzle! }:-|
Share this on:

Dear Birthday Fairy…
It’s a washed out day. I’m capable of only surfing and dreaming of my fantasy sewing room. My birthday is coming up and my boyfriend has been pestering me about what I want for my birthday.
Horn Gemini
 Last year I asked for a Horn sewing cabinet when we move into a bigger place. The bigger place didn’t materise. So neither did the sewing cabinet.
Now Horn wouldn’t be my first choice – it’s rather ugly. But I was thinking more of function than form, since sewing on my desk is breaking my shoulders and neck (too high). I wanted the 3-step airlift feature so I can hide the machine away, have it level with the desk surface, or on the desk surface to sew free arm.
Koala TreasureChest Plus lV

The choices in the UK are very limited. If I were still living in America I might have considered a Koala sewing cabinet. But again, they are only marginally less ugly.
Now why can’t they make sewing cabinets that look as classy as a Pottery Barns Aris Desk?

Pottery Barn Aris small desk – sadly no longer available
Deluxe Sewing Center Wookdworking Plan
 Now, of course if my boyfriend were the handy type, I’d ask for a custom built one. Like this Deluxe Sewing Center (plan and lift mechanism available for order online). But I got the urban DIY-what’s-that type. That’s boyfriend not sewing center of course.
Anyway, this year, still with no additional sewing space in sight, I’m aiming lower. Just about.
Husqvarna Designer Ruby I was lusting after an embroidery machine. But a toe in the water later I’m thinking
(A) I don’t have the space for such a big beast; and
(B) I probably won’t do enough embroidery to justify the price tag.
Baby Lock Evolution
 So next down the list of contenders is of course a home serger. Now the idea of clean-finish seams and puckerless knit sewing sound good. But what’s been stopping me is the idea of multiple spools of threads. I already have two overspilling drawers of threads of all different colors. Most I use only once for one garment. The idea of multiplying that by 3 or 4 just doesn’t bear thinking.
Do you own a serger? Do you keep a closet full of serger threads just to match the thread to the fabrics? Are there other strategies for keeping the thread pile under control?
Maybe I should just ask for a handbag instead? }:-)
Share this on:

Big Bertha: The Sloper Origin
So how did I ended up with that lopsided sloper? Well, Big Bertha is to blame. She’s my Saviour and Tormentor.
World, meet Big Bertha. Big Bertha, meet the World.


Big Bertha in her everyday muslin shift. This was based on a left-right average of the lopsided sloper I showed in the previous post. And that was based on muslin draped to follow her every curves (and also half-heartedly the instruction in Draping for Fashion Design).
I had previously tried a thin jersey cover. But that was no good as it stretches everywhere. And the whole reason why a sturdy stable cover is indispensable – apart from aesthetic reasons – is because Big Bertha’s thick duct tape skin gums up all my pins. Worse still, instead of stabbing her, the pins were pushing back into my much softer cushier finger pads. So I was getting absolutely no use out of her. I needed the fabric cover to pin onto.
As for the cover above, it looks reasonable enough. But I’ve since discovered that left-right average isn’t always the best way to solve lopsidedness problem. Especially when it comes to shoulders.
Big Bertha getting raunchy…


Big Bertha naked is white duct tape wrapped onto of some old fitted T-shirt, and stuffed with toy stuffing. Silver duct tape was just too industrial on the eyes. Looks like a mummy doesn’t she.
I got my BF to wrap me up. The whole process did take a few hours as you know men can’t follow instructions! So if you make one be sure you go to the loo first. Because you’ll be stuck: can’t sit, can’t walk, and of course can’t go to the toilet.
Mine’s obviously wrapped up only to the shoulder points and down below my bum. But I’ve seen somewhere pictures of others who made a whole body from head to toes!
OK, maybe not the head. Though Leah Crain, who I bought the Duct Tape Double instructional booklet from, did have a picture of hers with a mad hatter’s display head stuck on. It was a bit creepy though. I worried I’ll frighten myself when I get up in the middle of the night to go to the loo. So headless Big Bertha shall remain. Though I do have a book on hatmaking (From the Neck Up: An Illustrated Guide to Hatmaking) and have been very tempted to get hatter’s blocks.
Big Bertha in pieces
 I told her strip tease always ends in tears. But would she listen? Of course not!
So here’s Big Bertha dissected, showing the stand that is her spine.
 It was the bottom part of a Rubber wood coat stand I got on E-Bay. But you can also buy it off Amazon.
I ditched the top parts and used the base which reminds me of old fashion dressmaker dummy stands.
Unfortunately it wasn’t sturdy enough. Big Bertha is denser than you can see! The joints cracked under her weight and I had to patch the joints with wood fillers. Hence the unsightly discolouration in places.
Keeping Big Bertha standing…
She has a cardboard tube running inside her for the pole to go into. But it was bigger than the coat stand pole.
 So I had to wrap several layers of cardboards along the pole, kept in place with – you guessed it, more duct tape.
The screw eyes just below the torso are to control the height. Twist the eyes flat and Big Bertha’s down to my level in normal walking heels. Twist the eyes vertical, and I’d have to get out my highest stilettos to see her eyes to eyes. Except she’s got no eyes. Deliberate of course!
 What the birds see…
On the top, the solid steel handle of the wooden hanger I used as her shoulder frame pokes out of her neck. It wasn’t intentional, but it actually looks rather fetching. And if you have a hang-man stand, you could hang Big Bertha from the neck. I wouldn’t do that to her of course.
If you want to make yourself one, I do recommend checking out Leah’s Duct Tape Double website and her detailed instructional booklet. But do keep in mind the gumming up problem.
Next time I make one – and it’s only a matter of when not if, given the imminent middle age spread – I think I’ll try Connie Crawford’s paper packing tape version detailed in her Patternmaking Made Easy textbook and see if that gums up less.
Big Bertha wants her vintage wannabe
dress dummy cover & she wants it now.
 Although the muslin cover has worked better, it still shifts and stretches a bit. A sewer at a London Meet Up suggested using ticking fabric, more commonly used for mattresses and corsets.
I got the fabric. I even stained it with tea to give it that antiqued look.
But I just haven’t found the courage to make a simple new cover for Big Bertha. Because perfectionism stands in the way. But I’m changing that. S…l…o…w….l………y!
So dream on Big Bertha!
Share this on:

Dress Form Quest: The Big Bertha Prequel
In keeping with latest cultural trends, next up is of course a prequel to a prequel. So, how about a survey of dress form options I considered before settling on Big Bertha?
Now, you must understand, I have two criteria for my selection:
Aesthetics & Intended Purpose
Having been artsy fartsy most of my life, and having a job that requires none, I simply couldn’t stoop down to an ugly dress form in my leisure time. But on the other hand, my job has drilled into me Function Function Function (over Form – those damn artsy fartsy creative w**ker types! ;-). So I can’t settle for pretty but useless dress forms either.
Here are the Rejects:
Ready made rejects
1. Adjustable dress forms
 Reject Reason: Aesthetic Atrocity.
And now I find out from a Did You Make That? blog post & Connie Crawford’s Pattern Making Made Easy book another defect: gaps in places when you adjust the form to your measurements. Pros: if you sew for others, it saves you having to make & keep multiple forms. But then I’m in the Cult of Elaine (sorry Selfish Seamstress, “Cult of the Selfish Seamstress” just doesn’t have the same ring to it), so this is no cup of tea for me.
2.Professional dress form + padding out
 Reject Reason: Black Art. (+ expensive!)
These are of course very aesthetically pleasing. I drooled over…
- The collapsible shoulder version.
- The leggy version.
 The Project Runway version with bum cheeks.
(Why do sewing patterns still pretend they don’t exist? Where I work there are lots of finance / City types, and a lot of the girls look curvy yet professional in their bootylicious skirts and pants. Come on pattern companies, move with the times!) The Japanese real average body dress form. These are designed jointly by Bunka Fashion College and the Digital Human Laboratory. They’re based on actual measurements of the college’s students. So they reflect real figures (dress form on the left) rather than the idealised figures used in most professional dress form (dress form on the right). I like the scientificness of this, but it would still not match my real figure. The Fashion Incubator blog has a whole discussion about these forms.
Out of the box these are all utterly useless, not to mention expensive. And sculpting with wads of cotton batting seems like a Black Art. Fabulous Fit does have a fitting system that’s meant to speed this up somewhat. But even then it’ll take ages, if ever, to get it exactly right. So one for those genetically blessed with a standard figure & measurements. Not for me.
3. Uniquely You
 Reject Reason: … actually I had one of these long time ago.
This one you get a form roughly your size plus. You fit the skin-tight cover on yourself (with a pair of extra hands of course). Then the cover reins in the extra bulk. So theoretically this should be perfectly you. But it does have ugly legs. And it’s not exactly cheap either.
And you really need a dress-maker friend whose hands you’ll be borrowing. BFs and hubbies probably won’t do. (Mine is long gone, abandoned across the pond. Which is just as well since I’ve gained a few pounds and a couple of pattern sizes crossing the pond.)
Update: I just found this blog post with great pictures and discussion about fitting Uniquely You. Check out her video of unpacking the form. Hilarious!
Custom made rejects
1. Molded papier mâché dress form
 Reject Reason: My days of mucking about are over.
The process is just too messy, complicated, and time-consuming. I simply don’t have the patience to watch papier mâché dry!
You have to cast a mould first using plaster tape. I read in a Thread article some poor woman ended up overheating and fainted – plaster supposedly release heat when drying. So unless you’re quick with the moulding…keep the smelling salt at the ready.
And after all that you still have to build up your form in sections, then glue them together (see picture above)…See what I meant by mucking about?
2. My Twin molded polyurethane foam dress form
 Reject Reason: My days of getting high on fume are also over.
The end result does look quite good. But again, the process is messy, and presumably also fummy.
Again you have to cast a mould first using plaster tape. But then instead of using papier mâché, you pour this expanding liquid polyurethane foam into your cast. I can smell the toxic fume already!
3. Standard paper tape dress form
 Reject Reason: Armadillo.
This is similar process to making a Duct Tape Double, but you’re using paper packing tape. The one shown is the type that you have to dampen to make it stick. I don’t know how strong that would be, so how form-fitting you can make it. But presumably there’ll be no sticky pins problem pinning into this.
But my main gripe is with the Armadillo look. Presumably the tape isn’t very flexible, so the edges sticks out where your body curves away. So No! on aesthetic ground.
Having said that…I just discovered a variation of the paper tape dress form that I might try next time, which is:
Not yet a Reject:
Connie Crawford’s hybrid paper tape dress form
Non-Reject Reason: I don’t want gummy pins.
This I found in my copy of her Pattern Making Made Easy book. The end results looks decent enough. I’m hoping paper tape won’t leave sticky residues on my pins, and will be easier to stick into than Big Bertha’s thick skin. Here’s a DVD sample on YouTube:
And some picture of the end result from the book…


But for now, Big Bertha will do.
I’ve invested too much to give her up. She’s my girl, thick skin and all.