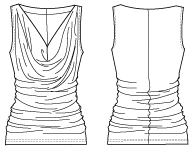
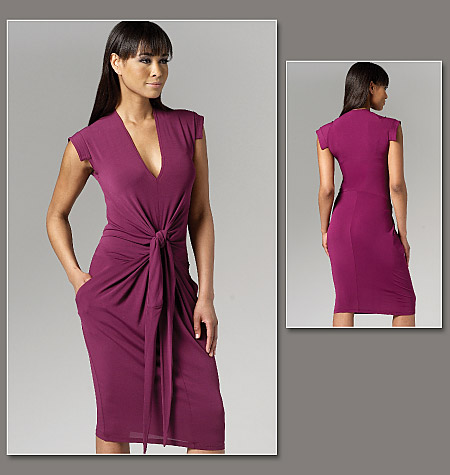
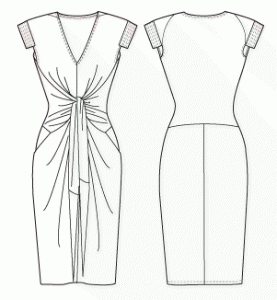
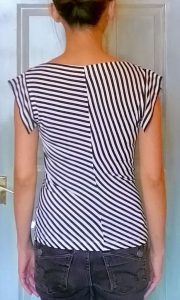
So let’s start with the Vivienne Westwoodesque top inspired by blogger Tia Dia’s vavavoom stripy dress version of Donna Karan Vogue Pattern 1282.
The Pattern
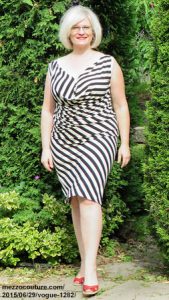
Tia Dia’s vavavoom V1282
Tia Dia’s decision to stick with the pattern’s grainline instruction while working with her stripes was genius. It’s so simple, yet the result is so much more interesting than even the Donna Karan original.
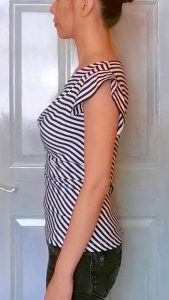
I also liked her idea of swapping the armhole facing/binding for an extended armhole edging/band/sleeve. I wanted mine even more extended, but wasn’t sure it’d be comfortable with extra fabric in the armpit. So I adapted the armhole band style of another designer Vogue Pattern – Vena Cava V1258 (which seems to have totally disappeared from the Vogue Patterns website!?!).
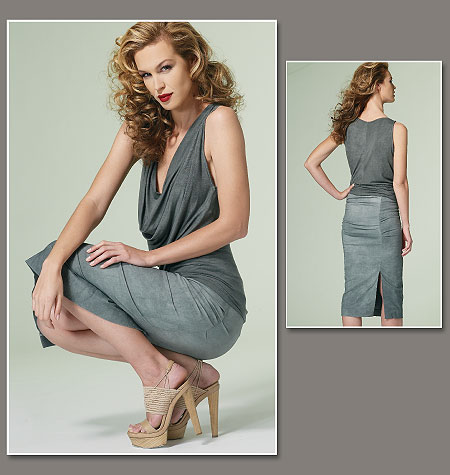
I actually made V1282 before, but I didn’t like how the result looked on me with my short-waisted inverted triangle shape, gravity compliant boobs, & age-compliant spreading middle. I think DK’s design would look better on the small busted or the hour-glass shape (which Tia Dia has). So this time I went back to the original pattern & made different adjustments to it. (So glad I trace pattern nowadays rather than wantonly chopped them up with the very first make!)
Style Shots & Mug Shots
WORN WITH: 1 Self-drafted mock-wrap pencil skirt; 2 Style Arc Antoinette trousers; 3 Self-drafted princess pencil skirt; 4 Refashioned A-line skirt; 5 Self-drafted pleated skirt
Size Used
Size 4 again – instead of the recommended size 12 & my current norm of FBA’ed size 8.
Changes Made
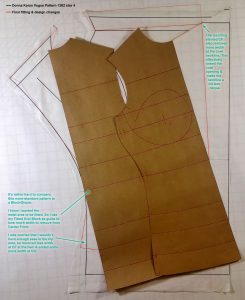
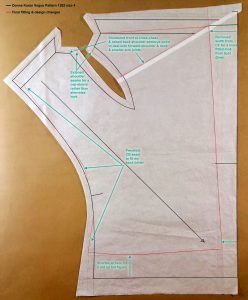
It’s rather hard to figure out how to assess & adjust these non-standard patterns that DK is so fond of. So there was a fair bit of making it up as I go along…
Fitting changes
- Forward Shoulder & Neck + Small Arm Joints (???): shortened front at cross-front level, made back shoulder more square (move shoulder-armscye point up/forward).
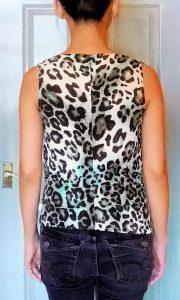
- Tweaked Center Back seam to better fit my shape: caved in at the top for rounded upper back, caved in at lower back, add with at hem for larger (than size 4) hip.
- Shorter Torso: shortened at the hem.
Design changes
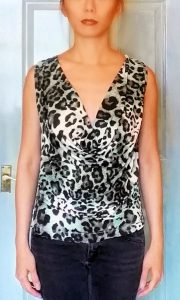
- Removed design ease from Center Front & raised cowl neckline in the process. I initially used the waist width as my guideline – I wanted the top to be fitted here – but ended up removing more at the top (neckline) & less at the hem. I was worried the hem would be too tight, but I didn’t mind removing more from the top because there were so much ease to begin with, plus doing so raised the cowl neckline further to minimise the risk of wardrobe malfunctioning! 🙂
- Widen shoulder for a cap sleeve rather than sleeveless look. Added strips of double-layered armhole bands except for about 3″ at the underarm, which was finished with facing/binding per V1282 instruction.
I originally wanted to incorporate some sort of asymmetrical side peplum as well by cutting a wedge off the right back below waist & somehow extending the left back below waist to form a peplum on the right hip. But my brain could not compute the pattern needed for this, especially when factoring in how this might affect the stripes. I was going to wing it during cutting out. And of course I totally forgot WHEN cutting out. Oh well, never mind.
Fabric & Notions Used
- Fabric: bamboo+lycra B&W stripe jersey from B&J Fabrics NYC.
- Notions: Vilene Bias Tape, So Sheer Fusible Interfacing.
- Tools: Walking Foot, Homemade Spray Starch.
Construction Notes
- See previous post about how I dealt with stripe matching in this PITA wiggly stripe fabric.
- Worried that this viscose will stretch lengthwise over time like other viscose knit I’ve worked with, I stablised the back neckline & the armholes with fusible interfacing.
 For the armhole, after stitching & turning the bands right-side out, the band was sewn right-sides together to the upper portion of the armhole first, then the facing/binding was sewn right-sides together to the underarm portion of the armhole – overlapping the bands slightly, the band is then pressed out while the facing/binding is pressed to the inside, the whole armhole is then top-stitched to secure the band seam allowance & facing/binding.
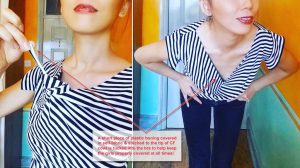 I replaced the weight at CF cowl tip with a boning stay that gets tucked into the bra to keep the cowl from gaping if I lean forward. This is just a short piece of plastic boning encased by self-fabric & one end sewn to the CF cowl tip. I read about this trick in Claire Shaeffer’s Couture Sewing Techniques. Some other blogger also used this trick but I can’t remember who it was damnit.
The Verdict
Much MUCH happier with this tweak of V1282! Feel much less dowdy in this version. And I like the mini-wings. Cute top. But still not sold on the B&W stripes as my aesthetic has become much more Crayola with age 🙂




Handloom sarees best online shopping sites is handloomsareeshop.com.Handloom saree shop is doing sales new generation handloom saree.
Handloom saree shop provides the latest stylish saree.We have a huge collection of handloom sarees with the latest design.Quick Look and Learn About Us.
All these clothes have the unique design and perfect to wear on regular occasion. Thanks for sharing.
You are obviously way more of a fit perfectionist than me, I’d have been more than happy with the original top! That said, top 2 looks fabulous in a stripe and I like the sleeve tab things on it too.
Another fabulous post. I too have both these patterns. You are so hard on yourself btw, looking gooood!
I love it! I have both these patterns already, so may just have to copy your idea 🙂
I like your take on the sleeves. I’ve used that CF boning stay a couple of times, too. Very useful idea!
I thought it was you! But I couldn’t find the posts where you mentioned the boning stay.
love the “mini wings” as you call them… I think I prefer the top with them – looks much more balanced to me
fabulous, I love it. Brilliant tailoring and those stripes are so effective, I think the cap sleeve really adds to it