Breton Odyssey Adrift

My quest for Raglan & Semi-Fitted variations to my Fitted Breton T wasn’t quite the smooth sailing that I had hoped. While not Titanic disasters, they have not delivered me to safe design harbors yet. So I see more fussing with fit ahead.

The Raglan Experiment

Mug Shots & Style Shots

What went wrong

The muslin is wearable, but the position of the raglan seams just look wrong. Unbalanced as the GBSB judges might have said. And the armholes feel a bit tight. There’s also a bit more drape underarm than I would have liked.

I think the problem stems from trying to follow standard flat-pattern design drafting instruction using my non-standard Blocks. Sometimes the steps are just impossible to follow once you’ve altered your Basic Blocks to fit your figure quirks.

I first tried Stretch Pattern School’s instruction for Raglan Sleeve. But I failed at step 3. I couldn’t get the corresponding raglan seamlines to be the same lengths. So I gave up and tried the instruction in Designing and Patternmaking for Stretch Fabrics instead.

This instruction was just about possible to achieve with my wonky Blocks. But the result, as I said, wasn’t perfect. I’m wondering if its approach of disregarding any overlap of the sleeve head and bodice at the armscye-shoulder area might have contributed to the armscye tightness – ie the raglan seam ended up too short and drew the underarm closer to the body than the set-in sleeve original. Maybe it’s an approach that’d work better with looser fitting Blocks.

The Semi-Fitted Experiment

Mug Shots & Style Shots

What went wrong

Again the muslin is wearable, but I don’t like how the back is loose until it hits my hip. And it’s not that the hem is too tight for my hip. The hip actually has 2-1/2″ of ease. Releasing the side seams I discovered that it’s in fact the shaped waist that’s the culprit. Instead of letting the back fall straight from the shoulder blades to the hip, it pulls the back in slightly under the blades. The ease added gave the back a loose fit until it hits where the bum protrudes out more. Then it goes into skim the bum mode. A very weird look indeed.

If I shorten the top to above this point, then problem solved. But with the looser fit I kind of prefer a longer length so that the width doesn’t stand out more than the length. I reckon if I let out the waist about 1″ at each side seam then I’ll get the smoother loose fit I want in the back.

The other problem I discovered are slight draglines pointing to the neck-shoulder points, as if the shoulder slope is too shallow. I then check the Fitted Breton T muslin I just made, it too has the same draglines, but just not as noticeable. Urgh.

Where next…

If I weren’t planning to design from these Blocks I might let these minor imperfections slide. But because I do want to get more creative with them, I don’t want those imperfections to multiply and amplify. So I will have to go back and fix these.

But I think I will abandon my original plan to go immediately into production mode with the Breton Ts. I’m feeling a bit seaksick after three wearable muslins in the same stripy knit. Time to disembark and head ashore for a change of scenery me thinks…
Dartless Knit Top Block Take 2

As I was saying, I’ve been messing with my Knit Top Block again. I was trying to get dartless to work so I can make Breton tops and hopefully have stripes that match well across seams. Bust darts just seem like they would get in the way.

So let’s cut to the chase & show you the result. No point getting into the nitty gritty if this turns out duds right? 🙂

Mug Shots & Style Shots


Well I’m pretty happy with the result. The front armscye needs tweaking. But overall this muslin turned out quite wearable. So here’s how I got from A to B…

The Nitty Gritty

sps_top_2-SLPattern Voodoooing

Remember my last attempt at Dartless Knit Top by distributing the bust ease into multiple places (like I did for the woven Tunic Block)? Well, I slept on it and thought maybe the problem is that there isn’t a smooth way to hide the excess without the darts. So maybe I should go the other way: Instead of having excess length at the seams to ease in, maybe I should make the seam lines the finished lengths I want and use the fabric stretch to accommodate the girls. So how do I go about this?

Firstly I decide to use the 0-ease Stable Knit Top Block as the starting point for a couple of reasons…

  • I reckon that this process will probably result in a reduction in the front bust width. If I start with the 12% reduction of the Stretchy Knit Top Block then I might be asking the fabric to stretch too much. By starting with 0% reduction I hoped I could stay within the overall 12% reduction limit for a good fit without much unsightly distortion.
  • I decided that even for stretchy fabrics I would prefer a skimming rather than a tight silhouette. Fact is even I have Michelin Man rolls with a standard bra on, especially in the back. Until I find foundation garments that smooth the silhouette without choking me I would rather not draw attention to my rolls.

Next it took me 3 attempts to get to B.

  1. I first tried Maria Denmark’s old Knit dartless FBA approach of taping up the dart, smooching the bust mound, then attempting to trace the outline.But the method adds width at the CF hem while reducing the bust width more than my max 12% target. So I abandon this approach. (Just found out that she had updated her approach to removing the dart for a knit top. It seems simpler. But I haven’t tested it and there is no result photo, so it’s hard to tell how well it works.)
  2. My second attempt used the Seam alteration method from Fitting & Pattern Alteration. Yeah yeah it’s meant for altering ill-fitting patterns to fit, not to alter a good-fitting pattern to do something else. But nothing ventured nothing gained! I wanted to know if it’s even possible to re-shape my seam lines as I planned. It did sort of worked. But because I had used flimsy tissue paper for this exercise, the resulting pattern was a bit distorted and not usable.
  3. So my final attempt was to redo attempt 2 without all those distorted hanging chads. This time I used the Pivot/Slide alteration method from Fitting & Pattern Alteration, but pivoted at more points rather than just at corners. It worked. And I manage to get the front & back side seams to be the same length vertically as well (rather than just at the seam line) for stripe matching.

For the sleeve, I also redid the bit below the bicep so that it’s symmetrical (rather than leaving it tilting towards the front to accommodate the way my arms hang). This was necessary for stripe matching across the sleeve seam. I reckon the stretch fabric would be accommodating enough for my twisted arms.

Les Tweaks

I then muslined this with my least favorite strippy knit. This is Viscose/Cotton/5% Lycra Stripe Jersey from Tissu Fabrics with 50%H/35%V stretch. It’s OK, but not as soft as the Bamboo stripe jerseys I got from B&J Fabrics. So no tears if this experiment didn’t work out.

Much to my delight the muslin was pretty good right off the bat. The only thing needing adjustment was how the sleeve hang:

  1. the stripe in the sleeve caps were tilting up towards the back;
  2. the whole armholes were tilting towards the back as if my posture was too erect.

For A I decided to adjust the pitch and live with mis-matched seam intersection at the arm pit. I think this is the less of the two evils because it’s less visible. It does mean that I can’t sew the sleeves in the flat – I’d have to set the sleeve in after sleeve seams & side seams have been sewn.

For B since the muslin was already cut with 1/2″ seam allowance I could only increase the cross-back & decrease the cross-front by 1/4″. So the wearable muslin shown above is the result. The back armsyce seems OK now. The front I think could do with further reduction in cross-front, with the removed amount added to the corresponding area of the sleeve cap. And that is what I’m doing for my final Dartless Fitted Knit Top Block.

Caveats

Next up, deriving & testing a Raglan Sleeve version and a Semi-Fitted version. I will also need to test this pattern again in other stretch fabrics in case I was just lucky with this fabric choice. I’ve noticed that the cotton/rayon + spandex knits I’ve used for Breton Tops have generally been better at molding to my shape than the pure synthetic knits. So I’m fairly optimistic that this Block will work as master pattern for my Breton Top collection. But whether it works as a general Dartless Knit Top Block is yet to be proven.

Also, the size of my bust dart in my Darted Knit Top Block is approx. 20° in angle & I’m a pseudo-D-cup. So if you have a larger bust this approach might not work well for you – you may still be better off retaining a bust dart of some sort.

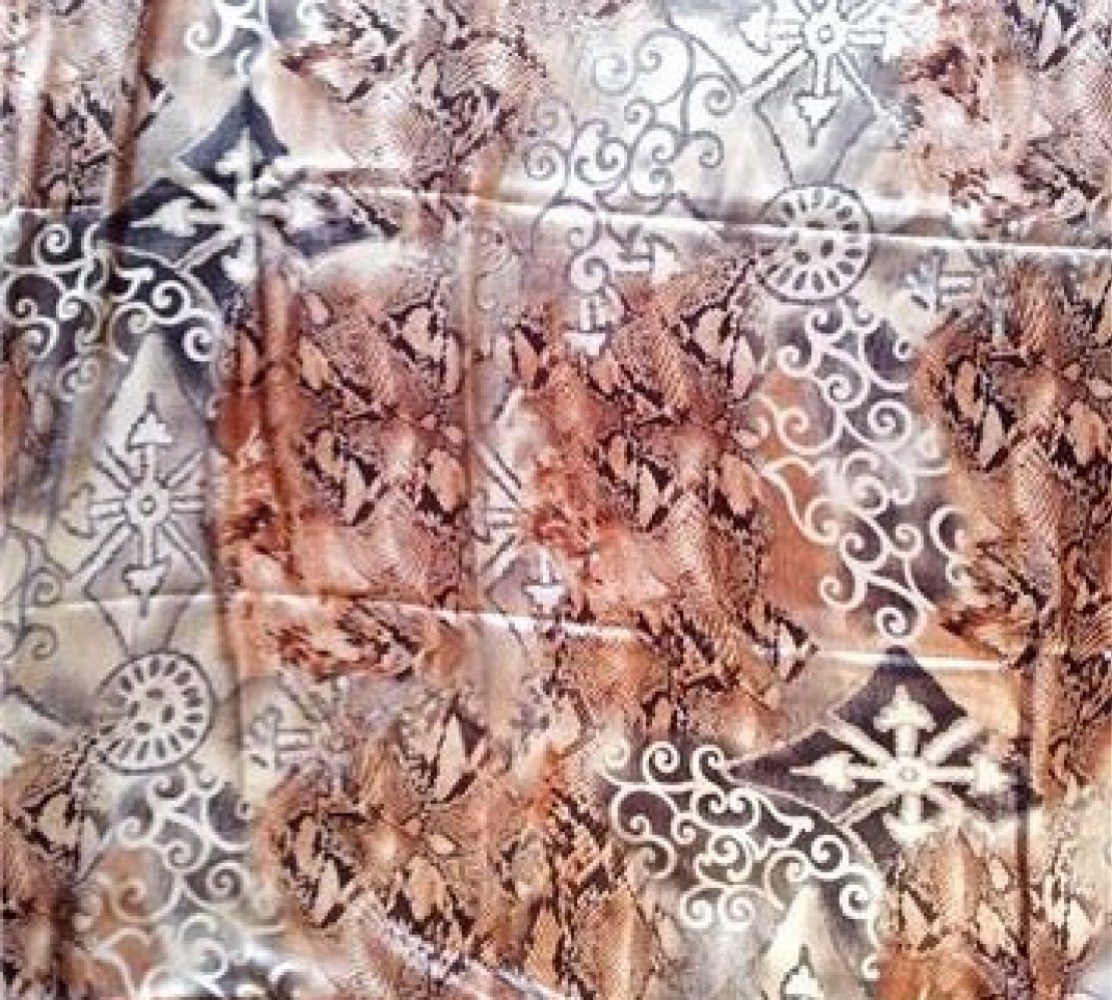
D&G Wannabe Python cardi

This one did make it to the party. It almost didn’t. I was still sewing the buttonholes at the eleventh hour. And this isn’t even like the Great British Sewing Bee. I had a whole month, not a meager couple of days for 3 projects. Again this should have been an easy make. But things didn’t go according to plan as I was trying new techniques that didn’t quite pan out.

Style Shots & Mug Shots

WORN WITH: 1 Burda 2011-08-121 skirt; 2 Burda 2012-05-113 skirt; 3 Altered Victoria Secret dress; 4 TopShop Martha jeans; 5 Modified Burda 2012-04-128 camisoleSelf-drafted skirt.

The Design & Pattern

Dolce & Gabbana cardi featured in Vogue US This one is a double agent: It’s a wearable muslin for all the cardis I planned to sew. But I’ve also wanted to make a feature panel cardi ever since I clipped this inspiration photo from Vogue US. Didn’t realized at the time that it’s a Dolce & Gabbana design. So it’s only incidentally a designer wannabe.

Block Used:

Stable Knit Fitted Top Block (Bodice & Sleeve)
Drafted using Stretch Pattern School’s One-Piece Swimwear + Tankini + Sleeve  instructions using 0% negative ease. Note that the Tankini instruction does add a little bit of ease to the waist and hip. So this block does already have positive ease there.

Design Changes Made

1-pat

  • Added extra ease to CF & CB, side seam, sleeve seam because this is suppose to go over other tops so can’t be too tight.
  • Lowered underarm slightly for the same reason.
  • Lopped off necklines & CF where I’m going to use binding for neck band & button placket.
  • Lopped off lower portions of bodices & sleeve where I’m going to use cuff ribbing.
  • Neck band & button plackets are rectangular binding pieces. They’re double layered with the fold at the neck / CF edge. The neck band length is length of the folded neck edge stretched at the seamed edge to match the bodice necklines to ensure that it’ll lie flat & smooth.
  • Bodice & sleeve cuff ribbing were originally going to be rectangular pieces as well. But I didn’t have matching ribbing fabric and my experiment with mock ribbing (see below) didn’t work. So I had to draft shaped bands instead. They’re also double layered with the fold at the bottom edge. I reduced the width a little bit to simulate the snug fit of real ribbing.

Things I’d do differently next time

  • I went waist length with the feature panel instead of the longer length in the inspiration because I thought blouson lower down wouldn’t work with my shortness & short-waistness. But as my mock ribbing idea didn’t work I think I might have gotten a better result if I had abandoned the blouson cardi idea and just made a fitted cardi top with the bottom band as a design feature.
  • 2-sew-details-3For this make I kept the bust dart. The font bodice is a layer of the thinner / drapier / stretchier New World Snake over a layer of the thicker / stiffer / less stretch Snake Bite Bandage. I was worried that the top layer might sag over time. So I sandwiched the dart seam allowances between the layers and tacked along the dart leg as extra insurance against downward migration of the New World Snake. Although my recent experiment with dartless stretch block didn’t work I might try again and see if I can get a dartless block for the other cardis.
  • I might also add more ease to the bodice & sleeve where they join the cuff ribbing for a more visible blouson effect. Otherwise the seam allowance shows through and the seam just look like a cutting mistake – like I cut them too short and had to patch with a band.

Fabric & Notions Used

Construction Notes

  • 2-sew-details-1I had hoped the mock ribbing technique that the Sewing Diva tried and described in details in Threads issue #64 Apr-May 1996 would work for me too. So that I can make sweaters & cardis from more variety of fabrics without having to find matching ribbing. But mine came out really stiff. Too stiff even to use single layer, which I wouldn’t want to anyway as it’s made with parallel rows of twin-needle stitches, so the back side has threads that could easily be snagged. It also curls up if left single layer. Maybe my fabric which is mid-weight like ponte is too thick for this technique. Maybe it would work for thinner, drapier knits. In any case, I had to switch to plain bands. And I think I will have to abandon the cardi idea for my SWAP blue sweater knit because it’s again a bit thick and stiff already. And I don’t have a matching ribbing.
  • I’ll have to rethink the construction order as well. A couple of areas were made more difficult to stitch because I went on auto-pilot:
    • I couldn’t figure out how to top-stitch the cuff seam allowance to the sleeve after the sleeve has been sewn together. The Walking Foot that I rely on to make sewing knit easier is really bulky, so can’t handle the claustrophobic narrow sleeve. So I didn’t top-stitch any of the cuffs & bindings. Hopefully the seam allowances won’t flip the wrong way and create unsightly ridges.
    • 2-sew-details-2I couldn’t use my machine’s one-step buttonhole this time because once the placket/binding was sewn to the front bodice & the seam allowance hidden in the placket, it became too uneven layer-wise for the one-step buttonholer to feel its way around where to start & stop. I had to resort to manual buttonholing with zig-zag stitches. The result wasn’t pretty.
  • The button spacing on this one wasn’t ideal because I was one button short. If this snake didn’t have a party to catch I would have waited until I can find another set of suitable buttons. As it is, the CF gap a little at crucial points like bust & waist, especially when I move.

The Verdict

Despite the warts I still quite like the result. Definitely worth making again with tweaks.

Stretch Pattern School Block Experiments

Before I show you the next snake I need to show you the Block it’s based on. This is like my Nth experiment to come up with a dependable Knit Top Block. I’ve tried:

The problem is that I didn’t really know what I was doing. And with so much variation in stretch fabrics, one minute I think I got it the next I get a wadder when I try to design from it. So my quest continues. And (Stretch) Pattern School website impresses with the theory, the background info, and the clear drafting instructions. So I thought it’s worth a try.

2020-07-20 update: GREAT NEWS! Mr Anderson is back from retirement with his (Stretch) Pattern School 2.0! I haven’t explored it in details yet, but he says the info has been updated to reflect latest developments in swim / dancewear technology. Unfortunately the free auto-generated custom block feature is gone because the company that host the new website doesn’t offer such sophisticated programming options. But there is now a Pattern & Block Shop for RTW designers & interested home-sewers. Presumably this will be standardised sizing rather than custom based on your measurements, but certainly better than nothing! There’s also a Pattern School Online Facebook group & he’s also on Instagram (pattern.school.online) if you want to get latest updates from him. Have fun!

2017-05-19 update: The Pattern School website is no longer available online, but Mr Anderson is still extremely protective of his copyrights. So to avoid lawsuits absolutely no sharing of his content if you saved pages for your own personal reference. Hopefully my report below on my experiment using his method does not constitute an infringement of his copyrights.

If you’re looking to draft your own stretch block you will have to look elsewhere for instruction. This method is no longer an option.

Since part of the fun of writing sewing blog is the sharing of experience, I’m going to look into replacing this set of blocks with one drafted from instructions that are still publicly available. Then hopefully when I design from my stretch blocks then you too can learn to create & design with your own stretch blocks. I’m thinking maybe Pattern Cutting for Lingerie, Beachwear and Leisurewear by Ann Haggar…or go back to Designing and Patternmaking For Stretch Fabrics since I’m not really looking for swimwear blocks. I may also experiment with adapting my 0-ease woven blocks – either my Kenneth King moulage or my body wraps.

If you’re looking to enter the swimwear design field & can expense professional books & subscriptions, maybe try Intimate Apparel Journal (ia-technical.com) website. They have articles on “Introduction to Swimwear Pattern Cutting Principles” & “Grading Swimwearavailable at $19.90 each. Or you can buy a subscription which costs $299/yr for verified students or $399/yr for professionals (4 issues/yr). Their shop also offers past issues of the IA Journal, special-topic compilations, or individual articles for purchase. The site is run by a Hong Kong professor with experience in the intimate apparel industry. But the above articles are written by David Morris, a British technical designer who worked for well-known intimate apparels brands & also taught at university level in the UK. David also runs Intimate Apparel Technical website (iatechnical.com) which offers a remote learning course on Swimwear Pattern Cutting & Grading for £250.)

Both are above my pay grade since I’m only sewing for myself, so I can’t comment on whether either professional sources are worthwhile. But I may just pay for an article or two from the Hong Kong site to learn the basic principles again from a publicly available source.

Anyway, back to the experiment. For not all theories works for everyone all the time. Theories need to be tested, especially when it comes to anything to do with infinitely variable human beings!

The Theory

For this experiment I tried Stretch Pattern School’s pattern drafting instruction for…

  1. One-Piece Swimwear Block for Stretchy Knit (75%+ stretch, 12% horizontal/0% vertical negative ease)
  2. Tankini Top Pattern based on 1 + variation for Stable Knit (0%/0% negative ease)
  3. Set-In Sleeve Block for Stretchy Knit

supplemented by

The Findings

One-Piece Swimwear Block (12%/0% negative ease)

(Made with Matt Lycra from Tissu Fabrics / Tia Knight with 40%H/40%V stretch)

The first muslin came out quite well. But there were a few small issues…

  1. My Front side seam came out longer than the corresponding Back side seam, even with the dart.
  2. There are some sway-back type draglines in the back.
  3. I got some draglines underarm and gapping in the armholes.
  4. The front neck chokes a bit.
  5. The crotch is a mess. My front gusset length came out longer than the Back.

1-pat1-1pHaving worked out what my key figure quirks through fitting wovens, I applied the advice from the Tweaking for Larger Sizes page for Front/Back Waist Issues and The Bigger Bust. Shifting the side seam towards the back at the waist solved #1 and mitigated #2.

Adjusting for sloping shoulder helped with #3. And forward head adjustment (raising back neckline & lowering front neckline) helped with #4.

#5 I haven’t solved yet. Not having sewn such garment before I don’t know if one has to insert the leg elastics first before one can check the crotch fit. It might also be possible that I have the “in thigh” figure quirk mentioned on the Tweaking for Larger Sizes page. Or the fact that I’ve put 4 big snaps in the gusset seam as temporary closure. In any case swimwear / bodysuit isn’t a priority, so I’m leaving this alone for now.

But I think in general wherever the instruction calls for “X cm +/-Y mm per size from size 10” it would be wise to check if the relevant Australian size 10 measurement he used matches yours. Eg going by the AUS size 10 measurement the front gusset length is in fact 0.5cm shorter than the back. I had calculated my back gusset length using the Wais-to-Waist (crotch length) and Waist-to-Crotch (crotch depth) measurements. But the front gusset length wasn’t given as a formula, so it came out longer than my back gusset length! Shortening this to back gusset length minus 0.5cm helped with #2 and #5 a bit.

Made with Matt Lycra from Tissu Fabrics / Tia Knight with 40%H/40%V stretch.

Tankini Top Patterns  + Sleeve Block

If this works it will become my new Fitted Knit Top Block. I’m hoping to have a set for

  • Stretchy Knits with 70+% stretch (12% negative ease)
  • Moderate Knits with 40-70% stretch (6% negative ease)
  • Stable Knits with 10-40% stretch (0% negative ease)

I used my adjusted One-Piece Swimwear Block as the starting point. Since I’m not making a tankini, I only followed steps 4-5, adding ease from bustline downward & shaping the hemline. I extended the hemline down to the One-Piece Block’s hip line, then superimposed my woven Pencil Skirt Block to mark where my high hip and hip levels are. These two are the most likely hemline references for tops I’d want to design from the block.

I drafted patterns for all three types of knit and muslined the Stretchy Knit and Stable Knit version. Both came out OK I think…

Stretchy: Made with Matt Lycra from Tissu Fabrics / Tia Knight with 40%H/40%V stretch.
Stable: Made with Shimmer Jersey from Minerva Crafts with 10%H/5%V stretch.

The bust dart on the Stable Knit version seems too high up. But the bustlines are exactly the same level on both version. Maybe the almost non-existent vertical stretch of my worst case scenario ‘Stable Knit’ test fabric is at fault. And to be honest I think I will avoid making fitted stretch tops out of such minimum stretch fabrics and instead use my Moulage with darts / princess seams for shaping and the minimum stretch for wearing ease.

The sleeve I only muslined for the Stretchy Knit. It came out rather long! Also the default instruction doesn’t cater for my twisted arms. I shortened the sleeve & shifted some width at bicep / underarm from front to back and at wrist from back to front. So now it looks asymmetrical like my woven Sleeve Blocks but feels more comfortable.

Going Dartless

1-pat3-top-dartlessFailThe holy grail of knit block of course is the dartless yet smooth fitted T for the busty gal. Is it possible? Stuart advise against it. So does the book I have on pattern drafting for stretch fabrics. But then in the Tankini instruction he did ofter the option of easing the dart into back side seam…provided that you also include a shelf bra which does have a bust dart.

Naughty me thought I’d try my luck and see if I can pivot out the dart here like I did for the woven Tunic Block. The result wasn’t pretty…

Made with Matt Lycra from Tissu Fabrics / Tia Knight with 40%H/40%V stretch.

Maybe it’s the fabric. I might try again with a stretchier and/or heavier weight spandex knit. But for now I will work with the dart and try to incorporated the shaping into the designs rather than risk crow feet around my bust!

From MMM to SPS by way of Nettie!

2015-04-27 update: I had to remove all the links in this post to the Web Archive version of Stretch Pattern School. Someone obviously bought the URL and is trying to make money from all the residual traffic for the site. It doesn’t seem right to let some greedy stranger profit from Mr Anderson’s benevolent effort.

As everyone know, it’s Me Made May. And I was tempted, but chickened out at the last minutes. If I were to wear every single me-made piece that I still own, then I might just about make it. But many are too summery for London at any time of the year, let alone this year’s unseasonably chilly May.

It did get me thinking about what I should make next / more of though. I have the woven top / dress & skirt blocks sorted, though I’m still missing sleeve block. But what I’ve been wearing more often are the knit Me Mades, especially the sleeved tops. And RTW jeans. Well there’s fat chance of me tackling the pants block any time soon. So I’m back to fiddling with my Fitted T-Shirt Block.

bs201209123mod1_4style_8Nope, the last version wasn’t perfect. The warts came out when I try to tinker with the design (from long to short sleeve). And that was like Take 5. (I obviously have infinite patience some things if not everything.) So at the moment I’m fiddling with Take 6. When I sort out Take 6 I’ll recap the attempts & hopefully include the result mug shots. (I find it quite frustrating to get fitting alteration advice that don’t come with photos of the results on real people. Drawings lie! Theories are not enough. I need proof that they work on at least some people if not every figure type out there.)

But in the meanwhile, Take 6 made me realize that I might have to live with the lower back puddle (also popularly known as ‘sway back’ wrinkles, though I’m not sure if I really have a sway back). Especially with a back that doesn’t have CB seam – which covers most T-shirt designs. Making the hip wider has no effect. Nor does shortening the CB in any fashion – the hem at CB just rides up. In fact, the only time the puddle temporarily goes away is if the hip is tighter and hem long enough to grab my hip / butt.

Nettie!

Nettie!

That got me thinking that maybe I should jump on the bodysuit craze started by Nettie.

(Actually, if my memory serves me, it was Donna Karan who first popularized bodysuit as normal wear in the 80s, and made them with crotch snaps so trips to the Ladies wasn’t a PITA. She also did hybrid blouson top with bodysuit bottom. How cool is that?)

Donna Karan 1980s bodysuitsDK Vogue Patterns 1961DK Vogue Pattern 2092

So, why bodysuit? The hypothesis being that adding the pants bit will pull the back down so it’s less likely to ride up and puddle. And this note on Stretch Pattern School kind of implies that, to me at least…

“…all tankinis will rise over time given the chance and there’s nothing you can do to stop it definitively…”

And speaking of Stretch Pattern School, I wonder if I should Nettie it or draft my own following the free instruction on Stretch Pattern School. I had initially dismissed the SPS patterns as they’re for swimwear & dancewear, neither of which I’d use often enough. Now I’m thinking maybe I should give it a go.

one-piece-patterns

Nettie would be more convenient – as I have relatively average figure, I think it might work without modification. But SPS would give me a Block + teach me how to make design & fitting changes properly. So I’m slightly more inclined towards SPS.

BTW, Stuart, the author / designer / patternmaker / teacher behind Stretch Pattern School seem to have retired & taken his website down. But you can still find a copy of most of the pages at Way Back Machine. The Lazy Person’s section probably doesn’t work anymore since the softwear generating the block for you probably is offline now. Also, Way Back Machine doesn’t seem to save complete version of the pages every time it checked the site. So if illustrations are missing (and Stuart does give step-by-step illustrated instruction for most patterns) use calendar back arrow at the top in the Way Back Machine box to go to an earlier version of the page. Usually you’ll eventually get to a version with the illustrations.

But the website was definitely worth a visit. There’s so much little gem of info there, some of which goes over my head at the moment – like all that jazz about tension lines! Other tidbits are fascinating, especially in light of complaints about ready-made stretch patterns not fitting. You’d think that they would be more forgiving. But Stuart points out that amount of horizontal negative ease in the pattern affects how many people the pattern will fit within each size. Also that as the size goes up, so does the variation in body shape. And that based on the data people entered into his website, he found more Australian size 6-10 B-cups getting breast implants than other sizes, which is an issue for pattern designers as implants affect the fit. And with C up and above, a dart, or at least some easing/gathering would be needed, even in stretch fabrics, because the fabric will try to stretch evenly / even out the tension. Otherwise you’d get ripples. There’s also a fascinating page on tweaking for larger sizes and/or different body shapes. Plus maternity block instruction for Mommies-In-Waiting!

It’s a shame Stuart didn’t consolidate his website into an Ebook before taking the site down. I’m sure I’m not the only one who’d buy a copy!