Not much interesting sewing happening here lately. I still feel exhausted & low from last two years’ craziness. To keep Meaning-Of-Life questions at bay, I tried to keep myself distracted by replacing boring basics in the wardrobe & made a bunch of easy-ish T-shirts that refine my stretch blocks.
This is a straight replacement for a couple of RTW Ts that I wore to death. The pattern is essentially my Camden Town Kids Wannabe top minus the puff over-sleeves & the funky hem. I also tighten up a bit at the side seams since the cotton (+lycra?) knit I used for this version moulds to the body better, so can take on a body-con shape without draglines – unlike the totally artificial fibre fabric I used for the previous top.
For the shawl collar I used V2980 as a guide to shaping the pattern using my own Blocks. I cut the collar as an extension to the back piece rather than a separate piece – my fabric stinginess won the day again! But I ended up having to stabilise (with bias tape) & stitch down the facing side of the collar extension along what would have been the shoulder-neckline seam. 6 vs half-dozen blah blah [roll eyes].
As for the shawl pleating at the side seams, I tried to minimise bulk by pleating only the top layer (ie not the facing layer).
Like my take on V2980 I again added a shelf bra (this time with double layer of stretch net), with elastics at both the bottom of the shelf bra & its seam with the front neckline.
The initial result was a bit disappointing. The main problem was a gapping front neckline: I didn’t account for hollow at the chest that affects the fit of a lowered neckline. I also ended the shawl pleating too high up at the side seams. This resulted in the pleating being barely visible & the shawl not overlapping the front neckline enough, thus exacerbating the wide gapping neckline problem. To fix this I tried redoing the armscye – side seam: I narrowed the front neckline (cross-front width) slightly at the armhole, and reduced the depths of the pleats a bit so the shawl can end lower at the side seams (bustline now). It’s a bit better now. But I’m still not 100% sure I’ve cracked this silhouette.
3. Strappy T
Self-drafted Strappy T
This – along with a matching skirt – was actually an afterthought tagged on while making T #6 below. But as it’s based on the set-in sleeve block let’s talk about it first. It started with liking the fabric swatch combination. Unfortunately the result didn’t turn out like my doodle promised. The contrast band end up more wrinkly than planned. And my short straight figure just doesn’t do my doodle any justice. Last but not least, my attempt at built-in bust support with a darted shelf bra (as suggested by defunct Pattern School instruction for a Tankini) left an unsightly visible seaming bump. So a bit meh.
This 2-bird 1-stone T attempted to use up the last scrap of cotton (+lycra?) knit from 1 above & retest my tweaked Raglan Dartless Knit Block at the same time (Test 3 in my previous Raglan Knit Block post). I had problem with the armholes feeling too tight – riding up against the armpit – despite the Block being derived from a set-in sleeve version which fitted fine. So I tried simply lowering the armpit a little bit. It’s been a while since I made the tweak, so I wanted to test the fit again in this forgiving cotton knit. No luck. Wearable, but the armpit is still a tad too close for comfort & the bodice still rides up slightly. The neckline is also a bit smaller – sit higher than I thought it would.
It’s good enough to wear, but not successful enough to make again.
5. Tweaked again Raglan T muslin 1
Self-drafted Gothic Raglan T
This time I tried adding length to both the raglan bodice & sleeve about mid-way up the armscye. This does seem to work better comfort-wise. But as the fabric I’ve used for this one – thin cotton jersey & lightweight power mesh – are both quite stretchy anyway, I won’t call this tweak a success just yet.
Exact same pattern as T #5 above. Wanted to test the pattern on a different knit. This time a less malleable artificial fibre knit. The very same fabric I’ve made a raglan T in before – Burda 2010-02-112. I got way too much of this fabric that was on sale, & that older raglan T is getting a bit tatty. Just the chance to replace & test my tweaked Raglan Block at the same time. Gosh I love my 2-4-1s!!!
To jazz this up I again turned to gold stamping/painting Queen B on the back, swarm of worker bees on the front, & barcodes at the wrists. Unfortunately my initial attempt resulted in a poorly positioned worker bee on the front bodice. For a moment I thought I’d just own it like a proper feminist should. But I chickened out & invited more bees to disguised the mistake. I don’t like the resulting mess of a print as much, but hopefully it’ll make the T more wearable.
Now on to the me-made bit in the outfit – the Choli Blouse… This is actually quite a simple top. Many choli blouses are. The most labour-intensive bit is in the embellishment. So after finishing the custom embroidery, I kind of lost interest, which made the simple blouse construction excruciatingly slow.
To recap, the outfit I bought was a copy. So while the blouse fabrics & trim supplied do match the skirt, they don’t look like the original design I wanted. I decided to make a blouse from scratch so I can incorporate as much of the original embellishment design as possible.
Original Gajiwala 7384 design
What I bought – details
I kept the front pretty simple & scale back the amount of embroidery because I wasn’t sure I can manage even just the hem & neckline borders.
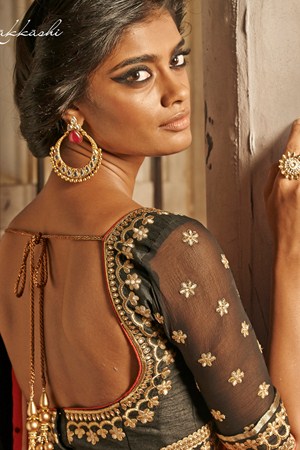
There wasn’t any photo of the back, so I took inspiration from other designs I liked & went for a basic U-neck that’s as open & deep as the bra I was going to wear would allow, with tasselled cord ties at upper back.
I debated whether to keep the sleeves see-through like in the original design or use the same opaque fabric as the bodice. I went with opaque because I thought I might want to wear the top as a vest over something like La Chemise, in keeping with the cooler London climate. It sort of half worked: On the plus side, it hid the messy underbelly of my embroidery. On the down side, my top turned out a bit on the tight side, so I’m not sure how practical – or visually pleasing – it would be to wear this as a vest over something else.
Pivoted front darts to create Front Armhole Princess Seams. (I really should sort out my Princess Seam Blocks.)
Picked a fight with gravity by moving the Bust Points up a bit & closer together for a fuller look.
Pivoted back darts to create smaller Back Waist Darts that won’t disrupt the embroidery design much.
Shortened bodice & sleeves for a cropped top with short sleeve.
Lowered neckline per design & pivoted out about 3/16″ per side (3/4″ total) from the neckline to pre-empt any gaps opening up on drastic lowering of the neckline.
Made the sleeve cap more shallow & wider at the top for better arm movement.
Added 3-sets of bra strap/band retainers – at the shoulder, further down the back straps, & near the CB opening.
Added placket beneath the butted CB opening which fasten with bra hooks & eyes.
Added detachable underarm sweat guard to help prevent sweat stains on the diva silk fashion fabric.
Well, it wasn’t a great success, despite a fitting muslin being made for a change.
The raised bust line didn’t fit very well. Gravity won this round. My bra was no match for it. It also didn’t help that I had to wash the fabric after I finished the embroidery (I had some hay fever sneezing fits while doing the embroidery). The washing or the pressing afterwards shrunk the embroidered neckline, which then pull the whole top up a bit further. Slight draglines above the bust was the result. Thankfully the blingy necklaces & shawl hid these draglines on The Day!
The whole thing is a bit tighter than planned. I always forget the extra ease needed to accommodate the innards – eg lining, interfacing, bumpy underbelly of couched embroidery. A fitting muslin is no help in this case – unless you include the extra layers in your muslin as well. The shrunken embroidery mentioned above no doubt made it worse. So I’m glad I didn’t aim for Bridezilla Second Skin Look in the first place!
And finally & most importantly, my draft failed the only test that matters when it comes to a Choli Blouse: I can’t bust out any ‘Screw In The Lightbulb’ Bollywood dance moves in this! The sleeves are still veering towards restrictive tailored fit. Me bad for not checking this in the fitting muslin – I only checked for standing still fit & lounging around comfort. Good thing no dance off was planned for the post-ceremony luncheon!
So the hunt for a TNT Choli Blouse pattern continues.
Fabric & Notions Used
There were a lot more bought than used. It was impossible to find supplies that come close to the inspiration photo & match the skirt. I never knew there were so many different shades of gold & types of metallic threads! So the Stash got a feast in the process…
And here’s the list of what I ended up using…
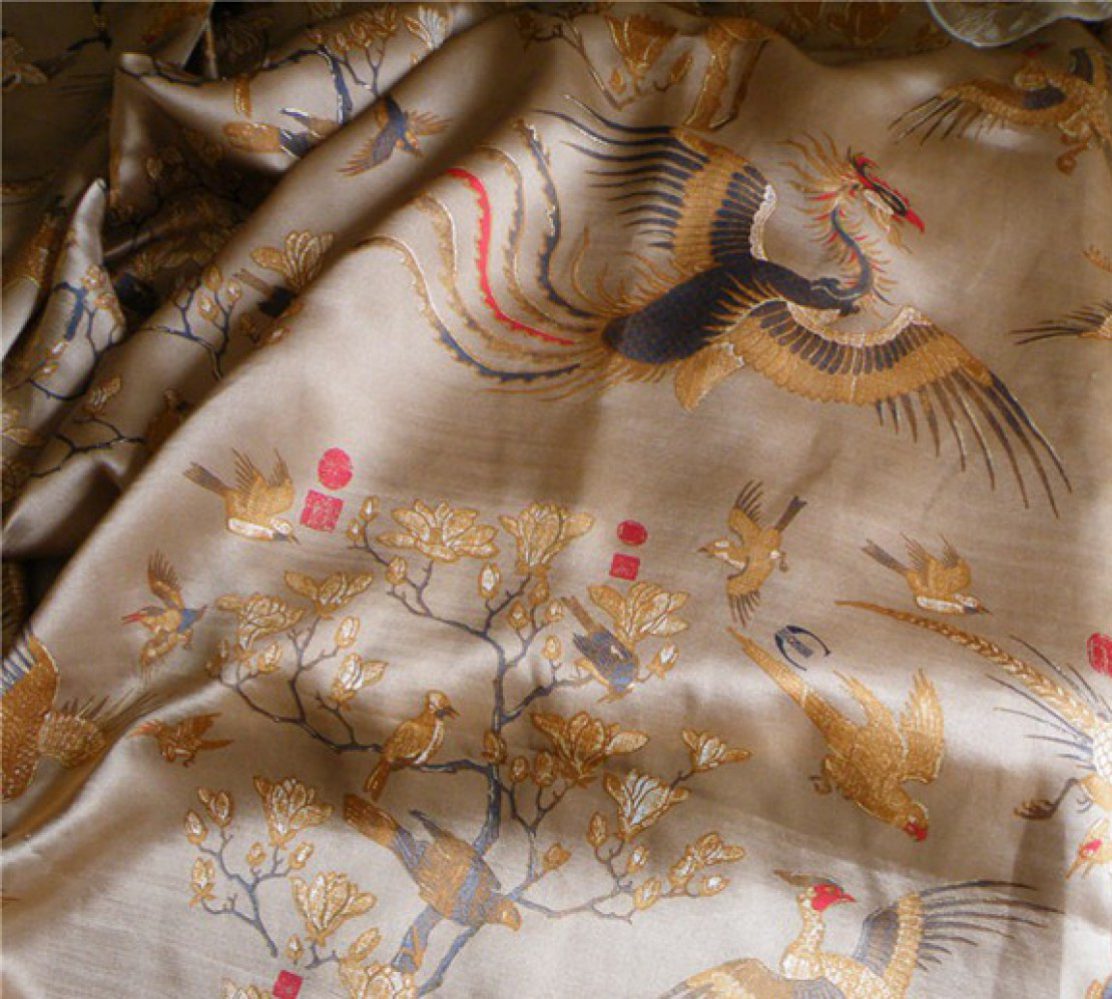
Fabric: 2-tone shot silk dupion from A-Z Fabrics (Goldhawk Rd, West London)
Stabilise the neckline & hemline edges with fusible interfacing. This also supports the embroidery & minimise puckering.
Traced the embroidery design from the Skirt scrap. As the material couldn’t be the same as the coordinating Skirt, I tried to at least match the embroidery design as much as possible.
Worked out the embroidery design on a copy of the Blouse pattern, tracing from the Skirt embroidery design wherever possible. Because my left & right sides are not symmetrical, the differences are worked into the spacing between the flowers and vines to keep the design itself more symmetrical.
The embroidery design is traced onto the right sides of the fabric with a pen & a white waxy dressmaking carbon paper. Using a different colour pen allowed me to easily see which bit of the design has already been traced. The pen is easier to control & the ball-point tip produced clear fine lines without shredding the pattern paper. My waxy carbon paper lines don’t wash out, but I think it’s acceptable as they will mostly be hidden by the embroidery. Plus the sheen of the Silk Dupion masks the white line in certain light. In fact it can be damn hard to see the design when I needed to! I had to experiment with the positioning of the lighting a fair bit.
Framing up:
I chose the mix-n-match Siesta No-Sew Embroidery Roller Frames because of its flexibility & availability of sizes large enough to accommodate my sewing pattern pieces (they’re available in 6″-30″ widths & 7″-15″ lengths). Most frames are designed for dainty picture embroidery, so it can be hard to find ones big enough to keep the whole embroidery area flat. I didn’t want the embroidered areas to be crushed by the frame (as would happen with a hoop frame). Even rolling them up didn’t appeal. So I went for 30” roller bars (width) & 15” side bars (length) – just about large enough to keep the embroidery areas flat. I did still have to split the pattern pieces into 3 groups to make this work.
The other reason for choosing this frame was the Siesta No-Sew Table/Lap Stand Legs add-on that turn the frame into a table top / lap frame. This makes it possible to work comfortably at the table or on the sofa with the embroidery frame at the right height & with easy access to the front & back of the fabric. I did buy the optional cross-support bar, but ended up not using it.
Although the frame is designed to be “no-sew” – ie you can tape or staple your fabric to the soft wood roller bars – I prefer the sturdier looking sew-on method of traditional roller frames. So I stapled & taped strips of sturdy cotton ticking to the roller bars. (Twill tapes would have been the traditional choice, but I didn’t have any in the Stash.)
When it came to mounting the fabric onto the frame, I checked out this great YouTube tutorial…
…then did my variation of course! 🙂
Reinforced the fabric on the sides with ticking strips.
Baste the top & bottom to the roller bar ticking strips & rolled outward to keep the fabric taut lengthwise.
To keep the fabric taut crosswise, sew the buttonhole twist threads through the reinforced sides & looped around the side bars. Keep top end of the thread in place by looping it around the top end of the side bar & sandwich between the bar & the wing nut. Pull the thread tighter around the side bar, working the slack loop by loop towards the bottom end of the side bar. Tighten the thread through multiple passes & alternate between the right & left side bars to keep the fabric centred. Once the loops are tight, keep the bottom end of the thread in place by looping around the bottom end of the side bar & sandwich between the side bar & the wing nut.
The Embroidery Sweat Shop
Embroidery that may have shrunken the patterns
Flower centres & leaves at the neckline are satin stitches done in two passes: First with Krenik #8 Braid in 5005 Gold Coin, then with Krenik Blending Filament in 202HL Aztec Gold for extra sparkle. The Blending Filament worked better when wetted & used in single strand. The white strengthening filaments did still fray a bit. When this happens I just remove them before using the Blending Filament.
Flower petals are Krenik #16 Braid in 202HL Aztec Gold couched with Guttermann Sulky in 7004 Gold. The flowers petals are double loops to match the flowers on the Skirt. To do this with a continuous Braid, I did the outer petal loops first, then flower centre outline, then inner petal loops.
As the Braids are not cheap, I tried to keep it continuous to minimize amount wasted by knotting the ends. I pulled the Braid to the right side at the end point, then back to the wrong side at the starting point & knot this starting end. This way I can pull just the amount of Braid I need to the right side, & at the end any extra can be pulled back to the wrong side, knotted & cut with very little waste.
The two Back pieces were done while I was away visiting relatives. So I stitched the Metallic Mesh Ribbon border by machine first. The fabric & the frame were transported disassembled & the framing up done on location.
The Back Darts end in the neckline design area. To avoid bulk in the dart allowance, I stitched the dart points first before framing up. It does make the fabric less tautly stretched, but it’s not too bad as I only stitch as much of the dart points as needed for the flowers that span across them.
I reckon the embroidery stitching process took me about 18 long days. I was at best managing 12 flowers a day & there were 111 of those, plus vines & leaves! I barely made it what with all the travelling. And it can be rather back-braking. I had to take regular breaks. So hats off to all the Embroidery Masters all over the world!
Sewing up
I didn’t do much research on how Choli Blouse are typically constructed beforehand. But I did notice a few blouses were sewn with wide side seams that are sewn last so that they can easily be let out when the Middle Age Spread hits! In other words, armscye seams & hems are done before the side seams, and if there’s any lining, they seem to be treated more like underlining – ie sewn as one with the fabric pieces.
Of course I went ahead & did this my bog standard Western way. For one thing, practical as they may be I still feel funny about those wide side seam allowance possibly peeking out at the hems.
Back darts, front princess seams, shoulder seams, armscye seams, side seams. Repeat with lining.
Join fabric & lining at neckline – sandwiching the back neck tasselled cords between the layers, understitch, then join fabric & lining at CB opening.
Hem fabric & lining. I did a jacket-style jump hem in case the two fabric shrink at different rate when cleaned. (I had a previous silk choli blouse develop an unsightly pull at the hem because the cotton lining shrank more. Not keen to repeat the mistake!)
Make the placket (fabric & lining), bra bits retainers (lining), sweat guards (lining) – all sewn right sides together with a gap for turning right side out.
Sew hooks to CB opening, then placket. Sew bra bits retainers to lining. Sew snaps to these retainers, sweat guards, & corresponding lining areas. Tack fabric & lining at shoulder-armscye points & underarm to help keep lining from peeking out.
The Verdict
I’m still feeling exhausted from my stint in the embroidery sweat shop. But I’m proud that I managed it. I don’t think I would have had the patience if it were for home decor projects like cushions or wall decorations. But once in a blue moon for a garment I can just about manage. There’s certainly a lot of leftover supplies for many more. And I’m impressed by how the simple embroidery design elements like these straight borders & nothing-special flowers can add up to something that looks fancier.
It’s a shame that the fit was off. Got to respect the Bod innit! And must, MUST remember to add extra allowance for each layer of innards added. I hope I’ll get a few more wear out of this top before I get too plump or it gets shrunken in the wash!
BTW all that effort with the bra bits retainers was a bit wasted. On the day I was too hot & flustered to do up all three sets, especially as the neckline was too snug to get one’s hand in. I only managed the bra band retainers near the CB. I ruled out attaching the bra first before putting the whole thing on because the too snug neckline wouldn’t have allowed me to cajole the girls into position. I kind of wished I had gone traditional bridal dress shopping so I can study how bridal wear designers manage to make so many women look so fabulous on their big day.
A couple of things for sure, I’m definitely up for making more of these embellished choli blouses, and the search for TNT choli blouse pattern continues. Now I just need some proper Summer days in London to make these worthwhile making!
I had enough of this limp & not-fit-for-a-Breton-T stripe jersey left to make another garment. As I wasn’t inspired, I just went for a long sleeve variation of the same old cowl neck fitted top idea. Figuring out how to add sleeves to Vogue 1282 would be more effort than I want to spend. So I picked another Vivienne Westwood design that looked easily achievable using any fitted Knit Blocks:
Pivoted side bust dart to shoulder so the dart allowance could be incorporated into the cowl drape.
Cut & spread the Front Bodice to create cowl drapes. I chose to do this from underbust up & to split the amount into separate rows of cut-n-spread because I thought this will give me cowl drape while retaining a fitted silhouette.
For more exaggerated drapes I added pleats to the shoulder seam & to minimise the risk of boob exposure I tapered the neckline back to a narrower width. For a more natural looking drape, I prefer to cut extra fabric & drape the cowl on Q, my dress form. I don’t like it when such drapes are too even / symmetrical. The extra fabric extends up from shoulder-armscye points, then across a bit above the shoulder-neck points. After draping the pleats I wanted, the excess fabric was trimmed to pleated shoulder seam + seam allowance.
Back neckline I was going to lower & maintain the neck curve. But I got lazy & went for straight line with cut on facing…because the Vogue 1282 top I was sewing at the same time had the same back neckline treatment. In retrospect, I should have used a binding like in my Burda 2013-12-119 top. It would have been cleaner & less chance of a facing flipping out on me.
Front bottom drape: This is essentially an unstitched dart.
After deciding where the bottom of the drape will be on the right side seam (ie the dart point), I folded the paper across to form one leg of the dart, then bring this up to where the top of the drape will be on the left side seam (ie the other leg of the dart). Across because you can see in the original design the fold line is almost parallel to a line of stripe.
Then I trace the rest of the Block below the fold.
Shorten to desired lengths:
Bodice to a couple inches above full hip, Sleeves to 3/4 length.
I made the hems straight to make it easier to sew a wider hem. But this meant the hem at the side seam could look weirdly pointy. So I reshaped the back side seams slightly to get closer to a right angle to the hemline. This also helps with the right side steam stripe matching as the unstitched dart modified the angle of the side seam blow the “dart point”.
Stripe-matching: See previous post about how I dealt with stripe matching in this PITA wiggly stripe fabric. It wasn’t possible to match the stripes 100% because of my pattern’s uneven front & back side seam heights. So I sacrificed the matching near the armpits – even going as far as letting the sleeve-bodice seam intersections not match. Somehow I managed to get a stripe going from the bodice to the sleeve in one armpit which I thought was rather neat. Too bad the other side was off a little bit. At the bodice hem, the left side seam draped area was never going to match. But on the right side I ended up trimming a bit of width off the hem & got the stripes to match pretty well.
Stablisation: Again, the back neckline & the armholes were stablised with fusible interfacing to fight the gravity-compliant tendency of this viscose jersey. As this is long-sleeved, the shoulder seams were also stablised so the extra weight of the sleeves won’t stretch out the shoulder seams over time.
Cowl: I’ve used the same technique on another VW inspired top. But this time it wasn’t so successful. The difference was the other top had a fitted lining which controlled the cowl drape. This top is unlined. So the extra width just wanted to spread & droop all over the place & get in the way of my forward arm movement, especially as my armscyes were all stablised & not stretchy. I ended up having to tack the drapes in place to maintain the folds. While the drapes still look a bit messy, at least the armsyces now feel comfortable & unrestrictive.
The Verdict
It’s an OK top. It’s one to slouch in rather than dress up in. It has just enough caffeine kick to keep me awake, but not enough to shout about.
There may be a little bit too much drape. My thin & droopy fabric doesn’t help. So it looks more sloppy than the VW original. I probably should have removed some width from the unstitched dart’s fold so that it hugs the body there & are less likely to spread open. But I just wasn’t interested enough to want to fix this in the top since it already looks sloppy in the cowl area.
So a caffeinated slouchy top it shall remain. And no doubt get more wear than its dressier siblings!
Tia Dia’s decision to stick with the pattern’s grainline instruction while working with her stripes was genius. It’s so simple, yet the result is so much more interesting than even the Donna Karan original.
I also liked her idea of swapping the armhole facing/binding for an extended armhole edging/band/sleeve. I wanted mine even more extended, but wasn’t sure it’d be comfortable with extra fabric in the armpit. So I adapted the armhole band style of another designer Vogue Pattern – Vena Cava V1258 (which seems to have totally disappeared from the Vogue Patterns website!?!).
I actually made V1282 before, but I didn’t like how the result looked on me with my short-waisted inverted triangle shape, gravity compliant boobs, & age-compliant spreading middle. I think DK’s design would look better on the small busted or the hour-glass shape (which Tia Dia has). So this time I went back to the original pattern & made different adjustments to it. (So glad I trace pattern nowadays rather than wantonly chopped them up with the very first make!)
Size 4 again – instead of the recommended size 12 & my current norm of FBA’ed size 8.
Changes Made
It’s rather hard to figure out how to assess & adjust these non-standard patterns that DK is so fond of. So there was a fair bit of making it up as I go along…
Fitting changes
Forward Shoulder & Neck + Small Arm Joints (???): shortened front at cross-front level, made back shoulder more square (move shoulder-armscye point up/forward).
Tweaked Center Back seam to better fit my shape: caved in at the top for rounded upper back, caved in at lower back, add with at hem for larger (than size 4) hip.
Shorter Torso: shortened at the hem.
Design changes
Removed design ease from Center Front & raised cowl neckline in the process. I initially used the waist width as my guideline – I wanted the top to be fitted here – but ended up removing more at the top (neckline) & less at the hem. I was worried the hem would be too tight, but I didn’t mind removing more from the top because there were so much ease to begin with, plus doing so raised the cowl neckline further to minimise the risk of wardrobe malfunctioning! 🙂
Widen shoulder for a cap sleeve rather than sleeveless look. Added strips of double-layered armhole bands except for about 3″ at the underarm, which was finished with facing/binding per V1282 instruction.
I originally wanted to incorporate some sort of asymmetrical side peplum as well by cutting a wedge off the right back below waist & somehow extending the left back below waist to form a peplum on the right hip. But my brain could not compute the pattern needed for this, especially when factoring in how this might affect the stripes. I was going to wing it during cutting out. And of course I totally forgot WHEN cutting out. Oh well, never mind.
Worried that this viscose will stretch lengthwise over time like other viscose knit I’ve worked with, I stablised the back neckline & the armholes with fusible interfacing.
For the armhole, after stitching & turning the bands right-side out, the band was sewn right-sides together to the upper portion of the armhole first, then the facing/binding was sewn right-sides together to the underarm portion of the armhole – overlapping the bands slightly, the band is then pressed out while the facing/binding is pressed to the inside, the whole armhole is then top-stitched to secure the band seam allowance & facing/binding.
I replaced the weight at CF cowl tip with a boning stay that gets tucked into the bra to keep the cowl from gaping if I lean forward. This is just a short piece of plastic boning encased by self-fabric & one end sewn to the CF cowl tip. I read about this trick in Claire Shaeffer’s Couture Sewing Techniques. Some other blogger also used this trick but I can’t remember who it was damnit.
The Verdict
Much MUCH happier with this tweak of V1282! Feel much less dowdy in this version. And I like the mini-wings. Cute top. But still not sold on the B&W stripes as my aesthetic has become much more Crayola with age 🙂
The hissy two-part shimmering black snake finally hatched. I tried really hard to get her to this year’s Jungle January Party, but Brain Freeze said No. It didn’t help that I picked two styles of garment that I haven’t tried before. And even she’s made with my Mom’s Kabuki sized top & skirt, there still wasn’t enough fabric for things to go according to plan. So neither part came out as I had hoped. But as they’re memories of Mom, I’ve styled them as best as I could & hope to wear them loads when the weather’s warmer.
The design started with the drape of the fabric. I thought this slinky knit would be perfect for the side bow tie halter top design that has been stuck in my head like forever. I think I first saw something like this on TV, then on the high street. But now I can’t seem to find a perfect specimen to show you. The closest are these:
I was originally planning on using a floral silk Mom gave me, but I was worried that its floatiness would make the front neck gathering (& its inhabitant) too puffy. I felt safer testing the design with this limpy knit. So that’s Mom’s Kabuki top taken care of.
As for the Kabuki skirt, turning it into another shape of skirt would be too easy. And too prim & proper for me. I needed edge. Another vague idea floated up from my primordial soup of mental clippings: matching trousers for a ‘jumpsuit’ look. Ding ding! I get to try a look that I otherwise wouldn’t go near. While I admire jumpsuits on other women, I can’t square with having to strip to go to the loo. This way I get the look without the loo hassle. Plus I multiply my wearing options. Win-win!
Top:
This was draped on Q. I actually sorted the trousers pattern first. And after struggling to fit the ready-made pattern into what I thought would be enough fabrics, I was in no mood for more of the same. Only the front neckline was gathered. The back I kept sleek & went for a slight A-line at the side seams. The neckband I ended up keeping simple & made the bow tie a separate sash for extra wearing options. But now it doesn’t work so well as a bow tie for the top. Win some lose some. The tie this time was made from only one sleeve. The other sleeve was sacrificed to the trouser pockets.
Trousers:
Style Arc Antoinette Pants
…Chosen because it had a bit of slouch & a bit of sleek, so hopefully would fit on the unpicked skirt panels. This is the first time I tried a Style Arc. Love what bloggers like the Clothing Engineer achieved with their patterns, but was put off by the high cost & single size paper pattern format. What if I pick the wrong size? Luckily the Style Arc Etsy shop sells cheaper PDF version of the pattern in multiple sizes. While the multiple sizes are not nested – you’ll have to print out each size separately – at least you won’t have to pay & wait for another size if your first choice isn’t quite right.
I did have to tweak the fit of the trousers, but as I made mine with a knit instead of a woven, it seems pointless to list the changes in details. I may need to tweak the changes again if I make this in a woven or even a different knit. Suffice it to say I needed crouch reshaping, waistline reshaping, and shifting inseam & side-seam slightly towards the centre to get rid of major wrinkling under my bum. I also had to adapt my pencil skirt block to make a replacement waist facing that fits my body shape better. Unfortunately I forgot about the ease in the skirt block, so the trousers hang lower than I wanted.
BTW I moved the zip to the side seam because I just can’t get my head around CB zip on trousers even though I have no problem with CB zip on skirts. But it’s partly about convenience for sure. It’s easier to see what I’m doing with side zips & hooks. And as I grow stiffer with age easier to reach too. For zips that get zipped & unzipped more frequently (think loo again!), these little practical details matter!
Fabric & Notions Used
Mystery slinky knit top & long skirt from Mom’s Closet. Also used the Georgette skirt lining for facings & pockets.
There were a lot of making it up as I go along. Like figuring out what need to be interfaced or stablised. I think I might have overdone it with the stablisation of the armholes and crotch. The top end up being shorter than when draped originally. The trousers would have been a bit tight in the crotch if the trousers hangs an inch above my belly button as intended, but luckily (?) it hangs lower thanks to built in waist ease.
Unfortunately even with the trousers hanging lower than intended the length still wasn’t long enough (due to lack of fabric). I had to add length at the hems with scraps, which unfortunately were on a different grainline. Hopefully it’s not too noticeable, or if it is doesn’t look too odd.
All hems were faced with the skirt lining Georgette because (A) I didn’t have enough of the slinky knit, and (B) the glittery bits of the slinky knit is rather scratchy. Most were bias tapes to conserve fabric.
Style Arc Antoinette Trousers instruction: This was clear enough for an intermediate sewer like me. It’s a bit on the short side (like Burda), but has diagrams for the tricky bits – like the front pleats (not sure if these were added after JamieDFC’s review on Denver Sew). What still is a bit of a problem is front facing peaking out due to the weight & bulk of the pleats. So like PoldaPop I also tacked my front facing discretely in the pocket / pleat area. That’s something so easy to forget when designing or picking a design – the force of gravity. I’m sure this is not the first time garments go unintentionally lopsided because someone forgot that extra bits of fabric or embellishment also add weight to one side which needs to be balanced somewhere else if the garment is to hang as intended.
Sash: I didn’t have enough of the slinky knit to do double layer sash as I normally do. So one side is the skirt lining Georgette. I was worried the slinky knit will grow more than the woven Georgette cut on grain, so it was stablised with ProTRICOT fusible interfacing from Fashion Sewing Supply – chosen because of its claim that it won’t interfere with the drape. The result is softer than the other interfaced bits, but for this super limpy slinky knit the drape does stiffen a little. Still works for this sash though.
The Verdict
Because the top is shorter and the trousers hangs lower than expected, I’m a bit on the fence with this refashioning project. I mean they’re still wearable, but the slight disappointments killed any desire to jump up & down in this psuedo jumpsuit. And does it counts as refashioning when none of the original design feature or sewing were reused?
Regardless, it’s still a piece of Mom with me. But I think I need to move on & get back on track with my SWAP, or at least sew with my own fabrics. It’s quite depressing too to be constantly reminded of Mom, or her absence rather. I’m still not getting the hang of grieving yet…


 0-ease Stable Knits Darted Fitted Top Block (Bodice & Sleeve)


 For the armhole, after stitching & turning the bands right-side out, the band was sewn right-sides together to the upper portion of the armhole first, then the facing/binding was sewn right-sides together to the underarm portion of the armhole – overlapping the bands slightly, the band is then pressed out while the facing/binding is pressed to the inside, the whole armhole is then top-stitched to secure the band seam allowance & facing/binding.
 I replaced the weight at CF cowl tip with a boning stay that gets tucked into the bra to keep the cowl from gaping if I lean forward. This is just a short piece of plastic boning encased by self-fabric & one end sewn to the CF cowl tip. I read about this trick in


