Fix It July: from Grecian to My Cup of Fugly

fortuny-dress_4s7_07.jpg

the Original dress

Throwing all caution to the wind I took on another less than stellar Make which did feature in MMM’15: My Fortuny Delphos Wannabe dress.

She’s such a Romantic, perfectly in her element on holiday in the Sun & Sea. But seriously, how will I ever afford to take her to such exotic places again with Uncle Sam & HRH dipping into my wallet whenever they want? 😉 Besides, I was never comfortable with her flashing my ribby chest.

So yeah another commitment-phobe city ensemble coming up! And one that MR considers F-U-G-L-Y. But I’m OK with that. What does he know about fashion right? 😉

The Design & Construction Odyssey
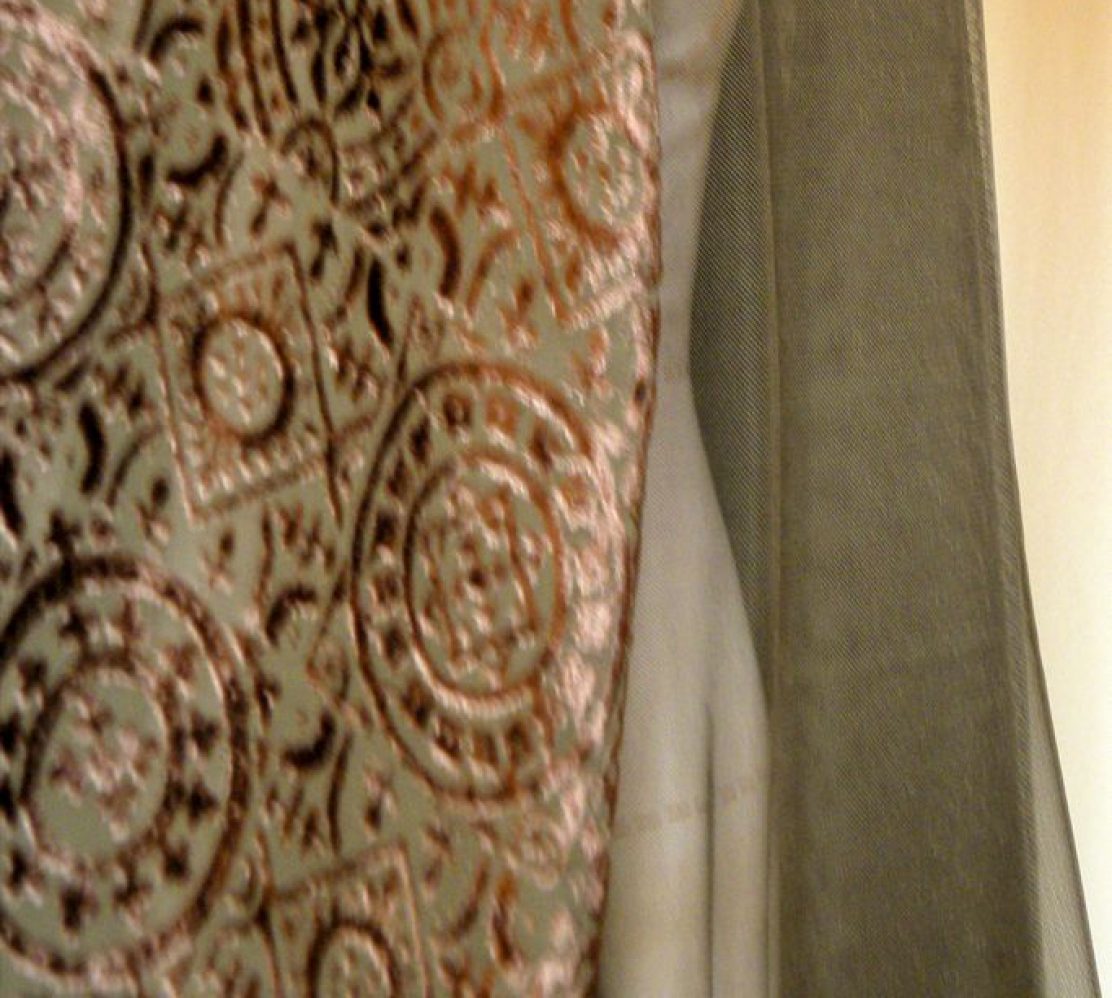
odyssey First off this fabric is a royal PITA to work with. Unlike Mario Fortuny’s Grecian Delphos which were made of silk, this is 70s Mary McFadden style polyester mushroom pleats. I don’t know if the Fortuny silk version drapes better, but my polyester version definitely balloons out in the most unflattering places, yet at the same time is highly shifty & unstable. An Utter Diva.

I was at a loss design-wise. Apart from Fortuny, McFadden & Issey Myake are the only designers I know who use this type of fabric as a signature. But neither are my cup of tea.

sari top + Gigli wannabe + Fortuney wannabeodyssey I did like the dress as a skirt in this style shot though. So comes what may out  the Reckless Scissor came!

TOP:

odyssey Designing by flat patterndrafting would be a nightmare. So again I turned to draping with Q. (The dress was originally draped on her mother Big Bertha.) I started out addressing what I didn’t like about the dress bodice: too much skin at the chest & side boobs…

  • Front neckline was pulled from the V into a square for more coverage.
  • The side seam was pulled closer to remove the underarm portion that had been cut down to the waist level.

odyssey The result however looked a bit twee. Too safe. Which draws attention to the extra volume added by this fabric. I threw on some elastic to see where/how I can control this extra volume, but ended up liking the combination enough to use it in the final design. It’s just my cup of tea – the edgy contrast between utilitarian black elastic vs the fluid femininity of the mushroom pleat. Exposed elastic as a decorative detail is certainly not new to my aesthetic. My former favorite designer Comme des Garçons did it in Spring/Summer ’94. And I have a Jean-Paul Gaultier men’s robe with elastic waist ties from the 90’s that I wear a lot too.

So that’s the Design settled. On Q anyway. It’s a totally different story on me. Because I don’t want pins stuck into me to keep the fabric in place. The temptation to rely on pins is such a pit-fall when one design by draping rather than patterndafting.

odyssey Thank goodness there’s Pattern Magic 2‘s Different Facing Different Looks technique. Too bad I chose a whimpy cotton batiste for the facing/lining. Gravity won. All the more reason to incorporate the elastic into the design. Now it serves both a decorative & a structural purpose.

odyssey The top ended up with the most ridiculously complicated underpinning. See the annotated photos below for all the glorious gory details. That’s what you get with a Band-Aid approach to design! Definitely not a repeatable make. And as if that wasn’t enough, this thing has ZERO hanger appeal. This is definitely an Once Is Enough top.

SKIRT/DRESS:

I could not for the life of me decide on a hem length. After the chop there was definitely no floor length option left, which is just as well since it’s so impractical for modern day life.

2-sew-Skirt-inside1

It’s Super Skress!!!???

odyssey As the matching top has already given way to exposed elastics, I spared myself the agony of committing to one length. So an exposed elastic waistband done the iCandy Handmade way it is then. One that’s post-feast waist circumference in length so it hangs lower exposing the waist, and can be pull down even lower for a saucier low-rise look, or worn above the bust as a dress.

odyssey Matching detachable elastic shoulder straps & famine waist elastic belt complete the dress look. At a pinch the belt also yield a normal rise skirt. And if I sail to the edge I can also eke out a knee length skirt by doubling over the belt and leaving the built in waistband to hug my behind – not the most comfortable way to wear it, but hey we all have to make sacrifices for fashion right? 😉

odysseyodysseyodyssey

And FINALLY…The Mug & Style Shots

gr-dancing-1

gr-dancing-2

😉

Fix It July: Pregger Wench no more

As I’m on a roll with the Fix-It’s…Here’s one that I couldn’t even bring myself to wear during MMM’15:

This was originally a RTW from a Camden Market stall. I actually quite liked the original. But because the bodice is made of stretchy knit without much recovery power, the combination of long skirt + gravity made this indecent to wear.

My first attempt at fixing this was an unmitigated failure. I wanted to keep the dress as a pull-on with no closure. But the China Silk/Habutai I used didn’t have the flattering clinging power of the original knit bodice. The resulting silhouette was F-U-G-L-Y, especially in the back.

My latest attempt at fixing this actually started January this year. I was hoping to finish it in time for a holiday in February. But when I tried it on for fit, the bodice felt too tight for a relaxing holiday. Plus there were too many new-to-me design features that I didn’t know how to sew up. So it went back onto the Fix-It Pile.

Fast forward to Fix-It June & July. I tried on the half-finished bodice again. I don’t know how, but the bodice now feels OK!!!??? Maybe recent stresses did what no diet can? 😉 Anyway, I felt ready to resume this Fix-It.

The Inspiration & Design

The funky A-line gore skirt has twill tapes inside on each gore seam which can be used to draw up the skirt into irregular bubble hem. It reminded me of this clipping of a Jean-Paul Gaultier dress from S/S ’91. So my initial design simply replaced the looser pull-on bodice with a corset style bodice.

But I clung to the original dress’ empire waistline, and this was a mistake. I looked like a pregger wench in the resulting dress. To avoid any well meaninged but awkward conversations about when I’m due, I separated the bodice from the skirt. I had just finished the Sari Top Fix-It, so was in a cropped top mood anyway. And you know how I feel about committing to a dress – I much prefer separates that give me more options.

In the same commitment-phobe vain, I made the skirt wearable at waist level and lower down when I’m in a saucy GoT mood! I suppose if I’m ever in a pregger wench mood I can always safety-pin the skirt to the top’s hem… 😉

The Mug & Style Shots


The Pattern

TOP:

  • BLOCK: Moulage Block (0-ease).
  • As this was meant to be underwired bustier style top, I started out with a skin-tight pattern. This is fine for the stretch lining, but then I got worried that having no ease at all in the outer non-stretch layer would mean another top that I’d never really wear. So I added some ease back in.
  • The cup was shifted towards CF slightly in the hope that it’ll give my wide-set girls the barest hint of a cleavage. (Not understanding how bra cups really work, I’m still holding out the hope that it’s possible to cajole the girls into gravity defying positions & shapes!)
  • The CF bust dart (which isn’t normally sew up) is pivoted to the princess line for closer fit at neckline. The bust point shifted up slightly and tinsy bit shaved off the cup princess seam below bust point all in the hope of helping my girls defy gravity.
  • Not shown: rectangular front closure modesty placket, bias binding for the hem, bias strips for the underwire channels.

SKIRT:

No patterns as this is just the RTW skirt with the top edge turned inside to create the casing for the elastic + existing draw-string.

Fabric & Notions Used

TOP:

SKIRT:

Construction Notes

TOP:

  • This is my first time attempting a bustier / long-line bra top. So many new-to-me details. I really should have tried a commercial patterns first. Doing it on my own meant brain freeze from juggling too many somewhat-relevant-but-not-entirely advices from scatter sources.
  • I roughly followed the instruction in “Create a Foam-Cup Bra” article from Threads 9/2014 (issue 174). The cup padding pattern was drafted without seam allowance, then the pieces butt jointed with zig-zag stitches. The cup assemblage instruction was particular helpful to get a clean finish at neckline and armholes.
  • After I decided to turn the dress into separates, I had to ditch the CF zipper idea. I went for hooks & eyes as it fits the bustier look. But I didn’t have any hooks & eyes tape in the right color. So they had to be sewn individually. And for modesty a placket had to be added beneath the CF opening.
  • Rigilene boning was added to the lining at side seams, underbust princess seams, & CF opening in the hope of further helping the girls defy gravity.
  • The hem was finished with bias binding and stretch stitching to aid breathability while preserving a tight fit. I’ve been using a hybrid of backstitch & slipstitch wherever I need a stretchy binding top-stitch that disappears into the ditch. It’s basically a one-step-backward (right side) -two-steps-forward (hem fold) slipstitch. I haven’t come across this in any of my sewing books, so it’s something I cobbled together for myself. Maybe I’ll do a tutorial on this. I also used it for the Mustard Many-Faced Skirt waistband.

SKIRT:

  • Although I could have just used the drawstring for the waistband, I added the elastic in the hope that it’ll help keep the skirt in place whether I wear it at the waist or lower down. I find that if my skirts aren’t fitted from waist to just below high-hip, then they have a tendency to spin around after a few hours’ wear. Since the skirt is A-line, so not fitted in this area, I’m hoping the elastic will grab on to my love-handles and keep the skirt in line.

The Verdict

My cups weren’t particularly successful. Or at least they didn’t do what I wanted them to do. The Fiberfill is too thin for modesty padding. My cup shaping probably isn’t right either as it leaves me with deflated pointy apexes & still droopy old boobs. But the ease I did add in does allow me to wear a proper bra under this tight top. So problem averted this time.

I’m not entirely convinced by my vertical seaming on the cups either. Most bustier tops seem to employ horizontal cup seaming. But this is good enough for now. If only I have a summery pedal pusher to match. And somewhere warmer to wear this in!

The skirt I think will be quite handy. I really should make more fuller skirt. Unless I’m working my day job, pencil skirts are a bit claustrophobic for my unladylike manners, cross-legged sitting style and all.

Fix It July: the Mustard lot

This lot was a bit of a bother. They required lots of unpicking. And lots of PITA unpicking at that (because of the stretch stitch used). Hence the continuation of my Fix it marathon into July. Let’s start with the least troublesome of the lot…

1. New & Improved!
McCall 6078 Cowl Neck T

This one just needed taking in at the side seams and shortening. It was a case of:

  • Picking the wrong pattern for my short-waisted torso. A loose but not flowy silhouette does nothing for my squarish upper-half. And I did have to wear this tucked in at the waist most of the time because of this second problem…
  • Thinking that I can fight gravity. I had to use the stretchiest grainline for the length of the top because I ran out of fabric. It was suppose to be hip length. But it grew & grew, but not enough to pass as a dress.

2. Emami / Bradbury Endless Dress
Many-Faced Skirt

This one needed the Shar-Pei waistband/tube-bodice circu… shortened because…

  • The yoga-style Shar-Pei waistband look better on a pooch than on me.
  • The Mighty Weighty Skirt threatened the Tube Bodice with wardrobe malfunctioning.

I may have shortened it a bit too much. Originally I was still hoping for a Shar-Pei-less yoga-waistband wearing option, as well as a decent cowl/turleneck poncho wearing option. Needless to say that didn’t work.

In the end I had to end the Endlessness of this dress & commit to a proper waistband with elastic inside. I had a hard look at my lifestyle and decided that I’m never going to wear it as a Caped Crusading Poncho, nor as a more impractical version of Hammer Pants – imagine going to the loo in that! It’s still has some shape-shifting ability, but all are variations of skirts & apron skirts.

3. Self-drafted Bandeau Tube
Ruched Bust Top + convertible straps

Original

the Original bandeau

This one is the diva of the batch. It demanded a piece of flesh from both 1 & 2 above. Even then, parts of it still had to be laid out on the wrong grain.

The Inspiration & Design

inspiration

the Inspiration

design

the Design

Yes, I seem to have a thing for ruched bust. Maybe it’s because despite my psuedo-D-cup, I still manage to look rather flat chested from the front. No push-up bra has ever managed to give me a cleavage. While the bandeau band reinforces my lack of curves, I do like this Victoria Secret ruched bust bandeau bikini top. The cinching at CF adds the illusion of a much needed curve. So I modeled my remake on this, but added a panel below to turn it into a more practical tummy covering top.

  • I also added a shelf-bra with clear elastic at top (neckline) & bottom (underbust) as insurance against wardrobe malfunction. I wanted a pull over top, but I don’t trust this fabric to recover from putting on/taking off the top.
  • To further prevent sagging I copied the VS inspiration & adding boning to the shelf-bra’s side seams.
  • The shelf-bra has vertical bust darts which are suppose to be more supportive, but unfortunately they’re kinda visible through the top layer.
  • I wanted to add bust padding for more modesty. But I couldn’t figure out figure out a way to do so without restricting the stretchability.
  • I also copied the VS inspiration’s option for detachable strap. But as usual I couldn’t decide and end up with two adjustable length straps to give me more options.

The Mug & Style Shots

The Pattern

  1. BLOCK: Stretch Pattern School Tankini Block for Stretchy Knits (-12%/0% ease). Since I want this wearable strapless, I thought the -12% ease block based on Stretch Pattern School instruction would be safer. BTW, I just managed to tracked down the author of Stretch Pattern School (patternschool.com). He’s writing a book that will contain all the info from that now defunct site plus more. I’m waiting for info on how to get on the notification list. Will let you know when I find out.)
  2. Pivot side seam bust dart into CF bust dart. Pivot additional 1cm from neckline to CF bust dart to ensure snug strapless fit (like the Stretch Pattern School instruction for ‘Palette Line Maillot/One-Piece’). CF bust dart will be gathered instead of sewn.
  3. Establish F&B neckline, hemline, & F underbust styleline.
  4. Separate F bust bandeau piece at underbust styleline, but extend CF up & down for additional CF gathering. (So both neckline & underbust styline become straight lines.) Remove additional 1/4″ width at CF to increase bustline tension & prevent saggy bust ruching.
  5. (During fitting, I had tweak the F bottom piece’s underbust styleline because I was getting excess fabric / bagging at CF underbust. I removed the pointy bit – what would be the bridge piece in a bra. The resulting underbust styleline is straight on the F pattern pieces, but curved when sewn up as intended by the design.)
  6. Drafted shelf-bra per Stretch Pattern School instruction forTankini shelf-bra:
    1. Using the same Tankini Bloc, pivot the side seam bust dart to waist seam bust dart.
    2. Establish neckline (this time CF curves down to busline) & hemline (underbust line).
  7. Rectangles for tab to cover the CF bust gathering / ruching, and for the detachable straps.

Fabric & Notions Used

  • Fabrics: All recycled from thebandeau tube + 1 & 2 above.
    • 4-way Stretch Viscose Cotton Lycra from Tia Knight/Tissu Fabrics.
    • Shelf-bra underlining: Lightweight Power Mesh from Tia Knight/Tissu Fabrics.
  • Clear elastic for neckline, shelf-bra bottom, and detachable straps.
  • Rigilene boning for shelf-bra side seams.
  • Strap notions: Bra hooks & sliders recycled from old VS bra. Hook loops at neckline: 3/8″ Satin Woven Elastic from Pacific Trimmings.

Construction Notes

  •  This is my first time using Rigilene boning. It’s not recommended for corsets with require sturdier construction to keep the soft bits tightly compressed. But for a stretchy top like this I just needed a little bit of shaping, so it seems good enough. Besides, I already had it in the stash.
  • To prevent the cut ends from poking I went overboard and used both options mentioned in Linda Sparks’ ‘The Basics of Corset Building’p21:
    • I slid the fabric portion down a bit to expose the plastic rods. Their tips are then melted using a tea light candle. The tips didn’t actually touch the flame – they started melting when they got near the flame. I flattened the melted tips a bit while they were still warm, then slid the fabric portion back up.
    • I also used scrap fabric to cover the ends after the boning has been sewn to the shelf-bra’s side seams.
  • To prevent the shelf-bra from flipping out, I had to tacked its bottom edge to the outer layer at the side seams and the bottom of the CF gathering / ruching tab. The loops for the straps to hook onto are sewn on before this is done so the stitches will be hidden from the outside.
  • I didn’t have bra straps in a matching color, so I had to make self-fabric straps. But as the fabric stretches in all direction, I added clear elastics inside to prevent them becoming too loose. I find this tricky as sometimes the elastic doesn’t lay flat & the strap gets a bit wavy. But once it’s on the body & slightly stretched this waviness isn’t so visible.

The Verdict

Was it worth all the trouble unpicking stretch stitches? I hope so. All three are more wearable now. Even the strapy top might be fine under a cardi or jacket for my relatively casual workplaces.

Yes, the fabrics are a bit ratty. But I like the color. And it makes the Environmentalist in me happier. We complain a bit about fast-fashion RTW being bad for the environment. But sometimes I wonder if we’re not just as bad since the process of learning to sew well may involve lots of failed projects and discarded fitting muslins. Plus the scraps from our projects might be harder to recycle especially if we sew with lots of different fibers. You don’t get the quantity of the same fabric that you’d get in RTW production waste. It makes me sad. So where possible I ‘upcycle’ my own makes despite having a huge fabric stash still waiting for their turn in the limelight.

Unravel-video-linkSpeaking of recycling…one of the sewing bloggers I follow (sorry, can’t find the post again for proper credit) shared a link to a fascinating documentary about an Indian community recycling our unwanted fast-fashions. It’s a short film by Meghna Gupta called Unravel. Some of these recycling ladies’ comments about the West are rather funny.

Watch it on a tablet or desktop as you’ll need to read the sub-title, but on a smartphone the timeline blocks the sub-title rather than disappear like on YouTube. Very silly.

Barely There Python ruched panel skirt (Burda 2011-08-121)

This should have been an easy make. But my fabrics conspired against me. So this snake missed the  Jungle January 2015 party.

The Pattern

Again this pattern wasn’t my first choice. When I thought I’d go ruching & front panel I had in mind the skirt portion of Burdastyle 2014-05/115 asymmetric dress. But I wasn’t sure the one-sided ruching would look as nice in a plain pencil skirt. It might have appealed to me initially because one shoulder bodice drive home the asymmetry point. Without that it might lack conviction and look like a mistake. Plus it would eat up my precious print. So I went with this simpler symmetrical rusching skirt.

Style Shots & Mug Shots

WORN WITH: 1 Self-drafted Alexander Wang S/S 2010 Wannabe sweater, tote v2; 2 Burda 2013-11-111 shrug, Burda 2012-05-109 top ; 3 Burda 2013-11-117 jacket ; 4 Self-drafted Martin Margiela SS 1997 Wannabe top / jacket ; 5 Self-drafted Vivienne Westwood – Comme des Garcons Love Child top ; 6 Burda 2013-12-119 top ; 7 Self-drafted Dolce & Gabanna Wannabe cardi

Size Used

34 as it was closest to Psychedelic Leopard 2: Burdastyle 2012-05-113 draped skirt I made previously which fitted well.

Changes Made

1-patAlt

Fitting changes
  1. Tweaks in widths which probably weren’t necessary.
  2. Sway-Back Alteration: Lowered waistline at CB tapering to nothing at Side Seam.
Design changes
  1. Extended the length to below knee, which is almost the same length as #122. I checked the ruching length. It was about 1.5 times longer than the corresponding front panel length. So I increased the ruching panel length accordingly.
  2. Pegged the side seam for a more shapely skirt. Hem is 2″ smaller.
  3. Omitted the vent. My fabric had enough stretch to accommodate walking.
  4. Added a facing to the lining instead of edge to edge lining. Wasn’t necessary, but since I didn’t manage to squeeze a snake into the front ruching panel I had to sneak the snake back in this way!
  5. I also ended up removing the extended waist. The high waist wasn’t doing anything for my short-waisted torso. More importantly I screwed up on the ruching so it started too low and looks really weird. Plus I stretched the skirt through over-handling. Lowing the waist hid these mistakes.

Fabric & Notions Used

Construction Notes

  • Pencil skirts are so easy so I didn’t really follow the instruction, especially as I made some design changes like extra top-stitching along the princess seams & omitting the vent.
  • 2-sew-details-2But I did follow the instruction for facing the upper skirt edge. I’ve had trouble getting a clean finish to the zipper opening at the waist before. This instruction gave me a tidy finish there. So thumbs up – I will be using it again.
  • I kept the zipper even though it might not be necessary in a knit skirt, especially with my narrow hip. I like my waist snug. So I didn’t want it stretched out of shape with fabrics of questionable stretch recovery rate.
  • 2-sew-details-1My New World Snake might not have been the ideal fabric for the ruched panel. Despite the narrower pattern (presumably the horizontal stretch would keep the ruching under tension & help it fight gravity) my snake sagged. While some might like the sweep the floor drape look, it’s not my cup of tea. I don’t like my drapes too low. So I had to tack the ruching in place along the CF at multiple points.
  • 2-sew-details-3My lining gave me hell. I originally chose a lighter weight tricot. But it doesn’t seem to have much stretch, but when sewn up the stitching lines all seem too tight. The fabric would sag between the vertical seams with draglines pointing to the seams. I could have tried my serger. But I was too crossed with the fabric to give it a second chance. I went with the same lining fabric I used for the Turquoise Leopard skirt and this time overlocked the seams. But no luck overlocking the hem. Twin needle stitch was NG as well. I resorted to hand blind catch stitch.

The Verdict

Despite the hassle this snake gave me I’m chaffed with the result. Not sure I can wear it over tights or anything bulky or bumpy. But nothing like a knit skirt to give a straight up & down girl some shape right?

Jungle Snake Pit The Origin

OK, this is what I would have brought to the Jungle January party if I had been more organized.

Jungle-January-2015

Yeah, it’s all fake. You would never find me near a real snake in this life time – too slimy looking. Damn you Pretty Grievances for enabling me to squander weeks on Jungle Makes & days on Photoshop Element Photomerge Compose instead of job hunting. I guess it’ll be pot noodles for the foreseeable future.

But I’m glad they’re all done now and The Stash is down 2 and a bit. I’m loving my Inner Scot and her mini-collection approach. I could never have squeezed 6 items out of these if I hadn’t done them as a batch to optimize cutting layout. I will go into more details about each later. But since they all use the same fabrics and the fabrics were the starting point for this lot let’s cover that off in one go shall we.

The Star: New World Python

cropped-2013-us-fabrics-93.jpgBefore I subscribed to Pretty Grievance’s blog I would not have had the courage for this mad print with a bit of everything: floral, damask, toile, paisley, and animal. But by her guiding light I now see how the craziest of prints can look great while having all the fun. So I took the plunge.

This mix reminds me of the Age of Discovery. All that heavy floral baroque prints, the conquistadors & their ladies. The Amazonian pythons sneaking up on them.

I got it thinking I’d make something like this Vivienne Westwood jersey dress I saw in the store.

c0e71f1a9d6c56c02259f36166b9709dI liked the asymmetric drape & sleeves (one side has drop shoulder with wider bodice). The fabric had similar drape & hand. But this catalog photo looks so unappealing that I was put off the idea. In any case I was too chicken to commit to a whole dress in this busy print. So I ended up using it mostly as feature panels. Plus one whole top as a compromise. Baby steps.

The fabric from NY Elegant is a wool / polyester / spandex mix according to my illegible notes (the NYC fabric stores aren’t so good with detailed descriptions). It has a really lovely hand similar to challis, and is warm & soft with not a bit of scratchiness. It stretches about 40% width- & length-wise, but sews easily with the aid of a walking foot. It does curl a little bit, so I also spray startched it before cutting & sewing. I bought this back in 9/2012, but it was still on display when I visited again in 10/2014.

Supporting Cast: Snake Bite Bandages

Now this light stone rayon/spandex “Morgan Crepe” from Tissu Fabrics was a bit of a disappointment when it arrived. I hadn’t intended to order yards of bandages. But that’s exactly what it looks & feels like. I was at a loss what to do with it.

So when I saw the Reiss bandage dress that Duchess of Cambridge wore to greet the Obamas I thought that was the answer. But being a more complicated pattern to draft it didn’t happen.

Then by chance it met the New World Python during one of my Get the Stash Out & Play Dress Up sessions. And it was opposites attract love at first sight.

vogue-floral-2 The cupid was this Dolce & Gabbana cardigan from a Vogue US clipping. Just the combination to tame the print while jazzing up the bandage. From there on the rest of the feature panel designs came tumbling out.

BTW, despite the humble look of the Snake Bite Bandages, like the New World Python it’s a pleasure to sew and wear. Equally soft, it’s heavier in weight, has the hand of ponte knit, and stretches about 30% width- & length-wise. And quite cheap too. I don’t think I will get any more, but I’m glad I managed to make something decent out of it.

So there you have it, the origin of this mini-collection of Jungle Snake Pit.